Monday, April 29, 2013

My Favorite Herbs and What They're Good For


And now a poem about herbs:

I love herbs.
It's one of those things that makes me a nerd(s).

Wow. If that has inspired you like it inspired me, here's some more stuff about herbs.

My number 1 favorite herb to grow.

Basil. It just is. It's pretty. It's easy to sow from seed. It's great in pots or garden beds. I love to eat it. I make pestos like a crazed woman and then I freeze them in ice cube trays and eat it all year long. It flowers and attracts bees. It could go in a bouquet if you wanted to (and I've done this before). I just love it. If you have trouble with slugs getting it, surround it with cracked egg shells.

My number 2.

Rosemary. It smells like heaven to me. I could just rub it all over myself and be happy. I love to cook with it and the dried just doesn't compare for me. I grow it in a pot so I can bring it in in the winter since it usually dies in a deciduous area if left outside.

After that I fall apart and have trouble choosing, but here's a decent list that I've kind of sort of ordered according to preference.

Chives. Perfect garnish or stir fry or potato anything. I haven't had success with seeds so I recommend a start. They come back year after year. They taste amazing. They have pretty flowers. Perennial.

Dill. Easiest herb to grow if you're looking for that. Great with fish, soup, salad, summer vegetables. Annual, but reseeds itself like a beast.

Parsley. Pretty as a garnish. Tasty as an herb. Biennial (grows the first year, then grows and goes to seed in the spring of the second year).

Sage. Thanksgiving will never be the same for me without fresh sage. It's very pretty, there are tons of varieties. And it tastes much much better than its dried counterpart.  Lots of beautiful varieties to choose from. Perennial.

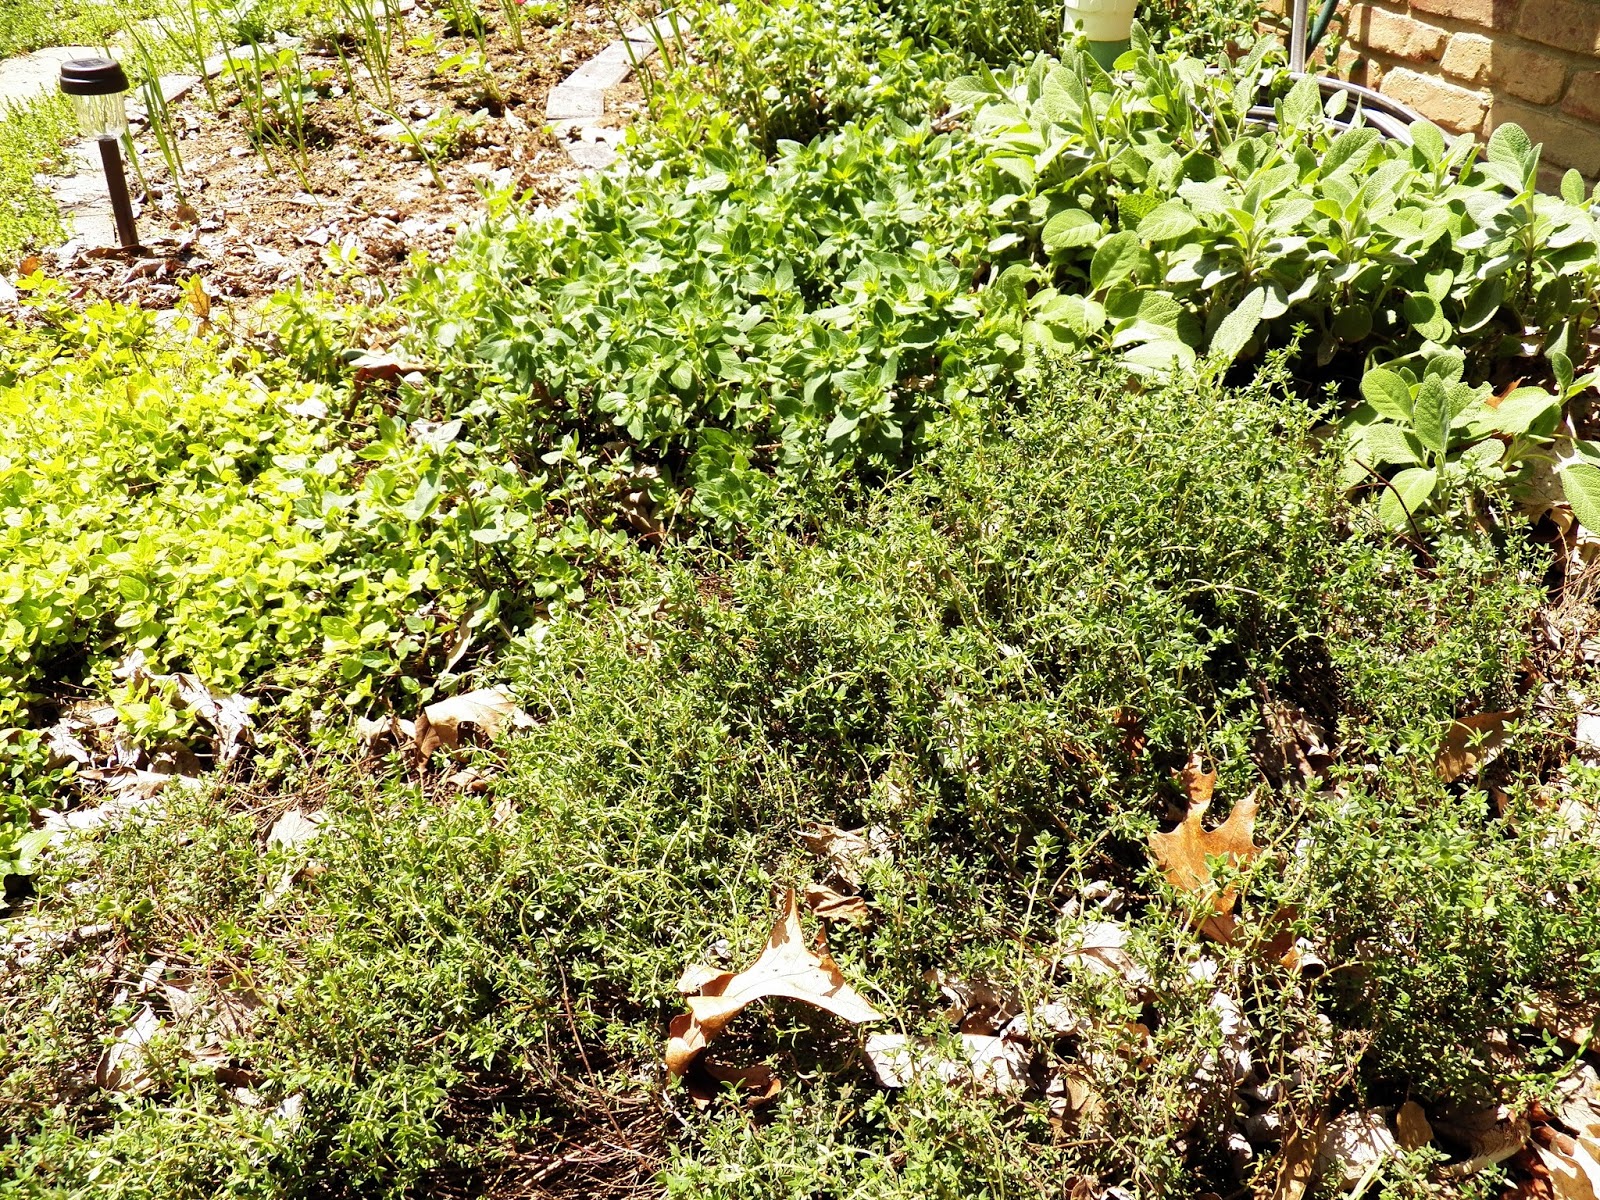
Thyme. Ditto the Thanksgiving thing. It's not so pretty (well, some varieties are, but the main kind I grow is just kind of gangly), but it sure tastes good with chicken, soup, and a lot of other foods. It's easy to dry because the leaves are small, so you can save some over the winter. There are many many varieties. You can get it tiny and creeping or bigger and flowering. Perennial.

Cilantro. I love this herb so much fresh that it's embarrassing, but I'm not always successful at growing it from seed (alas). That said, it's really easy to grow from seed for most people, so don't ask me what my problem is. Annual, but often reseeds.

Stevia. Must be grown from a start. I use this in smoothies instead of sugar during the summer and love it for this purpose. Also, when I am pregnant and chew the leaves, the taste it leaves in my mouth is awesome when everything else I eat when pregnant leaves a nasty taste in my mouth. I don't know why this is but because of it stevia holds a special place in my heart. Annual.

French Tarragon. I think tarragon can be pretty good dried, but it's even better fresh. Perennial.

There are others that I love for different, non-food reasons.

Scent and attract bees/butterflies:

Lavender (scent and attracts bees/butterflies). If you live in a deciduous area, be sure to get a hardy variety; others will die overwinter.
Bee Balm (beautiful blooms and attracts bees and butterflies)
Cone flower (i.e. echinacea) (pretty, attracts bees/butterflies and bugs)
Lemon Balm (lovely scent, great border plant or one you can stick in pesky open spaces that you don't know what to do with because it grows easily anywhere, attracts bees/butterflies after flowering)

Ground cover potential or rocky border potential:

Creeping thyme is my favorite looking, but not strong enough to grow well in our wet, then dry paths.
Winter Savory (great by rocks, also tastes great in pasta sauce)
Thyme (lots of different varieties so you'll have to ask your garden people for the lower growing types. I have one called caraway thyme that is not so low as the creeping thyme, but is much hardier, spreads better, and is still reasonably low for a ground cover)
Oregano (golden is good for this. It can get tallish later in the summer. you can weedwhack it or tromple it or something, but I like it)

Teas or garnishes:

Mint (Tea, ice cream, also so lovely in cold drinks--even water--delightful). My favorite mint is chocolate mint, but I love them all. Be careful with growing mint as it is invasive so put it in a pot.
Chamomile (Tea--you use the flowers of chamomile, not the leaves)
Lemon Balm (I don't use this in tea. I think it tastes like spinach, but other people successfully use it and have it taste like lemon. Maybe I let mine get too old or something.)
Parsley (curly)

Two years ago I wrote a post about herbs with more detailed info. So read if you are an herb nerd, read on.

Wednesday, April 24, 2013

9 Five-Minute Meals Cheaper Than the Dollar Menu


A couple weeks ago, I blogged about how irritating it is to me when people talk about how cheap fast food is. Fast food is not cheap. Fast food is fast. But homemade food can be too.

For each member of our family to order two things off of the dollar menu equals $12 (plus tax in Indiana). Below are several butt-kicking meals that can be made in 5 minutes. They each serve about 6 people (well, 6 of our people, which is 2 leanish adults and 4 youngish children, so take that for what it's worth--we're not feeding teenagers, although 2 dollar menu items isn't going to feed teenagers either). These meals are not gourmet meals and they are not necessarily entirely made from scratch or whole food ingredients (we're comparing them to fast food chains, people, so come on), though most can be adapted to homemade/whole food if you have 15-20 more minutes. Also, some require no or very little cooking time, but others are crock pot meals, which means you have to think of them in the morning (yeah, I don't always manage that either), but they still only take five minutes of your day to prepare. 

1. Shrimp (pre-cooked, yes) with cocktail sauce, bagged Caesar salad, and garlic bread.
Thaw the shrimp, toss the bagged salad, add butter and garlic to the bread and broil for a few minutes.
Cost: $11.50
shrimp: 7.00/lb, cocktail: 1.50, bagged salad (which includes dressing): 2.00, bread: 1.00

2. Sub sandwiches with fruit.
Put out the toppings, cut the fruit.
Cost: $9.50
deli meat: 4.00, buns: 1.50, pickles: .50, cheese: .75, toppings (tomatoes, lettuce, mayo, ketchup, mustard): .75, apples: 1.00, oranges: .50, pears: .50

3. Scrambled eggs and toast
Scramble your eggs with veggies like broccoli, spinach, or canned tomatoes (drained) and maybe some cheese if you'd like. Make toast. Eat.
Cost: $3.50
6 eggs: .60, can tomatoes: 1.00, cup spinach: .40, cheese: .50, half a loaf of bread: 1.00

4. Dorito Salad
Kip loves this stuff and he is not a huge salad guy. Even my kids will eat it if they get plenty of Doritos to buy them off. Chop lettuce, olives, tomatoes, cucumbers, and cheddar cheese. Add a can of chicken (drained). Toss. Add crumbled Doritos and serve with Ranch dressing.
Cost: $8.00
head romaine: .75, can olives: 1.00, cucumber: .50, tomatoes: .50, cheese: .75, canned chicken: 2.00, half bag of Doritoes: 1.50, dressing: 1.00

5. Crock Pot Ranch Chili.
Toss it all in the crock pot and turn the crock on.
Cost: $5.50 for 6-8 servings
chicken: 1.50, tomatoes: 1.00, beans: .50, corn: .50, ranch powder: .50-1.00, cream cheese: 1.00

6. Ranch Roast with potatoes and carrots.
Toss it all in the crock, cover it in Ranch powder, turn the crock on.
Cost: $11.00
roast: $8.00, potatoes: .50, carrots: .50, ranch powder:1.00-2.00

7. Crock Pot Italian Chicken with Instant Rice.
Toss in crock and turn it on. Make the rice when it's ready. With a few extra minutes, this can be whole-fooded.
Cost: $7.00
chicken: 4.00, cream cheese: 1.00, soup: 1.00, seasoning: .75, rice: (truth be told I have no idea on the instant, so I'm putting a normal rice price): .25

8. Crock Pot Rosemary Chicken
Throw a frozen bird in the crock with seasonings and turn the crock on.
Cost: $7.50
chicken: 6.00, seasonings: .50, potatoes: .50, carrots: .50

9. ...And then there's always angel hair. I know I mention it too much, but it's one of our super quick stand-bys.
Cost: $3.00
pasta: 1.00, sauce: 2.00


Monday, April 22, 2013

Pizza Roll


We eat homemade pizza about once every week or two. It's the only food I can think of that we eat so frequently, so even though we have our favorites, I like to switch things up a bit here and there.

Recently we tried a pizza roll (otherwise referred to as stromboli). You take an uncooked pizza. And roll it up. (And then you cook it of course.) I know; I know; you're still trying to wrap your brain around that earth shattering declaration, right? And I'm willing to bet that there are more than a few of you asking, "But why?" The biggest reason is because you were bored and this seemed fun. But there are a couple of practical reasons for making a pizza roll instead of a standard pizza.

1. You can make this with a homemade dough (as I did because I'm an overachiever and stuff and also because I have a breadmaker, which makes this a 2 minute task). But you don't have to. You can use frozen bread dough. You can use refrigerated biscuit or croissant dough. What I'm trying to say is that you can totally cheat. You can open up a can or two of croissant dough, flatten it a bit, slather some toppings on, roll it up, cook, and badabing, you've got dinner ready in 20 minutes. (See if your Dominoes guy can make it to your house that quick, eh?) But you don't have to cheat if you don't want to. This isn't a recipe that has to be made with refrigerated whatever or it will never be the same. 

2. I don't know why, but when something is rolled up like this, I don't feel bad giving it to my kids/husband cold in their lunches. It feels more like a pepperoni roll or something that just a sad little slice of cold pizza their neglectful mother packed up for them. What I'm trying to say is that warm this is a meal, but cold it becomes a snack food or a travel food. I like that about it. You can just eat the cool version like a sandwich in your hand.

3. You can dip these in marinara. What is it about dipping things that is so fun (especially for children)? I don't know, but the phenomena exists and I just roll with it. These are dip-able and my people like that.

Pepperoni Roll
adapted from What About Pie?
Makes 1 large pizza
Cost: $4.50
mozzarella: 3.00, dough: .50, pepperoni: 1.00

Step 1:
Make your favorite dough. Or pull it out of the freezer. Or bust open that can of refrigerated dough. Whatever. Just procure some dough, okay.

Step 2:
Flatten your dough into a rectangle, just like you're making cinnamon rolls.

Step 3: (this one can be skipped)
Add a very thin layer of pizza sauce. Too much sauce and it will ooze and sog. But just a thin layer will work. I did this, wanting to be sure that my kids ate at least a tiny bit of the fruit/veggie food group. However, you can totally skip the sauce if you want and just head straight for the cheese. Then after they're cooked you can dip in sauce if you like.

Step 4:
Add toppings. We did pepperoni and kept it simple at that.

Step 5:
Add cheese. We used mozzarella, but you can go all gourmet if you want.

Step 6:
Roll it. You're going to roll it so that it comes out long instead of short. Maybe you cheated your way through physics, but I know you can still do this, even though I did forget to take a picture. Seal the seam. Use a little water if you need to to get it to stick.

Step 7:
Put it on a lightly greased pan with the sealed seam down.

Step 8:
Bake at 375 for about 20 minutes or until the top of the dough is browned. This cooking time may vary depending on the type of dough you use, so keep your eye on it.

Step 9:
Let it cool for a few minutes. Then cut it with a nice sharp knife. If you try to cut it while hot with a dull knife, your cheese and stuff will just squish out the ends. So use a sharp knife and a gentle hand.

Step 10:
Eat. Dipping if desired.

Wednesday, April 17, 2013

Wacky Cake--photo update


Wacky cake is my most popular post on this blog ever. And for good reason. It's moist, delicious, chocolatey goodness. That you make in the pan. That's right--it is even better than a one bowl recipe. Also, it's intensely cheap (it came about during the depression where eggs, milk, and butter were harder to come by). And it takes just about the same amount of time to assemble as a boxed cake mix and is almost impossible to mess up.

People, it's just good (unless we're talking about health food, in which case it's bad).

But thus far, my pictures of it have just been so so (if that). Today I present a few pic's that are slightly better, although still imperfect. I've realized that the problem with wacky cake, pictures, and me is that people descend upon it like animals upon their prey and, just as in that lovely metaphor, there's often not a lot of pretty left to take advantage of when they're done. But that's okay--you should pin this anyway; you won't regret it.

And just for kicks, here's the previous picture I had of it:

Sunday, April 14, 2013

Big Green Triple Chocolate Smoothie


The title--well, it kind of says it all. I think there are a few things in life you really can't go wrong with. Chocolate is one. Spinach is another. So when I got Fit Mama Real Food for my Secret Recipe Club blog this month, I didn't have trouble picking the recipe I wanted to make. So I made it. And made it. And made it. Uh-huh. It's delicious. And chocolate-y. And green. But not green like that plop of icky green cooked-from-a-frozen-block spinach that my mom used to plop on my plate when I was a kid. Oh no. Green like all that vitality being pumped into your body under a chocolate-y disguise. By which I mean that even though you can see the spinach, it does not have a strong taste in this smoothie (and there is a whole lot of it there, so that's saying something). I can't really taste it at all, but perhaps if you were highly attuned to the taste of all things green you would taste it just a bit.

This smoothie is especially nice as temperatures rise. When it gets hot, I find myself craving ice cream all the time. And there's nothing wrong with a little ice cream here and there. But 3 times a day might be pushing it. Drinks like this make me feel like I just ate a cold dessert even when I really just ate several cups of raw spinach, a banana, some dark chocolate, and milk.

This is extra easy to make, but here are a few tips for achieving smoothie perfection:

1. If you've got a lame blender like me, you're going to want to melt the chocolate into just a bit of the milk before you make this. Otherwise, you'll end up with a banana spinach smoothie that contains chunks of chocolate that get stuck in your straw. That hardly ranks on the world problems list (and you better believe I drank that first smoothie and enjoyed it), but I did like it better with the chocolate incorporated more. If you have time, melt the chocolate, and let it cool a bit, but even if you are in a hurry and throw it in warm, your smoothie will still turn out cold (just not quite as cold).

2. I've always got frozen bananas on hand because when my bananas get too spotty, I throw them in a bag in the freezer. All smoothie lovers (or banana bread lovers) should do this. However, if you forgot to freeze your bananas, cut them thin and put them in a single layer on a plate. Twenty minutes later they should be pretty frozen. 

3. I used regular milk for this, but am pretty confident it would work with many different types of milk if you wanted to vegan it. Tomorrow I plan to use a couple tablespoons of coconut milk in it just because I love the stuff and have some sitting around.

4. If you've only got, say, regular chocolate chips lying around, you could still use them. Just omit the maple syrup and use about 3 Tbps chocolate chips in place of the dark chocolate and unsweetened chocolate.

Big Green Triple Chocolate Smoothie
adapted from Fit Mama Real Food
Serves 2--makes 3-4 C
Prep time: 5 minutes
Cost: $1.50
banana: .15, spinach: .80, chocolate: .25, milk: .20, maple syrup: .10

1 banana, frozen in chunks
3-4 C spinach (I'm usually pretty generous with the spinach)
1 Tbsp dark chocolate (I used Ghiradelli 60% chips)
1 Tbsp cocoa
1/2 oz unsweetened chocolate
1 1/2 C milk
1 Tbsp maple syrup (I used the pure stuff)

Melt dark chocolate, cocoa, and unsweetened chocolate into 2 Tbsp of the milk. I do this in the microwave at 15-20 second intervals. Once melted or mostly melted, remove it and allow it to cool for a couple minutes.

While it cools, put the banana, spinach, and milk into your blender. Blend it. Then add the melted chocolate/milk combo and blend until it's smooth and brownish green (it is a surprisingly non-repulsive shade of brownish green, but brownish-green nevertheless).

At this point, you might want to taste your smoothie to see if you want the maple syrup. If you do, go for it.

Then drink it up my friends. It's surprisingly filling.

PRINTABLE RECIPE

Thursday, April 11, 2013

Homemade versus the Dollar Menu

First. Let me be clear. I am not opposed to eating out sometimes. I am not opposed to the dollar menu. I am not opposed to being tired and wanting a break from cooking or cleaning up. I'm not even opposed to being completely unprepared for dinner some nights and being completely starved at dinner time and just going out.

What I am opposed to is the idea that eating out is cheaper than eating in. It's not. It makes me crazy crazy obscenely crazy to hear and/or read articles/people talk about how cheap fast food is. It is not cheap. It is easy. It is fast (sometimes). It is a source of pleasure for some. It is tasty for some. It is convenient for many. But it is not cheap. Also, the people who work there always look at me like they would personally be much happier if I were dead and I don't care for that much, but that's beside the point.

We're not even going to talk about the combo meals because when I see a $6-8 (per person) "meal" with a sandwich, fries and soda, I see what could have been a small roast in the crock pot with some ranch powder, potatoes and carrots. People, it's not even any more work than standing in line while your kids whine and the hollow-eyed workers give you death stares. So, no, we're not going to talk about combo meals.

We're going to talk about the dollar menu. If each member of my family orders two items from the dollar menu, we pay $12 plus tax. This is not, by any means, terrible. But it is also not particularly cheap (especially if you consider that little roast up above that could be a big roast for $10). Also, two items is filling enough for the me and the kids, but not really for Kip.

Again, let me reiterate that this isn't about taste or convenience or funness. It's about cost (though I personally believe homemade meals kick butt in the taste department too; they just don't always taste the same as beloved fast food staples). If you love Rally's fries (because I know I do--oh, yes, I do), then so be it. I just don't want to hear that they're any cheaper than my home fries, which are about 25 cents a serving.

Homemade Hamburgers and Fries to serve 6

1.5 lb hamburger: $6.00 (not a sale price there either)
buns: 1.50
condiments: .50
Potatoes for fries: 1.50

Total: $9.50

I realize that you have to make this food, then clean it up. I get that. But you're looking at much higher quality food too. $4/pound is how much our humanely raised (though not grass fed) beef costs. And the home fries are a whole food made with just potatoes and oil and salt. Also you can go nuts with the condiments if you want (my family always does). Also, there are no plastic chairs. Or scary employees (that is, unless you've had a very bad day and are giving the kids some good death stares of your own).

Next we'll compare some good old fashioned subway style sandwiches and fruit to the old dollar menu. This is not an apples to apples comparison because this is obviously not a burger type meal, but it is one that takes virtually no effort, so in that way I thought it a good comparison as well. You just put the stuff on the table and people make the sandwiches they want. You can have this meal on the table in less time you wait in line at McDonald's for lunch. We had it for dinner the other night and it was so good and satisfying and filling and EASY that it's what got me thinking about the whole dollar menu thing.

6-inch subs with fruit  for 6

Meat (deli chicken): 4.00
buns: 1.50
pickles: .50
cheese: .75
toppings (tomatoes, lettuce, mayo, ketchup, mustard): .75
apple: .50
orange: .25
pear: .25

Total: 8.50

Again this isn't even the cheapest of the cheap. These were delicious, fully loaded sandwiches. And everyone got 1/2 serving of fruit (which could have been doubled with another dollar). As an aside, my kids couldn't eat a full sandwich so we had leftovers the next day.

So go ahead and eat out. Have fun with it for Pete's sake. Or do it when you're out and haven't prepared anything and people in your car are melting down like a square of American cheese on a cheeseburger. This isn't about fast food guilt. But please please please spare me those droning arguments about how cheap fast food is and that that's why people have to eat it and that there's no possible way they could ever eat anything else more filling or more healthy. Cause, yeah, you might get a hollow-eyed death stare from me.

P.S. As a follow up, I'll soon be doing a post on faster-than-fast food meals you can make and enjoy.

Monday, April 8, 2013

Coconut Lime Pull Apart Bread


I am a terrible shameless fan of pull apart bread with all its buttery white floured goodness. I've made cinnamon/sugar, chocolate chip, and--my favorite--orange. This weekend, I made another winning combination: coconut lime. It was very very good. Although my son did look at the green zest between layers and ask if it all contained spinach. Ha (and, no, there is no spinach, okay).

You'll find the instructions for pull apart bread here.

To make coconut lime, sub the zest of two limes for the orange zest. Then frost it with this to-die-for coconut lime glaze. Let me give this glaze a little gush because it's awesome. It would be fabulous on bundt cakes, muffins, cupcakes, donuts, whatever. It's just really really wickedly good.

Coconut Lime Glaze

4 Tbsp coconut milk (the canned kind)
1- 1 1/2 C powdered sugar
juice from one lime
a few scrapes of zest for looks

Mix together and pour over bread while it's still warm. Note: You can add more powdered sugar and it will still be a glaze, but I really liked the pop of the limey coconut with a thinner glaze.

Thursday, April 4, 2013

Really Easy Roast Chicken


One of fundamental reasons that people don't cook is that they think it's difficult. Fussy. They think you have to know things to be a good cook, be part of an inner circle. The truth is that you really don't have to know a lot. You do need a decent recipe and a tiny tiny sense of confidence or adventure or homeyness, or a combination thereof. And maybe a small child to hang off of your leg, because I hear that that is kind of like a cooking talisman.

It took me many years into my cooking life to even attempt to roast a whole chicken. I mean, that was big-time--like Thanksgiving or something, right? Nope. Roasting a chicken is one of the easiest, most wonderful meals you can make.

I present this roast chicken recipe because it's the easiest I've found and it turns out a butt-kicking chicken--moist, golden-skinned, flavorful. The other great thing about roasting a chicken is that you usually get some good leftovers you can use in salads or burritos the next day. And if you're feeling adventurous, you can even attempt your own broth (it's easy; just throw it in the crock pot after dinner, cover in water, and strain out the liquid before bed. Done). But you don't have to make broth if that scares you. Just make chicken.

Basically, you will get your oven really hot, you will slather your bird in butter, salt, and pepper, and then you will cook it breast side up for an hour. That's it. It's easy. 

What you need:
-A THAWED bird
-Butter
-Salt and pepper
-A pan
-An oven
-An hour and 15 minutes (you don't have to DO anything during this time, mind you, but you have to be in your house)
-An instant read thermometer (maybe not essential, but very helpful, especially for a novice cook)

What you can have:
-Herbs
-Lemon or orange (this is supposed to keep it moist)
-Garlic

Why People Fuss:
-You do have to thaw the bird. Have I mentioned this? You can buy a fresh one, but if you buy frozen, that baby has to be thawed. I do this by putting it in a bowl of water and putting that in the fridge overnight.
-Time. It does take a good hour to cook your chicken. A mere five minutes of prep, but a good hour of cooking time. If you get home from work at 7:00 and want to eat NOW, that is a problem, but otherwise, it's easy to multitask around your cooking bird. (And you can totally rock a chicken in a crock pot too, but this post is about roasting one.)
-Do I have to brine it? No. Not with this recipe anyway. There's gonna be plenty of salt and it's just a small little guy, so you'll be fine without brining.
-Will I burn down my house? It is unlikely, even with the small child leg hanging talisman.
-Why is my oven so hot for this? I'm sure I will dry it out or burn down the house. This bird is probably going to explode in my oven isn't it? No. I don't know why the high heat works, but it really really does. Do it.
-Do I have to touch a raw chicken? Yes, yes you do. I'm sorry, but unless you have a very loving spouse who will do it for you, this is part of roasting a bird. You have to get all cozy with its raw self and possibly remove the neck and some innards (don't worry; most are in a bag if they're there at all).
-What ever will I serve with it? Potatoes, people. And maybe some broccoli if you want.

Really Easy Roast Chicken
adapted from here
Serves 4
Prep time: 5 minutes
Cook time: 1 hour
Rest time: 10 minutes
Cost: $5.60
chicken: $5.00, lemon: .30, butter: .25, garlic: .05

5 to 6 pound chicken, THAWED (have I emphasized that enough?)
1 lemon, halved or pricked several times with a sharp knife
4 garlic cloves, crushed and/or sliced
3-4 Tbsp butter
salt salt salt
pepper

Place rack on second level from bottom. Heat oven to 500 degrees (450 in a convection oven per the original post for this).

Take out the neck and giblets (you don't have to cut anything off--just remove them from the cavity where your loving butcher has stuffed them because some people like them or use them in stock or gravy; you don't have to, but that's why it's there)

Stuff the cavity (that's the hollow part of the bird where you probably just took out a neck and some innards) with the lemon and garlic and maybe a tablespoon of butter. Sprinkle a very good dose of salt and pepper into the cavity (I'm thinking 1/4-1/2 tsp salt--you won't end up eating it all; most will run off, but it will help flavor the bird).

Rub the chicken with the remaining butter. Get it good. Then sprinkle with salt and pepper. Be generous with your salt. Sprinkle it over all surfaces of the bird (again, you won't end up eating all of this, but it will season the bird).

Place the chicken BREAST SIDE UP in a roasting pan (or Dutch oven or 9x13 inch pan or whatever can handle high heat; roasting pans can be intimidating, huh?). Be sure there's a nice dollop of butter on the bottom part (where the bird meets the pan) to help it not stick too bad when it's done. Put it in the oven legs first and roast 50-60 minutes. Take it out when the juices run clear or when you can stick an instant read thermometer in any part of its little birdy body and have that thermometer come out at 160 or higher. In a neurotic way I poke that thing all over the place, but if you want to be less violent, you can google how to test the temp of a bird and just poke it in one or two places.

When it's done, take it out of the pan and let it rest covered in aluminum foil for 10 minutes. Resting lets the juices distribute evenly throughout the bird.

If you want, you can take the drippings and make a gravy with them. I keep this really easy. Remove all the liquid drippings and scrape off the browned bits at the bottom of your pan because they're awesomeness. Bring this to a boil in a saucepan. Mix 1-2 Tbsp cornstarch with 2-4 Tbsp water. When the drippings/broth are boiling, add the cornstarch/water, whisking until thickened to the desired thickness. That's it.

PRINTABLE RECIPE

Monday, April 1, 2013

Corn and Kale Chowder


This is a good recipe for spring. It's still been pretty chilly around here and we're practically in the southern half of the U.S. It uses kale, which is coming on (ours is just starting to look alive again). But it also uses corn. You can use frozen and I did. (I bet you can even use canned.) But if you have this during the summer, you can roast ears of corn and potentially make yourself the most butt-kicking corn chowder ever.

Corn and Kale Chowder
adapted from Good Life Eats
Makes: 8-10 servings
Prep and cook time: 40 minutes
Cost: $4.35 (or about: $.50/serving)
butter: .25, onion: .10, garlic: .05, flour: .04, milk: .26, cream: .50, chicken broth: .30, potato: .10, corn: 2.00, kale: .25, sausage: 50

Note: You can sub 2 1/2 C whole milk for the milk and cream mentioned below
Note: I used 1 1/2 C chopped kale and desperately longed for more. The recipe below reflects that longing.
Note: 1 C chicken broth will make your chowder thick and chowdery. Add more if you want it soupier. (Ours was chowdery.)
Note: If it's summer and you want to roast your corn, here's how: Heat oven to 425. Grease cobs with olive oil or butter. Place on cooking sheet (lined with parchment if you want dish duty to be easier). Cook, turning frequently for 20-30 minutes or until cobs have some brownish spots on them. Remove from oven. Cool. Take off corn. You'll need 2 1/2 C or about 5 cobs worth of corn.

3-4 Tbsp butter
1 small onion, diced small (or a decent dose of onion powder for the onion haters--start with 1/2 tsp and then add more to taste at the end)
3 cloves garlic, minced
1/4 C flour
2 C milk
1/2 C cream
1-2 C chicken broth (or veggie broth for a vegetarian soup)
1 large potato, peeled and diced (we used red)
2 1/2 C frozen corn, dethawed
1/2 tsp salt
1/4 tsp pepper
dash cayenne pepper, optional
dash nutmeg, optional
3 C chopped kale
2 links sausage or a few strips bacon, cooked and crumbled (optional)

Melt butter. Add onions and cook for 5-8 minutes. Add garlic. Cook 1 minute. Add flour. Cook 1-2 minutes. Whisk in milk. Add cream and chicken broth.

Add diced potatoes and corn. Let this simmer for about 30 minutes or until the potatoes are tender. I cut my potatoes small so they cook faster and because I don't like a big ol' bite a potato in my soups.

While it simmers, cook your bacon or sausage if using. Once cooked, chop small.

Also, chop your kale and put it in a microwave-safe bowl with a bit of water (2-4 Tbsp). Cover this with plastic wrap and cook 2-3 minutes in the microwave. The kale will wilt. Drain off the water. Note: I do this because sometimes kale is bitterish. If you cook it and pour off the water, the bitter goes with that water (yes, with a few nutrients as well, but those nutrients won't get eaten if your soup turns out bitter). If you cook the kale in the soup and the kale happens to be bitter, some of that is going to come into your soup and it will not taste quite as good.

When the potatoes are tender, add kale and meat. If it's too thick for you, add more chicken broth. Then add salt, pepper, cayenne, and nutmeg. Taste and adjust seasonings (don't burn your mouth--I hate that).

PRINTABLE RECIPE

LinkWithin

Related Posts Plugin for WordPress, Blogger...