Showing posts with label iced. Show all posts

Monday, July 25, 2016

Dumb Easy Dessert: 3-Ingredient No Churn Peach Mango Ice Cream


I was going to do shameless marketing post using a recipe inspired by the characters in my book, but then I made this and, since it is 100 and trillion and bazillion degrees here (and humid), I just had to post it.

Shameless marketing for my book will just have to wait for my release date on the 28th. Or, wait, I can work some shameless marketing in right now by inviting you to join the giveaway I'm hosting. Win a free book and a $10 Amazon gift card! Go here to sign up.


Okay, marketing is done. Now make this ice cream. If you've got frozen fruit on hand, it takes only five minutes to make. You only need a good blender or food processor, some frozen fruit, and a can of sweetened condensed milk. For this, you get cold beautiful perfection.  Now I call this Peach Mango (and that was a very good combination), but the first time we made it just with peaches, which also blew us away. I imagine it could be made with a variety of other frozen fruits although peaches and mangoes do give it a creaminess that you might not have with, say blueberries or something like that. My point here is that you should feel free to experiment and if you don't have a bunch of frozen peaches on hand, you shouldn't be afraid to try this with another fruit.

But we had farmer's market peaches that I'd bought for $.50/lb and $.50 mangoes, so we went with this combination.  

3-Ingredient No Churn Peach mango Ice Cream
adapted from Saving Room for Dessert
serves 4-6 smallish portions
prep time: 5 minutes
Cost: $4.00 (less if you use cheap farmer's market fruit like we did)
peaches: 2.00, mangoes: 1.00, sweetened condensed milk: 1.00

Note: You can buy these fruits pre-frozen at the store. No shame in that. But I got a steal on my fruits and froze them myself. As a bonus, the peaches particularly were super fresh and amazing.

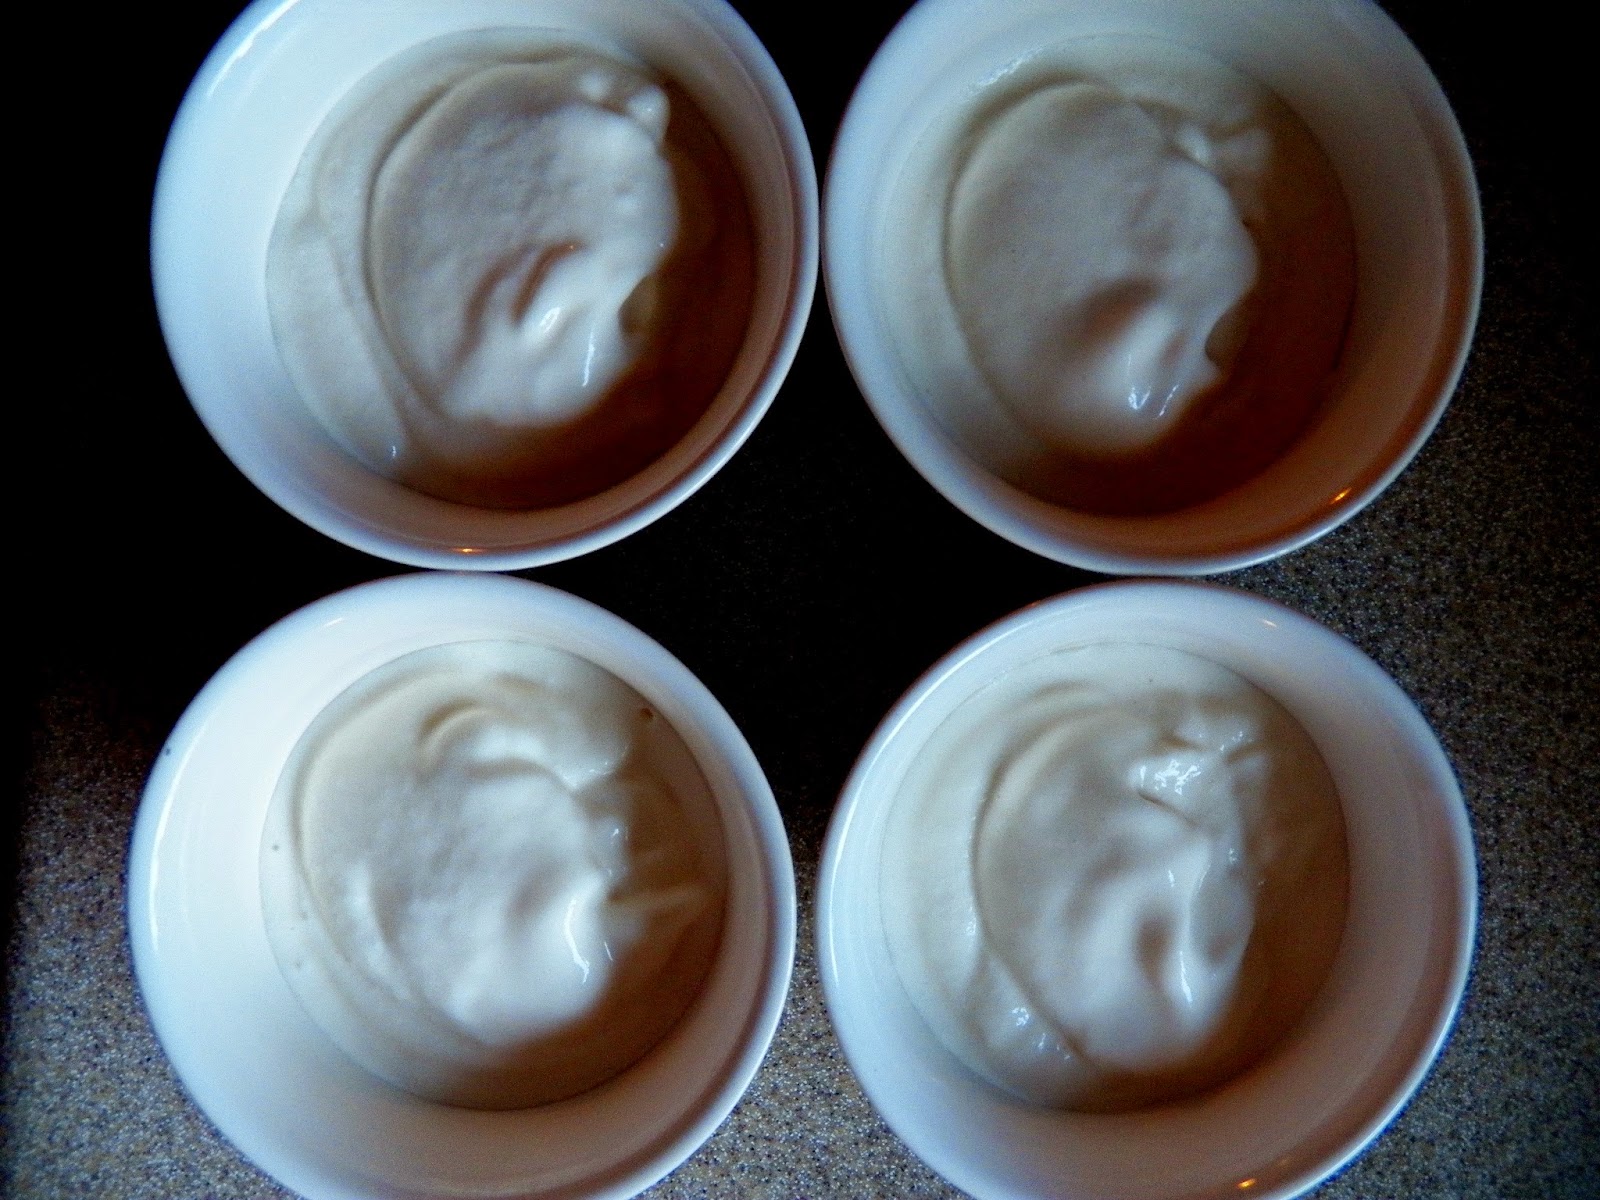
Note: When this is first done, it will be a creamy soft-serve texture. After it sits in the freezer for a day, it will look more like the pictures above. Both are amazing, but we ate almost all of ours in soft-serve state.

3-4 peaches slices and frozen (skin can be left on or peeled off)
1-2 mangoes, frozen
1/2-1 can sweetened condensed milk

Add fruits to a food processor (or a good blender). I added about half, pulsed and chopped, then added the other half, pulsed and chopped, so that I had some chopped up, icy fruit. Then I added the sweetened condensed milk and pulsed, then just let the processor run. I did not need the full can of sweetened condensed milk, but if your blender or food processor is struggling, feel free to add some more. This might make for a slightly runnier finished product, but I'm pretty sure you still won't regret this dessert.

Monday, May 11, 2015

Three-Ingredient Coconut Ice Cream (Made from Pantry-Stable Ingredients)

(Here it is--melting fast)


I'm so excited about this recipe. It's a shame I had to give it such a run-on sentence of a title. But I wanted you to know. Coconut ice cream! With only three ingredients!! Made from pantry stable ingredients!!! As in, you could get trapped in your basement during a tornado and these three ingredients would be staring you in the face, begging you to make ice cream out of them while the roof gets lifted off your house and carried to Oz. If that's not something to look forward to, I don't know what is. But I suppose I've digressed (and also come off as the crazy person that I am, but you know--ice cream! coconut!! pantry stable!!! three ingredients!!!! I'm still freaking out about it!!!!!)

And it is the best, most delicious coconut ice cream I've ever made or eaten.

You open two cans, add sugar, stir. And then add it to your ice cream maker.

The best news is that you don't even have to wait for a tornado to trap you in your basement--you can make this ice cream right now. I know--how lucky are you?

I came up with this ice cream recipe one hot evening last week when I Wanted Ice Cream, but didn't want to go anywhere to buy any and didn't have time to follow my usual method of cooking egg, sugar, and milk, then adding cream and cooling. This custard ice cream recipe is my go-to and it is a delicious recipe, but it's no good when you want ice cream NOW. And I've tried short-cutting it and leaving out the cooking process and it's never quite as rich. It occurred to me that coconut milk instead of cream and eggs would take care of a few problems. And game changer...It is rich and delicious and the stuff you need can just be sitting there waiting for you to need them. So now here we are--ready to encounter potential life-altering disasters with a quart of ice cream in hand.

Note: I tried to convince myself that since that has actual coconut milk in it, I could add blueberries and eat it for breakfast. This justification didn't really work--even for me. But, you know, you can't blame me for trying, right.

Three-Ingredient Coconut Ice Cream (Pantry stable ingredients)
Makes 1 quart ice cream
Prep time: 5 minutes or less
Mix time: 20 minutes
Cost: $2.35
coconut milk: 1.50, evaporated milk: .70, sugar: .15

Note: If you happen to think about your ice cream craving ahead of time, you could put the cans of milk in the refrigerator beforehand. This will make the churning process go a bit faster.
-Also--with my $20 ice cream maker, this produces a soft serve level of ice cream on the first day. This is standard for cheap machines and homemade ice cream. However, if you have a nicer ice cream maker it may be able to make it up as a harder ice cream.

1 can coconut milk (it can even be the cheap stuff as thickness isn't essential for this)
1 can evaporated milk
3/4 C sugar

Whisk together all ingredients. I stirred for a couple minutes, until the sugar was dissolved. I didn't want it sitting there at the bottom of the ice cream.

Pour into ice cream maker and churn according to manufacturer's instructions.

PRINTABLE RECIPE

Thursday, August 28, 2014

Lemon Granita


We've had the most delightful summer--warm days, cool nights, sunshine. Naturally summer decided to go out with a hot, miserable, muggy bang. Oh well. Time for iced desserts. One super hot day I was craving icy lemon. This did the trick.

I had never made a granita before and I'd expected them to come out with bigger chunks of ice (a la Snoopy Snow Cone Machine). Nope. With this you get tiny, velvety ice crystals that could rock any nice dinner party (should the parties you hold not involve sticky people and otter pops). But you don't have to save it for a dinner party because it's cheap and easy and it could also rock any 7-Up slushy cravings you've got (though you might have to skip the dainty serving dishes and super size it).

When Giada made this, she recommended a spoonful of lightly sweet ricotta on top. I didn't have ricotta, but liked the idea of a creamy contrast. I drizzled a little cream on mine and loved it (though it does get freezy, which you might find weird, but didn't bother me).

Also, this is super easy, but it isn't super quick. Sorry. It takes a good 3-4 hours of freezing time. The good news is that it keeps forever. I thought it would turn into an icy lump after a day or two, but it keeps its slushy-like consistency for at least a week and maybe longer.

Lemon Granita
adapted from The Food Network
serves 4
Prep time: 10 minutes
Freeze time: 4 hours
Cost: $.90
sugar: .15, lemons: .75 (cheaper if you use store-bought lemon juice)

1 C water
3/4 C sugar
2/3 C lemon juice
drizzle cream--optional

Combine water and sugar in saucepan. Stir until sugar dissolves. Whisk in lemon juice (if using fresh-squeezed juice, strain it well).

Pour into an 8x8 inch dish and put in freezer. (Note: I put mine in the fridge to cool it down first. The liquid was hot and I didn't want to melt any of my freezer stuff.)

Every 30 minutes or so, scrape through it with a fork until it is completely made up of ice crystals.

Serve with a drizzle of cream or a handful of raspberries if you wish.

PRINTABLE RECIPE

Tuesday, July 1, 2014

Mango Lime Pops


Ah. Lately I occasionally feel (as I stumble into bed after midnight) that I am a little bit drowning in summer.

Well, if you're going to drown in summer, these pops are the way to go. They are bright and fresh and perfect. Lime and mango together are perfect partners. Occasionally after I've peeled a mango to eat, I'll just rub a cut lime all over it and eat it like that.

Generally, mangoes aren't cheap, but this summer they've gone on sale for $.39/each at least three times. Each time, I've bought the limit (10) and then wondered what to do. Mangoes seem so decadent to me that just cutting them all up seems boring. Because of this I let some of them sit there until I was worried my precious fruits would go off (like a woman who buys a dress she doesn't wear because it's so nice). So I tried to get over that. Still, I wanted to do something special with at least some of them. And then the temperature pushed into the nineties, which is when summer popsicle ideas are born (or at least extracted from Pinterest).

Mango Lime Pops
adapted from Love and Lemons
makes 4-6
Prep time: 5-10 minutes
Freeze time: 4 hours

2 ripe mangoes, cut
2 limes (or about 1/4 C juice)
1/4 C coconut milk
2-4 Tbsp sugar

Put it all in a blender or food processor and puree. Taste and adjust sugar. I always start with just a bit and add more as necessary. Pour into popsicle molds or, if you're cute and Pinteresty, something like Dixie cups that you will them make look amazing. (I was born a little too much without the cuteness gene, but at least what we eat tastes good.)

PRINTABLE RECIPE

Tuesday, September 3, 2013

Ice Cream Cake


We had this for my nephew's birthday in July. Then Savannah wanted it for her birthday in August. It's not too late people. It's still plenty hot. Make this. Love this. Just don't eat too big a piece or you'll make yourself sick. Which brings me to the other sort of nice thing about ice cream cake. It can last a long time. Because it's frozen, you see. It won't get stale after 3 days or 5 days or ever. See, it's, like, diet friendly right. I mean, this cake is all about portion control, right. (Note: Wrong, people, wrong. This cake is not about portion control; you will see. Yes, you will see.)

Below I offer two options for this cake. One is the normal cake which involves ingredients like Hershey's syrup and Cool Whip. This version is still pretty darn yummy. However, I wanted to try it with homemade chocolate syrup and homemade whipped cream and that was pretty amazing. (Note: Portion control. No really, you'll thank me. Well, maybe.)

You'll find the homemade to be a bit cheaper and only about 7 minutes more labor intensive (yes, 7 minutes). However, you'll note that neither of these is particularly cheap. So now I will attempt to justify this sin.
Justification #1. It is very rich. You can eat/serve smaller pieces and get quite full and it doesn't spoil so you can keep it for longer.
Justification #2. You don't have to buy ice cream to serve with your cake. So really you should knock $3.50 off of the price of this, right.
Justification #3 (my old standby). It's still cheaper than buying a crap cake from the Walmart "bakery." Amen and amen.

One final note about this cake. It's easy to make, but don't try to slap it together in 30 minutes because each part needs to be put on and then frozen and the chocolate sauce will need a good 12-24 hours to cool. I recommend making it the day before (remember it's not going to go stale on you). Don't worry, making it a day ahead actually makes for its own kind of birthday bliss because there's no cake to worry about on the big day.

Ice Cream Cake with Homemade Fudge Sauce and Whipped Cream
makes one 9x13 inch pan
Prep time: 30 minutes, but you're going to have to have (sometimes long) breaks between layers.
Cost: $9.40
cookies: 1.50, butter: .50, 1.90, cream: 2.00, ice cream 3.50 (Walmart Breyer's price)

30 Oreos (or decent generic substitute--we used generic Walmart cookies to good effect and it wasn't even a full package)
1 stick butter
1 recipe of Kip's fudge sauce
16 oz. cream. whipped with 4-8 Tbsp sugar and a few drops vanilla (see here for a how to)
1/2 gallon vanilla ice cream (we used Breyer's, which was a little shy of 1/2 gallon--arg--but worked)
toppings like nuts, sprinkles, etc (optional

1. Make Kip's fudge sauce. You must do this 12-24 hours beforehand or your sauce will be warmish and melt your ice cream. The sauce must be COLD.

Note: If you're reading this 1 hour before the birthday of your precious and feeling about to cry, then do this. Make the sauce, then put it in a small bowl, then put the bowl of sauce in a bigger bowl that is filled with ice (no ice will go in your sauce--it's just surrounding the bowl that contains your sauce). Put this in the freezer and stir the sauce every 10 minutes or so.

2. Crush Oreos. I did this in a food processor, but a blender would work, as would a good old fashioned Ziploc bag and rolling pin. Add 1 stick butter to the crumbs, mix, and press into the bottom of a 9x13 inch pan.

Let this cool in the freezer for 20 minutes

3. While the crust is freezing, get your ice cream out, so it can soften. When the crust is ready, spread the ice cream onto it into an even layer. Then put this back in the freezer for an hour or until it's quite firm.

4. When it's firm, add the (cooled) chocolate sauce and spread it on. In my humble opinion, this is too much chocolate sauce and I would have used less. However, let it be noted that I was the ONLY one in our family who would have used less. Everyone else loved it how it was. Put this in the freezer for 15-20 minutes.

5. While it's freezing, whip (and sweeten) your cream. You can find directions here. Layer this onto your cake. Freeze for 10-15 minutes.

6. Add toppings if you wish and serve.

PRINTABLE RECIPE

Ice Cream Cake
cost: $10.50
cookies: 1.50, butter .50, Hershey's syrup: 2.00, sweetened condensed milk: 1.00, butter: .50, cool whip: 1.00 (guessing here--haven't bought this in years), ice cream: 3.50

Crust:
30 Oreo cookies (we used generic Walmart cookies to good effect and it wasn't even a full package)
1 stick butter

Sauce:
1 can Hershey's syrup--16 oz. (the kind you find in a can with a yellow lid like this)
1 can sweetened condensed milk
1 stick butter (yes, another one)

1 8-oz tub Cool Whip

1/2 gallon vanilla ice cream
toppings like sprinkles, nuts, cherries, whatever (optional)

1. Make your chocolate sauce. You must do this 12-24 hours beforehand or your sauce will be warmish and melt your ice cream. The sauce must be COLD.

Make the sauce by combining the Hershey's syrup, sweetened condensed milk, and 1 stick butter. Cook, stirring frequently (if not quite constantly) until boiling. Boil, stirring constantly, for one minute. LET THIS COOL COMPLETELY. It'll take the good part of a day. Note: If you're reading this 1 hour before the birthday of your precious and feeling about to cry, then do this. Make the sauce, then put it in a small bowl, then put the bowl of sauce in a bigger bowl that is filled with ice (no ice will go in your sauce--it's just surrounding the bowl that contains your sauce). Put this in the freezer and stir the sauce every 10 minutes or so.

2. Crush Oreos. I did this in a food processor, but a blender would work, as would a good old fashioned Ziploc bag and rolling pin. Add 1 stick butter to the crumbs, mix, and press into the bottom of a 9x13 inch pan.

Let this cool in the freezer for 20 minutes

3. While the crust is freezing, get your ice cream out, so it can soften. When the crust is ready, spread the ice cream onto it into an even layer. Then put this back in the freezer for an hour or until it's quite firm.

4. When it's firm, add the (cooled) chocolate sauce and spread it on. In my humble opinion, this is too much chocolate sauce and I would have used less. However, let it be noted that I was the ONLY one in our family who would have used less. Everyone else loved it how it was. Put this in the freezer for 15-20 minutes.

5. When it's done, spread the cool whip and freeze that.

6. Add any toppings you want and serve.

PRINTABLE RECIPE

Monday, July 2, 2012

Peanut Butter Ice Milk


I almost served ice cream for dinner last week. But wait... It's not as bad as it sounds. It's actually ice milk--the main players are peanut butter and milk. That didn't seem too sinful to me. The sugar is fairly minimal and if you're brave you can jazz it up with some spices such as cinnamon or cayenne. If you're not brave you can jazz it up with, ahem, chocolate chips. In the end, the reason I did not serve it for dinner is that, even though I considered it fairly virtuous, I didn't want my kids to start to believe that muffins and ice cream are dinner foods (I may or may not have had muffins as part of dinner the night before). Instead we added chocolate chips and had it for dessert.

I felt kind of good about that--like we were eating a healthy-ish, dessert and nobody knew. But here's a confession (because I think it's a rule that every post have one): If I make it again and don't serve it for dinner, I'll probably add a bit of cream--probably 1 C cream and 2 C milk. Not because it wasn't creamy. The cornstarch gives it plenty of creaminess. But because I think cream has a more sweet, rich, complex flavor, and I missed that.

A Few Notes: The cornstarch keeps this from getting ice-crystally in the freezer. However, it also thickens it a bit. That can be hard on low-end ice cream makers. On mine, the outside part froze up while the middle was still pudding-like. My recommendation is to not let it get even close to boiling after you add the cornstarch. If your ice cream maker still struggles, don't worry--we froze ours up by mixing the frozen sides into the unfrozen middle and soon enough it all evened out (which surprised me). Incidentally if you don't have an ice cream maker, you could freeze this into ice cubes and then blend those cubes into ice cream.

Peanut Butter Ice Cream
adapted from Sweet As Sugar Cookies
makes 1 quart
Prep time: 20 minutes (and then you'll need to cool it off before making it in your ice cream maker)
Mix time: 10 minutes
Cost: $1.05
milk: .40, peanut butter: .50, sugar: .15

3 C milk (we used 2 %)
1/2 C creamy peanut butter
6 Tbsp brown sugar
1 1/2 Tbsp cornstarch
3/4 tsp cinnamon, optional
1 tsp vanilla
1/2-1 C chocolate chips, chopped up a bit

Combine 2 Tbsp milk with cornstarch. Set aside.

Pour rest of milk into a saucepan. Add peanut butter, brown sugar, and spices if using. Whisk together over medium heat. Bring it almost to a boil.

Now add your cornstarch mixture and whisk it in well. If your ice cream maker is weak, take it off the heat here. Otherwise, heat it until it's thickened slightly. Whisk in the vanilla.

Chill this thoroughly. If you're in a hurry, put it in a bowl over a bigger bowl that is filled with ice and stir it ever few minutes. If you're not in a hurry, put it in your refrigeratore.

When you're ready, freeze it according to the instruction's on your ice cream maker. (Or freeze it into ice cubes and then blend it.)

PRINTABLE RECIPE

Monday, May 14, 2012

Salty Caramel Ice Cream with Chocolate Chunks


Time for another Secret Recipe Club recipe. This month I had A Little Bit of Everything. And I have to say that it was easy to pick a recipe because this Salty Caramel Ice Cream just jumped up and sang to me. Although I knew it wouldn't really be a part of my life without swimming in some chocolate chips. (Kip's swam in some chocolate sauce too. We have trouble with chocolate limits around here.)

I should tell you a few things about this recipe.

1. It's very good. It was the smoothest homemade ice cream I think I have ever made.
2. I was nervous about this method of sugar melting since I tend to burn my sugar unless using this fool proof caramel recipe, but Julie's method of sugar melting worked very well.
3. It's even better with chocolate.
4. It is, as it says, salted. When I tasted the un-frozen liquid, it was a little too salty for me, but the freezing took care of that (I assume by making the concoction less dense). However, if you don't like salty caramel or like it just a little tiny bit salty, you should omit or reduce the salt in this.
5. The liquid was thick--almost pudding-like. I figured this would make freezing a snap. However, in my lowest-possible-end ice cream maker, it made it a bit too much of a snap as the outsides froze so quickly that the ice cream maker couldn't move enough to get the middle frozen. Kip ended up churning it by hand--holding the churny thing and turning it around and around. It only took 5-10 minutes and we lived, but if you have a low end ice cream maker, you may want to omit or reduce the corn starch or cook it with the cornstarch for a shorter period of time. [Alternately this would be the perfect ice cream to make in a non-traditional manner like a kid-friendly bag throwing recipe like this. The quick freezing of this ice cream would make it perfect for something like this.]
6. That said, this ice cream was intensely creamy for homemade ice cream and I'm pretty sure we've got the corn starch to thank for that.
7. Heat your cream to simmering!!! (Please notice the exclamation points.) Yes, that dirties one more pan and is a wee bit of a hassle, but it is not as much of a hassle as pouring cold cream into your amber sugar and having the whole thing seize up into one enormous hard caramel candy and then spending the next 30-45 minutes slowly stirring this hard candy thing around your pan until it finally melts. Which is what I did. So do yourself a favor and heat up that cream before you pour it in.
8. This recipe requires a few bowls. Not big obtrusive tough-to-shove-in-your-dishwasher bowls, but yes several. Three to four bowls and 2 pans to be exact. In this way, it's not exactly the perfect weeknight dessert dish (unless of course your kids are throwing bags of it around, in which case it's great). For a warm Sunday afternoon, however, there's nothing better.
9. Julie recommends that when the liquid is done cooking, you throw a bowl of it onto ice to cool it quickly. This is what you should do if you want your ice cream right now. However, I was way to lazy for that and just put mine in the refrigerator overnight.

Salty Caramel Ice Cream with Chocolate Chunks
adapted from A Little Bit of Everything
Makes 1 quart
Prep time: Well, this took me a good hour due to my caramel seizing. I think that with warm cream it will take 20-30 minutes
Freeze time: 10 minutes
Cost: $2.73
(milk: .26, cream cheese: .20, cream: 1.25, sugar: .12, chocolate chips: .90)

2 C whole milk
1 Tbsp plus 1 tsp cornstarch
1 1/2 oz (3 Tbsp) cream cheese, softened
1/2 tsp fine sea salt (reduce or omit if salty caramel isn't your thing)
1 1/4 C heavy cream
2 Tbsp light corn syrup
2/3 C sugar
2 tsp vanilla
1 C chocolate chips, chopped so that some of big and some are small

To Prepare:

1. Mix 2 Tbsp of the milk with the cornstarch in a small bowl.
2. Whisk cream cheese and salt (if using) in a medium bowl (this is the bowl where all your ice cream will end up so make sure it's big enough.
3. Put cream in a small pot to warm. You're going to bring it to just under a simmer. Have your 2 Tbsp corn syrup ready to put into the cream just before you pour the cream on the sugar.
4. Fill a bowl with ice if you're going to do the ice bath thing.

To make ice cream:

1. In a medium saucepan over medium heat, spread an even layer of sugar over the bottom of the pan. Now heat it WITHOUT STIRRING until there is a full layer of melted sugar on the bottom, but still some white unmelted sugar on top. When the edges/bottom layer start to turn golden, gently pull the melted golden sugar towards the unmelted sugar with a heatproof spatula. In other words, nudge the sugar around until it's all melted and amber (dark goldeny orange) in color--like a penny.
2. As you're waiting for that bottom layer of sugar to melt, be sure your cream is heating up and go ahead and add the corn syrup to it. Give it a stir.
3. When the sugar is melted and golden, remove it from the heat and gradually whisk in the cream mixture. It may still seize a bit and it may bubble up a bit, but it should come together into a beautiful caramel. If there do happen to be chunks that are like hard (or soft) candy, just stir them around on medium low heat until they melt and incorporate into the mixture.
4. Return to heat.
5. Whisk in milk. Bring mixture to a rolling boil for 4 minutes.
6. Remove from heat and stir in cornstarch mixture.
7. Bring back to a boil and cook for 2 minutes until slightly thickened (Note: If you've got a low-end ice cream maker like I do, you may just want to stir this in until thoroughly incorporated and not give it the 2 minutes in an effort to keep it a little less thick so that your ice cream maker can handle it.)
8. Remove from heat. Pour this into your cream cheese mixture (whisking as you do this if you can; borrow an arm if you've got an extra around). Whisk until smooth. Add vanilla extract and whisk.
9. Place in ice bath if you want your ice cream now. Otherwise, cover it and put it in your fridge until you do want it.
10. Freeze in and ice cream maker according to manufacturuer's instructions.
11. Add chocolate chunks at end of freezing time.
12. Eat up. It's really good.

PRINTABLE RECIPE


Thursday, May 3, 2012

Mini Banana Chocolate Pops


I don't know about your neck of the woods, but here it is suddenly hot. On Monday I was making a nice soup and then yesterday, as my son put it, "Ever since I got home from school, I've been sweating." Which was very true. That night I finally broke down and turned the AC on, only to find the air cool but not cold, only to find that the AC would not even bring the temperature of the house down one degree. Sigh.

So today we're on to cold things. These are just about as easy as they come. Though not as perfectly nutritious as these or this, they still have something substantial at their core (which isn't to say your kids won't eat the chocolate off the banana and leave it to become a sliming mess on the table as my youngest did--It's like that old saying goes, "You can lead a horse to water, but he might eat the chocolate off and leave the rest." Don't you just love old sayings?)

Anyway, I thought they were really good, though they did give me a little teeth freeze. I didn't mind; it's toasty 'round here.

Mini Banana Chocolate Pops
adapted from Everyday Food
Makes 8
Prep time: 5 minutes
Freeze time: 30 minutes
Cost: $.90
(bananas: .30, chocolate: .60)

2 large ripe bananas, cut into 4 or 5 pieces
3/4 C chocolate chips
2-3 Tbsp milk
sprinkles if you wish

Cut your bananas into 4-5 pieces. Place them on a pan with wax paper or parchment paper. Stick toothpicks or small skewers in them. Freeze for at least 30 minutes.


When bananas are ready, combine chocolate chips and milk in microwave safe bowl. Microwave in 20-30 second intervals, stirring in between. (If it's too thick, add a little more milk and heat and stir. It should be thick, but not unspreadable.)

Remove bananas from freezer and spread chocolate onto each one. I just used a spoon and globbed and spread. Globbing and spreading is often my method of choice (maybe you should know this before asking me to make you a birthday cake). You're going to glob and spread around the outside edge (of course you could glob and spread the top and bottom too, but that might not be nutritious, right?). Put them back on the was paper and sprinkle (be sure to get those sprinkles on quickly or the chocolate will set and they won't stick). Repeat with other bananas.

If your chocolate becomes too hard to work with, throw it in the microwave for another 15 seconds and then have at it again.

The chocolate will freeze pretty quickly to the frozen bananas so you can eat these immediately if you wish. Otherwise put them back in the refrigerator. Once they're fully set, you can store them in a Ziploc bag.

And you're done. You can eat these straight out of the freezer, but if you'd like to avoid serious tooth freeze, take them out and give them 4-5 minutes before you bite in (they'll still be cold, but not quite as hard).

PRINTABLE RECIPE

Friday, September 23, 2011

Watermelon Lemonade Slurpee

Cheap Eat Challenge, Part 2: Watch as our family of 6 eats on less than $10/day.


Yeah, I know that today is the first day of fall. (Of course I only know that because my 1st grader pointed it out, but whatever, I knew it was coming.) But here in southern Indiana, you can still find a decent watermelon at the Farmer's market. And you still have days of such stunning beauty that your husband spends the bulk of them outside working on a stone patio and you occasionally go out and stand there and watch. Yes, it can be exhausting. Which is why you need this slushee. And maybe you can share some with your sweating spouse too.

I had some watermelon chunks hanging out in the freezer. They were waiting for a watermelon drink experiment involving limes, which I never got around to before consuming all my limes. In addition to this I had not enough lemonade to feed all my children without one or all of them whining that they hadn't gotten enough. I had a hot husband (in every sense of the word, I assure you) and I had an after school snack to dream up. And then I had an idea.

The best thing about this drink was that it really did come out in consistency exactly like a 7-11 Slurpee. It had that frothy icy thing going on. I was a little surprised myself. I'm quite confident that if I had set out to create a Slurpee-like drink in my very own blender, I would have spent the rest of my life in frustrated trying. Fortunately, the idea never occurred to me, and thus, a Slurpee fell right into my lap (not, fortunately, literally, although Emma did her best to try to spill hers on me several times).

Watermelon Lemonade Slurpee
Serves 2-4
Prep time: 2 minutes (not counting watermelon freezing time and lemonade making time)
Cost: $.40
(watermelon: .25, lemonade: .15)

Note: I'm willing to bet a limeade would have been just as good if not a little bit better, so if you've got some hanging around, go for it. As for me, that's a project for next summer.

3 C frozen watermelon balls
1 1/2 C lemonade (I used homemade, but I bet any would work)

Blend them together.

PRINTABLE RECIPE


This and my other sweet treats from the week are linked up at Sweets for a Saturday

Thursday, September 8, 2011

Lemon-Lime Gelato--No ice cream maker required

Cheap Eat Challenge, Part 2: Watch as our family of 6 eats on less than $10/day.


Have you had enough of virtuous drinks and ugly vegetables?

Good. Because I think there's still just enough summer left to squeeze in more ice cream, don't you?

This treat was inspired by a grapefruit gelato posted on apronstrings. It was the best frozen treat I've had all summer (and I have had, um, a few). I figured it would work with other citrus as well. And boy, did it ever.

In addition to tasting amazing, this ice cream requires no ice cream maker and takes a whopping 7 minutes to whip up (although for purposes of full disclosure, I should mention, it takes 4-8 hours to freeze). Seriously, it's so good, so easy, and all natural. And if you want more virtue in your ice cream, hear this: Before we went away on our trip, we had 1/2 lemon, 1/2 lime, and some cream. So you see, I had to make this ice cream, because otherwise, those things would have gone bad. And we all know that's a sin, right? Amen and amen.

Lemon-Lime Gelato
adapted from apronstrings
Serves 6 (or 4 or 2 or maybe just you because, really, who's counting)
Prep time: 7 minutes
Cost: $2.15
(1/2 lemon: .20, 1/2 lime: .15, cream: 1.50, milk: .10, sugar: .20)

Note: This recipe requires regular whipping cream--as in, not heavy whipping cream. You're shooting for 25-30% milkfat, so it's not too icy and not too much like whipped cream. Here in Evansville we apparently like our creams on the heavy side. The only non-heavy cream I found was still one at 36% milkfat. So for this recipe, I combined 1 1/2 C heavy whipping cream with 1/2 C whole milk (though other milk would probably work too). For the grapefruit version, I used 1 3/4 C of the 36% milkfat cream and 1/4 C whole milk. Both worked well.

1/2 lemon
1/2 lime
1 C sugar
2 C non-heavy whipping cream (see note above)

Juice the lemon and lime. You should end up with about 1/4 C juice. Then zest the lemon and lime.

Pour cream, sugar, juices, and zests into into an 8x8 inch pan. Mix it up. I used a flat whisk and mixed it till the sugar was incorporated enough that it didn't sit in a big lump on the bottom. Cover the pan with plastic wrap and freeze for 8 hours. (If you'd like this ice cream faster than that--and who wouldn't--put it in a larger pan so it's spread thinner.

PRINTABLE RECIPE

Saturday, August 13, 2011

Three Iced Delights

Cheap Eat Challenge, Part 2: Watch as our family of 6 eats on less than $10/day.


In case you've missed it, it's August:
August = heat
August = back to school
August = great need for iced delights

Recently I've found 3 online that I think perfectly fabulous. Only 1 needs an ice cream maker. Two are so healthy they can be served for breakfast. One I'll be eating for my last meal and, unless a great deal of willpower is exercised, every day until then. And all three could easily qualify as a perfectly perfect after school snack. Or weekend fun snack. Or Sunday breakfast snack. Or, you know, just about an any-old-time snack.

1. Strawberry Banana Sorbet

-No ice cream maker.
-Made with only fruit.
-If you're dealing with not very sweet strawberries, you may want to add a Tbsp of sugar, but do taste it first to be sure.
-Perfectly virtuous, yummy, and pretty in every way.

2. Peanut Butter Cinnamon Ice Milk

-Ice cream maker required. (Although I'm willing to bet if you froze it in ice cubes and then blended it up with a good blender, that would totally work with this recipe.)
-Made with skim or low-fat milk, so the PB's the only fat.
-This called for some hot spices, which I omitted, but if you and yourn are brave, go for it. Mine ended up merely peanut cinnamon-y, which gave it a fun exotic taste. Not into exotic? Omit the cinnamon and mix in some chopped strawberries at the end of freezing to get a PBJ effect and some extra nutrients.

3. Grapefruit Gelato

-No ice cream maker required.
-If you've only got heavy whipping cream, lighten it up by using a bit of whole milk in the mix: I used the lowest-fat cream I could find, which was about 36% milkfat. Donna recommends 25-30%, so I used 1 3/4 C cream and 1/4 C 2% milk.
-This one is the least healthy, but it could make a person look forward to her last meal. It is much better than any gelato I've ever purchased from fancy stores in the states.
-Try it with lemon, limes, or any highly acidic fruit. And if you do, please please please let me know how it turns out.


Friday, July 29, 2011

Five Minute Blueberry Sorbet

Cheap Eat Challenge, Part 2: Watch as our family of 6 eats on $10/day.

(We're a little melty here. It's 80 degrees in the house and it didn't help that Emma was banging on my leg with  her bowl in eager anticipation while I tried to get a few pictures.)

Five minutes from start to finish. That's what I'm talking about.

Because blueberry sorbet is always pretty. And blueberry sorbet is always tasty. But blueberry sorbet is not always fast. Usually, you have to freeze it for a day or put it in an ice cream maker for 40 minutes. I'm not opposed to that or anything, but I tend to lack foresight. I tend to get to dinner and think, "Oh yeah, I wanted to have blueberry sorbet with this." Do I go through my life this way? Let's just say I have my days.

Besides speed, beauty, and blueberry lemon punchiness, the other great thing about this is that there's very little sugar in this blend. Normally with a sorbet, you have to have a certain amount of sugar to get it to freeze right. Not with a blender sorbet. With a blender sorbet, you can use however much you want.

Now if I could just get someone to gift me a Vitamix...

Five Minute Blueberry Sorbet
makes 4 servings
Prep time: 5 minutes
Cost: $1.40
(blueberries: 1.29/pint on sale, kale: .05, lemon juice/sugar: .06)

1 1/2 C frozen blueberries
1 large kale leaf, spine torn out (or 1/2 C raw baby spinach leaves)
2 Tbsp sugar
2 Tbsp lemon juice
4 ice cubes
6-8 Tbsp water (you want to get away with as little as possible in order to get it as thick as possible)
a few scrapes of lemon zest for extra kick (optional)

Combine all ingredients in blender and pulse until completely smooth. Taste and add a bit more sugar if necessary (it will depend on how sweet your blueberries are). If your blender is awesome, this will take a minute. For me it took a little more. I kept having to shove my stuff down and mix it up, which leads me to the best smoothie making tip EVER. Seriously, I might give it its own post one of these days.

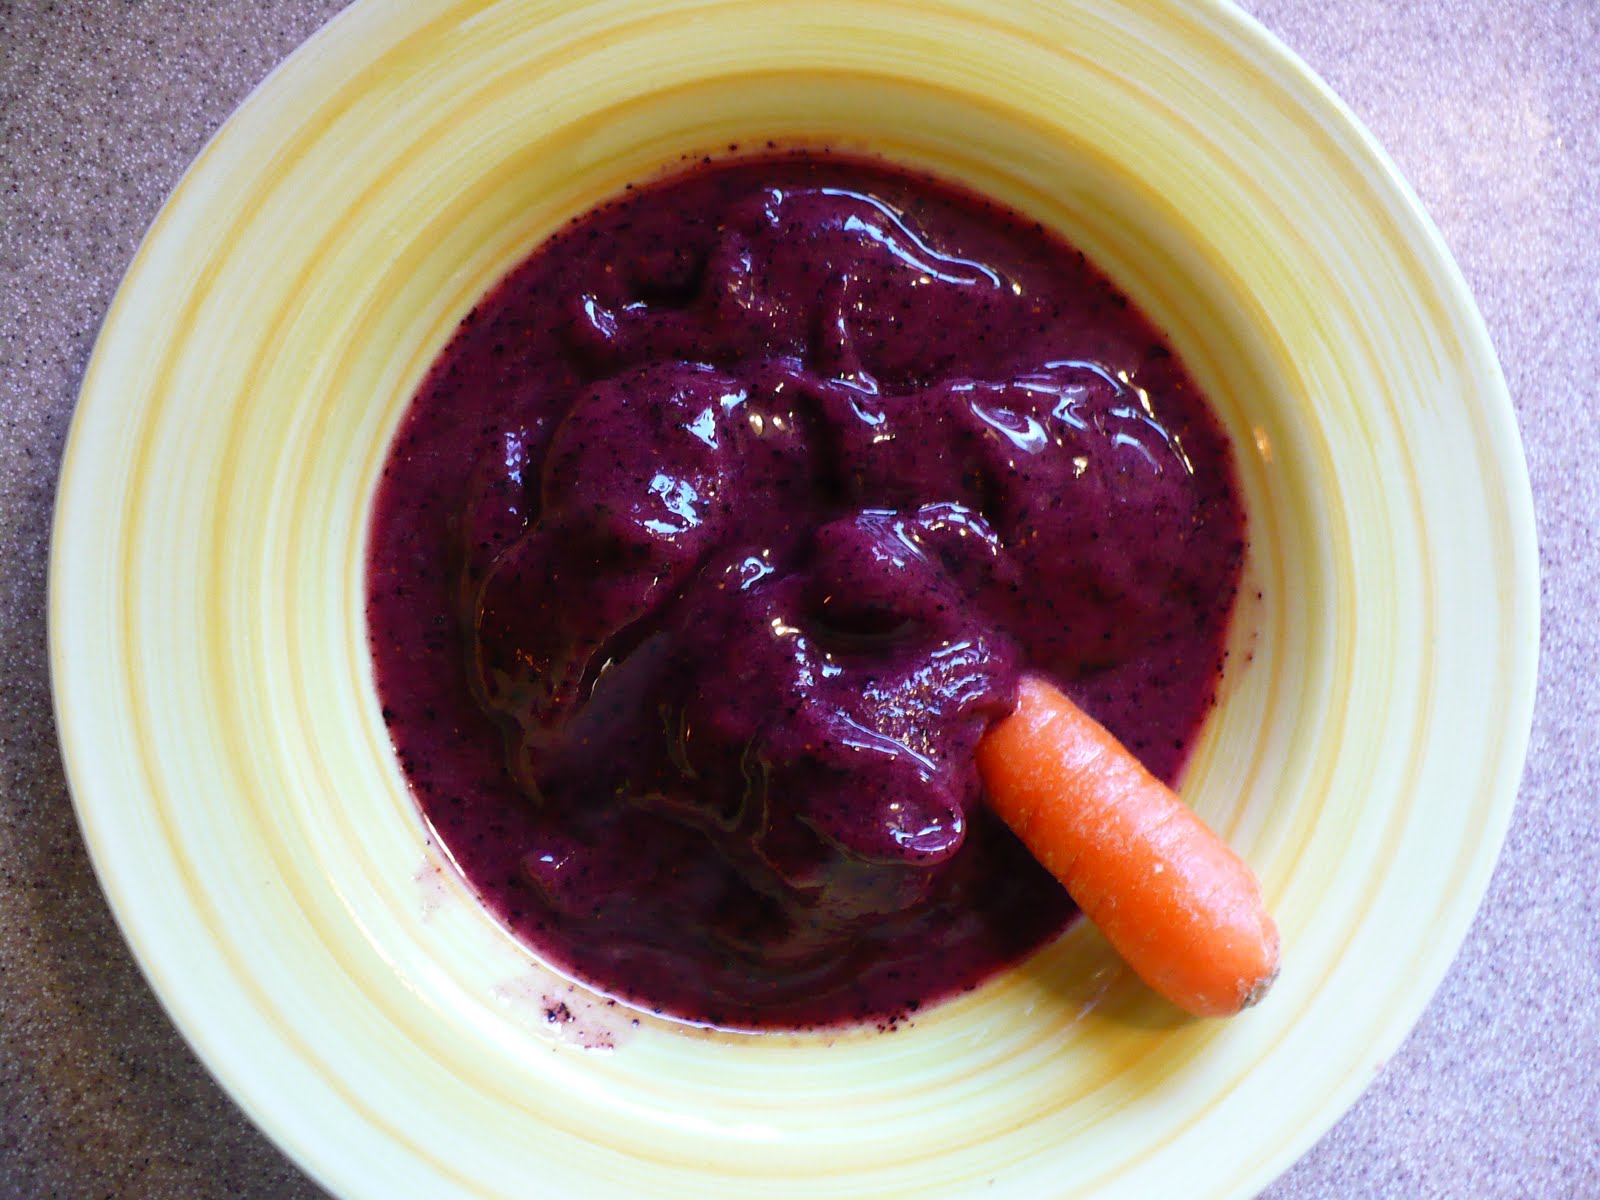
Best Smoothie Tip Ever: Use a celery stalk or carrot to mix or shove your fruit and ice down while the blender is blending. That way you will not end up accidentally breaking your wooden spoon or shattering your plastic spoon or bending your metal spoon or your blades while trying to shove food down to get your smoothie moving. I have broken a spoon at least 3 times and ended up with inedible shard-filled smoothie/hummus/sorbet. It pretty much always ends in tears. Better to get a teeny bit of carrot chopped up in your smoothie/hummus/sorbet. I promise you won't feel it go down the way you will with a bit of rubber spatula.

PRINTABLE RECIPE

Wednesday, May 11, 2011

Strawberry Banana Yogurt Popsicles

Cheap Eat Challenge: Watch as our family of 6 tries to eat on $6/day.


So of course I meant to get an action shot of these fabulous popsicles--melty popsicles, charming children, green grass and flowers in the background. But I forgot. Because, you see, when popsicles and children--however charming they may be--are outside all at once with popsicles, and when you're not planning on bathing them, they take a little supervision--both the popsicles and the children. We ended up doing a bath anyway.

So I got to this blog and realized I didn't have a popsicle picture. The good news is that these take all of three minutes to whip up. So I made some more. And took a picture. But it was dark by then. And the charming children were in bed. Perhaps tomorrow I'll get an action shot to post. For now, you get my kitchen. It has flourescent lights.

But I've spent too long apologizing for my lousy picture and not enough talking up popsicles. A week or two ago it was in the 50's around here. There were a couple of days I insisted we light the fire in the woodburner. And then we jumped into the 90's. (Sigh.) And all the sudden, popsicle season was upon us. So at least there's one good thing about jumping to the 90's.

These are healthy and easy and tasty. They're also fairly cheap. If you don't want to make them into popsicles, you can stop at smoothie stage, though I really must encourage you to make them into popsicles. There is almost nothing better on a hot day. It's fun for kids, of course. And it's a good way to get them to stop and eat something cold and wet when they may not want to stop for water or shade breaks. But they're also good for you. They allow you to sit, to slow down. Also, despite their utter virtuousness, you can use them as dessert. And they feel like dessert, not healthy food you should eat because it's, like, healthy.

Strawberry Banana Yogurt Popsicles
Makes 6-8 1/2 C servings (I may have forgotten to do a little measuring there)
Prep time: 3 minutes
Freeze time: at least 3 hours
Cost: $.94
(strawberries: .35, banana: .06, yogurt: .45, milk: .08)

Note on yogurt: I used vanilla yogurt because that's what I had. Alternately, you can use plain yogurt with 4-6 Tbsp. sugar.

Note on fruit: This recipe is more of a template. I used strawberries and banana, but most fruits would do--berries, mango, kiwi--knock yourself out. This recipe uses 1 C of fruit.

1 C vanilla yogurt
1/2 C milk
1/2 C sliced strawberries
1/2 banana

Blend in blender till smooth. Pour into popsicle molds. Freeze for at least 3 hours.

Note: Removing popsicles from their molds is the least fun part. Please let me know if you have some easy to remove popsicle molds and where I can get some. (Surely there's some silicone mold of some sort that you just pop out, but I haven't tried it.) Anyway, I always run my non-silicone molds under hot water for a minute or two and then they usually come out without too much grief.

PRINTABLE RECIPE

Thursday, January 13, 2011

Chocolate Chip Ice Cream

Cheap Eat Challenge: Watch (or join us) as our family of 6 eats, or tries to, on $6/day.


It's been a crappy day. There have been disobedient children; there have been nursing babies biting the thing that is much more sensitive and tender than a hand which feeds them; there have been video games and the fights that go with them (and here I'm referring to the fights off the screen); there have been naps cut short and bad attitudes and plenty of PMS. Which, if I may add, in a particularly PMS-y way, I just don't get. I mean, whether you you believe is God's Grand Design or Natural Selection, it just doesn't make sense. I mean, why would God create a person He kind of likes much less loves with such a flaw. And surely natural selection should have kicked that malfunction out of the line-up a long time ago. So I just tell myself that God loves and trusts women to rise above. Or that moody, grumpy women are really hot and that's how we've managed to stay around. Or that moody, grumpy religious women are hot. Only I don't tell myself that. I just cry. And pine after the ice cream we had earlier this week for my baby's birthday. Maybe writing about it will make me feel better.

For Christmas I got a couple ice cream makers. I love them both. I love the big party one from Kip's parents that can make a gallon (but doesn't have to) and is tried and true among the in-laws, which is saying a lot. And I love the little everyday one my sister's family gave us--the one with the base you can pop in the freezer and make just a bit of ice cream if you're in the mood for just a bit of something. It was this little guy we used to make my daughter's birthday ice cream. And it was fun. I wanted pure vanilla on our first run, but I was unanimously out-voted so we had chocolate chip instead. I didn't complain. The nice thing about making just a bit of something is that it doesn't have to break the cheap eat challenge. Unless of course, you develop an addiction, which is a very likely thing. Perhaps I should have Kip hide the gallon ice cream maker just in case. Only I don't think I could trust him to do it. In fact the mere mention of such a thing might put ice cream making dreams into his head--feelings he just couldn't deny until he acted upon them. And that is not what one needs when one is trying to convince one's family to eat on only $6/day. No, indeed. But I believe I have digressed.

Anyway, homemade ice cream can be made cheaply, especially if you don't need ice, or if you make your own ice instead of buying the ridiculously priced bags because you didn't think ahead (which, um, is generally our method--Kip hide the gallon ice cream maker; no, wait, don't.). Anyway, it can also be embarrassingly simple--sugar, milk, cream, vanilla--mixed up and thrown in. We opted for a slightly more decadent custard version that used egg which we cooked with the milk (though you can throw it all in raw and go for it, if you're the devil may care type).

Note on cheapness: When I say ice cream can be made 'cheaply,' you must remember to compare apples to apples--the substance I am referring to is something made with cream, milk, egg, sugar, and real vanilla extract. It is something most closely equivalent to (though better than) Breyer's. I expect there are "icecreams" on the market these days that are cheaper than what we made, but I expect--no, I guarantee--that they are made, nay, filled with sub-par ingredients. I'll be working on a cheaper version in the months to come--one that has a heavier milk to cream ratio with no eggs. We'll see how it goes.

Note on add-ins: I hate the wimpy add-ins the store bought ice cream sometimes have. That said, if you make yours too chunky, they will make your ice cream maker stop churning. If you want super chunks, stir them in yourself at the end.

Note on chocolate chips: Chop them up. A big piece of frozen chocolate is fine and all, but your chocolate chip ice cream will be much better with little frozen bits throughout. I may not know everything about cooking, but I know chocolate and ice cream fairly well. Chop them up.

Note on winter: I am aware that it is January and wicked cold in these parts. Nevertheless, stores persist in keeping ice cream on their shelves. I assume that that means people are buying it. If those people are you, then enjoy.

If you'd like ice cream, but don't have an ice cream maker, try this wonderful recipe from allrecipes for a freezer ice cream. It's not completely cheap, but it's completely great.

I myself cannot tonight enjoy. And so I will drown my sorrows by eating a handful of some of the mix-ins my sister gave us when she gave us the ice cream maker. Bon appetit.

Chocolate Chip Ice Cream
Serves 6-12 (depending on whether you eat a normal amount or the 1/2 C amount considered a portion by people who are clearly delusional)
Prep time: 15 minutes
Wait time: 1 1/2 hours--1 hour for cooling; 1/2 hour for churning (like I say above, the cooling portion can be avoided by removing the egg or not caring about it being raw)
Cost: $1.80 for vanilla; $2.00 with the chocolate chips added

3/4 C sugar
1/2 tsp salt
1 3/4 C whole milk (we used 2% and all was well)
2 eggs, beaten
1 1/2  C cream
1 tsp vanilla extract
1/4 C chocolate chips--chopped up so they're random sized bits and shavings and what nots

In saucepan, combine sugar, salt, milk, and beaten eggs. Whisk together. Keep stirring/whisking occasionally until milk is steaming. Cook a few more minutes until very slightly thickened (about 160-180 degrees if you've got an instant read thermometer).

Cool this mixture. (If you skip this step, your ice cream maker may not be able to freeze it up for you.) We put ours in a shallow dish, covered it and put it outside to get it cool fast.

Stir heavy cream and vanilla in.

Churn it according to your ice cream maker's instructions. Put the chopped chocolate chips in near the end.

We ate ours with this Swedish chocolate cake, which is pretty much a circular brownie.

PRINTABLE RECIPE

LinkWithin

Related Posts Plugin for WordPress, Blogger...