Wednesday, November 30, 2011

Diana's Apple Cake of Awesomeness (with Sauce of Beyond Awesomeness)

Cheap Eat Challenge, Part 2: Watch as our family of 6 eats on less than $10/day.

(This might not look like much here, but you should know that this is a picture of the cake after having been served up at a church party, then brought home in a cup, and rearranged the next day and photographed by me with all my non-skills. Frankly, I think it's doing pretty well for itself.)

Several weeks ago I attended a baby shower. Say what you will about baby showers and the cake that inhabits them, this shower had me laughing most of the time and over-the-baby-moon about the apple cake my friend Diana made. I mean, people, it was like true religion. Only less righteous. It was one of those things where you think you have a pretty darn good recipe (and I do), but then you have this and it's like discovering art or love. Oh love. Apples, sugar, spice, and everything nice sitting in a puddle of more sugar, spice, and BUTTER.

The shower was at 3:00 in the afternoon, but that didn't stop me from having--oh maybe an extra piece or two--even when my dinner and any shred of non-pig dignity I might still have was at stake. What can I say? The hosts are lucky they didn't find me after everyone had left, hiding under the table and consuming the rest. They're also lucky I didn't walk off with the leftover pan of the stuff (if only I'd brought a larger purse). It was just incredible--beyond incredible.

It was, in fact, so incredible that I was a little depressed. All these years, I'd been perfectly happy with my own humble apple cake, but now, now, I was ready to toss that aside. Seriously, it kind of bummed me out. The good news is that when I compared Diana's recipe to mine, they were surprisingly similar. Hers was a bit spicier and used butter in place of oil, which totally worked. And it was draped in the sauce of, well, frankly, the sauce of evil, but I love it too much to call it that--so let's go with 'sauce of awe,' which also--handily--contains assonance. I ask you, can assonance be evil, even if it does contain butter, sugar, nutmeg, and make you lick it off your plate, then spoon more on, and lick that off, and then repeat this process until you are veritably at death's door? I think not. Assonance is righteous. Ask your English teacher.

Diana's Apple Cake of Awesomeness (with Sauce of Beyond Awesomeness)
Makes 9x13 in pan (though for all that is righteous about your hips, you should make this for a party of halve it)
Cost: Who really cares? Make it.

For Cake:

4 C apples, peeled and diced
2 C sugar
1/2 C butter (1 stick), softened or even a bit melted for easier mixing
2 eggs
2 C flour
2 tsp baking soda
1 tsp cinnamon
1 tsp salt
1/2 tsp cloves

Heat oven to 325 degrees.

Mix sugar and butter. Add eggs. Add apples.

Combine dry ingredients. Add them to your wet ingredients. Mix until incorporated.

Bake in lightly greased 9x13 inch pan for 35-40 minutes or until a fork comes out clean or with a few tender crumbs clinging on.
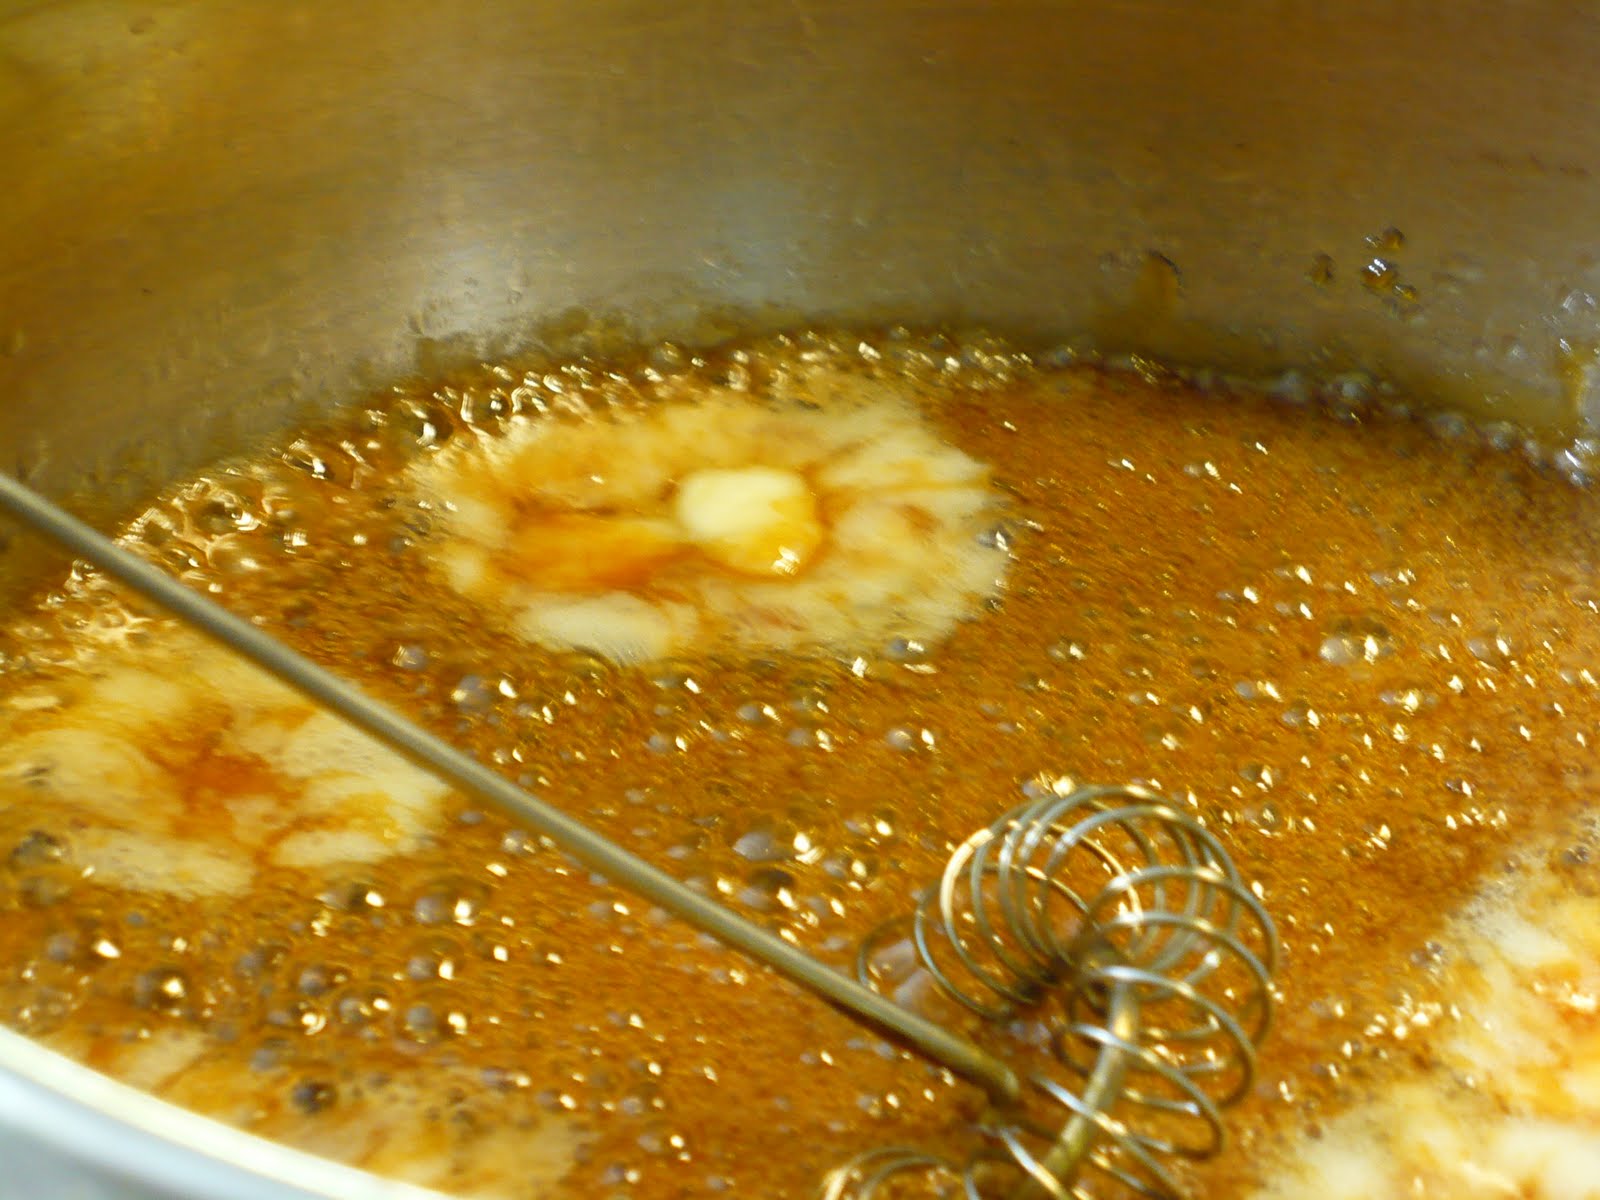
For Sauce of Evil Awe/Assonance (both righteous things):

1/2 C butter (1 stick)
1 C sugar
1/2 C evaporated milk
1 1/2 tsp vanilla
dash nutmeg

Melt butter and sugar in a sauce pan. Add milk. Stir until boiling. Take off heat. Add vanilla and a dash of nutmeg.

To serve: Cut cake into slices. Pour sauce over each slice and serve delicately to guests. After everyone leaves, be sure to check under the table and make sure I'm not there pretending to look for an earring in an empty pan of cake. Oh, gee, there it is; I'll just be leaving now with my very large purse.

Note: This can be served warm (Diana says this is best and I believe her) or at room temperature (still amazing). She even made this again the next week (I think she's secretly trying to kill me; that's okay. Note to Diana: I'm still alive; you'd better bring more apple cake over) for a church function and I took several pieces home for my "family." These pieces had already been dished up and draped in sauce and my "family" ate them the next day and my "family" said that it was just as good as ever. I forgot to ask them how they knew, but that's okay.

PRINTABLE RECIPE

Linked to Sweets for a Saturday and Fusion Fridays

Tuesday, November 29, 2011

Fail-proof Caramel and Ideas for Frosting with Caramel

Cheap Eat Challenge, Part 2: Watch as our family of 6 eats on less than $10/day.


Looks pretty good, doesn't it. Even in the late night light.

And it was good. But not as good as it looked and not as good as it sounded (chocolate pumpkin spice cake with caramel cream cheese frosting and ganache). You see, for the very reasons it looked and sounded so good, it was just trying to do too much. Way too much. As I ate it, I kept wishing it was pumpkin cake or chocolate cake or spice cake. With cream cheese frosting. Or caramel frosting. Or chocolate ganache. [For the record, the reviews were mixed. My brother-in-law said it was a masterpiece and my daughter who hates cream cheese frosting loved it enough to beg for it for her birthday this week.)

It was fussy too. And as I ate it, I couldn't help but pine for simple pumpkin-y muffins we had a couple weeks ago (don't worry, I'll get them up soon enough). Easy to make, easy to eat. Easy to add a little whole wheat flour to, thank you very much.

The best thing about this cake was that for it I made a perfectly perfect salted caramel. You should too. And with this fail-proof method you can. Only you shouldn't mix it with a cream cheese frosting. Because the cream cheese-y goodness will eat up most of the perfect caramel-y goodness and they're both too lovely to confuse like that.

Thus, today is a reminder about my fail-proof caramel (with an extra, even more fail-proof step compliments of my sister-in-law), so that any ice cream cravings you have at this time of year can meet their autumnal fullness. This sauce also makes a butt kicking gift.

And just to draw a metaphor because that's what people who spent large amounts of time in English departments like to do, let's also make today a reminder to keep the season simple as well. We should all try to remember that it's best like that.  


Note: If you are trying to make a good caramel buttercream frosting, I recommend one of two things.

1. Either mix 1 recipe of the below caramel into your normal vanilla frosting (not a cream cheese frosting--cream cheese has too strong of a flavor and the caramel gets lost). (If you use the frosting in this link, be sure to halve it or double the caramel below.)

2. Frost your cake with a vanilla frosting and then drizzle your caramel topping over it just as you would a ganache. It'll be gorgeous and you'll have some very caramel-y bites of goodness.

Fail-Proof Salted Caramel
adapted from Simply Recipes and New Best Recipe Cookbook
makes a good 1 1/2 C
Cook time: 20-30 minutes
Cost: $.86
(sugar: .16, cream: .50, butter: .20)

1/2 C water
1 C sugar
6 Tbsp butter, cut into chunks
1/2 C cream
1/2 tsp vanilla, optional
1/8-1/4 tsp chunky sea salt (optional, for salted caramel, yum)

1. Put water in a pan. Please do not use the cheapest, flimsiest-bottomed pan you have.


2. Pour sugar in a mound in the middle of the water in the pan.


Don't worry, the water will soak into the sugar. Putting it in a mound in the middle means crystals of sugar are less likely to get on the side of the pan, causing the final mixture to crystallize.

3. Put the lid on the pan and turn the heat to medium or just above medium.


4. Let it boil. Do not stir it or mess with it in any way.


La di da. This is going to take 10 minutes or so. You don't need to watch your pot too much at first. Do the dishes, make the kids lunch. Whatever. (Do NOT leave the kitchen and then forget you were boiling sugar.) This method of caramel making does take a little longer than just letting your sugar melt and adding butter and cream. However, at this point of the process, you don't have to be super duper attentive. Give it a glance here and there to see if it's starting to change color. Also, take a few minutes to get your other ingredients ready... (see step #5). [Note: You can remove the lid when it starts to boil as long as the sugar is entirely dissolved. If it's not, leave the lid on.]

5. Get your other ingredients ready.


At a certain point in caramel making, a little speed is required. It helps to have your cream measured and your butter cut. You can warm the cream if you wish (I used the microwave to get it warm--took me 25 seconds or so). It might make your life a little bit easier, but it's not essential with this method. (Cold cream--and sometimes even warm cream--can cause the boiled sugar to seize--or get kind of hard for a few seconds--worry not, even if it seizes, you just keep mixing and it will, um, un-seize--which is a totally technical term, I assure you.)

Here I'm going to update this post and add a tip from my sister-in-law--a tip which made this easier and less stressful and more perfectPut your butter and cream together in the microwave and microwave (and mix) at 20 second intervals until the butter is melted and the mixture is warm. Then just pour this into your amber caramel. I believe this helps in a couple of ways. It doesn't foam as furiously. It doesn't seize. It mixes in faster, making it less likely for your perfectly amber sugar to burn while it waits to get mixed up. It's faster. And it's just easier.

6. When the boiling sugar turns the color of straw, remove the lid and REDUCE THE HEAT to medium low.


7. It's still going to boil for a few minutes, but watch it now. If you're stove is even the teensiest bit un-level, rotate your pan. DO NOT UNDER ANY CIRCUMSTANCES STIR THIS MIXTURELet it boil until it becomes an amber color. If your stove really is uneven or the sugar is cooking in an obviously uneven way (this is how my stove is), give it the gentlest of swirls every few moments (if it's really really uneven, take it off the heat and swirl it so so absolutely gently with a spoon--I will not even call it stirring; it is like moving the mixture with a spoon). You don't want the melted sugar to swish up on the sides of the pan AT ALL.


This is a bracelet made of actual amber. This is the color you want.


But take care not to go darker or you will probably burn your caramel. If you are nervous as I often am, or if you are making this for guests or a gift, err on the side of light amber. It may not be as rich as complex as the amber caramel, but it will be un-burned and perfectly delicious.

8. When it is an amber color, it's time to move quickly. Don't get nervous, just be ready.When it's amber, take the pan off the stove and whisk in the butter (I use a flat whisk, but any whisk will do--don't use a spoon--too slow). If it seizes and seems to separate and get funky, just keep stirring. If it bubbles up (as it almost surely will), don't freak out, just keep stirring. All will be well. [Note: Again, as an update: Here you'll pour in the mixed/melted butter and cream mixture.]


9. As soon as your butter is incorporated, whisk in the cream--you're still moving quickly here, but you're almost done. When all is incorporated, add vanilla and sea salt if using. 


10. My friends, it is finished. And it is delicious. Stir it for another minute and pour it into a bowl that can handle some heat because it is really really hot. Put some on a spoon, blow it a lot, and taste it. Good, huh?

11. Allow it to cool in a bowl and then cover it for storage. It'll last quite a while just on the counter. It can also be refrigerated for really long-term storage (i.e. if you have a will of iron).


And now, at the end of this very long post, I have a confession. I burned my first batch. Oh, it wasn't the method's fault. I was trying to take pictures you see. And pictures are distracting and they take time to take, especially for me. First of all, I forgot to reduce the heat after I took the lid off. And then, I was trying to nail that right on perfect amber color and, um, my stove is not level and things just got away from me. By the time I'd clicked a few times, the sugar was burned. Just barely--just 30 seconds too long, but yes, it definitely tasted burned. It does give me the chance, however, to blab on a little longerdiscuss the color of your caramel.


The spoon on the right is burned, the one on the left is good (they'll both look darker in a bowl or pot--the one in the bowl above is the good caramel). You'll notice that there's a little place in between these two shades. The name of that shade is 'risk.' Hit it right on and you'll have the best most heavenly caramel to ever cross your lips (this will be easier with the melted butter/cream). It will be deep nutty sweet, complex, and perfect, but miss it and you've burned your sugar and there's no going back. If you wish to try to hit that mark, I have a bit of advice. Go there slowly. Turn your heat to low (as opposed to medium low) after the lid is removed and rotate the pan a bit as it cooks. Remember that your pan is hot, so even when you take it off the stove, it's going to keep cooking for a few moments (which is sometimes all the time it takes to burn sugar), so keep your heat at low which will give you a lot more control and a little more time after the pan is removed from the burner. If your heat/pan is too hot, you're going to go from perfect to burned too fast to get the butter and cream in there.

Now, go forth and conquer thy caramel sauce.

PRINTABLE RECIPE

Linked to Sweets for a Saturday and Fusion Fridays

Monday, November 28, 2011

Six Favorite Things

Cheap Eat Challenge, Part 2: Watch as our family of 6 eats on less than $10/day.

Happy Cyber Monday! For purposes of completely selling out helping you along in your holiday shopping choices, I've decided to compile of a list--a small list because you really don't need tons of things--of things I believe make cooking easier, more fail-proof and sometimes even cheaper. (And for purposes of full disclosure, buy these or anything else through this site and Amazon gives me a wee bit of money, so thank you for that.)

1. Instant Read Thermometer

You guys know I love these things. They make everything from turkey to bread to cheesecake and pumpkin pie more fail proof, less guess proof, and overall better tasting. No food poisoning necessary. No over-baking necessary.


2. Flat Whisk

This seems like such a simple thing, but I use mine ALL THE TIME. And it makes things better. All of the sudden, making a white sauce isn't a lumpy mess--it's easy peasy. In fact, making any sauce becomes easier and less lumpy. And you can get to those little edge places in your pan so things get mixed even better.


3. Food Processor

I don't even have a good one. I don't even have a kind of good one, but it's lasted me 5 years and is still going. And it has allowed me to make things that were always really intimidating before (like pie crust). Plus it lets me grate cheeses or vegetables like zucchini and potatoes really easily, which allows me to make some really simple foods that I otherwise might shy away from because of all of the darned grating required.

This is similar to the mega cheap one I have.


This is one that looks pretty sweet.


4. Blender

What can I say? I use mine nearly daily. It helps me get healthy foods into me and my family (especially important at this time of year) and I also use it a ton for creamy soups, sauces, bread crumbs, and a quick painless graham cracker/cookie based crusts.

This is the one kind of like what I have. It's decent and affordable.


This is the one that would be dream dream dreamy to have.


5. Cast Iron Dutch Oven with Lid that functions as a skillet.

I have a 12-inch cast iron skillet and a Dutch oven with a lid. I was trying to decide between the two.  And then it occurred to me that what would take care of most of a person's cast iron needs would be a skillet that was a little taller than normal skillet so it could fulfill your skillet needs, while also handling most oven jobs. And then I found this. Oh baby.


6. Slow cooker.

It's your friend when you don't have a lot of time and you otherwise might end up going out to eat instead of home to your--ta da--fully cooked, nice and hot meal. Of course it's your friend even if you're not busy and you just want to smell warm comforting easy foods. It's that kind of friend, versatile and not choosy. I know that's the kind of friend I need.

This is similar to what I have. It's not super sophisticated, but it gets basic jobs done, it's lasted me 10 years, and it's pretty darn cheap.


This is a better one with good reviews though I haven't personally tried it and thus can't personally recommend it.

Saturday, November 26, 2011

Turkey Cranberry Spinach Salad

Cheap Eat Challenge, Part 2: Watch as our family of 6 eats on less than $10/day.


I cannot tell you how glorious this salad is as a use-up-the-turkey-leftovers meal. For lunch we had leftover roll and turkey sandwiches (aka 'best lunch of the year' sandwiches) and then we may or may not have, um, eaten a couple pieces of pie. By dinner, most of us weren't really ready for more stuffing and gravy. So we made a big bowl of this. Best choice ever.

Turkey Cranberry Spinach Salad
Serves about 6
Cost: $2.20
(spinach: .80, lettuce: .75, cranberries: .25, celery: .15, cheese: .25)

1/2 bag baby spinach
1 head romaine lettuce, chopped into bit sized bits
1 C shredded or cubed leftover turkey (we used white meat, but I added some dark for leftovers today; both were great)
3 stalks celery
1/2 C dried cranberries
1/4 C Parmesan cheese, optional

Serve it with this orange vinaigrette and your holiday salad life will be complete.

Toss spinach and lettuce and then add the other ingredients on the top. If you toss all together, those heavy ingredients will fall to the bottom of the bowl, only to be discovered at the end of the meal. So use a shallow wide salad bowl and put the heavy fixings on top. They'll naturally mix in as you serve up the salad.

Add dressing to individual plates unless you're positive it will all be eaten up (there's a very good chance, but we did have a bit leftover).

Eat. Feel good. Be happy.

PRINTABLE RECIPE

Wednesday, November 23, 2011

Thanksgiving: a Tip

Tired? I know, so am I. Nevertheless do yourself a little favor tonight or tomorrow. Jot down a few notes about what you did right. How was it that you changed that pumpkin pie from the recipe? What did you put in the brine that you loved so much? How much did your turkey weigh, how long did you cook it, at what temperature(s) and on which oven rack? That sort of stuff. The stuff you think you'll remember, or the stuff that doesn't seem that important till next year when you're wondering how exactly you managed to pull off that silky smooth pie. Just write it down. It won't take long and it will save you some time next year.

Tuesday, November 22, 2011

How to Make Homemade "Boxed" Stuffing (also How to Doll Up Your Regular Boxed Stuffing)

Cheap Eat Challenge, Part 2: Watch as our family of 6 eats on less than $10/day.

(Yours will have more green flecks that this if you use dried herbs. I plan to use fresh ones, so this is a little bland looking today.)

Last year my sister gave me a super easy super good recipe that juiced up boxed stuffing. The problem was that it was, like, Wednesday and I didn't have any boxed stuffing. Enter the Internet.

And the glorious thing is that homemade boxed stuffing is pretty much just as easy as walking down an aisle to find the pre-prepared stuff. Except for one detail: you either have to dry your bread ahead of time by leaving it out in a bowl (as I did this year) or you've got to toast it in the oven so it's dry (as I did last year when it was Wednesday and the time for air-drying had passed). Otherwise, be prepared to be amazed at how easy and tasty your own homemade non-Stouffers can be.

You can just leave it at that or you can add some fresh veggies and herbs to make it a-m-a-z-i-n-g. Which is what I recommend. Though I hardly insist. Anyone else double dog tired even though it's only Tuesday? (Note: I can't blame Thanksgiving for being tired, well, not too much--I think this tiredness is just from regular life:).

Homemade "Boxed" Stuffing
Makes a couple "boxes" worth
Prep time: 5 minutes (not counting any oven-drying time your bread might need)

Note: One of the fun things about doing this at home is that you can use an assortment of bread. When you have some lying around, just toss it into a bowl (a bowl that gets some airflow). This year I did this with whole wheat, white, potato, corn bread, and Italian bread. It makes for a fun mix.

Note: If you happen to have fresh herbs about from a garden or that you bought to use for your bird, you can use those instead of the dried herbs listed below. It's really really and really good. You'll use tablespoons in place of teaspoons-->1/2 tsp dried sage = 1/2 Tbsp fresh chopped sage)

6 C bread, dried and cubed
1 Tbsp parsley flakes
3 cubes chicken bullion
1/4 C minced onion (or about 1 Tbsp onion powder)
1/2 C dried minced celery (I skipped since I didn't have it, but I did use a bit of celery salt and then cut down the salt)
1 tsp dried thyme
1 tsp pepper
1/2 tsp dried sage
1/2 tsp salt

Combine it all in a bowl. Done.

Now if you just want to make it up like that, you'll add 1/2 C water and 2 Tbsp melted butter. Combine it all together, cover it, and let it sit 5 minutes. Then fluff with a fork. [Note: I ended up needing more water than this. I think it's because my pieces of bread were a bit large and chunky.]

However, if you'd like to take it up a notch (and if you've got 5 extra minutes to chop, it is well, well worth your time), leave it dry and follow the instructions below:

Heat 2 Tbsp butter in large skillet

Add:
1/4 C onion, finely chopped
2-3 celery stalks, chopped
the dry recipe above (or one store-bought box of stuffing mix)
1/2 C water [Again, I had to add more water than this, probably an extra 1 1/2-2 C--I think due to my large chunky pieces of bread. Next year I'll get those smaller.]

Stir well, cover, remove from heat.

If it's really dry, add a bit more butter or water.

Then add:

1 apple, diced
1/3-1/2 C craisins

Stir in fruit and serve.

PRINTABLE RECIPE

Monday, November 21, 2011

Easy Cranberry Sauce

Cheap Eat Challenge, Part 2: Watch as our family of 6 eats on less than $10/day.


Although I have more than my share of homemade Thanksgiving memories, our family never made cranberry sauce. As I recall, most of us didn't like it and those who did preferred theirs from a can. Consequently, cranberry sauce is something I had to marry into. Last year my mother-in-law walked me through it. It was sort of embarrassingly easy--like simpler than getting my 75-year-old can opener into (and then around) one of those cans. It's also so so good. Like a nice, incredibly pretty, non-gelatinous homemade jam.

Easy Delicious Cranberry Sauce
Makes a couple cups
Cook time: 5-10 minutes
Cost: $1.15
(cranberries: 1.00, sugar: .12, other stuff: .03)

12-16 oz. bag cranberries
1 C water
3/4 C sugar
1/4-1/2 tsp lemon juice
a grate of lemon zest (optional)

Put cranberries and water in a pot and let cook on medium, stirring here and there, until they pop open (some of them actually make a popping sound--how thrilling) and get kind of mushy-like.

From this...

To this...


Then mash them to the consistency you like (I use a potato masher).


You can even run them through the blender if you like, though I like more texture. Add sugar. Spoon out a bit and taste. If it's not sweet enough for you add more sugar by the tablespoon-full until it is. Then add a wee bit of lemon juice to brighten it up and bring out the flavor. And a scrape of zest if you've got an actual lemon lying around and if you like lemon.

Let it cool and you're done.

The other awesome thing about this is that you can do it on a Monday and by Thursday it'll still be just as good. As long as you can keep your paws out of it, that is.

PRINTABLE RECIPE

Saturday, November 19, 2011

Ideas on Making a Good Free Range Bird, (with some links to pies and soups thrown in)

Cheap Eat Challenge, Part 2: Watch as our family of 6 eats on less than $10/day.


Now that my trim is (cough) mostly painted, it has occurred to me that Thanksgiving is a mere 5 days away. Perhaps this occurred to you, say, 3 weeks ago. If so, I salute you. If not, you were perhaps among the masses of lunatics I saw on the road this morning. (Don't worry, lunacy is nothing to be ashamed of. And let's do lunch.)

I have, unintentionally, been preparing for this holiday by making this amazing pie and the acorn squash soup from earlier this week. Not weird enough for you, try some roasted parsnips or this parsnip soup. You should also make my sister's rolls because they will make you happy.

And I thought people could use a reminder about making a turkey, especially a free-range turkey, which might need some extra love in the form of a nice brine. Because free-range turkeys are not all shot up with a salt-water solution. That's part of the reason we buy them, yet it also means you could wind up with a dry bird if you don't know a few tricks of the trade.

So have a look here for all I know about turkeys and don't forget the brine.

Next week, look for a super simple, yet awesome cranberry sauce and a super simple yet awesome stuffing that can be made from scratch or using a boxed stuffing mix that is dolled up. (That is, of course, if I can find the small scraps of paper I wrote these recipes on last year. Because we all know the best way to keep a recipe you use only once a year is to scribble it on a small piece of paper and stuff it somewhere.) Super simple yet hopefully awesome is the theme this year (looney bin painting projects aside, of course). And if you're lucky you can look for some beautiful croissants and a great pumpkin pie and lots of cookies and maybe some much better pictures of my old favorites. Maybe.

Friday, November 18, 2011

Happy Anniversary to Me

Cheap Eat Challenge, Part 2: Watch as our family of 6 eats on less than $10/day.

Yesterday was my 10th anniversary. Thanks to a glorious friend who watched our kids, we weren't in town. We were gone for only a day/night, but it was such a lovely lovely day/night.

Alas, I have now returned to life and the painting of trim, which we all know is really the best way to celebrate marital bliss.

But first, I wanted to let you know what I would have made if we'd been here for our anniversary instead of in Nashville sharing cheesecakes.

This cake, only with 10 layers. Yeah, pretty brilliant. Maybe I can do it for Valentine's Day.

Wednesday, November 16, 2011

Acorn Squash Soup

Cheap Eat Challenge, Part 2: Watch as our family of 6 eats on less than $10/day.


As we all know, people who endeavor to paint over a room of wood paneling one day before their 10th anniversary and 6 days before their in-laws arrive in town are clinically insane of high moral character.

Fortunately for you I've provided a step-by-step guide for any others who wish to have turkey with me in the looney bin take the high road.

1. Get the wrong thing at Lowe's. The workers will most likely make this easy on you since they like to give you the wrong thing even if you specifically ask for the right thing. I got this taken care of on Monday and discovered it last night, so that I could run to Lowe's to rectify it this morning, which takes me to the 2nd step.

2. Run to Lowe's to rectify previous problem. Commit to buying extra of everything you could possibly need so that you won't ever have to return. Forget to buy extra of the thing you'll actually run out of.

3. Prime in the afternoon, racing to beat your piano students who will start arriving any minute. Mostly make it. Discover that oil-based primer that you had to use for wood paneling must be removed from your hands with none other than paint thinner.

4. Send your husband--quick--to Rural King to buy the thing you need that you ran out of.

5. Paint in the evening after putting kids to bed.

6. Think you're making really good time at 9:00pm.

7. Stop thinking that at 10:00pm. Wonder if it was the fumes from the oil-based primer speaking earlier anyway.

8. Start surveying room and wonder if you will actually like the color (cottage cream) that looked so beautiful and cottage creamy in your friend's house, but has started to look a little nicotine stain-y in your own room with the flourescent lights over head.

9. Enter denial. Express cock-eyed optimism. You're quite sure that that color will look just stunning in the morning with the sun streaming through. You're also purely confident that the one wall that isn't wood paneling--the one that had wall paper on it that you ripped off--does not have any residual glue that must be painstakingly washed off. You're perfectly confident that you can paint over it.

10. Console yourself that anything will look better than the wood paneling (true enough). And that things do brighten up when the trim is done.

11. Commit to purchasing a different kind of light bulb for overhead lighting.

12. Discover that you are a person of low moral character practical thinking because you are considering skipping painting the part of the wall behind the desk, which you cannot move.

13. Discover that you are a person of low religious character prayer because you begin praying fervently when you are in need that the paint will make it through that last wall. And also that the color will look a wee bit lighter when dry. It's not that you're saying there aren't more important things to pray about in this world. It's just that, in this moment, you may not happen to care one lick about them.

14. Ponder that you think the 10th anniversary is wood. How fitting that you are painting the wood paneling. Your spouse will be very pleased. If, of course, he is the type to consider good gifts those in which he is required to watch the kids all afternoon while you paint. If, on the other hand, he is the type that rather wishes you would just be bathed by the time the big day rolls around, well then, I cannot help you.

15. Discover wood is for the 5th anniversary. 10th is tin. Perhaps your brain will suffice.

16. Discover that your cheapskatery has a limit at washing out that roller that cost only a few bucks.

17. Consider that your carpet looks much better with your tennis shoe bottom imprinted on it in country cream. Perhaps you should leave it be instead of hastily scrubbing it out. I believe they call that art.

18. Remember how very physical painting is.

19. Do not put the furniture back. Do not pack anything for your big day tomorrow. Or wrap your spouse's gift. Or clean the house. Or write your dear friend, who is babysitting, a list of routines/things she might need to know for the day.

20. Eat something. (And for heaven's sake, go read a good book in a really hot bath.)

Which brings us here to this lovely, and I might add, soothing soup. You can even have it with some chocolate covered cranberries thereby. Not that I did, due to my high moral character and all.

Acorn Squash Soup
adapted from Koreafornian
Makes a good 8 servings
prep time: 5 minutes
Cook time: 5-6 hours

3 acorn squash, halved, seeds removed
2 carrots
1 Korean pear, peeled cored and chopped (I sprang for this, but think you could get away with a regular pear)
1 onion, peeling and chopped
1/2 tsp powdered ginger
1/2 tsp allspice
4 C chicken or vegetable broth
salt and pepper to taste
I also added a shot of cayenne pepper, which I really enjoyed
garnish with green onions if that's your thing

Note: Don't waste tons of time chopping since this is going in the crock pot. Just get things into big chunks.

Another note: I did the squash in the oven, but if you're crunched for time (like if you work or plan to be gone for the day), you can put these flesh side down (cut in half with the seeds out) on a plate with just a wee bit of water and microwave until soft (between 5 and 10 minutes most likely).

Preheat oven to 400.

Cut squash in halft and scoop out seeds and stringy stuff.

Lay on baking sheet (on parchment paper if you care about your sanity) cut side down and bake for 40-45 minutes.

Scoop out insides and put in crock pot.

Put other ingredients in crock pot and set on high for 4-5 hours.

Use your immersion blender to blend. I don't have one so I let this cool a bit and put it in my regular blender (you'll probably need to do 2 batches.

Warm again if necessary.

Eat. Then eat more.

PRINTABLE RECIPE

Monday, November 14, 2011

Curry Popcorn

Cheap Eat Challenge, Part 2: Watch as our family of 6 eats on less than $10/day.


Note: I got this up a little late yesterday. I'd had it written since last Wednesday, but managed not to publish it because, apparently, I also have popcorn for brains. Anyway, because I got it up late I'm leaving it up an extra day and I'll be posting another recipe from Koreafornian Cooking tomorrow. So keep an eye out and hop on over to Koreafornian and have a look at the blog.

It's reveal day for the Secret Recipe Club. This month I was assigned the blog Koreafornian Cooking, which was a surprise and stretch for me. Not because I don't love Asian food. I absolutely love Asian food. However, I've never made much of it and it seems really intimidating to me. My own brother spent two years in Japan and then married an utterly charming Japanese girl who's a great cook. I've been meaning to pick her brain forever, but--again--I'm intimidated. Additionally, finding exotic ingredients also seemed a bit overwhelming to me. Evansville is not exactly the crux of cultural foods and--although we have one excellent international market--it kind of intimidates me too.

Admittedly my choice for this month still reflects that intimidation. I chose a food I know all Koreafornian'ed out. I might not have even posted it as my choice, however, except that it was SO DANG AWESOME. Not only was this curry popcorn awesome the day I made it when I ate almost the entire bowl, but the little bag I had left was still really good the next day. This is no small feat for popcorn.

So now I feel less intimidated. I'm planning to try this acorn squash soup this weekend. And this sandwich as soon as I get my lazy bottom to the store for ground beef.

The only thing I changed about this recipe was the cooking method as I don't have an air popper so I made mine in a pot.

Curry Popcorn
taken from Koreafornian Cooking
Serves about 6
Prep and cook time: 5-10 minutes

3 Tbsp butter
2 Tbsp coconut oil
2 Tbsp curry powder
1/2 C popping corn

Heat coconut oil in sturdy pot. Put 2 kernels of corn in it and cover with lid.

While the oil heats, melt your butter in the microwave and add the curry to it. Mix well.

When your 2 kernels pop, your oil is ready. Add popcorn. Put lid back on pot. Shake or slide the pot back and forth as your popcorn pops. When popping has slowed to almost nothing remove it from the heat.

Quickly pour popcorn into a bowl and drizzle on butter/curry mixture. Toss gently. And then try not to make a pig of yourself, alright.

PRINTABLE RECIPE


Saturday, November 12, 2011

Homemade Pumpkin Pie Spice

Cheap Eat Challenge, Part 2: Watch as our family of 6 eats on less than $10/day.


Lately, I've come across a bunch of recipes that call for pumpkin pie spice. It's not a crazy expensive spice to buy, although it's still cheaper to make because it's comprised muchly of cinnamon, which can be bought for very cheap. However, I've found that it's nice to have a recipe for this on hand for those times you find a recipe that calls for it and you don't have it. Not that things like that ever happen to me. Because I have a perfectly stocked pantry, especially if I'm making something in a time crunch. Yes, I am definitely always prepared at those times. But just in case you're not...

Homemade Pumpkin Pie Spice
Makes 6-7 tsp
Prep time: 1 minute
Cost: I really have no idea, but I'm going to go out on a limb here and say $.05

4 tsp cinnamon
1 tsp nutmeg
1 tsp ginger
1/2 tsp cloves
generous dash allspice (optional and I usually leave it out, but if you're an allspice lover, you'll want to throw some in)

Mix all ingredients together. 

Then use as directed in your recipes

Friday, November 11, 2011

Pineapple-Orange-Carrot Smoothie

Cheap Eat Challenge, Part 2: Watch as our family of 6 eats on less than $10/day.

(Yeah, it was too cold to sit out on the deck sipping a cool drink this morning, but it made for the best picture.)

I don't know about you guys, but ever since Halloween we've been swimming in sweets. I'm actually not a huge candy eater (though I manage to steal a piece or two that I otherwise wouldn't), but candy isn't the only thing that's been hanging around. There's been pumpkin cake and pumpkin muffins and brownies and the best darn apple cake I have ever had It will be on this blog soon because if I'm going to be sweeted out this season, I want this cake to be part of it. I also want it to marry me; do you think Kip will be offended.

But wait, this post isn't about cake. Well, in a round about way, it is. It's what to do about after cake. About cake hangover. (Or candy hangover. Or chocolate hangover.)

As if cake hangover isn't bad enough, my toddler (who's surely had her own sweets hangover, despite my efforts that she not get too awfully much candy) woke up at 2:00 in the morning sniffling. She went right back to sleep so it wouldn't have been so bad. Except that I didn't. Around about dawn I dozed off to some extremely wonky dreams and then at 7:30 Kip left for his paramedic training and me and Emma zoned on the couch for a while watching Elmo (not an unusual thing to do for many, but I have a neurotic issue with letting my kids watch cartoons in the morning. I blame my own Saturday morning cartoon addiction.)

Still, at some point breakfast needed to come. I made this smoothie, which--besides being a burst of sunshine on a bleary-eyed day--is packed with Vitaman C and potassium (among many other good things). Carrots are still somewhat seasonal (I've still got a few hanging out, though I really should harvest them). And although tropical fruits aren't seasonal here, somewhere warmer oranges are coming into season as are pineapples grown in the Caribbean. So you'll most likely find those fruits a little cheaper right now. Win win and win again. I think I'll have another (anybody got that musical?).

Pineapple-Orange-Carrot Smoothie
adapted from Real Simple
Makes 2 cups
Cost: .50
(pineapple: .25 if gotten on sale: OJ: .10 from concentrate, banana: .07, carrot: .10)

Note: If you freeze at least some of your produce (I froze the pineapple and banana), you don't need ice for this and can use water. This works for me since my blender doesn't chop huge chunks of ice very well. If you don't think to freeze your fruit, add 1/4-1/2 C ice chunks.

3/4 C pineapple, cubed and frozen
1/2 banana, frozen
1/4 C diced carrot (1 small carrot)
1/2 C OJ (or 2 Tbsp orange juice concentrate and 6 Tbsp water)
more water/OJ as needed to loosen the smoothie into a drinkable consistency

Put first four ingredients in blender and blend till smooth. If you're blender is struggling, add a bit more water or OJ until you can get it blended smooth (still thick-ish, but drinkable).

As one final note: This smoothie isn't as completely smooth as my green ones. The carrots and even pineapple give it just a bit more body. Or teeny-tiny chunkiness. This might not go over with your minions. Mine said they liked it (except for Mark who was still asleep, but who probably wouldn't have liked it), but Elizabeth and Savannah didn't drink a lot (although, there were games to be played). Me and Emma didn't mind. I thought it was crazy awesome.

PRINTABLE RECIPE

Thursday, November 10, 2011

Chocolate Pie with Latticed Cookie Crust

Cheap Eat Challenge, Part 2: Watch as our family eats on less than $10/day.


Every Thanksgiving we have a pumpkin pie and a chocolate pie.

I found this pie from Petit Chef where it looked dream dream dreamy, though frankly I had my doubts about it. Besides sporting a latticed top, the crust called for all kinds of non-crusty ingredients like eggs, baking powder, lemon zest and vanilla. I came close to using my go-to crust and then I sort of put something together. If you're brighter than me, you may have already figured it out. Because this crust isn't just a crust; it's a cookie with crust-like properties. I figured me and my chocolate filling could totally make peace with that.

So I made it. I found it a little fussy. And then I realized that I'd made most of it with a toddler in one of my arm. So while it's still fussier than this also awesome and easier than pie chocolate pie, it's not really that fussy at all. Unless you have only one arm. (And your non-arm wiggles and tries to grab things and eat all the chocolate before you've put it in the pie and then smear it's chocolate-y stump all over you.) Yes, unless this is true of your non-arm, you may still find this not too fussy.

I liked it just as much as my easier than pie chocolate pie and probably a little more. If you really just want to eat dark chocolate with a bit of crust or if you're looking for something that will only take you 10 minutes to put together, go here. However, if you're in the mood for a little something different that is still fabulously chocolate-y, something that will make you crave it when it's gone (is that a good thing?), give this a whirl. When I make it for Thanksgiving I'm planning to try a little orange zest in place of part or all of the lemon to give it a bit of a chocolate orange feel.

One more change you might want to make: You may wish to 1 1/2 the chocolate filling. It'll fill the pan up better. Of course, it may take a little of the petit out of your chef if you know what I mean. What can I say? Fold up your skinny jeans.

And if that isn't repulsively American enough for you...

Just in case you happen to be someone who hasn't really met the metric system since the 6th grade (and you didn't get it then either), I converted it into cups for you.

Chocolate Latticed Pie
From Petit Chef
Makes 1 9-inch pie
Cost: $2.30
(flour: .20, sugar: .20, butter: .40, eggs: .30, lemon: .25, chocolate: .75, cream: .20)

Crust:

2 C flour
3/4 C sugar
1 tsp baking powder
10 Tbsp butter
1 egg
1 egg yolk
zest from 1 lemon (I used a very small lemon and not even the whole one as I was worried about being overpowered with lemonliness)
1 tsp pure vanilla extract

Chocolate Filling:


4-5 oz dark chocolate (that's about 2/3 C if using dark chocolate chips)
1/2 C sugar
1 egg
2 oz or 1/4 C cream
1 tsp pure vanilla extract

For Crust:

In food processor, pulse flour, sugar and butter until butter in chunks. In separate bowl, mix egg, yolk, vanilla, and lemon zest. Add this to the food processor and process. It will be a little chunky and not quite come together.

Sometimes it's crumblier than this. Don't despair. Just use your hands to form it into a ball. 


Pour it out on counter (or in a Ziploc bag) and knead it once or twice till it comes together. Put it in the fridge while you make the filling.

Melt chocolate in microwave in 20 second intervals. Let cool somewhat. In the meantime beat egg and sugar unti light lemon-colored (this will take a minute or two.

dark

light

Add cream and vanilla and beat just until incorporated. Then add chocolate and beat.

Roll out about half of dough. Put this in your pan. Add the filling.
Roll out the other half as if to make a normal pie crust and then cut it in strips. Lattice the strips. I'm a little stupid at this, so I'll leave you to internet tutorials. However, I noticed that Petit Chef just laid her top layer over her bottom layer (as opposed to weaving and it came out looking great). Fold down the edges and pinch them to neaten them.


Bake at 325 for 30 minutes or until an instant read thermometer reads about 165-170.

PRINTABLE RECIPE

LinkWithin

Related Posts Plugin for WordPress, Blogger...