Monday, April 30, 2018

Pumpkin Oatmeal Travelling Cookies (that you could eat for breakfast)

BEST OF THE TASTY CHEAPSKATE


I make these ALL the time. Not only when we're travelling, but also for a healthy snack. Or, heck, breakfast. They're a little sweeter than they should be for one of your day's three meals, but we do it anyway. 

But this week, I really am travelling, and I'm going to make them for that. I believe them to be the perfect travelling food. They hold up well, but even if they get smooshed, they're still amazing (maybe even more amazing). They need no refrigeration, no special love or extra care. They stay moist forever. Yes, yes, there is sugar in them (though not quite as much as a normal cookie). But, no, they are not carrot sticks, quite. Still, they do have a healthy dose of pumpkin. And there are lots of delicious oats and whole grains as well. Happy for the brain, good for the bowels. What more can you ask for? No airport lunch required, thank you very much.


And if you do eat them for breakfast, just remind yourself that It's kind of like pumpkin oatmeal in cookie form. Yeah, you're welcome.

Pumpkin Oatmeal Breakfast Cookies
adapted from  All Recipes
makes 36
Prep time: 10 minutes
Cook time: 10 minutes
Cost: $3.40 (that's about $.10/cookie; what!!!??? No bowl of cereal can compete with that)
butter: .90, brown sugar: .35, sugar: .15, pumpkin puree: .50, egg: .10, flour: .10, oats: .30, chocolate chips: .90, other stuff: .10

3/4 C butter
1 C brown sugar
1/2 C white sugar
1/2 can pumpkin puree (so about 8 oz or a scant cup)
1 egg
1/2 tsp vanilla
1 C all-purpose flour
2 C oats, (blended into crumbles or flour; see below)
1 tsp cinnamon
1 tsp baking soda
1/2 tsp baking powder
1/2 tsp salt
1 C dark chocolate chips (I like 60%), optional, but awesome

Preheat oven to 375.

First of all, you're going to give those oats a whiz in your blender or food processor. They don't have to be a completely smooth flour (though they can be), but these are best when they're at least crumbles instead of regular oats. Set that aside when you're done.

Beat butter and sugars together. Add pumpkin puree, egg, and vanilla.

Add dry ingredients to wet. Blend.

Then add the chocolate chips.

Drop onto baking sheet (my sister sprays hers; she also uses a cookie scoop, which makes these really pretty, but I didn't have one).

PRINTABLE RECIPE

Monday, April 23, 2018

Katie's Rolls

BEST OF THE TASTY CHEAPSKATE


As BBQ season pokes its head out of the dismal clouds of freezing cold spring, I felt inspired to make us some pulled pork with these amazing rolls. Do not save them only for BBQ season. They're also perfect for Thanksgiving and Christmas and Easter and Sundays and winter and dreary spring and summer picnic and pretty much every day ever in the whole world.


Katie's Rolls
Makes 16-24

Prep and cook time: 2 hours (1.5 hour rise, 15 minute bake, 15 minute prep)
Cost: $2.05 ($.10-.15/roll)
milk: .15, yeast: .15, butter: .30, sugar: .05, eggs: .20, flour: 1.20

1 C warm water
1 C milk, warmed (not hot)
2 Tbsp yeast
1/4 C butter
2 tsp salt
1/2 C sugar
2 eggs
7-8 C flour

Add yeast to water and milk. Let it sit there if you've got five minutes. If you'll get distracted by leaving a thing for five minutes, then just throw the butter, salt, sugar, and eggs in before you forget what on earth you were doing in the first place. Mix it all together. Mix in 4 C flour. Add 2 more cups. Begin kneading with hands when it gets too tough to stir. Of course, if you're a member of the 21st century and have a Kitchenaid, you can use that too with the dough hook. I myself haven't quite made it to the 21st century and that's okay with me because (weird mental disorder alert) I kind of like kneading. It relaxes me. I like how the dough smells. I like how it feels. 

So if you, like me, will be doing things manually, here is #1 best tip for rolls. The dough should be pillowy--like a mother's bosom. We don't want any tight teenage breasts, nor do we want a stretched and sagging grandma shelf. If a three-year-old would just love to lay her head on your dough, it's perfect. (Warning: If you have a real life 3-year-old available, do not invite her to lay her head upon your dough to test it out. You'll get hair in your dough. And possibly boogers. Which is what mother's bosoms also get covered in when they have three-year-olds. Not that we mind because three-year-olds are cute.) I've digressed, haven't I? Anyway, so keep adding flour in 1/4 C increments or so and knead it for about 8 minutes until it is nice and pillowy and perhaps the teeniest little bit tacky, but not sticky. Then put it in a bowl and cover it and keep it in a warm place. (Everyone always says put it in an oiled bowl. I have never, not even once in my life done this. I always just throw it back in the bowl I mixed it in. It is always always fine. Who are these people with their oiled bowls and what is the purpose of oiling the bowl?) 

Tip #2: If it's cold in your house, stick the bowl with the dough in the oven. Turn the oven on for 1 minute. Then turn the oven off and leave the dough in the warmed oven. (Do not leave the room to go do something in that one minute. You will never remember your dough. It will cook right there in your bowl with a dish towel over it and perhaps your house will burn down. This is not worth what you were going to do in that one minute.) Note: You can also turn the oven on and off, and then put the dough in if you value not setting off any fire alarms. 

Let it rise for one hour or until doubled. Then punch it down and shape it into rolls. Put the rolls on a greased baking sheet. Cover them and let them rise again--this time for about 20 minutes. 


(They should look kind of like this.)

Bake at 375 for about 10-15 minutes. I like my rolls just a bit on the dough-y end. I always break them open to determine if they're just right and not way too doughy still. It's not the perfect technique, but it works. 

You can make the rolls ahead of time and freeze them. You can make the dough ahead and refrigerate it (covered in plastic wrap) for about 24 hours. You can even make them to the rolled roll point and then freeze them and then take them out, let them dethaw and rise, then bake them. The possibilities are limitless. As it seems is my ability to write many many words even when I am so so tired and have said I will not tonight write many many words.


PRINTABLE RECIPE


Wednesday, April 18, 2018

Character-inspired Recipes: Cinnamon Oat Crispies, Molasses Curls, Double Chocolate Scones


Last week, my new book, Hugging Death: Essays on Motherhood and Saying Goodbye came out on Amazon. To celebrate my mom, I reminded you of these amazing cookies. (P.S. Hugging Death hit the #1 spot in SIX of its categories. It's still on sale for $1.99 through the end of the week.)

This week, my YA fantasy novels are both on sale. Grey Stone is for sale for the ever-lovable price of FREE (on Kindle) (P.S. It just hit #1 on Amazon it the epic category as I was writing this post!). And Grey Lore is just $.99. If you like fantasy and you haven't snatched them up, then you definitely should. But lets forget about books (haha; don't really; seriously go buy them) for just a moment and talk about FOOD.

When those books came out, I created several character-inspired recipes to go along with them. They were really good. Here is your loving reminder to go make these right now.

Two are cookies that are connected to each other (much like the books are connected to each other). And the last are just some really amazing chocolate scones.


Zinnegael's Cinnamon Oat Crispies (aka Cinnamon Lace Cookies)
ORIGINAL POST HEREadapted from Add a Pinch
Makes 50-ish cookies
Prep time: 5 minutes
Cook time: 5-8 minutes
Cost: $2.25 (that's $.04 per cookie. I didn't even realize how cheap these actually were till doing the math)
butter: 1.25, sugar: .50, oats: .25, egg: .10, other stuff: .15

For gluten-free adaptation, use a gluten-free flour or skip it altogether. You may also need to use oats that haven't been grown or harvested with wheat or gluten-y foods.

1 C (2 sticks) butter
2 1/4 C brown sugar
2 1/4 C rolled oats
3 Tbsp flour
1 tsp salt
1 tsp cinnamon
1 egg
1 tsp vanilla

Preheat oven to 375 degrees. Line baking sheets with parchment paper or silicon baking mats. You must do this. Don't skip it or these will not come off.

Heat butter and brown sugar in a saucepan over medium heat, stirring frequently with a wooden spoon  until butter is melted and mixture is smooth. Stir in oats, flour salt, cinnamon, egg, and vanilla.

Drop the batter by the teaspoon or half tablespoon onto the baking sheets (did you notice how little those scoops are. They must be little; they are going to SPREAD and if you use too much you will have one huge pan-sized rectangle of cookie at the end).

Bake to 5-8 minutes until the edges have browned (you can make these blonder, but they crumble more easily).

Allow to cool. Then remove from parchment paper.

Store in airtight container. These will last well for several days and freeze wonderfully.

PRINTABLE RECIPE


Molasses Curls
 (Zinnie and I would like to thank Pioneer Woman for her inspiration for these cookies, though neither of us is big on brandy, so it had to be adapted) 

Cookies: 

1 stick (1/2 C) butter
½ C molasses
¼ C sugar
¼ C brown sugar, packed
2 tsp vanilla
¾ C flour
1/8 tsp salt
¼ tsp ginger

Filling:

2 C heavy cream
1/3 C sugar
1 T vanilla
1 T cream cheese, softened to room temperature (this acts as a stabilizer)

Preheat oven to 325 degrees.

Put butter, molasses, brown sugar, and white sugar in a skillet. Allow butter to melt, stirring constantly with heat proof whisk or a wooden spoon. Allow mixture to bubble and cook for one minute.

Remove from heat and add in the flour, ginger, and salt. Stir together quickly, then stir in vanilla.

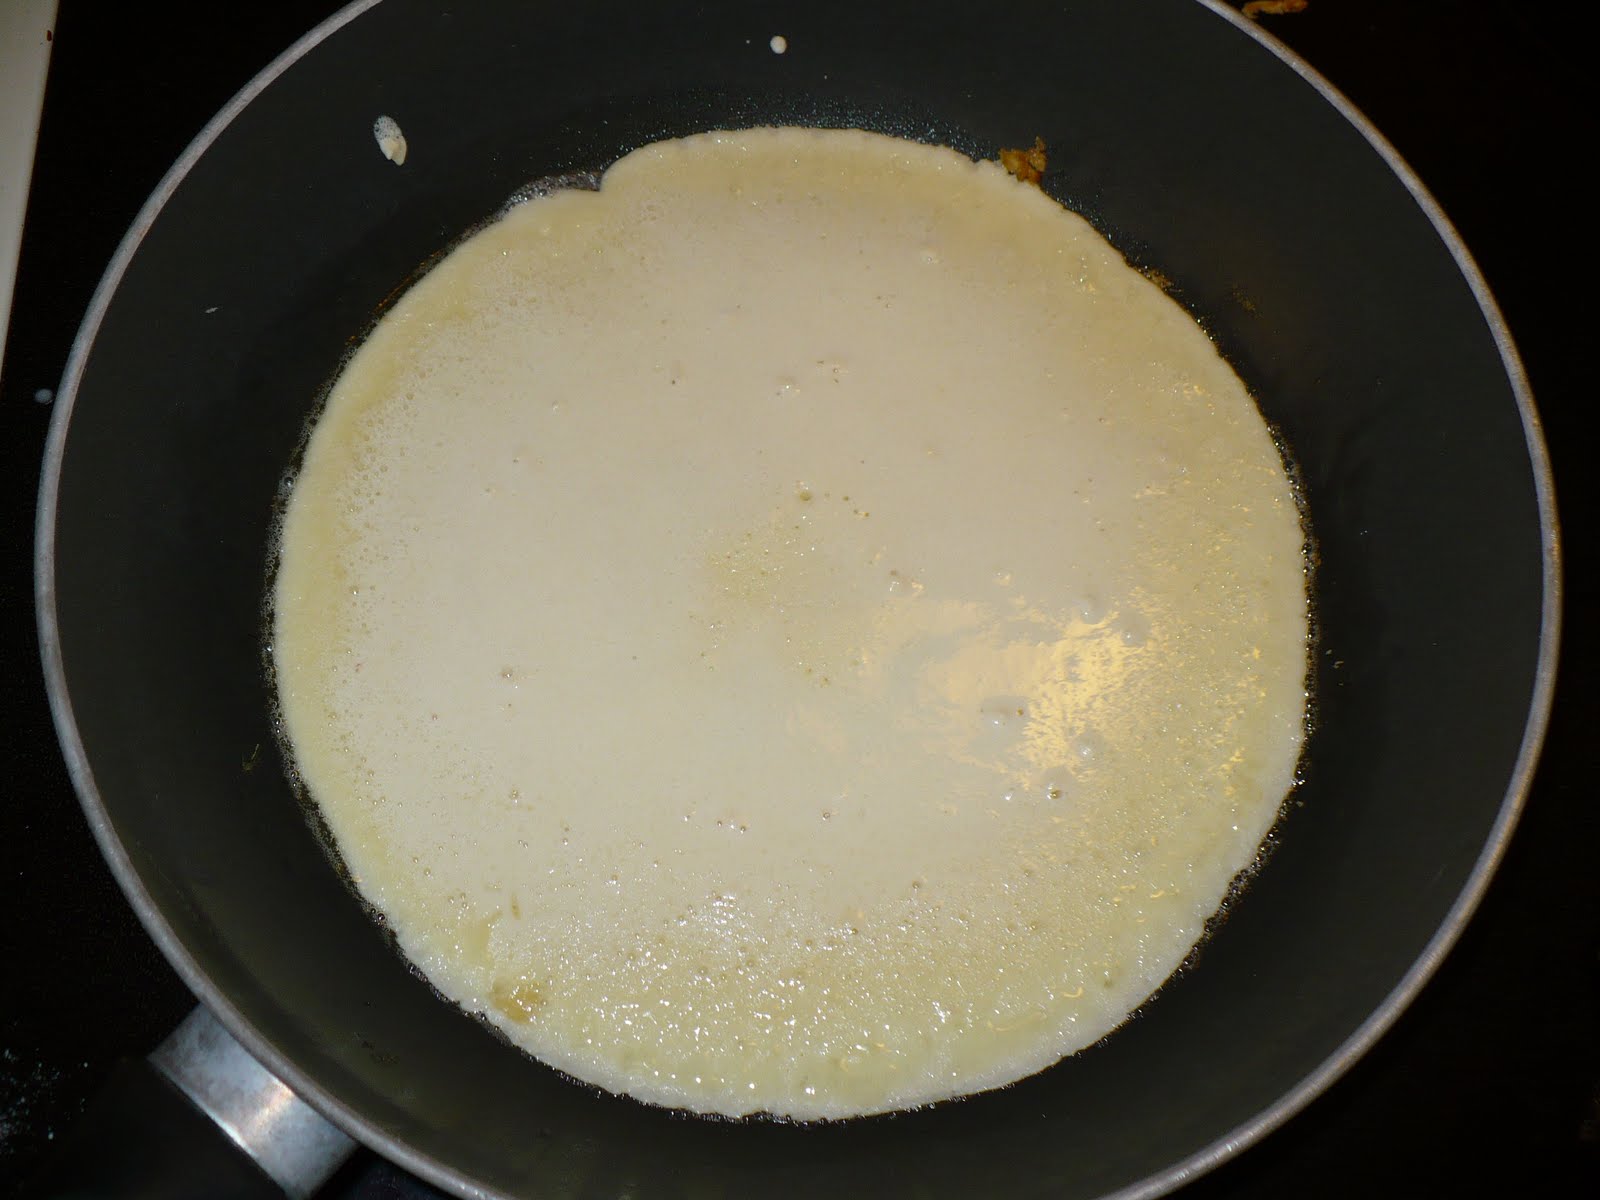
Drop ½ tablespoon FAR APART on a cookie sheet covered in parchment paper or a silicone pad. You’ll only fit about 6 cookies on at a time. They will spread A LOT.

Bake for 10 minutes. They should be bubbly and flat. Ours always ran together a little no matter how hard we tried to get them not to.

Remove from oven. Allow to cool three minutes. They should be pliable, but not stretch when you pull them off the pan.

Drape over cannoli mold (or the large metal handle of a whisk, which is what we used; anything thick and round will do; we used the handle of an ice cream scoop as well). It will drape over the edges and you’ll kind of form it into a cylinder shape. Set on parchment paper sealed side down and allow to cool completely. You have to work kind of quickly so they don’t get too brittle, but don’t panic. It’s not too hard.

Allow to cool and set completely.

Meanwhile, make whipped cream. Combine cream, sugar, vanilla, an softened cream cheese in a large bowl. Whip until stiff peaks form.

After all have cooled completely, use a frosting piping thing (or a Ziploc bag with a small hole cut out of the corner like we did in our apparently insufficiently stocked kitchen). Pipe the whipped cream into the cookies.

Trouble Shooting:
-Once we let our cookies cool too much and they were too brittle to form into cylinders. Life went on; we ate them anyway.
-Since you have to make these in batches, your batter will cool as you wait. That’s not a problem. Just scoop it onto the cookie sheet when it’s its turn and it will spread and bubble as it should.
-When we were folding these, they were very greasy and that worried me, but then the grease went away and wasn't a problem. So don't stress if they seem greasy. 
-As I said above, if you want these to be as they are supposed to be (crispy cookies), you need to pipe them right before eating, but they are so divine soft that if they sit in the fridge, your life might just become a little bit fuller. 


(Ugh, this picture needs a serious photo re-do, but I don't have time today.)

Double Chocolate Scones
ORIGINAL POST HEREadapted from Sally's Baking Addiction
makes 8 scones
Prep time: 10 minutes
Cook time: 10 minutes
Cost: $2.60
flour: .10, whole wheat flour: .10, oat flour: .05, cocoa: .20, sugar: .10, butter: .60, cream: .50, egg: .10, chocolate chips: .85

Note: To healthy this up just the slightest little bit, I couldn't help but use some whole wheat flour and oat flour (Zinnegael would never have done such a thing, but I did). They were delicious and while the oat flour makes it a tiny bit crumblier, I think it also helps it stay moist and gives it a depth of flavor that is fantastic.

1 C all-purpose flour
1/3 C whole wheat flour
1/3 C oat flour
1/3 C cocoa
1/2 C sugar
2 1/2 tsp baking powder
1/2 tsp ground cinnamon (optional)
1/2 C (1 stick) butter (frozen or cold)
1/2 C plus 1 Tbsp heavy cream
1 large egg
1 1/2 tsp vanilla
1 C semi-sweet or bittersweet chocolate chips (oh, and we were short, so we threw in some white chocolate chips too)

Glaze: 

Note: This glaze adds more sweetness, but it also sort of seals the scone so that it doesn't dry out. The original recipe recommends dipping them in this glaze, but I just drizzled it rather thoroughly over the top of the scones, and that was way easier. (Yay for laziness and stuff.)

1 C powdered sugar
1 tsp vanilla
2 oz water

Preheat oven to 400 degrees. Put baking rack in middle-low position. Line it with parchment paper (seriously--this is a good idea).

In a bowl or food processor (I use a food processor and it makes things like this so fast and easy), combine flour, whole wheat flour, oat flour, cocoa, sugar, baking powder, cinnamon, and salt.

Cut the butter into chunks with a knife and toss those in. Give the food processor several pulses (or mush them into the dry ingredients with your hands, or a pastry cutter if you must).

In a small bowl, whisk the cream, vanilla, and egg. Pour it into the food processor and process until combined. Don't overmix it. A bit crumbly here is better than being it to death.

Dump out your mixture and press it together until it forms a bit of a ball. Knead it 10-12 times. Don't knead the heck out of it. You just want it to come together and be combined. That's all. Scones are sensitive little things and if you overmix or overknead them, they will be dry. So err on the side of underdoing it. You won't regret it.

Form into a ball and roll or press it into a nice circle that is about 1/4-1/2 inch thick. Cut this into 8 triangles (like cutting a pizza).
(Sorry that this pic is a little blurry, but wanted to show you the correct thickness)


Put these on the baking sheet and bake for 10 minutes, or just until they lose their shiny look. Again, err on the side of too little. Cook too long and they dry out.

Remove and let cool slightly.

Prepare glaze by mixing all those ingredients together and drizzle thoroughly over scones (or use a pastry brush, which is easiest). You want the glaze to pretty much cover the top and sides as much as possible (you're welcome).

Eat warm or not. They're delicious.

PRINTABLE RECIPE

Tuesday, April 10, 2018

Katie's Chocolate Chip Cookies

BEST OF THE TASTY CHEAPSKATE


This week I officially launched a very short collection of essays about my mother entitled, Hugging Death: Essays on Motherhood and Saying Goodbye. For the next couple days, it will be $.99 for the Kindle version on Amazon. So hop on over and buy it. It's mostly about my mother's struggle with, and then death from, cancer. As such, it's a little bittersweet with, I think, the sweet winning out over the bitter. If you're interested (and I truly hope you are), you can find the link HERE.

I miss my mom. On the last visit my siblings and I had with her, I remember that when her home health nurse came to check her out, she was joking with mom (who could barely talk at this point due to her brain tumor) about food and dieting. "Well," the nurse said, "the good news is that now you can eat as many cookies as you want." You know when a nurse tells you it's a great idea to eat as many cookies as you want that things are kind of winding down for you life on this earth. But guess what? My sister made cookies. And we ate them with Mom with gusto. I hadn't had them for many years. And they were just, well, perfect. Or as perfect as it gets when life throws you something utterly imperfect.

Below the recipe, you'll find my original post about these cookies. Eat them, love them, don't get cancer if you can help it. But if you do get cancer, then eat them with some people you love.

Katie's Chocolate Chip Cookies
makes 24
Prep time: 10 minutes
Cook time: 10 minutes per batch
Cost: $3.60
butter: .55, shortening: .10, sugar: .15, brown sugar: .35, eggs: .20, flour: .45, chocolate chips: 1.80

1/2 C (1 stick butter), just barely softened
1/2 C shortening
1 C white sugar
1 C brown sugar, packed
2 eggs
2 tsp vanilla
3 C flour
1/2 tsp salt
1 tsp baking soda
2 C chocolate chips

Preheat oven to 375.

Combine butter and shortening. I like to mix mine with a spoon, but a mixer will work too. Add sugars and mix well. Add eggs and vanilla and mix until fully incorporated. Add dry ingredients and mix into wetter ingredients until all in combined. Add chocolate chips and mix. If you have the time, let your cookies rest for 15 minutes or so.

Bake for 8-10 minutes until just beginning to brown (Note: The edges and perhaps a rouge spot on the top of some of the cookies should be just barely beginning to brown. Learning when to take these cookies out is half the batter. Remember they'll continue to cook after you take them out, so don't wait too long to take them out.)

PRINTABLE RECIPE


ORIGINAL POST

I think I have found my soul cookie. That's right. If you're a regular follower of this blog, you may pass out from the shockingness of this announcement (though, frankly, if your life and heart revolve so closely around my cookie infidelities, perhaps you need to find a hobby of some sort, or part time work, or maybe introduce yourself to reality TV; I don't know; something). Anyway, I've had some trouble committing to a chocolate chip recipe. I've got several on here and they're all good. I even have another with cinnamon that I've been meaning to add but haven't gotten to yet. But this, this--I think--is it.

The funny thing is that this is a cookie I've known for a long long time. In fact, it's the first chocolate chip cookie I ever really met. It was the cookie of my childhood and young adulthood.

So, why, you may be asking, did I ever leave such monogamous bliss. Well, this cookie contains something I don't generally stock in my pantry, something I have self-righteous feelings towards, something that is touted as evil by pretty much everyone in the health field (and we all know that we eat chocolate chip cookies to be healthy, right). It contains shortening. Generally speaking, unless you're going to be making emergency candles from it, I really really don't like shortening. Oh, there are exceptions to be sure. But usually if I can find a recipe without shortening, that is the one I will use. As I grew into cooking, this is how I felt about all my baked goods. I still feel that way about most of my baked goods. Seriously, don't even start putting shortening in your cakes or I might throw up in my mouth. But cookies with shortening I've always been a little more lenient towards. Maybe it's because I grew up with my mom and sister making such cookies. Maybe it's because I've always known that Katie's cookies have been some of the best. Shortening keeps cookies soft and chewy longer than using all butter does. And it often can keep your cookies from going flat if that's a problem you have with your cookies. It adds density to cookies without making them bricks. It adds body to cookies without making them airy or cakey. But it's definitely not as flavorful as butter and if you use all shortening (as opposed to part shortening, part butter), your cookies will not turn golden as I believe all the best chocolate chip cookies ought to.

However, when my siblings and I were hanging out with Mom in her very last few days with us all together, my sister Katie made her famous cookies. They were insanely good, and she was sitting there complaining that they weren't as good as usual. They were dense and chewy, but had that lovely just barely crispy edgy part that gives you something to bite into. They use half butter and, as such, are still very flavorful and get a lovely brown edge. They were just perfect, and as I sat there eating more than I intended to, I realized that I'd been living in denial for a very long time. Cookies with all butter are very good. Some of them even divinely good. Every cookie on this site is incredibleBut these, these were better than the rest.Miraculously, some of these cookies made it to the next day. They were insanely good too. In fact, they were nearly as good as they'd been the first day.

I came home and bought my first tub of shortening in years. And then I made Katie's cookies. And they weren't good. They looked like Kip's cookies (Kip's are not quite as dense or thick as Katie's), but tasted worse. It was a sad day. I was about to chalk it up to being one of those things that only people with the cookie gift can manage, but first I called my sister and asked a few questions about her method. Kip and I nearly always melt or significantly soften the butter. Katie does not. So I made them again with barely softened butter and I'll be geewhizzed if they didn't turn out perfect in every way. Then I made a batch of all-butter cookies just to be sure. Then, just to be extra fair and extra sure, I made a batch of all-butter cookies and didn't melt the butter. Nope. Katie's still won hands down. My son Mark accused me of betraying Kip's cookies (yes, 'betray' is the word he used) and I'm just going to have to live with that because these are the best there is.

(From left to right: Katie's cookie, Kip's with melted butter, Kip's with softened butter. And yes, that middle one did need more chocolate chips, but still, the cookie batter couldn't quite hold its own.)

So, while I still don't embrace shortening in the way that our mothers and grandmothers of the '50s did, I'm going to allow it this little place in my life. Although there is one caveat: The all-butter dough is way better. If you plan to use the dough in something like ice cream or just to eat it shamelessly in blobs out of the refrigerator, then go for the all butter.

(Katie's cookie batter was slightly crumblier and less flavorful than the all butter. It's pictured bottom right.)


If however, you plan to make the best cookies of your life, buy yourself some shortening, take a deep breath, and remind yourself that cookies weren't meant to be a health food anyway. Happy eating.

Monday, April 2, 2018

Best Ever Crepes


So it's easy to lump crepes into the class of evil foods (right along with chocolate cake and their ilk). This is mostly because I (and every other normal American human) think it's not really a crepe unless it's slathered in Nutella and dipped in whipped cream. This, of course, is a perfectly acceptable way to eat a crepe. However, there are (gasp) other ways. And they, too, are delicious. And sometimes even (double gasp) nutritious.

For this crepe, I used a good dollop of ricotta and a bit of peach butter, and--not to brag or anything--but it was perfectly divine. The ricotta gave it a creamy feeling while contributing protein and calcium instead of just fat and sugar (sorry whipped cream; you know I love yo anyway). The peach butter was lightly sweet. And the crepe itself is higher in protein than a normal pancake or muffin. And we use just a smidgen of whole grains in ours to help it along the path of virtue.

It makes for an inexpensive breakfast and a downright tightwad dinner. The crepes themselves run about $.10/crepe and I cannot eat more than two if they're filled (if not, all bets are off). And the fillings don't have to be expensive. A few tablespoons of ricotta add another $.25 and the peach butter is probably just $.10 (plus a lot of love to make that stuff). That's a solid meal for $.50 (though it is missing vegetables...)


(Psst. Want homemade recipes for either of these. Look HERE for a perfectly divine (and utterly cheap) ricotta. And HERE for peach butter so good you know it's made from love and sunshine (which it is).)

Have a look HERE for my original post on crepes plus a filling of brown sugar peaches. (Plus a pretty profound poem if I do say so myself; I mean, you won't want to miss it.)
Or HERE for a pumpkin whole wheat version.

Best Ever Crepes
Makes: a booty load (I'm guessing it makes between 20-30 crepes; we always have leftovers)
Prep and cook time: 30 minutes
Cost: $2.05 (that's about $.10/serving; even if you do splurge on Nutella, that's a VERY cheap meal)
(eggs: .50, milk: .60, flour: .30, other stuff: .15, butter: .50)

Note: These directions are given to you as Maren gave them to me. I always make mine this way with an extra cup of milk added at the end. Would it matter if you added it at the beginning? I don't know. I just do it as she said because hers were the best and I don't mess with that.

Whisk together:
4 eggs
3 C milk

Combine:
2 Tbsp sugar
3 C flour (I use 1/2 C whole wheat and 2 1/2 C all-purpose)
1 tsp baking powder
1/2 tsp salt

Add dry mixture to egg/milk mixture.

To this batter, add:
1 C milk
1 tsp vanilla

Whisk it all together. It might be a little lumpy at first, but whisk for a minute or two and most will go away. If you still have some lumps when you make the crepes, don't worry, the crepes will still come out just fine.

Heat skillet to medium or just below. Plop a pat of butter on the skillet. You want your skillet nice and non-sticky--whether that happens with plenty of butter or with a good non-stick pan is up to you. Pour the batter onto the skillet and tilt the skillet so that the entire face of the skillet is covered with a thin layer of batter. It won't be thick like a pancake, or even close. It'll look like this:


Now you're going to let the crepe cook until there it's kind of cooked all the way through--there won't be any (or much) raw batter-y patches left and it will be just barely golden brown on the bottom (it takes 1-2 minutes usually). If it's not done enough you'll have a really really hard time flipping this baby. At this point you'll flip it over to give the other side a chance to color just a bit. I think that authentic French crepe makers don't always even flip theirs, but I like to.

Continue this process until you're done. If you've got too much batter, you can save it as batter or you can make it all into crepes. They reheat very well.

Note: Your first crepe will probably be a disaster. I don't know why this is a law of the universe, but it is. I suspect that your pan is still warming up and stuff. Anyway, if your first crepe tears and crumples and looks a mess, do not despair. Set it aside for the baby or the dog, re-butter your pan and do it again. I promise that the next will (almost surely) be much much better. If it discourages you too much, dip some in Nutella and eat it. That should make you feel much better about the world.

Another note: If, however, your crepe is burned on the bottom, turn down the heat and wait a couple minutes before continuing.

Continue making and flipping until you have crepes coming out of you ears. 


Then eat. 

PRINTABLE RECIPE


LinkWithin

Related Posts Plugin for WordPress, Blogger...