We kind of sort of almost did it. Don't know what I'm talking about? Check out the Cheap Eat Challenge.
This month our total came up to $237.49.
After subtracting the $20.00 for our vitamin credit, that's $217.49.
Which (when divided by 31 days) takes us to a daily total of $7.01.
Which is just so close to being in the 6 dollar range that it almost hurts.
The breakdown from highest to lowest:
Produce: $59.57
Dairy: $39.97 (plus $8.00 for the cow share)
Grains: $36.79
Sweets/Sugars: $29.14 (I won't pretend that that's not a little embarrassing for me, especially since I know that we usually eat more.)
Beans/Legumes/Nuts: $24.05
Meat/Eggs: $15.54
Fats: $13.55
Condiments/Yeast: $5.90
What'd we waste?
Very little.
-Milk from sippy cups carried around all day and from leftover cereal milk.
-1 small piece lasagna
-2 eggs
-millions of bread crusts and some bits of sandwich that the kids didn't finish
Were we hungry?
No. We've never been hungry or even close, although I think that we have felt a little deprived of some of our favorite things at times. However, I tried to plan better this month and we had more meat and I'd say that while not completely always satisfied, Kip felt a little less deprived this month than in previous months. However, this was the first month I started to feel a little bored. I'm going to work on that in April.
Are we sacrificing nutrition for some masochistic gimmick?
No. This month in a bout of obsessive compulsive record keeping, I decided to record how many cups of fruits and vegetables the kids and I ate. I used the guidelines from mypyramid.gov, which recommended 4.5 C for me, 2.5 C for Mark, 2 C for Elizabeth, and 1.5 C for Savannah. It had no recommendations for children as young as Emma and I therefore did not record her fruit/veggie intake. (Kip does not get enough fruits and vegetables, but this is by choice and I'm not going to nag or pester him because he is a grown up and can make his own decisions.) We didn't all make the recommendations, but I doubt we did much worse than average Americans (not that that is something to be proud of) Additionally, I don't feel like any lack of vegetable consumption was too much the result of the foods we bought (or didn't) as much as personality and pickiness. Don't get me wrong; I feel that as a mother, it's my responsibility to teach my kids how to eat well and to make that as easy/accessible a goal as possible, but I'm not going to jam it down their throats either.
You can check out the daily details here if you enjoy reading the records of obsessive compulsive people. Otherwise, you'll find our averages below (to come to this average, I threw out the highest and lowest numbers for each person). Remember: these are cups, not servings. A cup is often (though not always) more than a single serving.
Me (goal 4.5 C/day): 4.49 cups/day. As my mother would say--close enough for government work.
Mark (goal 2.5 C/day: .88 cups/day. This is probably not close enough even for government work. It is, in fact, a bad number indeed, though I will not take full responsibility for it. (I must take some as I did not help Mark develop very healthy eating habits when he was younger, but...) Mark, like his father, is a man of will. He is a very picky eater and does not like many fruits and almost no vegetables. He does love potatoes and I should definitely try to incorporate more of these in our weekly diets. I know that potatoes have gotten a somewhat bad rap in recent years, but I believe they're perfectly nutritious and if nothing else, they're better than nothing.
Elizabeth (goal 2 C): 1.28 cups/day. Elizabeth is the only child who I felt I sort of short changed. She loves bananas and sometimes we were out when she wanted one. She also loves strawberries, which I tried to buy, but which at this time of year are often out of our league. She also loves green drinks and often wanted more when there wasn't more to have. I'm going to try to make more of those so she can get her daily dose of fruits and veggies.
Savannah (goal 1.5 C): 1.6 cups/day. Savannah is a great eater, and the only one I've got. She also loves fruits and sometimes even vegetables, so she was fairly easy. (Thank you, my sweet.)
Did I spend all day cooking?
No. I kept the numbers for those as well in my food journal. (Yes, I am crazy compulsive; please don't call the shrink yet.)
I often made breakfast, lunch, and dinner entirely from scratch (we only ate about 6 boxes of cereal this month, which gave me about 8-10 breakfasts off). I spent on average 31 minutes of active cooking time (time when I was actually doing something) and 26 minutes of passive cooking time (time I needed to be home because something was in the oven or on the stove, but where I wasn't in the kitchen doing anything) for a total of 57 minutes/day in food related endeavors (you can add another 5 minutes/day because I forgot to tally the time I spend making school lunches). Again, I made almost all of our meals from scratch; I made bread (though not all of it; thank you day-old bread store); I made more sweets than is wise. This fairly low number of minutes spent in cooking has been one of the pleasant surprises of the Cheap Eat Challenge. I figured I'd be in the kitchen a lot more than that.
Where'd we cheat?
1. I only counted half the cow share we have. It's $17.00 and I only counted $8.00 of it. Why? Because we're not getting much milk from it. I could have cancelled it and then gotten it again in the late spring and summer when milk supplies were higher. But I wanted to support the farm (and by way of full disclosure, I certainly didn't want to lose my spot), so I only counted a portion of it. If I had counted all of it, we would have been at $7.30/day, which still isn't too shabby. You may call me a weanie cheater if you wish.
2. I bought Kip a couple candy gifts. Gifts are allowed under our rules. Of course, if we buy each other "gifts" all the time, then we could get away with quite a lot, couldn't we? In my defense, Kip has been a super sport and has given up a lot for this challenge; I wanted to thank him. And it's really not out of the ordinary for me to buy Kip gifts of candy when I go out, especially if it's without my children.
A note on the future of the Cheap Eat Challenge:
I think I'm going to change the way I tally costs. I've been trying to estimate exactly how much food we actually eat each month, which in some ways is a record-keeping nightmare (even for the OCD among us) because I'm trying to figure out how much of something like ranch powder or ketchup I used and about how much that might cost. So the partially used stuff is being very roughly estimated. Furthermore, people's budgets don't work that way. It's not like if someone used only half a can of peaches in a month, they could count only that 1/2 can; they'd have to pay for it all and count it all in their budgets. Thus. I'm going to begin tallying all I buy, though I won't be including the leftover foods from the month before (does that make sense?). In other words, if I've got ketchup and peanut butter left over, I don't have to count them (because in theory I counted them the month before), but I will end up counting things I open even if I don't use them all this month. The exception will be if I buy things in huge bulk and divide them up and freeze them. Then I only have to count the portion I pull out of the fridge. Also, if I buy something, but don't crack it open that month, it'll go onto the next month's tab. This new process of record keeping might throw me off for a month or so as far as keeping it at $6/day while I build up a cheap-ish stockpile, but we're not quite keeping it at $6/day anyway.
Along with this, I'm going to be giving us a $20 entertainment food fund--a little boost of extra money so that we can afford to have our generous and wonderful friends over without feeding them beans and rice (unless they love beans and rice...). If we go through the month without having anyone over, I won't be allowed to count this.
I'm still shooting for the $6/day, but in the coming months, I'm going to try to be less stressed about it. Last week when I realized we wouldn't quite make it, it bummed me out. I don't want to go through life bummed out about a few cents a day. In coming months I might even raise (um, lower) the bar so we're eating more around $8-10/day so that I can experiment with some different types of foods and participate in a CSA, which is a cause I find worth supporting (and which I expect to deliver some yummy foods). I'll keep you posted.
Thursday, March 31, 2011
Wednesday, March 30, 2011
BFF: Orange Pull Apart Bread (aka: Rip-apart-like-a-hungry-jungle-beast-because-it's-so-good Bread)
Cheap Eat Challenge: Watch as our family of 6 tries to eat healthfully and satisfyingly on $6/day.

Meet my new best friend.

Forever.
We eat a lot of good food around here. And the sweets we make are spectacular. Even so, this bread from Sweet As Sugar Cookies is the best things that has passed these lips in a while. It might have even outdone the brownies with browned butter frosting, though I'm not quite ready stand fully behind that statement yet. Either way, though, it's given it and even my beloved chocolate cake a run for their money.
Furthermore, it's not even difficult to make (as far as breads go, mind you).
This weekend I plan to make a version of this bread with cinnamon, sugar, and butter in place of the cinnamon rolls I sometimes make. Because this is easier. And better. Since there are more gooey insides. Oh me oh my. It's like the best of the cinnamon roll/monkey bread world--more square inchage of gooey insided-ness than cinnamon rolls and way less fussy than monkey bread.
Try it, and see if it doesn't make a friend or lover out of you too.
Oh, and those browned tops that look a little burned. Uh-uh. They're just carmalized orange/sugar goodness through and through.
And one more thing. Although the frosting is surely lovely and I will not fault anyone for making it, this bread doesn't need it. At all.
This bread might be the death of me.
And I will die happy.
Should I manage to survive, stay tuned for the cinnamon version coming this weekend. (With lots of pictures to make assembly instructions easy to follow.) RIP
Tuesday, March 29, 2011
A Word on White Sauce
Cheap Eat Challenge: Watch as our family of 6 tries (sigh) to eat on $6/day.
Once upon a time my mother-in-law made macaroni and cheese. It was an excellent recipe, which I hope to soon share with you. It contained macaroni, ground beef, tomatoes, cheese, and some mystical and delicious sauce.
I was newly married and eager to expand my recipe box, so I asked her for the recipe.
"Well, you make the macaroni and then you start off with a basic white sauce..."
Oh dear, she'd already lost me. I got the macaroni part, but had to ask her to tell me how to make a white sauce. She looked at me kind of funny. Clearly, there was a home ec class or two that I should have signed up for. Or maybe I should have drilled my mom a little more about how to cook. Not that anything that started with something containing (no, not containing--being) a fat would have made it past my no fat alert in high school anyway.
So my mother-in-law gave me a brief tutorial on how to make a basic white sauce.
I pass it on to you, with several tips about how to use such powerful wisdom and why it is both cheapskate and cook's best friend.
First, what's it good for.
It's good for soups, casseroles, pasta sauces. It's good for anything in which you otherwise might toss a can of cream of somethingorother soup. At it's homiest, it's the basis for a simple broccoli chicken casserole. Dressed up for the evening, it's the basis of an alfredo sauce.
Secondly, why do cooks love it?
*It tastes better than canned soups, for one thing.
*It has less preservatives and you know just what's inside of it.
*Along that vein, you can season it in a multitude of ways. You can go from basic salt and pepper to onion and garlic to thai or indian.
Thirdly, why do cheapskates love it?
*A can of cream of somethingorothersoup is going to run you about $1.00 and more if you want a name brand soup. The same amount of white sauce costs about $.30.
But isn't it just easier to throw in a can of cream of somethingorother soup? Maybe. This sauce takes 3 minutes to make. Three. Minutes. It often takes me longer than that to find my can opener (true, though unfortunate, story).
A few final notes:
1. You can make this thin for pouring over vegetables or starting a soup. Or you can make it thick (ala cream of somethingorother soup) for casseroles and scalloped foods. (This tip is from my friend, Sally--maker of amazing soup and sometimes-cheapskate extraordinaire.) The thick recipe is given below. To thin it, use half as much butter and flour.
2. You can make a white sauce with milk, but you can also substitute chicken broth (or another broth) if you'd like something to have a thick sauce, but not to be milky or creamy.
3. You can even make it lower fat by using skim milk. I'm not advocating this by any means, but it is certainly possible.
4. You can add cheese and make cheese sauces (see how below). My mom used to pour a cheddar sauce over broccoli when I was a kid and it was the only way I really liked broccoli. So, here's to you, white sauce, for keeping me from a life of vegetable dereliction.
Basic White Sauce
Prep and cook time: 3 minutes
Cost: $.30
(butter: .15, flour: .01, milk: .19)
2 Tbsp butter of other fat (oil, lard, whatever floats your boat)
2 Tbsp flour
1 C milk (or broth)
a few dashes of salt and pepper or whatever crazy seasonings you'd like
Melt butter in saucepan over lowish heat. Whisk in flour (I use a flat whisk ) and seasonings. It'll get thick and pasty. Then pour in the milk or broth, stirring as you do. Heat to boiling and let it boil gently for about a minute or until it thickens.
To Make Cheese Sauce: Stir in 1/2 C shredded cheese and 1/4 tsp dry mustard if you've got it on hand and you're feeling fiesty (it won't make it mustard-y tasting; it will just make it good--you can thank Sally for this tip too). Stir until smooth over low heat.
PRINTABLE RECIPE
Once upon a time my mother-in-law made macaroni and cheese. It was an excellent recipe, which I hope to soon share with you. It contained macaroni, ground beef, tomatoes, cheese, and some mystical and delicious sauce.
I was newly married and eager to expand my recipe box, so I asked her for the recipe.
"Well, you make the macaroni and then you start off with a basic white sauce..."
Oh dear, she'd already lost me. I got the macaroni part, but had to ask her to tell me how to make a white sauce. She looked at me kind of funny. Clearly, there was a home ec class or two that I should have signed up for. Or maybe I should have drilled my mom a little more about how to cook. Not that anything that started with something containing (no, not containing--being) a fat would have made it past my no fat alert in high school anyway.
So my mother-in-law gave me a brief tutorial on how to make a basic white sauce.
I pass it on to you, with several tips about how to use such powerful wisdom and why it is both cheapskate and cook's best friend.
First, what's it good for.
It's good for soups, casseroles, pasta sauces. It's good for anything in which you otherwise might toss a can of cream of somethingorother soup. At it's homiest, it's the basis for a simple broccoli chicken casserole. Dressed up for the evening, it's the basis of an alfredo sauce.
Secondly, why do cooks love it?
*It tastes better than canned soups, for one thing.
*It has less preservatives and you know just what's inside of it.
*Along that vein, you can season it in a multitude of ways. You can go from basic salt and pepper to onion and garlic to thai or indian.
Thirdly, why do cheapskates love it?
*A can of cream of somethingorothersoup is going to run you about $1.00 and more if you want a name brand soup. The same amount of white sauce costs about $.30.
But isn't it just easier to throw in a can of cream of somethingorother soup? Maybe. This sauce takes 3 minutes to make. Three. Minutes. It often takes me longer than that to find my can opener (true, though unfortunate, story).
A few final notes:
1. You can make this thin for pouring over vegetables or starting a soup. Or you can make it thick (ala cream of somethingorother soup) for casseroles and scalloped foods. (This tip is from my friend, Sally--maker of amazing soup and sometimes-cheapskate extraordinaire.) The thick recipe is given below. To thin it, use half as much butter and flour.
2. You can make a white sauce with milk, but you can also substitute chicken broth (or another broth) if you'd like something to have a thick sauce, but not to be milky or creamy.
3. You can even make it lower fat by using skim milk. I'm not advocating this by any means, but it is certainly possible.
4. You can add cheese and make cheese sauces (see how below). My mom used to pour a cheddar sauce over broccoli when I was a kid and it was the only way I really liked broccoli. So, here's to you, white sauce, for keeping me from a life of vegetable dereliction.
Basic White Sauce
Prep and cook time: 3 minutes
Cost: $.30
(butter: .15, flour: .01, milk: .19)
2 Tbsp butter of other fat (oil, lard, whatever floats your boat)
2 Tbsp flour
1 C milk (or broth)
a few dashes of salt and pepper or whatever crazy seasonings you'd like
Melt butter in saucepan over lowish heat. Whisk in flour (I use a flat whisk
To Make Cheese Sauce: Stir in 1/2 C shredded cheese and 1/4 tsp dry mustard if you've got it on hand and you're feeling fiesty (it won't make it mustard-y tasting; it will just make it good--you can thank Sally for this tip too). Stir until smooth over low heat.
PRINTABLE RECIPE
Monday, March 28, 2011
Baked Potato Soup
Cheap Eat Challenge: Watch as our family of 6 eats on $7 (oops, you caught that did you--this challenge is giving me a run for my money) a day.

I was looking for a way to use leftover baked potatoes. This is an excellent way. Excellent. It evokes baked potato goodness; it uses up a leftover; and it's quite tasty.
But. (Pesky little word isn't it?)
This soup would be even better if you didn't use baked potatoes. I hate to say it. I really really wanted this to be perfect as is, but the fact is that the potatoes are better if boiled in the chicken broth instead of merely thrown in near the end and mashed up a bit. Ah well. If you've got baked potatoes, use 'em. It makes this a 30-minute (or less) meal. If not, it takes a little longer. But it tastes a little better.
Baked Potato Soup
Source: Adapted from my friend Sally who is a positively amazing cook.
Prep time: 10 minutes if you're potatoes are already baked; longer if you need to chop the potatoes as well
Cook time: 10-15 minutes with baked potatoes; 20-30 with raw potatoes
Cost: $1.95
(bacon: .25, onion: .20, celery: .05, chicken broth (with buillion): .25, potatoes: .40, cream: .25, milk: .10, cheese: .40, other stuff: .05)
3 strips bacon
1 small onion or a good dash onion powder (I used the powder; Kip doesn't like chunky onions)
1/2 C sliced celery (1 large stalk)
1 clove garlic, minced
3 Tbsp flour
1 tsp salt
1 tsp dry basil
1/2 tsp pepper
3 C chicken broth
6-8 small to medium sized baked potatoes (I used Russet, but think it would have been better with red or yukon gold)
1/3 C cream
2/3 C milk
1/2 tsp hot pepper sauce (didn't use because didn't have, but it adds a nice touch and just a bit of heat)
1 oz cheddar cheese for garnish (optional, but I highly recommend it)
chives for garnish (optional)
sour cream for garnish (optional)
If using baked potatoes:
Cook bacon until crisp. Remove and drain on paper towels. Saute onion, celery, in drippings, adding garlic when almost done. When the vegetables are fairly tender, stir in the flour (if most or all of your bacon drippings are gone, as mine were, add 1-2 Tbsp butter to the pot and melt it before adding flour. Also, you can leave the veggies in the grease and just mix them up with the grease and flour). The fat and flour will create a roux, or a thick paste that will then serve to thicken your broth. Add broth, whisking as you do. Bring to boil. Boil and stir until thickened somewhat. Add the potatoes, crumbling them into the broth. Add cream, milk, and hot pepper sauce. Heat through. If desired, mash the potatoes somewhat by sticking a potato masher right in the pot.
Garnish with bacon, cheese, chives, and/or sour cream.
If using raw potatoes:
Begin by boiling diced potatoes in the 3 C chicken broth. As they cook, prepare your bacon and then your vegetables as described above. Prepare your roux with the flour and fat. Gradually pour the milk in and whisk until it thickens (probably about 1 minutes). Add the potatoes and broth; stir or whisk it up well so it's all incorporated, and let it simmer until thickened somewhat. Add cream and hot sauce. Again, you can mash some of the potatoes with a potato masher if that's your thing (it's our thing). Garnish as you wish.
PRINTABLE RECIPE

Saturday, March 26, 2011
Double Chocolate Breakfast Cookies (Low Sugar)
Cheap Eat Challenge: Watch as our family of 6 eats, or gets frustrated trying, on $6/day.

I'm working on the main courses, people. They're just not cooperating. (They are among the many things not cooperating these days--the weather, our $6/day budget, my children--arg and double arg.)
So you get my latest breakfast cookies. They're really good.
A few notes on potential substitutions:
1. If you want to skip the chocolate chips, I shall not forbid you. I think it'd be awesome, however, if you'd sub in some coconut or some type of nut (pecan, walnut, almond, even pistachio if you're feeling fiesty).
2. If you want an even healthier cookie, you can replace the butter with 4 Tbsp peanut butter and 2 Tbsp butter. Or all peanut butter if you're that type. However, if you use all peanut butter, you may need to add an extra Tbsp milk to loosen it up a bit.
Double Chocolate Breakfast Cookies
Makes 10 cookies
Prep time: 5 minutes
Cook time: 8 minutes
Cost: $.85
(butter: .30, sugars: .07, egg: .10, cocoa: .20, flour: .15, other stuff: .03)
1/4 C butter, melted
2 Tbsp white sugar
2 Tbsp brown sugar
1 egg
1 tsp vanilla
1/4 tsp almond extract
1/3 C cocoa
1/4 tsp baking soda
1/8 tsp salt
3/4 C whole wheat flour
3 T chocolate chips (optional, but then you can't call these double chocolate)
Preheat oven to 350.
Beat butter with sugars. Add egg, vanilla and almond extract.
Sift cocoa, whole wheat, baking soda, and salt.
Add dry to wet. It will be a little dry and possibly crumbly. After I added the chocolate chips, I worked it together with my hands and they came out very well.
Add chocolate chips if using.
Bake 8 minutes.
PRINTABLE RECIPE
Friday, March 25, 2011
Brooke and Big Bird's Banana Bread
Cheap Eat Challenge: Watch as our family of 6 eats, or tries to, on $6/day.

My friend, Brooke, brought some banana bread to our house a couple years ago. We devoured it at an alarming rate. The next morning my husband said something like, "You should make banana bread like that. That's how I remember liking it as a kid." I said, "I guess I didn't realize you liked banana bread that much." And he said, "I like it when it's moist like that." Ahem.
Fortunately I don't have too much food pride and I asked Brooke for the recipe. She said she'd gotten it from a friend who'd gotten it from a 1970's Sesame Street magazine. When a recipe comes from the Big Bird himself, I suppose you should expect it to be wholesome, but I was still surprised at how many bananas it used. My no-longer-standby recipe called for only 1 large banana. And I was even more surprised to see that Brooke and Big Bird's recipe was entirely whole wheat. I even asked her if she had used all whole wheat. It was just so smooth and nice. I guess I forgot to notice it was virtuous too.
We often make this into muffins for breakfast. By eating just two, which is easy peasy for this clan, you're getting 1/2 of a banana and lots of whole grains. If I asked my kids to eat a whole wheat muffin and 1/2 a banana on the side, the majority of them would stomp around and complain of the utter trial that is their lives. So for us these muffins are a very good thing.
And if that's not enough good stuff, this is the type of recipe you throw into one bowl and mix with a spoon. I love those. And, one more good thing: these taste even better the next day.
Below I've given you Brooke's/Big Bird's original recipe as well as a lower sugar, lower cost version of my own. (The original is better, but mine is good too and it fits better in our uber tight budget. Also, I feel even better eating these with less sugar.)
And in case your wondering why we're so heavy on the breakfast-y stuff on this blog, well, dinner was a bust tonight--edible, but not bloggable. And, yes, my life apparently centers around sweet breakfasts that I try to avoid feeling guilty about.
Brooke and Big Bird's Banana Bread
Makes 1 loaf or 12 muffins
Prep time: 5-10 minutes
Cook time: 15-20 minutes for muffins; 1 hour for the loaf
Cost: $1.70
(bananas: .40, honey: .75 (a little sketchy on this estimation), butter: .25, flour: .30)
3 ripe bananas, peeled and mashed
3/4 cup honey
1/4 cup melted butter
1/2 teaspoon baking soda
1 1/2 cups whole wheat flour
1/2 C chocolate chips (optional)
Mash bananas well with a fork. Add other ingredients. Mix together, pour into a greased bread pan, and bake at 350 for one hour. (Alternately pour into 12 muffins cups and bake for 15-20 minutes.)
PRINTABLE RECIPE
The Cheaper Less Sweet Sister (Hmm, good thing this isn't a personals add)
Cost: $.78
(bananas: .40, sugar: .04, oil: .04, whole wheat: .30)
A confession: I used sugar and less of it. It was good and all, but if you've got honey and your budget can swing it, I recommend the honey instead of the sugar. It keeps the muffins super moist and makes for a more complex flavor.
A note: If you don't have quite enough bananas, use a bit of applesauce to fill the void.
3 ripe bananas
1/4 C sugar
1/4 C canola oil
1/2 tsp baking soda
1 1/2 C whole wheat flour
Prepare as above.
PRINTABLE RECIPE
Thursday, March 24, 2011
6 Ways to Stretch Ground Beef
Cheap Eat Challenge: Watch as our family of 6 eats, or tries to, on $6/day.
6 Ways to Stretch Ground Beef
1. Add sweet potato puree. I'd begin with about 1/4 C per pound of beef. It makes it go a little further, it adds some extra nutrition, and--in my humble opinion--it actually makes the beef taste a bit better as it adds a touch of sweetness and complexity to the flavor of the meat. The best part about this addition is that I've never had anyone in my family know it's there. Ah, sweet deception.
2. Add quick oats. Again, I'd begin with about 1/4 C per pound of beef, though if that goes over well, you may be able to add more as it doesn't affect the texture as much as too much sweet potato would. Beware, however, because if you go too far, the meat/oatmeal mixture will become bland. Consequently, you can get away with more in ground beef for a pasta sauce than you can for, say, a burger.
3. Beans. You can mash them and they will have a similar look and texture to the ground beef and if seasoned similarly can be used without easy detection in your ground beef recipes (start with 1/4 C per pound of ground beef and see how it goes). I expect that many kinds of beans will work, but pinto have similar coloring and therefore hide the best; while white beans have a milder taste than some beans and therefore are harder for picky eaters to detect. And if your family doesn't care to see a bean mixed in with their ground beef, you can add a ton of beans to just a bit of beef (ala beef bean burritos). The flavor of the beef will transfer nicely to the beans and you'll end up with a cheaper, healthier filling for tacos, casseroles, shepherd's pie, whatever.
4. Chopped mushrooms. You heard me. Mushrooms are often described as being meaty and if you chop them up fine and maybe even saute them in some butter if you want to be fancy, you'll probably get away with this one. Chop 'em up good and beware the super tasters. Also, I'm not sure mushrooms will cheapen your meat, but they will make it less caloric/lower fat and add some extra nutrients. (P.S. You'll want to sweat the water out before you use them for burgers (by sauteeing them first), although you can probably just throw them in with ground beef if you're browning it.)
5. Whole wheat bread crumbs. If you've ever made meat loaf or meatballs, you probably know that bread crumbs work well with ground beef. Don't use too much or you'll end up with a gummy sort of texture, but if you use the right amount (1/4 C-1/2 C per pound of beef), there's a good chance you might like your burgers even better with some bread crumbs thrown in. (To make the bread crumbs, throw a few pieces of bread in the blender and have at it. You'll have crumbs in no time.) You can also use saltine crackers. These won't add nutrition (and they'll wreck your Atkins diet, as will probably all these suggestions), but they do reduce the calories/fat somewhat and they cheapen the meal. (Also, I think Saltines in meatloaf are awesome. Yum, salt.)
6. Use less. Generally speaking, I'd say that in most recipes, the ground beef can be reduced by half, without you and yourn even noticing the difference.
Wednesday, March 23, 2011
Whole Wheat Peanut Butter and Jelly Bars
Cheap Eat Challenge: Watch as our family of 6 eats, or tries to, on $6/day.

I'm not sure what families do when their children aren't allowed to have peanut butter at their schools. I think my oldest would have to be home schooled. He doesn't eat cold cuts, tuna fish, or cheese. He likes pastas and pizza and even tomato soup (motto: if it looks like ketchup, it must be okay), but he won't touch most of the other foods the school offers, including things that are supposed to be classic kid foods: hamburgers, chicken nuggets, burritos. He is, in fact, a vegetarian--not through any kind of a choice except that of his palate. He just doesn't like meat. Or beans. Or most nuts. Which means he is kept alive with peanut butter and whole wheat bread.
Fortunately, I like peanuts too. And even more fortunately there are no peanut allergies in this family and no peanut bans at his school.
In their original conception, these peanut butter and jelly bars were meant as a dessert. But like so many desserts containing peanuts, I saw some potential for a breakfast cookie. And I'm glad I did.
Peanut Butter and Jelly Bars
Adapted from Barefoot Contessa at Home
Serves 16
Prep time: 10 minutes
Cook Time: 30 minutes
Cost: $1.25
(butter: .30, sugar: .10, egg: .10, peanut butter: .32, whole wheat flour: .18, jam: .25)
1/4 C (1/2 stick) butter, melted
1/3 C sugar
1/2 tsp vanilla
1 egg
1 C peanut butter
1 Tbsp milk
1 C whole wheat flour
1/2 tsp baking powder
1/2 tsp salt
4 Tbsp jam
1/3 C chopped peanuts (optional--wasn't a hit in my family; now if I'd used chopped chocolate chips...)
Preheat oven to 350 degree. Grease 9x9 inch square pan.
Cream butter and sugar until lighter in color and fluffy. Add vanilla, eggs, peanut butter, and milk. Mix until well combined.
Sift flour, baking powder, and salt. Add to creamed mixture. Dough will be very thick.
Press 2/3 of the dough into the pan. Glop on the jam and spread it around evenly. Plop the remaining dough over the top and very gently press it so that it is flat-ish. If you don't, it will come out a bit crumbly on top. Not a problem, but a little messier (note: it's going to be a little crumbly on top no matter what you do, unless you'd like to add more butter so that the batter will spread on its own; if you do, I promise not to tattle to the breakfast police).
Bake for about 30 minutes. These bars are tough to test for doneness. Why? Because even if you stick a fork in the original uncooked batter, it will come out fairly clean. Fortunately, this is good even if it's not completely done. And fortunately, I've made these a couple times and 30 minutes is fairly accurate, though that is not a guarantee or a promise for your oven and you may not sue me if your bars are not done at 30 minutes, thank you. Now, how do I check it, you ask. I take a small centimeter sized chunk out of the middle and look at the bottom layer. If it is still goopy, I put the pan back in. Yes, I have a lot of finesse as a chef. Which is why I get paid the big bucks.
Note: You can use jelly, but jam works best. The jelly doesn't leave much of a fruity line in these already pared down bars. Also, I wanted to make a honey-filled version and did. I used 2 oz cream cheese and mixed it with 4 Tbsp honey, which created two problems. First, the honey flavor was somewhat overpowered by the cream cheese flavoring (thus, my kids weren't huge fans). Also, it really needed to be doubled because the line of cream cheese kind of got lost in the baking, but to double something with cream cheese--well, you see the breakfast-y problem here; it's becoming less and less healthy. So we'll just be going with jam in the future, but if you'd like to experiment with honey, be my guest. If you wanted to get fussier, you could puree cottage cheese or drain plain yogurt overnight to get a cream cheese-like yogurt. If you wanted to go more gourmet, you could use ricotta cheese mixed with honey. And if your children will eat such a thing, I salute you.
Note: These are thick little bars. Which means that although they are nutritious, they are a wee bit calorie rich. I'm okay with that sort of thing. But by way of warning, you probably want to eat them slowly and perhaps with a piece of fruit thereby. Otherwise, you might look down to realize you've eaten a half a pan. And lower sugar, lower fat or not, half a pan is a whole lot of breakfast bar.
PRINTABLE RECIPE

Tuesday, March 22, 2011
Vegetable Soup
Cheap Eat Challenge: Watch or join us as our family of 6 eats, or tries to, on $6/day.


Because it's pretty.
And healthy.
And because cabbage was on sale last week.
And because it's spring and the parsley is popping up through the leaves in my herb garden. (It's the little guy on the left.)

But also because ever since I stopped nursing my baby about a month ago, I've had a sharp--sharp, I say--decline in appetite. I've always noticed a shift in the amount of food I need when I stop nursing my babies, but I've never noticed such a dramatic drop. I can only blame the mid-30-something birthday that is just around the corner for ruining my youthful metabolism.
Whatever the cause, I've lately been almost inclined to skip lunch entirely, or rather postpone it till 2:00 or so, which wouldn't so much matter if I were French and wouldn't even think of eating dinner until 8:00 or 9:00, but in a house where we dine at 5:00, well, you get my point. My body is just off. And it's not needing as many calories as I'm used to eating. And I'm trying to humor it. Because if I've learned one thing from bearing offspring, it's that you should listen to your body when it's trying to tell you something. So I made vegetable soup. And ate it at a normal American lunching hour. And it was very very good. And then I was starving at 3:00. Hmm. Bring on the crusty bread.
Now before I get to the recipe, allow me to blabber on about it.
First of all, I just throw everything in a pot. You could do this in a slow cooker too. It comes out great this way and I have no complaints and eat it greedily.
Could you saute the onion and then garlic in oil and add the veggies and saute them for a minute before adding the broth? Absolutely. Would it make it even better? Quite possibly so. I'm just too lazy to do it. I use this as a sort of lazy vitamin boost/brownie detoxification/not-too-hungry sort of soup and I don't make it a gourmet affair. Could you make it perfectly divine? Yes.
Along that line:
You could roast these vegetables in olive oil, salt and pepper with a sprinkle of lemon juice on it all to brighten it up, and I expect get an even better result than I do.
You could add Italian seasonings and even a little Italian sausage.
You could add white beans and make more of a meal of it.
You could add a bit of salsa, chicken, and lime juice.
You could add asian greens and ginger.
You could swap the chicken broth out for vegetable broth and make it purely vegetarian.
You could do a whole lot with this soup.
But I don't. Forgive me.
Vegetable Soup
Serves (in this house, it serves only me over and over again): 10-12
Prep time: 5-10 minutes
Cook Time: 30 minutes (or more if you're busy and just want to let it simmer)
Cost: $2.85
(cabbage: .75, tomatoes--free for me since canned from last summer's harvest, but otherwise would be about .1.25, onion: .20, carrot: .10, celery: .20, garlic: .05, broth--free for me, but if you don't have any homemade will cost about .30 from bullion)
2 lb head of cabbage (a small to medium sized one)
1 C diced carrots (1 large)
5-6 celery stalks
1 small onion
29 oz. tomatoes (diced or whole or even Italian style)
2-3 cloves garlic
2 C chicken broth (or vegetable broth)
small handful parsley
salt and pepper to taste
Chop vegetables and throw them in a pot. Pour broth over it. Bring to a boil, then reduce heat and simmer, covered, for about 30 minutes. Add salt and pepper to taste and garnish with parsley.
PRINTABLE RECIPE

A vegetable soup.

As promised.

Because it's pretty.
And healthy.
And because cabbage was on sale last week.
And because it's spring and the parsley is popping up through the leaves in my herb garden. (It's the little guy on the left.)

But also because ever since I stopped nursing my baby about a month ago, I've had a sharp--sharp, I say--decline in appetite. I've always noticed a shift in the amount of food I need when I stop nursing my babies, but I've never noticed such a dramatic drop. I can only blame the mid-30-something birthday that is just around the corner for ruining my youthful metabolism.
Whatever the cause, I've lately been almost inclined to skip lunch entirely, or rather postpone it till 2:00 or so, which wouldn't so much matter if I were French and wouldn't even think of eating dinner until 8:00 or 9:00, but in a house where we dine at 5:00, well, you get my point. My body is just off. And it's not needing as many calories as I'm used to eating. And I'm trying to humor it. Because if I've learned one thing from bearing offspring, it's that you should listen to your body when it's trying to tell you something. So I made vegetable soup. And ate it at a normal American lunching hour. And it was very very good. And then I was starving at 3:00. Hmm. Bring on the crusty bread.
Now before I get to the recipe, allow me to blabber on about it.
First of all, I just throw everything in a pot. You could do this in a slow cooker too. It comes out great this way and I have no complaints and eat it greedily.
Could you saute the onion and then garlic in oil and add the veggies and saute them for a minute before adding the broth? Absolutely. Would it make it even better? Quite possibly so. I'm just too lazy to do it. I use this as a sort of lazy vitamin boost/brownie detoxification/not-too-hungry sort of soup and I don't make it a gourmet affair. Could you make it perfectly divine? Yes.
Along that line:
You could roast these vegetables in olive oil, salt and pepper with a sprinkle of lemon juice on it all to brighten it up, and I expect get an even better result than I do.
You could add Italian seasonings and even a little Italian sausage.
You could add white beans and make more of a meal of it.
You could add a bit of salsa, chicken, and lime juice.
You could add asian greens and ginger.
You could swap the chicken broth out for vegetable broth and make it purely vegetarian.
You could do a whole lot with this soup.
But I don't. Forgive me.
Vegetable Soup
Serves (in this house, it serves only me over and over again): 10-12
Prep time: 5-10 minutes
Cook Time: 30 minutes (or more if you're busy and just want to let it simmer)
Cost: $2.85
(cabbage: .75, tomatoes--free for me since canned from last summer's harvest, but otherwise would be about .1.25, onion: .20, carrot: .10, celery: .20, garlic: .05, broth--free for me, but if you don't have any homemade will cost about .30 from bullion)
2 lb head of cabbage (a small to medium sized one)
1 C diced carrots (1 large)
5-6 celery stalks
1 small onion
29 oz. tomatoes (diced or whole or even Italian style)
2-3 cloves garlic
2 C chicken broth (or vegetable broth)
small handful parsley
salt and pepper to taste
Chop vegetables and throw them in a pot. Pour broth over it. Bring to a boil, then reduce heat and simmer, covered, for about 30 minutes. Add salt and pepper to taste and garnish with parsley.
PRINTABLE RECIPE
Monday, March 21, 2011
My Interview with Rebecca Cressman
Cheap Eat Challenge: Watch or join us as our family of 6 learns to eat on $6/day.

Last week I did an interview with Rebecca Cressman from yourLDSneighborhood.com. Hop on over and have a listen. (Hopefully I don't bungle my way through it too much; I've been afraid to listen to it myself.)
If you're new to the blog, I hope you enjoy it.
Below you'll find a few of my favorite things.
Oatmeal Raisin Breakfast Cookies

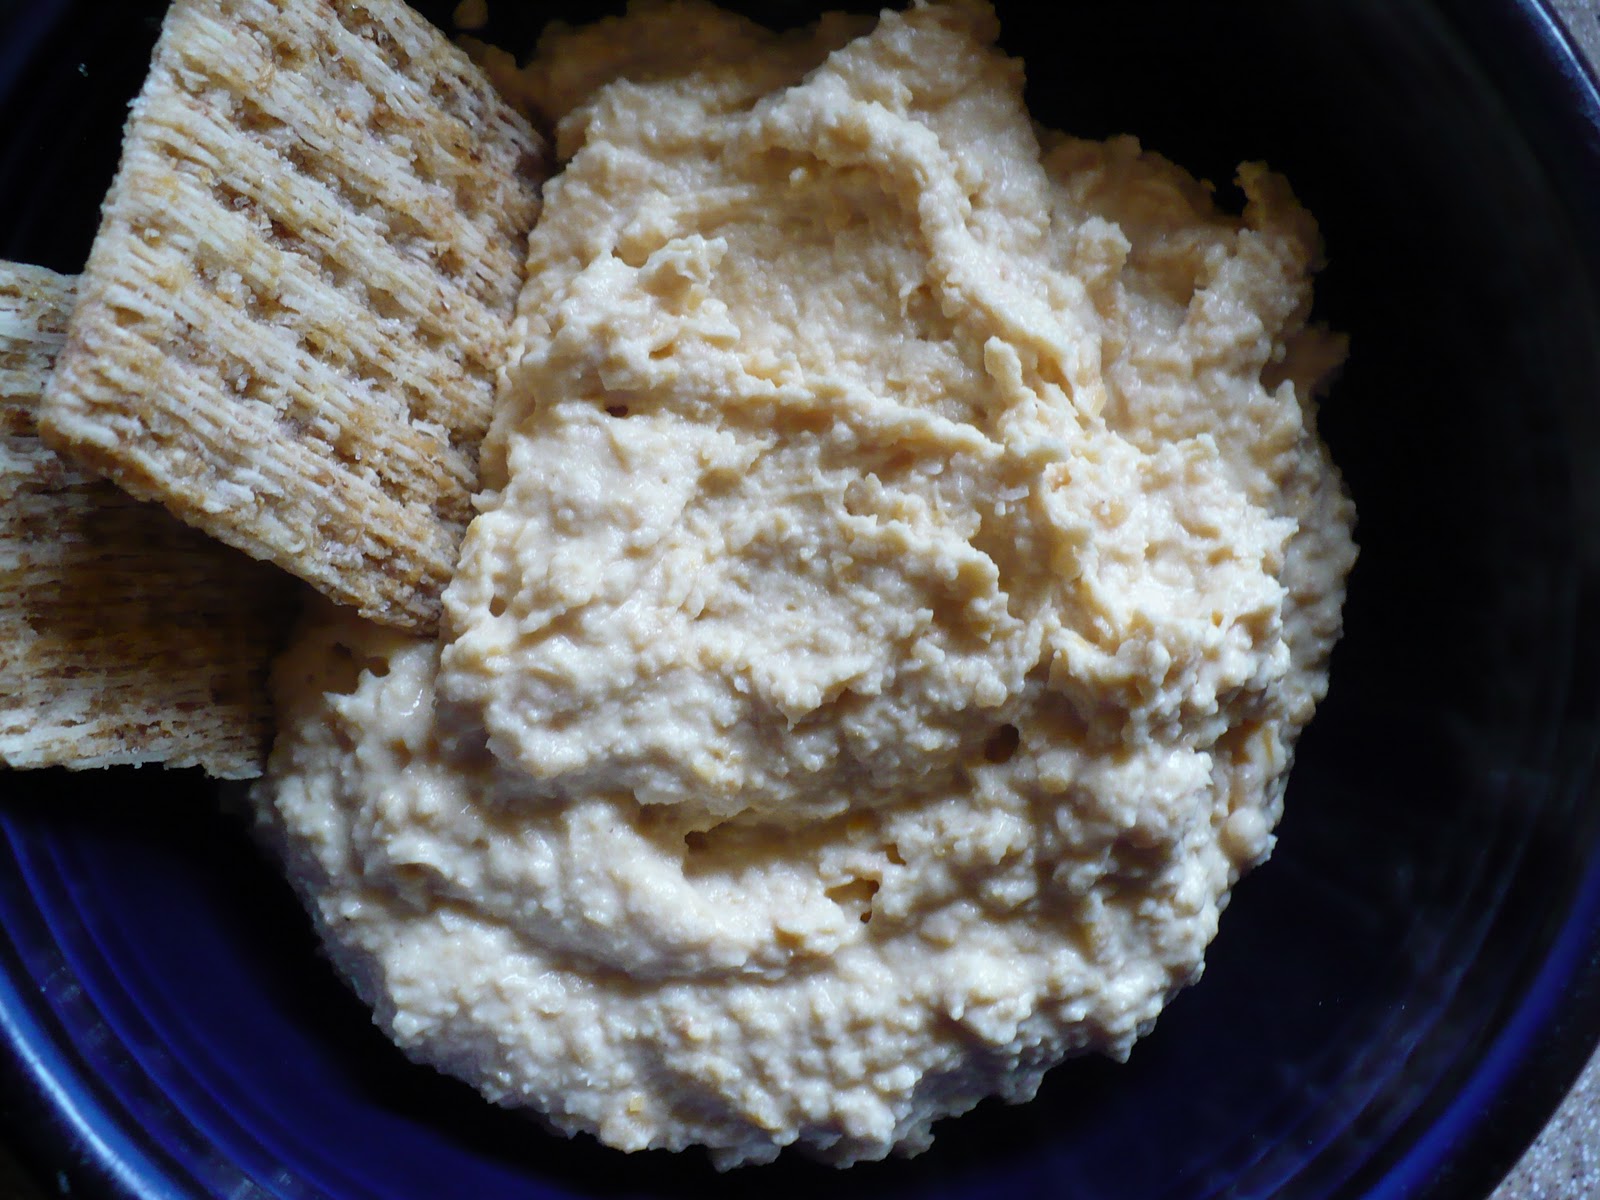
Lemon Garlic Hummus

Alyssa's Better Than Perfect Bread Sticks

Vegetarian Fajitas


(What does brownie batter have to do with this post? Nothing at all, but isn't it pretty?)
Last week I did an interview with Rebecca Cressman from yourLDSneighborhood.com. Hop on over and have a listen. (Hopefully I don't bungle my way through it too much; I've been afraid to listen to it myself.)
If you're new to the blog, I hope you enjoy it.
Below you'll find a few of my favorite things.
Oatmeal Raisin Breakfast Cookies

Lemon Garlic Hummus
Alyssa's Better Than Perfect Bread Sticks

Vegetarian Fajitas

And so many desserts I should be a little embarrassed (so I guess the brownie batter above does have something to do with this blog).


Saturday, March 19, 2011
Chocolate Zucchini Muffins--Whole Wheat
Cheap Eat Challenge: Watch as our family of 6 eats, or tries to, on $6/day.

I was going to make a nice vegetable soup tonight--one loaded with late winter/early spring vegetables. One perfect for purposes of detoxifacation necessary the day after brownies with browned butter.
But we've been working outside all day and we are HUNGRY. The veggie soup will have to wait until Monday.
For today I'll give you a chocolate zucchini muffin recipe that is super yum. Yes, I realize zucchini is not in season, but we had some in our freezer needing to be used. And even though it doesn't seem like it in this chilly mid-March, in another 3 months, the zucchini will be coming on.
If you simply must have this, but don't have zucchini and think it's too expensive, try using applesauce in place of the zucchini.
P.S. The original recipe is from jamiecooksitup.blogspot.com. It was great. But I was surprised at how close the lower fat, lower sugar, whole wheat muffin was in taste. Also, the healthier ones had more rise. Not sure why.
Whole Wheat Chocolate Zucchini Muffins
adapted from jamiecooksitup.blogspot.com
Makes 12
Prep time: 10 minutes
Cook Time: 20 minutes
2 C whole wheat flour
1/3 C sugar
1/4 C cocoa
1/2 tsp baking soda
1/4 tsp baking powder
1/4 tsp salt
1/2 tsp cinnamon
1/4 tsp nutmeg
1/2 C oil
1/4 C applesauce
3/4 C milk
1 very large egg
1 tsp vanilla
1 C shredded zucchini (or 1 scant cup pureed zucchini)
1/4-1/2 C chocolate chips (optional)
Mix wet ingredients in a large bow. Add zucchini.
Mix dry ingredients.
Bake at 350 for 15-20 minutes.
Add dry to wet and stir, just until combined. Stir in chocolate chips.
PRINTABLE RECIPE

Friday, March 18, 2011
Brownies with Browned Butter Frosting--A Link That Will Change Your Life
Cheap Eat Challenge: Watch our family of 6 eat (or try to) on $6/day.
What? You think I'm being dramatic? You think brownies are good and all, but that they don't really change one's life? Well that shows how much you know. The first thing Kip ever gave me were brownies--wonderful, perfect, homemade brownies.
Of course, they weren't these brownies. If they'd been these brownies, I would have married him on the spot instead of dragging things out in bothering to think about the hugely life-changing event that marriage is. Some people get drunk in Vegas. Some people give brownies with browned butter frosting. So I suppose it's for the best that Kip and I discovered browned butter frosting after we were married and several children into it. Because some things are worth thinking through.
And now onto the recipe.
I wanted to steal this recipe. I really did. I wanted to post it and claim it all as my own. I wanted the glory. Because, truly, it is glorious. I tried to think of ways I could alter it so as to improve it or change it just a bit so I could say I had adapted it. But I didn't want to touch it. It is too perfect as is.
Here is the link. It's from a now defunct parenting magazine called Wondertime. And below you'll find the recipe written out. Because the link is very very hard to see.
A few notes:
This recipe is not your throw it together because you're in the mood kind of recipe. It's not hard, but there are three steps and between them you must cool the part before, so it's the kind of thing you start in the morning. I'm okay with that. It keeps me from making these so often that I gain 7 trillion pounds in 3 weeks.
Also, if you have excellent eyesight and read the link, you'll note that she recommends eating these cold for two reasons: one is that you'll be forced to savor them and the second is that they're better. I disagree on both points.
These brownies are awesome and if cold brownies are your thing, so be it, but I like them best at room temperature. The layers hang together better instead of getting so firm that they try (somewhat) to separate from the brownie, they are totally savorable (who says something has to be cold to slow you down) and I just really love the texture when they're soft with a supple frosting. (Boy, I think I need a cold shower just thinking about it. Maybe things do need to be cold to slow you down.)

Brownies with Browned Butter Frosting
from Wondertime
makes 24
Prep time: 20 minutes spread out over several hours
Cook time: 30 minutes
Cost: too much, but worth every penny: $4.76
(this is for brownies and toppings: butter: 1.25, unsweetened chocolate: 2.00, eggs: .40, flour: .09, sugar: .32, powdered sugar: .45, vanilla: .05, cream: .20)
The brownie:
1/2 C butter
6 ounces unsweetened chocolate
2 C sugar
4 large eggs
1/2 tsp salt
1 C flour
1 tsp vanilla
Heat oven to 300. Butter a 9x13 pan and line it with buttered parchment paper to fit the bottom of the pan. (I didn't; I only lightly greased mine and all was quite well.)
Melt the butter and chocolate on low heat. (Did mine in the microwave.) Remove and cool. Beat eggs with sugar and salt for 8 minutes. (I did mine for 8 minutes, but felt that at 5 or 6 they were as fluffy and thick as they ever got, so you can probably cut this time down a bit.)
Fold in the chocolate, then flour and vanilla.
Pour into the pan and bake for about 30 minutes. (Mine went 32-33 minutes.) Cool about and hour and a half.
The frosting:
1/2 C butter
2 C powdered sugar
1/4 C heavy cream
2 tsp vanilla
Melt the butter on low heat until it browns. The original recipe said to do it for 25 minutes on low. I did this and had to turn it up at the end to get it to brown. You can probably do it faster on medium heat, but it will need your attention so you don't burn your butter. For those who haven't browned butter: The butter will melt; it will reduce; it may foam; it will begin to change color. You will want it to be a nice caramel color. There may well be some solids (dark fleck like things) at the bottom of the pan; this is fine. It will begin to smell nutty. You'll want to swirl your pan or stir it so parts don't burn. When it's caramel colored with a nutty smell, take it off. Give it a minute to cool and pour it into a bowl. If you leave it in the pan, it will continue to cook and may burn.
Remove from heat and beat in the sugar, cream and vanilla.
Frost the brownie layer while it's still a tad warm.
Let cool at least 15 minutes. (I left mine much longer and all was well.)
The glaze:
Note: I know it takes a teeny bit of faith to use the unsweetened chocolate on the top. DO IT. It's the perfect contrast to the sweet brownie. It will not seem you are eating unsweetened chocolate at all. It will merely seem very chocolate-y and very browned butter-y.
3 Tbsp butter
4 ounces unsweetened chocolate
Melt the butter and chocolate in a small pan on very low heat. (I did mine in brief--20-30 second--intervals as I always do when melting chocolate.) Pour over the icing layer and gently spread it by tipping the pan back and forth.
Let the whole thing cool for about an hour then cut the brownies into squares.
Refrigerate it if that's your thing.
PRINTABLE RECIPE

Thursday, March 17, 2011
Potato, Bacon, and Cheddar Egg Bake
Cheap Eat Challenge: Watch as our family of 6 eats on $6/day.

Man, talk about boring titles. But I was really struggling with this one. Oh, sure, I toyed with a few different things:
The Fat and Starch Egg Bake
The High Cholesterol Egg Bake
Artery Infusion
But for some reason, I just wasn't feeling it. So we're stuck with the bland, but accurate Potato, Bacon, and Cheddar Egg Bake.
And if any of my failed titles have discouraged you from making this, I assure you that they're just throw-backs from the 80's. These days eggs are hip, normal-fat cheese is cool (thank goodness) and bacon, well, bacon never really went away. It just had to hide in the closet for a few years until people couldn't hide the love any more.
Seriously, though (in case you don't think I've been serious enough to convince you to eat something I called "Artery Infusion"), this is very good and it is my opinion that it is also good for you. It is my opinion that eggs and potatoes are nothing short of virtuous (A, B, C-vitamins, fiber, etc.). And as for the outed bacon, I only used 2 slices and I let my daughter nibble on a bit of one of those slices, so you really need very very little to add some flavor and loveliness to this. Furthermore, it could totally support some carrots or some chopped spinach or kale if you wanted to make it even more nutrient dense. And now I realize that I could have used kale in mine and called it Colcannon Egg Bake, which would have been both a fabulous title and perfectly appropriate to today and healthier than what I made. (Excuse me while I bang my head on the desk a few times. And, hey, no stealing that idea and publishing it in your upcoming cookbook with cute, clever recipe titles, okay. The patent is pending and stuff.)
And now, the recipe.
Potato, Bacon, and Cheddar Egg Bake
adapted from Barefoot Contessa at Home
Serves: 4
Prep time: 10 minutes
Cook times: 30 minutes
Cost: $1.47
(bacon: .20, butter. 07, potato: .13, onion: .05, eggs: .50, milk: .02, cheese: .50)
2 slices bacon
1 Tbsp butter
1 C red potato, diced with skin on (1 medium potato)
1/4-1/2 onion, shredded (see note)
5 large eggs
2 Tbsp milk
1 tsp salt
1/2 tsp pepper
a few scallions or chives, chopped
4 oz (1/2 C) cheddar cheese, diced (mine was scant and still worked great)
Note on onion: I shredded mine (in the little shredder holes), which makes it into a sort of pulp. Why would I do such a thing? Because Kip has a texture problem with onion. When you shred/pulpify it, there are no chunks of textured onion to get in the way, but you still get good onion flavor (which he can handle in non-overpowering doses).
Note on cheese: You can use shredded, but it will float to the top. The diced is nicer because it's heavier and will sink a bit. We used shredded and lived to tell the tale, but I like those chunks of cheese.
Preheat oven to 350.
Cook bacon in cast-iron skillet or something else oven-proof. (If you don't have such a skillet, just cook the first part in a regular skillet and then pour it into an oven-proof pan--probably a 9-inch cake pan would work or a 9-inch square pan.)
Remove bacon and drain on paper towels. Don't let your 3-year-old eat it all. Add butter to the pan (make sure your pan isn't too hot or the butter will burn instantly--with cast iron, you'll probably be set at medium low). Add potato and onion. Cook for about 10 minutes, tossing occasionally until the potato is tender but firm.
In the meantime, whisk eggs, milk, salt, and pepper. Sitr in scallions and cheddar. When potato is ready, throw the bacon onto it and then pour the egg mixture over it all. Place the pan in the oven for about 15 minutes (at least 160 on an instant read thermometer) or until the center is done.
PRINTABLE RECIPE

Wednesday, March 16, 2011
Irish Soda Bread and Other Recipes for St. Patrick's Day
Cheap Eat Challenge: Watch as our family of 6 learns to eat on $6/day.

Of course, you could simply dye your milk green. This is what my mother did and we loved it. And there are always green eggs to be had. Or you could make a cake with mint frosting that is actually dyed green.
But if you're looking for something more traditional, here are two recipes I'm itching to try:
Roasted Cabbage with Lemon from Kalyn's Kitchen
Colcannon from Simply Recipes
And here is a favortie of my own. I have to use all my will power not to sub out some of the white flour for wheat, as I do in my other Irish Soda Bread recipe. Because this recipe is really best in its wicked all-white (not quite perfectly traditional) way. Enjoy.
Irish Soda Bread
adapted from The New Best Recipe Cookbook
Serves 8-10
Prep time: 10 minutes
Cook Time: 40 minutes
4 C all-purpose flour
4 Tbsp sugar
1 1/2 tsp baking soda
1 1/2 tsp cream of tartar
1 1/2 tsp salt
2 Tbsp butter, softened
1 1/2 C buttermilk (or a scant 1 1/2 C milk with 1 1/2 Tbsp vinegar mixed in)
Preheat oven to 400 degrees. Whisk flour, sugar, baking soda, cream of tartar, and salt together in a large bowl. Work the butter in with your fingertips until the mixture is like course crumbs (it only takes a minute or two, I promise).
Add buttermilk and sitr with a fork until the dough begins to come together. Turn out onto a flour-coated surface and dry to get it into some sort of ball. Knead just until the dough becomes cohesive and bumpy. This is going to be about 12-14 turns. It's going to be kind of shaggy and seem drier and less incorportated than you think it should be. You're going to think to yourself, "I have to knead this more; it's a mess." Do not knead it more. If you knead it until smooth, you'll have a tough tough loaf. Glob and gather it into a ball, then 12-14 turns. No more than 16. Seriously.
Pat the dough into a round of about 6 inches in diameter and 2 inches high. (You can also do 2 smaller loaves.) Place on greased baking sheet.
Score the top with a sharp knife, making an X. (I went a little crazy in my scoring. You don't have to do it so deep and crazy style like me.)
Bake 40-50 minutes or until golden brown and done in the middle (about 170-180 degrees if you've got a handy instant read thermometer ).
).
Feel free to brush the warm loaf with butter if the all-white-flour thing wasn't decadent enough for you.
PRINTABLE RECIPE


But if you're looking for something more traditional, here are two recipes I'm itching to try:
Roasted Cabbage with Lemon from Kalyn's Kitchen
Colcannon from Simply Recipes
And here is a favortie of my own. I have to use all my will power not to sub out some of the white flour for wheat, as I do in my other Irish Soda Bread recipe. Because this recipe is really best in its wicked all-white (not quite perfectly traditional) way. Enjoy.
Irish Soda Bread
adapted from The New Best Recipe Cookbook
Serves 8-10
Prep time: 10 minutes
Cook Time: 40 minutes
4 C all-purpose flour
4 Tbsp sugar
1 1/2 tsp baking soda
1 1/2 tsp cream of tartar
1 1/2 tsp salt
2 Tbsp butter, softened
1 1/2 C buttermilk (or a scant 1 1/2 C milk with 1 1/2 Tbsp vinegar mixed in)
Preheat oven to 400 degrees. Whisk flour, sugar, baking soda, cream of tartar, and salt together in a large bowl. Work the butter in with your fingertips until the mixture is like course crumbs (it only takes a minute or two, I promise).
Add buttermilk and sitr with a fork until the dough begins to come together. Turn out onto a flour-coated surface and dry to get it into some sort of ball. Knead just until the dough becomes cohesive and bumpy. This is going to be about 12-14 turns. It's going to be kind of shaggy and seem drier and less incorportated than you think it should be. You're going to think to yourself, "I have to knead this more; it's a mess." Do not knead it more. If you knead it until smooth, you'll have a tough tough loaf. Glob and gather it into a ball, then 12-14 turns. No more than 16. Seriously.
Pat the dough into a round of about 6 inches in diameter and 2 inches high. (You can also do 2 smaller loaves.) Place on greased baking sheet.
Score the top with a sharp knife, making an X. (I went a little crazy in my scoring. You don't have to do it so deep and crazy style like me.)
Bake 40-50 minutes or until golden brown and done in the middle (about 170-180 degrees if you've got a handy instant read thermometer
Feel free to brush the warm loaf with butter if the all-white-flour thing wasn't decadent enough for you.
PRINTABLE RECIPE

Tuesday, March 15, 2011
Carrot Cake with the Best Cream Cheese Frosting Ever
Cheap Eat Challenge: Watch as our family of 6 eats on $6/day.
With some updated pictures.


Let's get one thing straight. Carrot cake is not a health food. But it is one of those foods you can tell yourself is healthier. Especially if you sub out a cup of the white flour for a cup of the wheat flour and serve it as muffins at a brunch.
Now, telling yourself something is healthy when it is only marginally healthier is certainly not the best habit. It probably won't help your waistline at all or aid in any of your New Year's resolutions (huh, what are those, it's, like, March, right?). But every once in a while, it is kind of fun. So while I won't encourage you to eat this for breakfast (I'm quite sure I never have), it's plenty fun to eat for dessert. So if a three-layer cake on a Tuesday night just seems a little wrong to you, just think Vitamin A; and sub out a cup of the white flour for the wheat if you must (which, incidentally, gives it a bit of earthiness I rather enjoy--all undeserved justifications aside).
The other nice thing about carrot cake, and yet another reason you can eat it on a Tuesday night if you darned well please is that, aside from the carrot shredding, it's an absolute breeze to put together (you don't even need to break out the beaters, just a bowl and a spoon). I shred my carrots in the food processor, which makes it a breeze for me all around.
And if you're still not convinced, let me say this: I know the best cream cheese frosting recipe ever. So there. Make it.
Carrot Cake
adapted from Blue Ribbon Recipes
Serves: many (probably about 30)
Prep time: 10 minutes (with food processor)
Cook time: 25 minutes
Cost: $1.90 (not bad for 3 layers)
(carrots: .75, oil: .24, sugar: .32, eggs: .40, flour: .18, other stuff: .01)
1 1/2 C oil
2 C sugar
4 eggs
1/2 tsp vanilla
2 C flour
3 tsp cinnamon
2 tsp baking soda
1 tsp salt
3 C grated carrots (just a bit shy of 1 lb)
Heat oven to 325. Grease three 9-inch pans and put wax paper on the bottoms, then grease again.
Mix oil and sugar. Mix in eggs and vanilla.
Sift flour, cinnamon, baking soda, and salt. Mix it into the creamed mixture. Add the carrots, a bit at a time so as to avoid getting a huge clump of them somewhere (your kids will never go for that).
Pour batter evenly into the cake pans. The batter will be shallow. I suppose you could probably get it into two pans (though I can't 100% guarantee that), but I like to have the extra frosting. I guess I'm a bit of a frosting lush. Don't tell, okay.
Bake for 22-25 minutes or until a fork comes out clean. Let cool for 10 minutes in the pans and then turn out on a rack (or some parchment paper or waxed paper on your counter top if you don't have a rack). Let cool completely and then frost.
 Cream Cheese Frosting
from The New Best Recipe Cookbook (with an orange cream cheese adaptation from me)
enough for 3 layers
Prep time: 10 minutes
Cost: 3.10
(cream cheese: 2.20, sugar: .40, butter: .70)
2 packages of cream cheese (16 oz. total), softened
10 Tbsp butter, softened
2 Tbsp sour cream
2 1/2 C powdered sugar
1 tsp vanilla
Beat together cream cheese, butter, and sour cream. Add vanilla. Beat in powdered sugar.
An option for Orange Cream Cheese Frosting:
Add the zest from one small orange and 2-3 Tbsp of orange juice to make orange cream cheese frosting.
PRINTABLE RECIPE
P.S. I didn't eat it for breakfast (I swear; no crosses count). I took it to my church party.

With some updated pictures.


(Here's the old pic for old time's sake.)
Let's get one thing straight. Carrot cake is not a health food. But it is one of those foods you can tell yourself is healthier. Especially if you sub out a cup of the white flour for a cup of the wheat flour and serve it as muffins at a brunch.
Now, telling yourself something is healthy when it is only marginally healthier is certainly not the best habit. It probably won't help your waistline at all or aid in any of your New Year's resolutions (huh, what are those, it's, like, March, right?). But every once in a while, it is kind of fun. So while I won't encourage you to eat this for breakfast (I'm quite sure I never have), it's plenty fun to eat for dessert. So if a three-layer cake on a Tuesday night just seems a little wrong to you, just think Vitamin A; and sub out a cup of the white flour for the wheat if you must (which, incidentally, gives it a bit of earthiness I rather enjoy--all undeserved justifications aside).
The other nice thing about carrot cake, and yet another reason you can eat it on a Tuesday night if you darned well please is that, aside from the carrot shredding, it's an absolute breeze to put together (you don't even need to break out the beaters, just a bowl and a spoon). I shred my carrots in the food processor, which makes it a breeze for me all around.
And if you're still not convinced, let me say this: I know the best cream cheese frosting recipe ever. So there. Make it.
Carrot Cake
adapted from Blue Ribbon Recipes
Serves: many (probably about 30)
Prep time: 10 minutes (with food processor)
Cook time: 25 minutes
Cost: $1.90 (not bad for 3 layers)
(carrots: .75, oil: .24, sugar: .32, eggs: .40, flour: .18, other stuff: .01)
1 1/2 C oil
2 C sugar
4 eggs
1/2 tsp vanilla
2 C flour
3 tsp cinnamon
2 tsp baking soda
1 tsp salt
3 C grated carrots (just a bit shy of 1 lb)
Heat oven to 325. Grease three 9-inch pans and put wax paper on the bottoms, then grease again.
Mix oil and sugar. Mix in eggs and vanilla.
Sift flour, cinnamon, baking soda, and salt. Mix it into the creamed mixture. Add the carrots, a bit at a time so as to avoid getting a huge clump of them somewhere (your kids will never go for that).
Pour batter evenly into the cake pans. The batter will be shallow. I suppose you could probably get it into two pans (though I can't 100% guarantee that), but I like to have the extra frosting. I guess I'm a bit of a frosting lush. Don't tell, okay.
Bake for 22-25 minutes or until a fork comes out clean. Let cool for 10 minutes in the pans and then turn out on a rack (or some parchment paper or waxed paper on your counter top if you don't have a rack). Let cool completely and then frost.

from The New Best Recipe Cookbook
enough for 3 layers
Prep time: 10 minutes
Cost: 3.10
(cream cheese: 2.20, sugar: .40, butter: .70)
2 packages of cream cheese (16 oz. total), softened
10 Tbsp butter, softened
2 Tbsp sour cream
2 1/2 C powdered sugar
1 tsp vanilla
Beat together cream cheese, butter, and sour cream. Add vanilla. Beat in powdered sugar.
An option for Orange Cream Cheese Frosting:
Add the zest from one small orange and 2-3 Tbsp of orange juice to make orange cream cheese frosting.
PRINTABLE RECIPE
P.S. I didn't eat it for breakfast (I swear; no crosses count). I took it to my church party.

Monday, March 14, 2011
Guest Post: Food Budget Crunch by Gary Foreman
Today we here at The Tasty Cheapskate are pleased to welcome our first ever guest blogger, Gary Foreman.
Gary is the editor of The Dollar Stretcher.com. The Dollar Stretcher came into my life over a year ago and I was surprised at the number of fresh, helpful, and down to earth insights it provided about living on the cheap (especially as opposed to those goofy "tips" articles that show up on the Yahoo homepage sometimes--you know, the ones that promise "Ten Ways to Cheapen Your Life" and then recommend that you ask your maid to come only twice a week or that you postpone your trip to Aruba). For more information about living on a bare bones budget, click here.
Food Budget Crunch
Dear Gary,
We're in a mess. I have a family of 4 to feed and only have $80 for the month. Can you provide any help?
Scared and Hungry
More and more people are facing the same problem that SAH has. How to feed their families on a tiny grocery budget. And, although it isn't easy, it can be done.
Start with what resources you already have available to you. What's already in your cupboard? Perhaps it isn't much, but everything that's edible helps.
Find any other sources for food that might be available to you. Don't be too proud to ask for help. There's a reason most places have a food pantry. Many churches and synagogues also have pantries. If you don't know how to find one, call a local church and ask them. Often they'll have a contact list for various agencies that can help people in need.
Check out Angel Food Ministry. They're able to provide a box of food worth approximately $65 for $30. There is no qualification required. Check their site to see if there's a location near you.
"Food Stamps" (or it's formal designation Supplemental Nutritional Assistance Program) is there to help families who need food assistance. Over 40 million people receive SNAP aid each month. You can find out more at the government website.
If your children are in school find out what lunch assistance is available. Knowing that they're eating well at noon will make your life a little easier.
You might also be able to trade some manual labor for food. Check with local farmers or fruit/vegetable stands.
Once you know what resources are available to you it's time to think about what to buy. You'll want to shop the perimeter of the store. The cheapest foods (and often the healthiest) are usually found along the side and back walls of the grocery store. Avoid all the prepackaged and processed foods.
Rice, potatoes, pasta and flour are all relatively inexpensive and filling. Use these items as the foundation of your meals. They're easy to cook and can be used in a variety of ways. For centuries they've been the main part of the working person's diet.
Every meal does not have to include meat. In fact, you'll need to resign yourself to the fact that meat will be an occasional treat during the month. Ask the grocery butcher when they mark down meat that's near it's expiration date for clearance. That's your best bet for affordable meats.
Study depression era strategies. Basic, filling foods fixed in an engaging manner. One example is Clara Cannucciari. She's a great grandmother who has a video series showing depression cooking. You can find one of her videos here. See if your local library has older cookbooks. Or cookbooks with traditional recipes.
In season vegetables offer nutrition and add flavor to your meals. Add them to potatoes, rice or pasta to create variety and interest to your meals.
Beans are an excellent, inexpensive source of protein. Not only are they cheap, they come in a variety of flavors. Buy them raw or dried and prepare them yourself. You can find instructions on the web or most cookbooks.
Also remember that soups offer a low cost meal. Start with whatever veggies you have and add potatoes, rice or noodles.
When you have very few dollars to spend, it's important to make your purchases count. So know how you'll use something before you buy it. Waste is not an option with a really tight food budget.
The task may seem very difficult, but be encouraged that others before you have successfully fed their families on a very tight budget. I'm sure that you can do it, too.

Subscribe to:
Posts (Atom)