Showing posts sorted by relevance for query raspberry filling. Sort by date Show all posts

Saturday, May 5, 2012

Chocolate Cake with Raspberry Filling


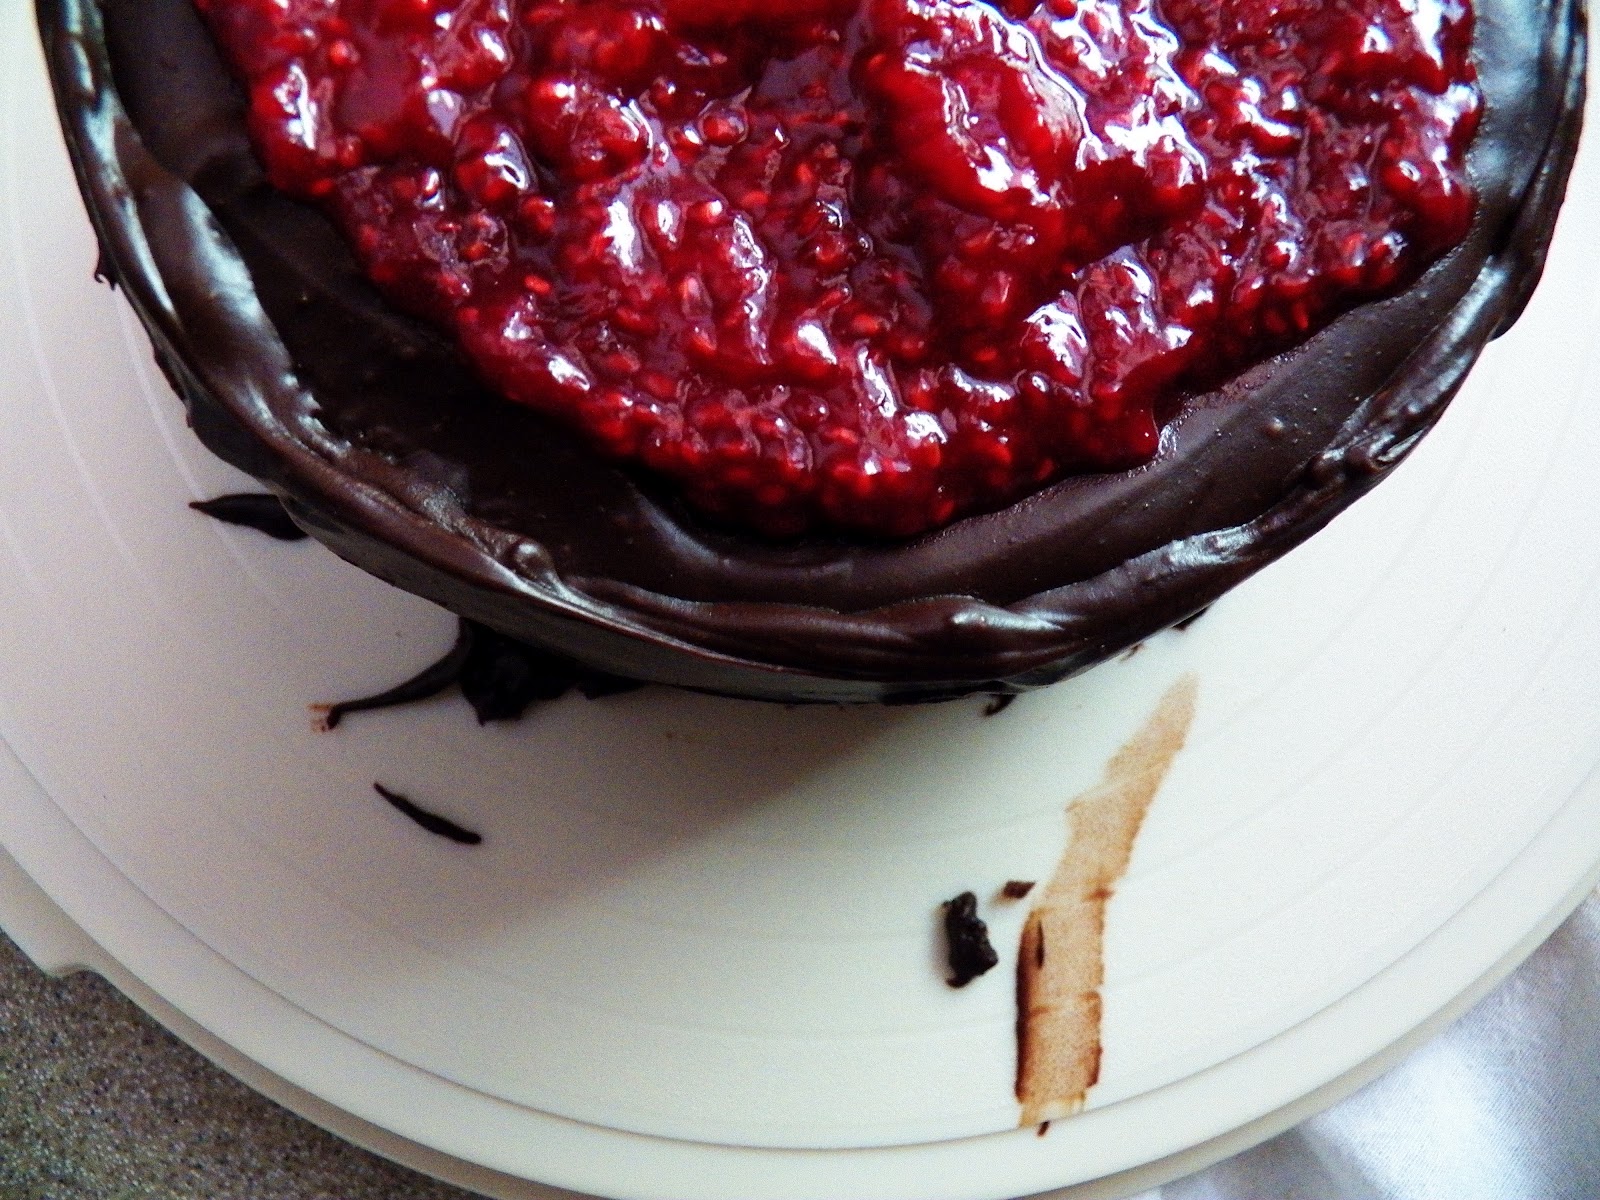
You have no idea how beautiful this cake is. My pictures could not even begin to do it justice (btw, could somebody tell me how to take a decent picture of red things).

(What? Professional photographers/food bloggers don't lick up their chocolate drippings? Fine, whatever.)

Usually I'm not one to go for the chocolate fruit combinations. I don't really care for the chocolate oranges at Christmastime or the Lindt chocolates with the raspberry/orange/whatever fillings. And those chocolate fountains meant to go with a plate full of strawberries. You may call me uncouth, but they're just not my thing (whatever; you can't call me uncouth; they have those things at Golden Corral now).

Nevertheless after my sister-in-law's testimonial about the amazingness of this cake, I decided to give it a try. It's a chocolate cake with a raspberry filling, which is then surrounded with chocolate ganache and then topped with more raspberry filling.

It was very good, even for those of us who don't love chocolate fruit combinations. Even for those of use who don't love cakes frosted with ganache. If you really can't bear the thought of mixing your five a day with your chocolate fix, know this: This recipe is worth your while if for nothing other than the amazing raspberry sauce. Seriously, so good. I actually think it would be even more butt kickingly good on this cake (or, uh, your morning yogurt).

Chocolate Raspberry Cake
adapted from Cupcakes by Elinor Klivans
Makes 18 cupcakes, 2 8-inch round cakes or 2 thin 9-inch round cakes
Prep time: 15-20 minutes
Cook time: 15-20 minutes

Note: I melt the butter because I believe it makes cakes moister. I don't know why, but I have great success with it. I highly recommend it.

3 oz unsweetened chocolate, chopped
1 C all-purpose flour
1/2 tsp baking powder
1/2 tsp baking soda
1/4 tsp salt
1/2 C (1 stick) unsalted butter, melted completely--if using salted, omit salt above
1 1/4 C sugar
2 large eggs
1 tsp vanilla
1/2 C sour cream
1/2 C water
1 C chocolate chips (optional; I didn't use these, but Kip's sister says it's an incredible addition)

Melt chocolate. I do this in a microwave in 20 second intervals, stirring at each interval. Stir until melted and smooth.

Sift dry ingredients and set aside.

In a large bowl, beat butter and sugar until smoothly blended and creamy, at least 2 minutes. On low speed, mix in melted chocolate. Add eggs one at a time, mixing until well blended. Add vanilla and beat until mixture looks creamy and the color has lightened slightly--a minute or two. Mix in sour cream until no white streaks remain. Add half the flour mixture and mix. Add water. Add remaining flour mixture and mix until just incorporated.

Bake at 350 for 15 minutes. Remove with fork or cake tester comes out with a few moist crumbs.

Remove cakes from pans after 10 minutes (I line my pans with wax paper and grease them well). Let cool.

Raspberry Filling
from Food

3 C raspberries
2 Tbsp cornstarch
4 Tbsp lemon juice
1/2 C sugar

Mix together and gradually bring to a boil, stirring until thickened.

Let cool completely before using on cake.

Milk Ganache

1 1/3 C chocolate chips
2/3 C milk

Combine in microwave safe bowl and microwave for 30 seconds. Mix. Microwave for 30 more and mix. Repeat until smooth. This should be thick but spreadable and thin enough to spread, but not so thin it will all drip off your cake. If it needs a little more milk, add it. I have a confession here. I measured out my ingredients for this and then forgot to write them down (because I enjoy self torture.) I think these are the measurements, but cannot guarantee it and I am not willing to go make a batch to see because then I will eat the batch and that will make me sad.

To Assemble:

Put 1/2 of the raspberry filling between your cake layers.

Cover cake with ganache. [Note: If I made this cake again, I'd put a thin layer of Kip's fudge frosting on it before I covered it with ganache.] Put it in the fridge for 30 minutes to let it set. Then add the rest of the raspberry filling to the top of the cake. Pretty huh?

PRINTABLE RECIPE

Saturday, June 11, 2011

Raspberry Breakfast Bars

Cheap Eat Challenge: Watch as our family of 6 eats, or tries to, on $6/day.


Thursday a friend showed up at my door with a bucket of raspberries. Hopefully you're lucky enough to have such a friend.

I wasn't sure the raspberries would make it into any prepared foods. Too many were ending up on children's faces (I trust that at least some of that fruit even made it all the way into their bellies). That night I stashed a couple cups in the freezer. And then I found a raspberry breakfast bar on smittenkitchen that looked so good I wanted it then--right then. If I'd had a genie nearby I would have skipped my wishes for millions of dollars and world domination and totally wasted my wishing on breakfast. I guess I'm that kind of person. Unfortunately, I had no genie available, so I made it happen myself today.


The bar was somewhat nutritious (you know that category, right), but I wanted to make it whole grain. That was the main change I made. I almost scaled back the sugar, but then thought better of it, which turned out to be a good thing. I do, wish, however, that I'd scaled back the salt somewhat as I found these bars a tinge on the too salty side. To my own surprise, I also wish I'd cut the lemon zest back. I love lemon and I think it's a great compliment to raspberries, but in this case, I thought it stood too strong against the raspberries. Below I'll put the measurements for what was as well as for what will be the next time I make these. Because there will be a next time. 

Raspberry Breakfast Bars
adapted from smitten kitchen
Makes 9x13 inch pan or about 32 bars
Prep time: 10 minutes
Cook time: 30 minutes
Cost: $1.72 plus cost of raspberries--let's say $5.00 total
(flour: .30, oats: .12, sugar: .35, butter: .45, lemon: .50, raspberries--get them from a friend:) because they'll cost you otherwise--probably $3-4)

Crust/Topping:
1 1/2 C whole wheat flour
1 C brown sugar (I used light; smitten kitchen did dark)
1 1/4 C rolled oats
3/4 tsp salt (I recommend 1/4-1/2 tsp)
3/4 tsp baking powder
1/2 tsp baking soda
1/2 tsp cinnamon
3/4 C (1 1/2 sticks) unsalted butter (if you use salted, omit the salt above), cut into pieces

For the raspberry filling:
1/4 C white sugar (if your raspberries are tart at all, take this up to 6 Tbsp)
1 Tbsp lemon zest (I recommend 1/2 Tbsp)
1/2 tsp cinnamon
2 Tbsp white flour
1 pound (about 4 C) raspberries
1/4 C lemon juice
2 Tbsp unsalted butter, melted but not still hot

Directions:


Grease a 9x13 inch pan and put a piece of parchment paper in the bottom so that it drapes over the short ends of the pan (this makes it easy to take your bars out--you can get away with not doing it if you don't have parchment paper).

For crust/top:

Combine dry ingredients in food processor and give a pulse or two to combine. Add butter chunks and pulse until it's a crumb-like texture. (You can do this by hand with a pastry cutter or just by repeatedly mashing with your fingertips or a fork if you don't have a food processor.)

Reserve 1 1/2 C in a separate bowl to use later for topping. Put the rest in pan and press it in with your fingertips. Bake for 12-15 minutes at 350 degrees. Allow to cool (at least until you can touch the sides of the pan with your fingers).

For the Filling:

Whisk together sugar, zest, cinnamon, and flour. Add raspberries and lemon juice, and melted butter (you probably could get away with skipping that butter if you're trying to healthify this more). Gently toss.

To finish:

Put your raspberry mixture evenly over your crust. Sprinkle remaining 1 1/2 C crumb mixture over top.

Bake for about 30 minutes or until the top is golden and the raspberry part is bubbling or at least making a show of looking jam-like.

Allow to cool before cutting.

PRINTABLE RECIPE


Monday, August 24, 2015

Lemon Layer Cake with Lemon Butter Frosting


Because why wouldn't I post two lemon cakes this summer?

And you should absolutely make them both. The first was a simple little sheet cake--a butter lemon cake with an interesting and wonderful frosting. This one is a perfectly moist, perfectly textured layer cake (that, P.S., could also be made as a sheet cake if you wanted to), which uses two oils as its fat, and has a smooth lemon butter frosting. I took it to a baby shower and the next day when I went to take a picture, I just had this teeny tiny little piece left. After the pictures, it was not long for this world.


I let my daughter frost this for me, and she did a fabulous job. However, if I knew I was taking this to a group of coconut lovers, I would have sprinkled toasted coconut on the frosting, and I think it would have made for a fabulous compliment to the lemon cake. Another nice addition might be a raspberry drizzle or raspberry filling.

I must tell you that this calls for pure lemon extract, which is not cheap. The cheapskate in me so so badly wanted to skip it, but since this was for a friend, I didn't, and I'm really glad I didn't because I don't think it would have been the same without it. Even adding lemon juice wouldn't have made for a punchy enough lemon flavor, or so I think. Sorry, friends. If I ever find a good substitute, I'll let you know.

Lemon Layer Cake with Lemon Butter Frosting
adapted from Rock Recipes
serves: 20 ladies and probably fewer men
Prep time: 15-20 minutes
Cook time: 30-35 minutes (then you'll have to cool it before frosting it)
Cost: $4.90 (which is only about $.25/serving depending on whether you're serving ladies, gentlemen, or teenagers)
flour: .30, sugar: .30, oil: .20, coconut oil: .50, extracts: .70, eggs: .30, buttermilk: .40, lemon: .20 powdered sugar: .90 butter: 1.00, other stuff: .10

2 3/4 C all-purpose flour
1/2 tsp baking soda
1 1/2 tsp baking powder
1 tsp salt
1 1/2 C sugar
2/3 C vegetable oil (I used canola)
1/3 C coconut oil
1 tsp vanilla extract
2 tsp pure lemon extract
3 large eggs
1 1/2 C buttermilk
zest of one largish lemon, finely chopped

For the frosting:

4 C powdered sugar
1 C butter
1 tsp pure lemon extract
1 tsp minced lemon zest (optional--this absolutely makes the frosting more lemony; however, it does add tiny bumps in the frosting. That doesn't bother me at all, but if you know it will bother you, don't add it.
2-4 Tbsp milk

Grease and flour 2 nine-inch round cake pans. Line the bottom with circles of parchment paper or wax paper.

Combine flour, baking soda, baking powder, salt, and sugar.

Beat together oil, coconut oil, vanilla, and lemon extract.

Beat in the eggs one at a time.

Mix in lemon zest.

Alternate adding dry ingredients with the buttermilk (so dry ingredients, some buttermilk, dry ingredients, some buttermilk, dry ingredients). Don't overmix this. Beat or mix it just until the ingredients are combined and not lumpy.

Bake at 325 for 30-35 minutes or until a toothpick (or blade of any variety) comes out clean or with a few moist crumbs attached.

Allow to cool in pans for 10 minutes, then turn them out on a rack to cool completely.

For the frosting:

Melt the butter, or mostly melt the butter. Beat in sugar, zest, and lemon extract. Now beat in the milk, starting with a couple tablespoons and then adding more if the frosting is too stiff.

When your cake is cool, frost it.

Thursday, January 31, 2013

Lemon Buttercream Frosting and an Orange Cake to Put it On


Call me old fashioned, but I really believe that a buttercream frosting should contain the elements butter and cream. Often these days they're made with shortening and, well, shortening. Blah.


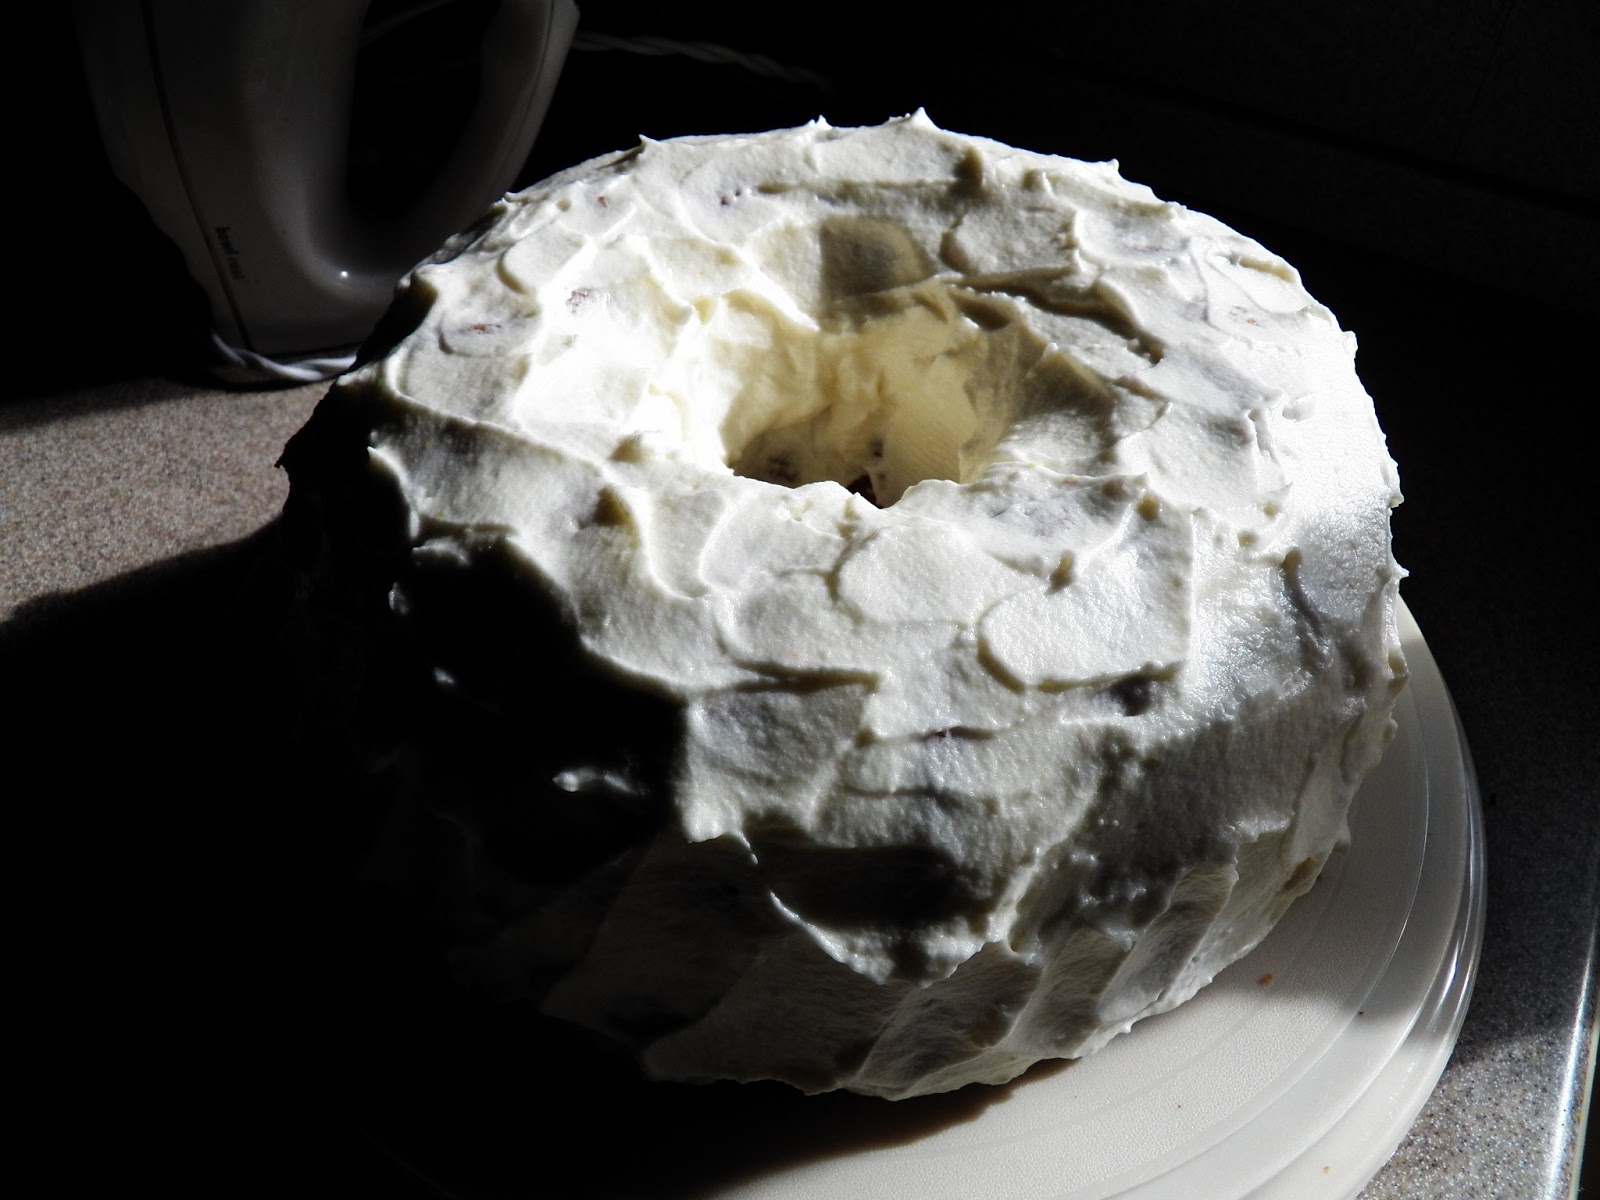
Saturday was a birthday party for one of my dearest friends. The cake needed to fit the occasion. What do you give to one of your dearest friends on her special day? You give her orange cake with lemon buttercream frosting and raspberry sauce. (True, the sauce is missing from these pic's. I only put it on just before.) It was really really delicious. I hope she felt the same way. I, myself, checked tact and self-control at the front door and went back for a second piece. 


Lemon Buttercream Frosting
frosts 1 bundt cake
Prep time: 10 minutes
Cost: $2.10
butter: .50, cream: .50, powdered sugar: .80, lemon: .30

6-8 Tbsp butter
4-8 Tbsp cream
1 lb powdered sugar
1 lemon, zested and juiced (you'll use the zest and 1-2 Tbsp juice)

Melt butter. Add powdered sugar, lemon zest, lemon juice and beat. Add cream, starting with 4 Tbsp and adding more as needed (if it's still too thick add more cream or 1-2 Tbsp milk). Beat. It'll get nice and fluffy.

Then, if we wish to make something as divine as a best friend's birthday, make this cake in bundt form. Let it cool, frost it, and add this raspberry sauce (I halved the recipe and drizzled it on top--and, yes, it's called 'filling' in its original post, but totally drizzle-able). One of the best cakes I've ever made. Which is saying something since this is usually a chocolate cake house.

PRINTABLE RECIPE


Wednesday, February 12, 2014

Death by Chocolate Mousse--Potentially Paleo


No. Really. This is seriously seriously rich. It can also be very very dark (but you can lighten it up if you want by using semi-sweet or possibly even milk chocolate chips).

It is surprisingly not coconut-y. There's a hint of it to be sure, but just a faint faint hint. If you want more coconut, you can add some coconut extract or top that whipped cream with some shredded coconut. Or you could whip the thick part of a can of coconut and make coconut cream and top it with that. Kip doesn't like coconut, so I was glad that that flavor wasn't too intense.

The best thing about it is that it is so so so stupidly easy to make. Sometimes I think that I should have called this blog "Stupidly Easy" instead of "The Tasty Cheapskate." (Seriously, we're looking at 5 minutes plus chill time.)

Or maybe the best thing about it is that it could be considered somewhat virtuous as a dessert--dark chocolate and coconut milk. It's gluten-free and can be paleo, dairy-free or vegan if you use vegan chocolate chips.

Or maybe the best thing is that a very very little can be satisfying. I poured this into four 4-oz ramekins. I wish I'd poured it into 8 miniature vessels of some type (I'm thinking Chinese-style tea cups would have been gorgeous).

Happy Valentine's Day!

Death by Chocolate Mousse
adapted from The Darling Bakers
Serves 4-8
Prep time: 5 minutes
Chill time: At least an hour
Cost: $1.70 (or about $.42/serving)
coconut milk: .75, chocolate chips: .80, egg: .10, other stuff: .05

Note: Doubling would be nice since then you could use a larger blender and a can of coconut milk instead of a partial can. Just keep in mind that this dessert is intense and filling.

Note on chocolate chips: I used 60% Ghiradelli chips and got a very dark final result (I looove dark chocolate.) I think this was intended for semi-sweet chips and I even think that milk chocolate chips would work great.

Note on extracts: I'm sure you could use some type of orange (probably even a Tbsp or two of orange juice) or raspberry or even mint as well, but I didn't want any flavors that would detract from the chocolate.

2/3 C coconut milk
1 C chocolate chips
1 egg
1/2 tsp vanilla extract
1/8 tsp almond extract
good pinch sea salt

Heat coconut milk to near-boiling (I did this in microwave).

Meanwhile blend chocolate chips, egg, and extracts in blender (it'll kind of chop the chips small and beat that egg a bit). Note: With such a small amount you'll likely need a smaller blender. I used my Magic Bullet and that worked. I'm not sure a large blender would work with the small amounts.

When your coconut milk is nice and super hot, pour it into the blender. I was worried it might lump the egg up, but it totally didn't. Pulse, then blend until it's smooth and creamy.

Pour into your tiniest, cutest dishes and let chill.

After it's cool, you can top it with homemade whipped cream or homemade whipped coconut cream.

PRINTABLE RECIPE

Monday, March 19, 2012

Creme Chocolate or Baked Chocolate Custard


This chocolate defies naming. It's like part mousse, part pudding, part pots de creme. I believe the blog from whence they were inspired called them Creme Chocolate, which sounds lovely and romatic. What they are is sort of a very chocolate-y baked chocolate custard. And they are GOOD. (And pretty easy too.) Though I must warn you that it is very dark.

I made tiny ones in four 4-oz. ramekins, thinking that would help me with portion control. And then they were so good I started in to a second one and then I kind of regretted it, because these are pretty darn filling. So control yourselves, but indulge yourselves too. Oxymoron? If you do like me perhaps, but if you can ignore my bad example and stick with that one ramekin, I think you can have yourself the best of both worlds.

Baked Chocolate Custard
adapted from Arctic Garden Studio
Prep time: 10 minutes
Cook time: 15-30 minutes (depending on whether you make them large or small)
Cost: $1.05
milk: .08, cream: .25, chocolate: .50, eggs: .20, other stuff: .02

Note: If you don't have any bittersweet chocolate on hand, you can use 2 oz. chocolate chips and 1/2 oz. unsweetened chocolate. I'm sure you can just go with the (semi-sweet) chocolate chips as well, but I do love me some darker chocolate. Semi-sweet is usually about 45-50% cocao. If you do 2 oz semi-sweet + 1/2 oz unsweetened you get chocolate with about 60% cocao. If you do 1.5 oz. semi-sweet with 1 oz. unsweetened, you'll wind up with the equivalent of about 70% cocao.

Another Note: You can double up the vanilla if you don't have almond extract on hand. I'm guessing you can also use orange extract or raspberry extract, or anything that sounds like it might go well with chocolate.

1/2 C whole milk
1/4 C cream
2.5 oz bittersweet chocolate, chopped
1 Tbsp sugar
2 large egg yolks
1/4 tsp vanilla extract
1/4 tsp almond extract
1/4 tsp cocoa powder
dash salt
whipped cream for garnish if desired

Preheat oven to 300.

Warm milk and cream and add chocolate and sugar. I did this in the microwave, but you could do it on the stove top as well. If you do it in the microwave, microwave all ingredients at 20-30 second intervals, stirring in between. If you do it on the stove, bring cream and milk to a simmer and then add the chocolate and sugar and stir until melted. Set aside to let cool slightly.

In another bowl whisk together the rest of the ingredients (except the whipped cream for garnish of course).

Gradually add the chocolate mixture, whisking briskly as you add it to the egg mixture. (You don't want your eggs cooking, so just keep whisking. Get your spouse to help if you need to. If you don't have a spouse on hand, whisk just a bit of chocolate in and stop. Then add a bit more. This is called tempering and it will keep your eggs from cooking as you add the chocolate.)

Once you've got your chocolate and egg all mixed together, you can pour the mixture through a fine-meshed sieve if you want to be sure to remove any chocolate and/or egg bits that might have escaped your careful whisking. However, I skipped that part since I am lazy. Now, I have to tell you that at this point, my Creme Chocolate didn't look too promising. It seemed thin and like it would separate somehow upon cooking. I sallied forth anyway and I'm glad I did.

Pour your mixture into 2-4 ramekins.

Bake in a water bath for 20-30 minutes. (Note: A water bath means that you put your ramekins in a shallow roasting pan and then pour hot water in the roasting pan--not the ramekins--so that it goes about halfway up the ramekins. Then put the pan in the oven. This is supposed to make your custard smoother and silkier and I believe it does. However, I must confess that I missed this little step--whoops--and just put my ramekins in the oven on a pan without the water bath. They still came out great, although they cooked faster (they were small servings and took only about 15 minutes).

Take them out of the oven when they are almost set in the center (meaning when they have just the teeniest bit of jiggle left right there in the center). This will be between 12 and 30 minutes depending on whether you did bigger servings or smaller ones and on whether you carelessly missed steps or not. They'll firm up as they sit. I'm guessing they're between 160 and 180 degrees, although I didn't take the temperature of mine since they were definitely done when I checked them and I just got them out as fast as I could. (Remember--I forgot the water bath and made the smaller sized ones.)

I should tell you that when they came out they still didn't look like much. I was sure they'd be grainy and gross, but they were dream dream dreamy, and this despite all my efforts to mess them up. Make them. Share them. Love them.

Serve cool with whipped cream if desired, though they're really great without it too.

PRINTABLE RECIPE

Linked to Sweets for a Saturday

Monday, December 7, 2015

Pecan Brie: Dumb Easy Appetizer


Appetizer, party contribution, whatever--this brie is dumb easy, looks like angels made it, and can be eaten with crackers or fruit. It's also delicious, creamy, oozy, etc. It takes only minutes to throw together and then about 20 minutes to cook.

As for cost, you can often find brie for cheaper at this time of year or in discount grocery stores (like Aldi) where it's not sold all year. Additionally, it's super filling and packs a nice caloric punch, so you're getting plenty of caloric bang for your buck. Which is totally what everyone is going for at this time of year, right? (um, right?)


Pecan Brie
adapted from Hobo Kitchen
prep time: 3 minutes
cook time: 20-25 minutes
Cost: $3.00
brie: 2.00 (Aldi price), pecans:  .70, other stuff: .30

1 round (or wedge) Brie cheese, rind removed from top (or whole thing if you want) (I believe it was 14 oz.)
1 tsp butter, soft (and optional; I think this would still rock without it)
1 Tbsp honey (alternately, I think some raspberry jam would rock this)
1 Tbsp balsamic vinegar
1/4 C chopped pecans

First of all, remove the upper rind from your Brie (you just cut it off with a knife). You can remove it from all sides (not just the top) if you like. It's edible, but not something everyone loves.

Secondly, pack that Brie into an oven-safe dish that holds it snugly. It's going to melt and get gooey and if you put it in a big old casserole dish, it will just ooze and bleb all over the place. Not the end of the world because we're talking about cheese here, but your presentation will bleb right along with it. So find a snuggly dish if you can.

Put the Brie in, top with with the butter, add pecans, then drizzle with honey and balsamic vinegar.

Bake at 375 for 20-25 minutes or until it's hot and gooey.

PRINTABLE RECIPE

Ebates Reminder: (yeah, I'm totally going to be obnoxious about this; thanks for asking). I signed up for Ebates 1 1/2 weeks ago and have already made $12. No, that's not a ton of money, but it's money I've earned by doing abso-freaking nothing except Christmas shopping as I normally would online (can I just tell you how much better this is than doing surveys that take an hour and pay you $1.12--hint: it's ten trillion times better). You can earn free easy money too. Do it through my link and we'll earn free money together: FREE MONEY

Saturday, October 19, 2013

Homemade Greek Yogurt for Dummies (Crock Pot)


I mean, really. It's so easy it will change your life forever.

And it will save you a stinking butt load of money if you like Greek yogurt. For $2 (TWO DOLLARS!) I got no less than 10 cups (TEN CUPS!) Greek yogurt--that's $.20/cup if you're math impaired (don't worry--math unnecessary for this recipe; brains in general unnecessary for this recipe). Twenty cents for creamy, perfect Greek yogurt.

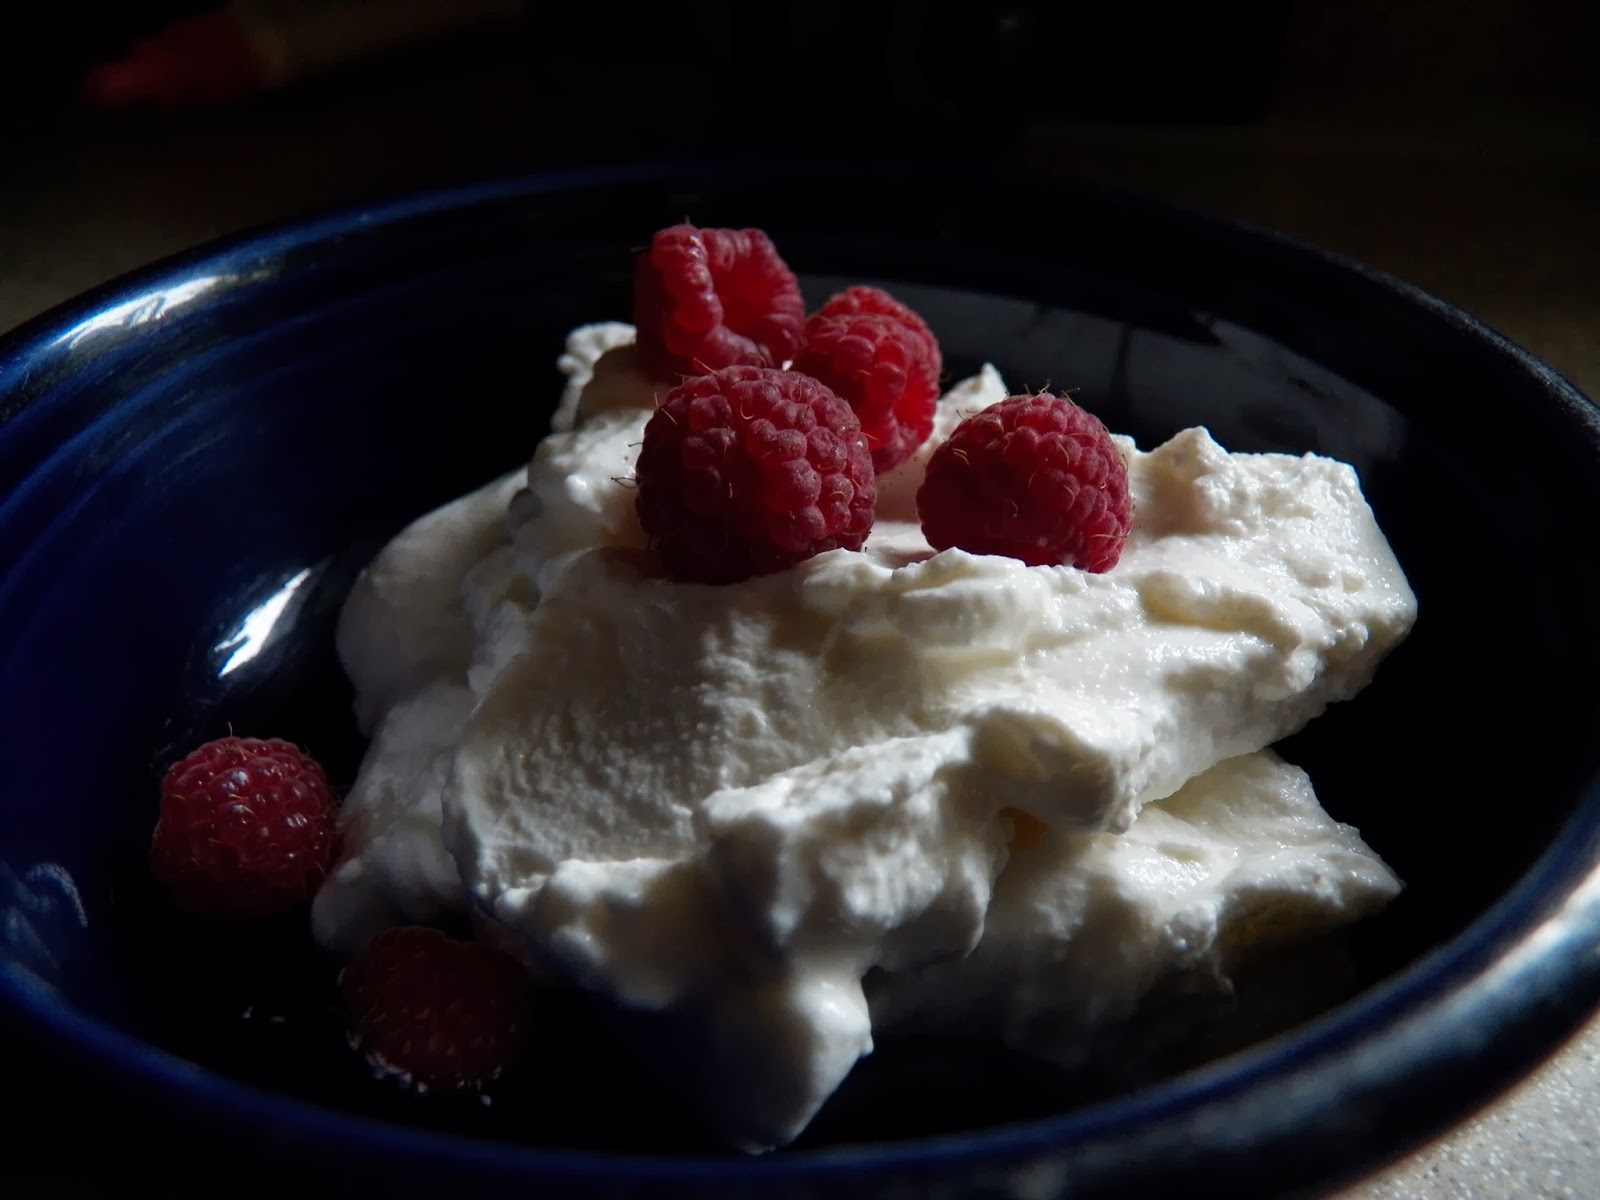
You can eat it with anything. I like it for breakfast with some jam mixed it. My kids like it best blended with jam and put into popsicle molds and frozen. My friend serves it as a dessert. She mixes it with jam and then adds a squirt of whipped cream to the top. But don't think it can only be served sweet. This thick Greek yogurt can be used as a substitute for sour cream and cream cheese. It can be used in savory dips, for ranch dressing, with tacos.

And in case you missed the whole Greek yogurt bandwagon (or were maybe too poor to buy a ticket), Greek yogurt is awesome and loveable because it is a) delicious and creamy, b) higher in protein, lower in sugar (lactose), and lower than sodium than regular yogurt. And did I mention creamy awesomeness? It's also just way versatile--it can really be subbed for a lot of things.

Let me say that making yogurt is not entirely new to me. I even have a yogurt maker (which I may now sell) that has cute little cups with lids. I used it faithfully when we lived in California, but when we moved here, it became cost INeffective. I couldn't find small amounts of plain yogurt and after I'd bought 32 oz of plain yogurt, well then it seemed silly to bother making little cupfuls of yogurt. And my homemade yogurt always came out somewhat runny. This is true of yogurt. Most (if not all) of what we find in the store has been artificially thickened--cornstarch and gluten are both in Dannon. Homemade yogurt tends to be thinner. Real Greek yogurt, on the other hand, is thick because much of the whey has been strained out of it. But because of that, it is often very expensive. Thus, for the last several years I haven't made my yogurt; I've just bought it. Until the fateful day when my friend (the dessert yogurt making one) brought over some yogurt with raspberry jam in it. It was better than ice cream. Oh, yes, it was. Thick, creamy, and beautiful. And it had cost her almost nothing. And it had been stupidly easy. Now that's what I'm talking about. Because many of the other homemade yogurt recipes I knew of (the ones without the handy yogurt-maker) seemed hard. There seemed to be lots of variables that could cause it to fail. Some required you to double boil your milk (I double boil nothing, people, nothing). Some gave detailed instructions for putting it in a cooler or oven and then keeping it consistently warm but not hot. If you got too cool or too hot, you'd wind up with curdled, runny nasties instead of yogurt. Yes, it was all too frightening. I needed fail proof. I needed dummy proof. I needed distracted mom proof. My friend provided that.

She had used a pot to make the yogurt. You can too if you don't have a crock pot. A regular pot works great, but it requires more of your attention. A crock pot, on the other hand, requires only a one-minute attention span and perhaps and IQ of 32 or so.

Now, what do you do? Let me pull back the curtain so you can be amazed.

1. Put 1 gallon whole milk into your crock pot. Put lid on. Heat until 180 degrees. This should take between two and four hours (depending on your crock pot). If you don't have a thermometer (though one is useful), it will be bubbly/foamy all over on top without actually boiling.
2. Remove lid and let cool to 110-115 degrees (if you don't have a thermometer, this will feel warm when you stick your finger in, but not hot--this is the temperature you'd kind of want to get baby formula to--warm, but nothing that would scald a baby's throat).
3. Add 1/2 C PLAIN yogurt and whisk it in. (I add yogurt to a small amount of milk and whisk in order to keep it from lumping up. Then I put that into the big pot of milk and whisk.)
4. Put lid back on.
5. Put crock pot in oven for 6-8 hours. You don't have to heat your oven or leave the oven light on. You don't have to do ANYTHING. The crock pot provides natural insulation, so it doesn't cool too quickly and the oven provides a space to trap the necessary warmth for your yogurt to yogurtify (it should be kept at a fairly stable 110 degrees; it does this naturally in a crock pot in the oven, so don't worry). That said, I would not recommend you put it into a cold oven (not a problem for us in the summer, but in winter it gets chilly around here). If your oven is cold, turn it on for 1 minute BEFORE you put the yogurt in. Then turn it off. Then put the yogurt in. (Ah, now the IQ requirements have moved up to 45). It will need 6-8 hours to yogurtify. It's nice if you can time this overnight. If you do it during the day, you may want to put a little post it note on your oven that says, "Do not turn on." I do this (yes, I do) because if you or someone you love comes in and decides to make cookies and pre-heats the oven before realizing there's yogurt in there, your yogurt will be ruined and you will be sad.
6. When you take it out, you'll have regular yogurt. Reserve 1/2 C of this for your next batch of yogurt and put that 1/2 C in the fridge.

 (It will look like this.)


7. Now: You can eat the rest of the yogurt regular-style if you want (it was actually a little thicker than that which my yogurt maker used to make). But I HIGHLY recommend straining it and making Greek yogurt (because it's awesome, that's why). Get a tea towel. Put it over a colander, and strain your yogurt. You can do this in the sink if you don't want the whey. Or you can strain it over a pan or large pot/bowl if you want the whey (Note: Whey can be used as a milk or buttermilk substitute in some recipes. It works well in muffins and things like that. That said, I throw my whey away most of the time (unless I know I'm making muffins or something soon). Lazy, I know. Straining will take between two and six hours depending on how thick you want your yogurt. I like mine thick. You might give it a stir after 2 hours to get it to strain more quickly.

And you're done. You will have a TON of Greek yogurt. In Evansville, we can currently get milk for $1.69 at Aldi. And then you'll need a bit of plain yogurt as a starter. Greek yogurt from the store occasionally goes on sale for $1.00/6 oz., but is usually much more. The nice brands can cost as much as $5.00(ish) for 16 oz. or so.

Now to answer some questions:

1. Do I need an instant read thermometer? No, but it is helpful; it takes any and all guesswork away from the process. And you will pretty much earn back the cost of your $9 thermometer in the first yogurt making, so it's a reasonable purchase. Still you don't have to have one. You just might need an IQ slightly higher than 32.
2. What will I do with all that yogurt? The sky is the limit. If you make this stuff, you can stop buying yogurt, sour cream, and (in some cases) cream cheese. You can make amazing smoothies and popsicles. You can do tons of stuff with it. 
3. Do I have to use whole milk? Probably not, but I always do. Still, I'm pretty sure you can make it with any type of cow's milk . However, I won't vouch for taste. True Greek yogurt is whole fat. It's only us Americans who've freaked out about that and developed lower fat versions. It is my opinion that skim Greek yogurt isn't really Greek yogurt at all. It is skim, strained yogurt. Eat it if you want. But my other opinion is that fat (without a lot of sugar) is NOT the enemy. I think natural fats are healthy and filling and great.
4. Why do I heat it and then let it cool? I don't have a complete scientific answer for you. All I know is that if you heat it to 180 you wind up with thicker yogurt than if you don't. I imagine you don't have to heat it that much. I know there are even raw yogurt recipes out there. You'll just likely end up with thinner yogurt. Of course, you'll be straining it, so will still end up with thick Greek yogurt--you'll just have a bit less of it because more will have strained out.
5. How do I make it on the stove top? Let's say you don't have a crock pot. You can still make this stove top. It's best to do when you have other jobs to do in the kitchen because it takes a while to heat and needs to be stirred occasionally so you don't want to burn on the bottom. (You can cook it faster, but you'll have to stir frequently or even constantly so it doesn't burn on the bottom.) Also, you'll want to make it in a heavy pot. The time I made it on the stove top, I used a porcelain-covered Dutch oven pot (WITH A LID). You need to do this because when you put it in the oven, it needs a sort of heat-holding pot. Otherwise it will cool too quickly and not set properly. I suppose you could use a normal pot and insulate it with towels or something, but for me the IQ requirements and fail factor get too high with that.
6. Can I make less? Probably. The problem you're going to come up against with this no fail method is that if you only have a little milk/yogurt in your pot, it will cool off faster. If it cools off too fast in your oven, you'll wind up with runny, curdled mess, not yogurt. If you really really want to make less, I recommend putting it in a small cooler instead of an oven. Or you might just have to babysit your oven a bit more and turn it on here or there throughout the setting process to ensure that your yogurt doesn't get too cool. Anyway, I'd really encourage you to make more simply because yogurt lasts a long time, which leads to...
7. How long does it last? I don't know. Ha. Because it's never gone bad on us and we've kept it in the fridge for upwards of two weeks. I imagine it would last a good month, maybe two, but can't promise that. I will try to do a little experiment next time I make yogurt and set some aside and see how long it takes for it to go bad.

Monday, February 5, 2018

Crockpot Greek Yogurt for Dummies

BEST OF THE TASTY CHEAPSKATE 


I mean, really. It's so easy it will change your life forever

Before I begin with this INCREDIBLY LONG post, let me say that this is super easy. In a nutshell, this is what you do. 
1. Heat 1 gallon milk in crock pot to 180 degrees.
2. Let cool to 120 degrees. 
3. Whisk in 1/2 C yogurt. 
4. Put lid on crock pot and put crock pot in oven (an oven that is OFF). 
5. Let sit for 6-10 hours in oven. 
6. Strain through tea towel to desired thickness. 

But below I've detailed all those steps and tried to trouble shoot and everything. 

(Note: If you want something EVEN EASIER that doesn't involve actually making yogurt, scroll to the bottom for a trick to make normal store bought yogurt into Greek yogurt.) 

Now on to the post. 
Besides being life-changing in every way, this yogurt will save you a stinking butt load of money if you like Greek yogurt. For $2 (TWO DOLLARS!) I got no less than 10 cups (TEN CUPS!) Greek yogurt--that's $.20/cup if you're math impaired (don't worry--math unnecessary for this recipe; brains in general unnecessary for this recipe). Twenty cents for creamy, perfect Greek yogurt.

You can eat it with anything. I like it for breakfast with some jam mixed it. My kids like it best blended with jam and put into popsicle molds and frozen. My friend serves it as a dessert. She mixes it with jam and then adds a squirt of whipped cream to the top. But don't think it can only be served sweet. This thick Greek yogurt can be used as a substitute for sour cream and cream cheese. It can be used in savory dips, for ranch dressing, with tacos.

And in case you missed the whole Greek yogurt bandwagon (or were maybe too poor to buy a ticket), Greek yogurt is awesome and loveable because it is a) delicious and creamy, b) higher in protein, lower in sugar (lactose), and lower than sodium than regular yogurt. And did I mention creamy awesomeness? It's also just way versatile--it can really be subbed for a lot of things.

Let me say that making yogurt is not entirely new to me. I even have a yogurt maker (which I may now sell) that has cute little cups with lids. I used it faithfully when we lived in California, but when we moved here, it became cost INeffective. I couldn't find small amounts of plain yogurt and after I'd bought 32 oz of plain yogurt, well then it seemed silly to bother making little cupfuls of yogurt. And my homemade yogurt always came out somewhat runny. This is true of yogurt. Most (if not all) of what we find in the store has been artificially thickened--cornstarch and gluten are both in Dannon. Homemade yogurt tends to be thinner. Real Greek yogurt, on the other hand, is thick because much of the whey has been strained out of it. But because of that, it is often very expensive. Thus, for the last several years I haven't made my yogurt; I've just bought it. Until the fateful day when my friend (the dessert yogurt making one) brought over some yogurt with raspberry jam in it. It was better than ice cream. Oh, yes, it was. Thick, creamy, and beautiful. And it had cost her almost nothing. And it had been stupidly easy. Now that's what I'm talking about. Because many of the other homemade yogurt recipes I knew of (the ones without the handy yogurt-maker) seemed hard. There seemed to be lots of variables that could cause it to fail. Some required you to double boil your milk (I double boil nothing, people, nothing). Some gave detailed instructions for putting it in a cooler or oven and then keeping it consistently warm but not hot. If you got too cool or too hot, you'd wind up with curdled, runny nasties instead of yogurt. Yes, it was all too frightening. I needed fail proof. I needed dummy proof. I needed distracted mom proof. My friend provided that. 

She had used a pot to make the yogurt. You can too if you don't have a crock pot. A regular pot works great, but it requires more of your attention. A crock pot, on the other hand, requires only a one-minute attention span and perhaps and IQ of 32 or so.

Now, what do you do? Let me pull back the curtain so you can be amazed.

1. Put 1 gallon whole milk into your crock pot. Put lid on. Heat until 180 degrees. (Note: I recommend heating it on low. You can heat it on high, but sometimes that means the bottom will get a little too hot, which is--honestly--fine, but sometimes it makes your yogurt come out browner in color.) This should take between two and four hours (depending on your crock pot). If you don't have a thermometer (though one is useful), it will be bubbly/foamy all over on top without actually boiling.) Note: If you get this too hot, it's okay. It does turn into a browner colored yogurt, but tastes normal, unless you were to actually burn the bottom, which I never have in a crock pot.)
2. Remove lid and let cool to 110-120 degrees (if you don't have a thermometer, this will feel warm when you stick your finger in, but not hot--this is the temperature you'd kind of want to get baby formula to--warm, but nothing that would scald a baby's throat). Note: It will sometimes form a skin. My kids hate this because they claim it makes chunky bits in the finished product, so I take a slotted spoon and scoop it off. 
3. Add 1/2 C PLAIN yogurt and whisk it in. (I add yogurt to a small amount of milk in a bowl and whisk in order to keep it from lumping up. Then I put that into the big pot of milk and whisk.)
4. Put lid back on.
5. Put crock pot in oven for 6-10 hours. You don't have to heat your oven or leave the oven light on (though you can and it makes for a steady, warm temperature). You don't have to do ANYTHING. The crock pot provides natural insulation, so it doesn't cool too quickly and the oven provides a space to trap the necessary warmth for your yogurt to yogurtify (it should be kept at a fairly stable 110 degrees; it does this naturally in a crock pot in the oven, so don't worry). That said, I would not recommend you put it into a cold oven (not a problem for us in the summer, but in winter it gets chilly around here). If your oven is cold, turn it on for 1 minute BEFORE you put the yogurt in. Then turn it off. Then put the yogurt in. (Ah, now the IQ requirements have moved up to 45). It will need 6-10 hours to yogurtify. It's nice if you can time this overnight. If you do it during the day, you may want to put a little post it note on your oven that says, "Do not turn on." I do this (yes, I do) because if you or someone you love comes in and decides to make cookies and pre-heats the oven before realizing there's yogurt in there, your yogurt will be ruined and you will be sad. 
A few notes: 
Note #1: Since the original post, I have legit turned the oven on and forgotten I had yogurt in there. Guess what? It was still okay. The yogurt didn't have enough time to get too hot in the preheat stage. Just get it out of there as soon as you remember. 
Note #2: Occasionally, for reasons only the universe understands, my yogurt comes out either very thin, or a little clumpy. Who knows... Imprecise temperature, atmospheric shifts, unhappy yogurt gods. But the great thing is that once strained, this yogurt is still delicious. If it's extra thin, you'll have a little more whey and less yogurt--but still a lot). And the clumps won't matter once it thickens.) 
6. When you take it out, you'll have regular yogurt. Reserve 1/2 C of this for your next batch of yogurt and put that 1/2 C in the fridge.

 (It will look like this.)


7. Now: You can eat the rest of the yogurt regular-style if you want (it was actually a little thicker than that which my yogurt maker used to make). But I HIGHLY recommend straining it and making Greek yogurt (because it's awesome, that's why). Get a tea towel. Put it over a colander, and strain your yogurt. You can do this in the sink if you don't want the whey. Or you can strain it over a pan or large pot/bowl if you want the whey (Note: Whey can be used as a milk or buttermilk substitute in some recipes. It works well in muffins and things like that. It's also good in smoothies. I usually save a cup or two because that's all I use. And I throw it away in a week if I haven't used it by then. Straining will take between two and six hours depending on how thick you want your yogurt. I like mine thick. You might give it a stir after 2 hours to get it to strain more quickly. 

I really love mine thick (almost as thick as cream cheese), but the great thing about this recipe is that you can get it to any thickness you like. Here are some pictures from another post on cheater Greek yogurt I did (with a much smaller amount of yogurt). 
 
(Before)

(After)

(See how super thick it CAN get if you want it to.)

Leave it for 8-24 hours and it will get super thick--to the consistency of a soft cheese. You can then use it as a substitute for cream cheese (it has more protein and more healthy bacterial cultures.)


And you're done. You will have a TON of Greek yogurt. In Evansville, we can currently get milk for $.99 at Aldi. And then you'll need a bit of plain yogurt as a starter. Greek yogurt from the store occasionally goes on sale for $1.00/6 oz., but is usually much more. The nice brands can cost as much as $5.00(ish) for 16 oz. or so.

Now to answer some questions:

1. Do I need an instant read thermometer? No, but it is helpful; it takes any and all guesswork away from the process. And you will pretty much earn back the cost of your $9 thermometer in the first yogurt making, so it's a reasonable purchase. Still you don't have to have one. You just might need an IQ slightly higher than 32.
2. What will I do with all that yogurt? The sky is the limit. If you make this stuff, you can stop buying yogurt, sour cream, and (in some cases) cream cheese. You can make amazing smoothies and popsicles. You can do tons of stuff with it. 
3. Do I have to use whole milk? Probably not, but I always do. Still, I'm pretty sure you can make it with any type of cow's milk . However, I won't vouch for taste. True Greek yogurt is whole fat. It's only us Americans who've freaked out about that and developed lower fat versions. It is my opinion that skim Greek yogurt isn't really Greek yogurt at all. It is skim, strained yogurt. Eat it if you want. But my other opinion is that fat (without a lot of sugar) is NOT the enemy. I think natural fats are healthy and filling and great.
4. Why do I heat it and then let it cool? I don't have a complete scientific answer for you. All I know is that if you heat it to 180 you wind up with thicker yogurt than if you don't. I imagine you don't have to heat it that much. I know there are even raw yogurt recipes out there. You'll just likely end up with thinner yogurt. Of course, you'll be straining it, so will still end up with thick Greek yogurt--you'll just have a bit less of it because more will have strained out. Note: Since the original post, I've tried making this recipe "raw" meaning that you only heat it to 110 degrees and then just add the yogurt. It is thinner, but it works. 
5. How do I make it on the stove top? Let's say you don't have a crock pot. You can still make this stove top. It's best to do when you have other jobs to do in the kitchen because it takes a while to heat and needs to be stirred occasionally so you don't want to burn on the bottom. (You can cook it faster, but you'll have to stir frequently or even constantly so it doesn't burn on the bottom.) Also, you'll want to make it in a heavy pot. The time I made it on the stove top, I used a porcelain-covered Dutch oven pot (WITH A LID). You need to do this because when you put it in the oven, it needs a sort of heat-holding pot. Otherwise it will cool too quickly and not set properly. I suppose you could use a normal pot and insulate it with towels or something, but for me the IQ requirements and fail factor get too high with that.
6. Can I make less? Probably. The problem you're going to come up against with this no fail method is that if you only have a little milk/yogurt in your pot, it will cool off faster. If it cools off too fast in your oven, you'll wind up with runny, curdled mess, not yogurt. If you really really want to make less, I recommend putting it in a small cooler instead of an oven. Or you might just have to babysit your oven a bit more and turn it on here or there throughout the setting process to ensure that your yogurt doesn't get too cool. Anyway, I'd really encourage you to make more simply because yogurt lasts a long time, which leads to...
7. How long does it last? I don't know. Ha. Because it's never gone bad on us and we've kept it in the fridge for upwards of two weeks. I imagine it would last a good month, maybe two, but can't promise that. I will try to do a little experiment next time I make yogurt and set some aside and see how long it takes for it to go bad.

Did you get discouraged with all those steps? Do you want something even easier, albeit not quite as cheap (but still cheap). Here's a method for making regular plain yogurt into Greek yogurt. It's not quite as cheap, but still much cheaper than buying it from the store (where it often has various thickeners mixed in). Also this post has handy-dandy pictures about how it will look as it strains. 

Want to take this to a level of unrighteous decadence. Try this Almond Joy variation


Or you could use cashews, which is my absolute favorite.


LinkWithin

Related Posts Plugin for WordPress, Blogger...