This month we spend a total of $269.38. After subracting $20.00 for our vitamin allowance and $25.00 for our entertaining allowance, that came to $224.38. Which takes us to $7.48/day.
That's not our best number ever. However you'll recall that last month I decided to calculate our spending differently. Before I was estimating how much food exactly we were eating--that meant if we used a little ketchup here or a couple eggs there, that's what I calculated. It was a headache and it's also not how people spend. We spend on items we open, and even if we don't finish the package in a month, it must still be figured into our budget. So this month I've calculated the costs of what we buy (and open). (There are some pantry items or sale items that I buy and don't open--I don't count those.) I occasionally "shop" from the pantry and when I do, I add in the costs of those things as well.
Here's the breakdown of where we spent our money. It's a little different than usual too.
Produce: $69.16
Dairy: $59.52
Meat/Eggs: 40.43
Grains: 35.24
Sweets/Sugars: 28:04 (oh, the shame)
Legumes/Beans/Nuts: $20.61
Fats/Cocoa: 10.91
Condiments/Misc: 5.47
What I'm Proud Of:
Admittedly, I'm always proud that even with some of our less healthful habits (another Robin's Egg, anyone?), we do spend the most on the thing that's the most important (in my eyes). Additionally, although there are some canned tomato sauces and a very occasional juice, it's almost entirely from whole fresh fruits and vegetables. (Want details? You can check out exactly what I bought in 'Costs.')
What I'm Not So Proud Of:
Seriously, I'm sure you don't even need to ask. We eat too many sweets. Way too many. Embarrassingly too many. And yet. I'm not quite sure how to pull the plug. Especially where the number one beloved is concerned. Because he loves them. And he's been a super sport about this whole cheap eat challenge thing. And Easter candy is his super best very favorite candy in the whole wide world. Not that I'm without any guilt in this department myself. But I have a slower metabolism than the rest of the family, so there's a wee bit more willpower from my end.
Also, I feel our dairy is a little out of control. I am not a member of the school of milk. I enjoy milk thoroughly (especially my yummy raw milk), and I do believe it's good for you (especially my yummy raw milk). However, I think we drink it in excess and I think we could get a lot of our calcium, etc. from cheeses and other sources that we also eat. Additionally, and I hesitate to even make the following confession, we tend to drink milk with sweets (especially Kip) and so when our sweets consumption goes up, so does our milk consumption. That makes it a bit less virtuous, now doesn't it.
Where We Cheated:
Don't I know that cheaters never prosper? What if they confess their cheating ways? That must be good for something, right? I said, 'Right?'
I didn't count the candy I bought for Easter. I considered it a gift and therefore did not count it. It was a gift, but still...I did count the candy we bought after Easter on sale. It wasn't a gift, more of an impulsive snacking choice.
I only counted a little over half ($9) of our $17.00 milk share. I, uh, count the other part as my contribution to local eating (see, it's a cause and all).
And just as a head's up on some pre-meditated cheating: My birthday's in May and I have no intention of counting anything extra we buy for the cake/party (possibly some almond paste and ice cream).
What We Wasted:
We waste very little. Except in the bread crust department. We waste obscene amounts of bread crusts. I'm not proud of that, but my kids won't eat them, and there's only so much you can do with 100's of leftover crusts. We also wasted a tiny bit of regular bread this month. Also, my kids tend to leave a bit of milk in their cups, which goes bad. My sour cream and spinach both got a bit on the edge. I threw them in the freezer. I know I can use the spinach in green smoothies that way, but I'm not sure if the sour cream will go freezer funky or not. We didn't waste any candy so don't worry your little heads about that, okay.
What Are My Goals for Next Month?
1) I want us to find a way to eat fish at least once a month, but hopefully two.
2) I want to make green smoothies every other day. I really think this will benefit my kids in their fruit/veggie consumption and they/we need that. I think I'll be keeping track our our fruit/veggie intake again this coming month because it helped me to know how much we were getting and it forced me to do better because I had this blog to account to. I'm a little afraid of how much this will cost, but I'm going to give it a nice organized shopping (hopefully) try.
3) I'm going to try to shop only once a week--for all things, not just food. I noticed this month that I went shopping more. And the more times I went, the more I spent. Why do I shop a lot sometimes? Because I have small children and going to more than 2 places in an outing makes me want to poke my eyes out. However. It is just that emotion that makes me not want to take too long or spend too much. If well used, it can be an excellent strategy. But if it just causes me to shop 4 times a week (which is definitely its own type of torture), then I spend more (and I'm still pretty miserable, so what's the point). Shopping less requires a little more organization. So I'll get right on that. Speaking of which: I'll hopefully have menus and shopping lists up Monday.
Saturday, April 30, 2011
Friday, April 29, 2011
100% Whole Wheat Pancakes
Cheap Eat Challenge: Watch as our family of 6 tries to eat on $6/day.

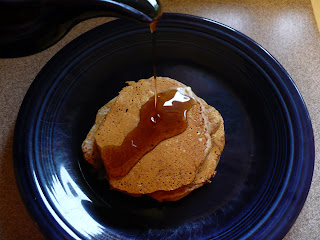
Today we're going to talk about what goes under the syrup. Why would we want to do that, right? Well, turns out that what goes under the syrup can be pretty darn tasty too.
Of course pancakes make a fun Saturday morning breakfast and even a quick throw together dinner, but since we've been doing our cheap eat challenge and eating hot breakfast more often than ever in our lives, I've also realized that it can be a perfectly good, rather fast every day breakfast as well. It's not cold cereal fast, no. But with a simple basic recipe like this one, it can be 15-minute fast. Easy peasy pumkpin easy, as we say in these parts. And bon appetit as they say in parts far far away.
P.S. To make it extra special and not much harder, top it with some homemade maple syrup.
100% Whole Wheat Pancakes
Makes about 6 three-inch pancakes
Prep time: 2 minutes
Cook time: 4 minutes per batch
Cost: $.35
(whole wheat: .18, milk: .16, other stuff: .01)
1 C whole wheat flour
1 tsp baking powder
1/2 tsp baking soda
1/2 tsp salt
1 1/4 C milk (or buttermilk if you've got it around)
Note: This recipe originally came with an egg. One morning I didn't have an egg and it came out just fine. In fact I didn't even notice a difference. An egg would add a bit of richness and perhaps a bit of lift (though these get plenty of lift even without), so feel free to include one, but I usually don't.
Combine dry ingredients. Add milk and whisk together. Do not get the batter completely smooth. There should be a few lumps. Why? The more you mix wheat, the more the gluten organizes itself and sort of lines up (how's that for a scientific expanation), thus becoming stretchy and chewy. That's great for yeasty breads, but it will make your pancakes and quick breads tough and elastic-y. Overstirring will also release the bubbles from the baking soda too quickly, meaning you will have less to make your pancakes nice and fluffy. If you want a light fluffy pancake, do not over mix.
Put butter or oil in a pan and cook on medium or medium low. (Your pancakes should not cook so fast that they're burning before the middles are done and they should not take forever to get golden on one side.) I hate to say this, but you'll probably have to experiment with your stove in order to figure out your right temperature. I have not found any hard and fast rule that always works (such as 'when the bubbles are popping, it's time'. It might be time, but then, if you're stove is too hot, you might have burned the pancakes by the time the bubbles get to doing their thing.) The good news is that it should only take a pancake or three before you're getting the swing of things.
Tip: Pancakes can be kept warm on a cookie sheet in an oven set at 200 degrees for up to an hour.
Another tip: The dry ingredients can be prepared in bulk ahead of time and you can then use 1 C of dry ingredient to 1 C of milk to make the mix.
PRINTABLE RECIPE

Thursday, April 28, 2011
Jeanie's Mac and Cheese
Cheap Eat Challenge: Watch our family of 6 try to eat on $6/day.


Jeanie is also my mother-in-law's name. Tricky, I know. When we got married my mother-in-law made some great macaroni and cheese. I'm sure she thought it was just a simple basic recipe that was easy to whip up for a group. But at the time, I had all of, oh, maybe three solid recipes under my belt and a homemade version of something I'd only eaten from a box for my single years seemed advanced.
It's nice to know that now it's an easy recipe for me to whip up too. But it's still a great crowd pleaser (as long as your crowd does not involve certain of my kids). And it's infinitely adaptable, if you're the type to like infinite adaptations.
You can add Italian seasonings or a shot of hot sauce. You can throw in some spinach or basil or olives. You can add mashed butternut squash to increase the nutritional punch. You can use whatever exciting cheese you like. Or do Italian sausage or turkey sausage or chopped ham. We keep it simple because some of us are not what you would call 'adventurous.' The great thing about it is that it's still really good.
Jeanie's Mac and Cheese
Makes enough for 9x13 inch pan
Prep time: 15 minutes
Cook time: 15 minutes
Cost: $3.15
(macaroni: .50, tomatoes: .75, hamburger: 1.00; cheese: .75, milk: .08, butter: .07)
2-3 C cooked macaroni (1-1 1/2 C dry macaroni)
1 14-oz. can diced tomatoes (with some juice)
1/2 lb hamburger (we used less)
1 1/2 C cheddar cheese, divided
1 Tbsp butter
1 Tbsp flour
1/2 C milk
1/2 tsp onion powder
1/2 tsp garlic powder
salt and pepper to taste
Boil macaroni in water until al dente. Do not boil it until it's mush. Remember, you'll be baking it as well. When it's ready (I taste mine), drain it.
While pasta is cooking, cook hamburger in a skillet till it's browned. Drain and discard most of the fat.
Prepare a white sauce: First melt the butter. Whisk in the flour until there's a paste. Add the onion powder and garlic powder. Whisk in the milk until all is smooth. Heat it until it thickens to a saucy consistency (not a pot of paste).
Combine pasta, tomatoes, white sauce, and 1 C of the cheddar cheese. Taste and add salt and pepper as needed. Spread in 9x13 inch pan. Sprinkle remaining cheese on the top.
Wednesday, April 27, 2011
Lemon Pepper Dressing (with Bacon and Egg Salad)
Cheap Eat Challenge: Watch as our family of 6 works really hard to eat well on $6/day.


Got hard-boiled eggs? Yeah, me too. Mine have lots of multi-colored splotches on them when you crack them. Yippee. Now what to do with these beauties? I made some deviled eggs, of course. And I think they're great sliced onto a roll sandwich with cheddar, mayo, salt, and pepper. But I've got a booty-load of lettuce in my fridge right now and some expiring spinach. And then my friend mentioned how her mother's been eating egg bacon salads for lunch every day. And all the sudden nothing sounded better in the whole wide world.
And the dressing to go with. Oh, this one's good. I thought I would want to make it creamier with some mayonnaise or sour cream, but found that it had a sort of creaminess even without those things (vegans rejoice). I think this comes from the fact that's it's not quite as thin and unobtrusive as a vinaigrette and also that it sort of jams with the egg yolks (vegans stop rejoicing--but wait vegans, it's still really good; don't go away yet).
And the price tag that goes with it is lovely too. Store-bought salad dressing is rather pricey. Additionally, there are very few varieties that taste really good to me (and those are more than 'rather' pricey). The ingredient lists are nothing short of reprehensible and call me an alarmist (or, you know, whatever else you'd like to call me), but I bet they sometimes sneak MSG in under the 'spices' category. This dressing isn't quite sainted, but it contains friendly fats and simple spices.
For one serving of salad I use 1-2 C interesting lettuce (I use a combination, but anything not iceberg should do), 1 C spinach, 1 hard-boiled egg, and 1-2 strips bacon, crumbled (did I just lose the remaining vegans there). Sometimes I add a sprinkle of cheese too.
Lemon Pepper Dressing
adapted from smittenkitchen
Makes 1 1/2 C
Prep time: less than 5 minutes
Cost: .37
(canola: .12, olive oil: .15, other stuff: .10)
Note: This is good if you mix it up right before you eat it, but it's better if it has some time to sit and let the flavors meld.
Another note: I used dry mustard, which is surprisingly non-obtrusive (at least my el cheapo kind was), which I liked. If you don't have dry mustard, you can sub in regular mustard, but I'd start with only 1/2 tsp. lest the mustard flavor overpower the others.
3/4 C canola oil
1/4 C extra-virgin olive oil
1/4 C red wine vinegar (I suspect another kind would work as well)
2 Tbsp lemon juice
1/2-1 tsp lemon pepper (start with 1/2 and move up if you feel it needs it--I like more)
1 tsp dry mustard
1/2 tsp Worcestershire
1/2 tsp sugar
1 clove minced garlic (or 1/2 tsp garlic powder if you or yourn have texture issues)
1/2-1 tsp salt
1/4-1/2 tsp pepper
Combine all in a jar or a Tupperware with a nice tight lid and shake shake shake it.
Taste it and adjust seasonings.
Let it sit for a spell if you've got the time. And be careful that your lettuce isn't too wet because it dilutes the flavor of this dressing considerably.
Refrigerate to store (that's probably not even necessary if you're going to use it quickly, but it's what I do). Give it a good shake before next use.
P.S. If you're quacky for all things lemon, as I am, check this out.
Tuesday, April 26, 2011
Homemade Maple Syrup
Cheap Eat Challenge: Watch as our family of 6 tries to eat on $6/day.
Pancakes are a really cheap breakfast (or fun, easy dinner if you're us)--a couple cups of flour, a couple cups of milk, a bit of leavening. Less than $.50 could easily feed a family. Except of course for the toppings. Those pesky topping are always hitting us below the belt--first in the wallet, then the hips. We'll keep our discussion today centered on the wallet.
I've always enjoyed homemade syrup when it's been served to me, but have had terrible luck making my own, even though it is supposed to be super easy. Mine has been bland, or it's crystalized, or I've tried to store it and it's turned into rock candy, or all three. So I've kept buying it, which more than doubles the cost of pancake-making in this house. And then one day we ran out. I'd already made the pancakes so there was nothing else to do. I tinkered with a recipe I had and took a tip from my mother-in-law not to cook it to the "syrup" point. Perfection. And at room temperature it kept really well.
Why is this so awesome? Because homemade syrup costs easily half as much as store bought and usually is even cheaper than that. Additionally, it tastes so good and lacks that hello-I'm-maple-flavored-corn-syrup flavor that many store bought syrups have. Finally, it's easy. Shockingly easy. If you put it on the stove while you're doing the pancakes it'll be done by the time they are.
Here you have it with some tips for perfection.
Homemade Maple Syrup
Makes about 2 cups
Cook time: 10 minutes
Cost: $.35
(sugars: .33, other: .02)
1 1/2 C white sugar
3/4 C brown sugar
1 C water
1 1/2 T corn syrup
1-2 tsp maple flavoring (if you have none, you can use 1/2 tsp vanilla plus 1/2 tsp almond extract)
Combine all ingredients except maple flavoring in a sauce pan. Heat on medium heat until it's got a somewhat vigorous boil going (it shouldn't be boiling like crazy, but it shouldn't be barely simmering either). Boil it for about 2-4 minutes (I tend to go on the long side). Take off heat, let it sit for a minute and add maple (or other) flavoring. I love love love it hot, but if you don't, I forgive you. Also, if it seems thin, worry not; it will thicken as it cools.
Store any leftovers covered at room temperature. (You may have a small amount of crystalization, but it should be minimal.)
Note: If you go to the syrup point, which takes about 8 minutes (the 'syrup point' is a certain temperature when something is supposed to thicken to what it considered a 'syrup'), you will have much much more trouble getting it not to crystalize. You'll also risk getting it too hot and winding up with a soft sort of candy stuff for your syrup instead. You will also--or at least I do--have trouble storing it without a lot more crystalization.
PRINTABLE RECIPE
Monday, April 25, 2011
Smooth and Tasty Marinara Sauce (aka Five Minute Marinara Sauce)
Cheap Eat Challenge: Watch as our family of 6 eats on $6/day.

You may have heard me mention--oh, a time or two--that my children (and often husband) do not like "chunkies." Chunkies are anything that gives a dish a little texutre--chopped onions, oatmeal, nuts, tomatoes, dried fruit, seeds--you get the picture. Therefore when we eat spaghetti sauce, it is requisite that it have no chunkies. Since I'd prefer for my kids to top their pasta with tomato sauce rather than butter, it's a battle I don't choose to fight. Also their father is on their side, which leaves me rather soundly out-numbered. Also, even though this isn't my number one favorite ever pasta sauce, it's pretty darn good.
And while we're talking about picky people, let me get a confession out here on the table. In college I was very careful with my fats and calories--too careful, way too careful, rude kind of careful. I did not often eat dinner with my roommates (they must have been relieved), but one night I was home and they were having pasta and I was invited. It was sweet and delicious and my roommate--who, for the record, was the nicest person in the universe, ever--revealed that she had put a little sugar in it. I freaked out. Why, I asked, would anyone knowingly add, like, 25 calories to something that previously did not have 25 calories. I didn't say it quite like that, but something along those lines. I am not sure I finished my food. My roommate should have stuffed it up my snooty little nose. But she didn't. Of course the great irony in my behavior and attitude is that each week I ate tons of Hunt's $.99 pasta sauce (pasta was one of my 3 main college staples), which surely had more than a few calories worth of high fructose corn syrup in it. So, Amber, I'm sorry. I hadn't yet come into my own; I was young and foolish, and I didn't then know what good food tasted like. I will rectify that attitude tonight, as I now know that a little sugar adds a nice contrast to the acid-y bite of tomatoes.
Smooth and Tasty Marinara Sauce
Makes 60 oz.
Prep time: 5 minutes
Cook time: 10 minutes
Cost: $2.95
(tomato sauce: 2.40, paste: .50, my pesto is homemade; I've no idea how much it costs; other stuff: .05)
2 cans plain, unsalted tomato sauce, 29 oz.
1 can tomato paste
3-4 Tbsp pesto (alternately, you can use 2 handfuls of basil and 1 clove of garlic)
2 Tbsp sugar (brown or white both work)
1/2 Tbsp salt (if using salted tomato sauce, omit completely)
1/2 tsp onion powder
1/2 tsp dried oregano
1/2 tsp pepper
Combine in a pot and simmer for 10 minutes.
PRINTABLE RECIPE
Saturday, April 23, 2011
Cadbury Milk Chocolate Cookies
Cheap Eat Challenge: Watch as our family of 6 tries to eat too many sweets and some other food too on $6/day.

Kip is an avid lover of those milk chocolate Cadbury eggs (not to be confused with the large fake-yolk filled Cadbury eggs that I loved as a child, although he likes those too). Tonight I made these cookies to put in his Easter basket because I love him. They actually came out even more delicious than I thought they would. The shell of the Cadbury egg gives a super awesome candy crunch to your cookie and the milk chocolate gives it a sweet something different as far as chocolate flavor. And of course I added a few semi-sweet chips as well to keep it real.
As I whipped up the batter with just a wooden spoon, I was struck by how easy homemade cookies are to make. Much easier than navigating the "bakery" section at your local chain grocery store. And do I even need to say how much better.
Cadbury Milk Chocolate Cookies
Makes 36-48 cookies, Serves: Kip (fine, whatever, I may have had a few tonight too)
Prep time: 7 minutes
Cook time: 9 minutes per batch
Cost: $5.10 (good thing those Cadbury's are a gift)
(butter: 1.15, sugars: 1.00, eggs: .20, flour: .30, Cadbury's: 2.00, semi-sweet chocolate chips: .45)
1 recipe for Kip's Chocolate Chip Cookies:
1 C butter
1 C brown sugar (packed)
1 C sugar
2 tsp vanilla
2 eggs
3 C flour
1/2 tsp salt
1 tsp baking soda
And to that you'll add:
1 1/2 C Cadbury eggs, roughly chopped (I admit that I halved the recipe so there'd be Cadbury's left for baskets)
1/2 C semi-sweet chocolate chips
When I chopped the eggs, it was very rough. I wanted large pieces, so I pretty much chopped at the halfway point--sometimes I got a half and sometimes it shattered into smaller pieces.

Preheat to 375. Cream butter, sugars, and vanilla. Add and mix in eggs. Sift, then add flour, salt, and baking soda. Stir in chopped Cadbury's and chocolate chips. Bake 8-10 minutes until barely golden. DON'T OVERBAKE AND DON'T EVEN THINK ABOUT USING MARGARINE.
Amen and Happy Easter!
P.S. Don't have time to make these this weekend, even better for you. Easter candy goes on sale Monday. Grab some Cadbury's if you can find them and make these.
P.P.S. Check out Sweets for a Saturday for more Easter treat ideas.
PRINTABLE RECIPE


One last sweet, then next week, it's back to business. Good thing my business is sweets. No, wait, it's being cheap and a good mom and a nice person and a millionaire who eats a lot of fine chocolate. Sorry, just a little Easter wish there at the end. But seriously, I've got pictures and recipes for bean dishes, potatoes, casserole all languishing on my desktop, awaiting their day in the sun. Well, they can join the club. They, like me, have seen not much sun this weekend. But come Monday, we'll keep our fingers crossed.
As I whipped up the batter with just a wooden spoon, I was struck by how easy homemade cookies are to make. Much easier than navigating the "bakery" section at your local chain grocery store. And do I even need to say how much better.
Cadbury Milk Chocolate Cookies
Makes 36-48 cookies, Serves: Kip (fine, whatever, I may have had a few tonight too)
Prep time: 7 minutes
Cook time: 9 minutes per batch
Cost: $5.10 (good thing those Cadbury's are a gift)
(butter: 1.15, sugars: 1.00, eggs: .20, flour: .30, Cadbury's: 2.00, semi-sweet chocolate chips: .45)
1 recipe for Kip's Chocolate Chip Cookies:
1 C butter
1 C brown sugar (packed)
1 C sugar
2 tsp vanilla
2 eggs
3 C flour
1/2 tsp salt
1 tsp baking soda
And to that you'll add:
1 1/2 C Cadbury eggs, roughly chopped (I admit that I halved the recipe so there'd be Cadbury's left for baskets)
1/2 C semi-sweet chocolate chips
When I chopped the eggs, it was very rough. I wanted large pieces, so I pretty much chopped at the halfway point--sometimes I got a half and sometimes it shattered into smaller pieces.

Preheat to 375. Cream butter, sugars, and vanilla. Add and mix in eggs. Sift, then add flour, salt, and baking soda. Stir in chopped Cadbury's and chocolate chips. Bake 8-10 minutes until barely golden. DON'T OVERBAKE AND DON'T EVEN THINK ABOUT USING MARGARINE.
Amen and Happy Easter!
P.S. Don't have time to make these this weekend, even better for you. Easter candy goes on sale Monday. Grab some Cadbury's if you can find them and make these.
P.P.S. Check out Sweets for a Saturday for more Easter treat ideas.
PRINTABLE RECIPE

Friday, April 22, 2011
Hot Cross Buns
Cheap Eat Challenge: Watch as our family of 6 tries to eat on $6/day.

We had a lot of traditions growing up. My dad was raised Catholic and said that on Good Friday he and his siblings went to their rooms for 3 hours to think about Christ and his cruxifiction. Then that night they got hot cross buns. When he married my mom, they only kept one of those traditions. Perhaps this is because it was easier to think about Christ when your kids weren't whining and moaning and pitching a fit in their rooms for three hours (not that we as children ever would have done such a thing). At any rate, I love making these every year, and did so even in college (it was some of the very little cooking I did in college, and I like to think my rolls have come a long way since then). And you know, they always remind me what day it is (does anybody else find it easy to forget?), and what that day represents. So I guess my parents succeeded in helping me remember Christ on Good Friday after all.
Hot Cross Buns
Makes 20-24
Prep time: 20 minutes (plus you've got about 2 hours of rise time to figure in)
Cook time: 15 minutes
Cost: $1.70 plus frosting which will add an extra $.15 or so, unless you've got a bunch already in your fridge like I do.
(milk: .15, yeast: .15, butter: .30, sugar: .10, eggs: .20, flour: .80)
I start with my sister's roll recipe (it's copied below).
When you've got the dough formed into balls, I cut a cross into the dough. You don't have to; you can just paint it on with frosting at the end, but I like the frosting to have a gulley to seep into, yes I do.


You could stop right there and they'd still be amazing, but we always add a bit of frosting in the crosses. You could pipe this frosting in if you wanted it to, like, look good, but I was in a super hurry so I just used a knife and my finger to blob it on. No one complained.

You can use whatever your favorite frosting is. I had several to choose from hanging out in the fridge and picked orange cream cheese frosting (yes, it was totally awesome). If you're at a loss for what frosting to use, have a look here. For the orange cream cheese, add 2 Tbsp orange juice and 1 tsp zest to my Best Ever Cream Cheese Frosting.
1 C warm water
1 C milk, warmed (not hot)
2 Tbsp yeast
1/4 C butter
2 tsp salt
1/2 C sugar
2 eggs
7-8 C flour
Add yeast to water and milk. Let it sit there if you've got five minutes. If you'll get distracted by leaving a thing for five minutes, then just throw the butter, salt, sugar, and eggs in before you forget what on earth you were doing in the first place. Mix it all together. Mix in 4 C flour. Add 2 more cups. Begin kneading with hands when it gets too tough to stir. Of course, if you're a member of the 21st century and have a Kitchenaid , you can use that too with the dough hook. I myself haven't quite made it to the 21st century and that's okay with me because (weird mental disorder alert) I kind of like kneading. It relaxes me. I like how the dough smells. I like how it feels.
So if you, like me, will be doing things manually, here is #1 best tip for rolls. The dough should be pillowy--like a mother's bosom. We don't want any tight teenage breasts, nor do we want a stretched and sagging grandma shelf. If a three-year-old would just love to lay her head on your dough, it's perfect. (Warning: If you have a real life 3-year-old available, do not invite her to lay her head upon your dough to test it out. You'll get hair in your dough. And possibly boogers. Which is what mother's bosoms also get covered in when they have three-year-olds. Not that we mind because three-year-olds are cute.) I've digressed, haven't I? Anyway, so keep adding flour in 1/4 C increments or so and knead it for about 8 minutes until it is nice and pillowy and perhaps the teeniest little bit tacky, but not sticky. Then put it in a bowl and cover it and keep it in a warm place. (Everyone always says put it in an oiled bowl. I have never, not even once in my life done this. I always just throw it back in the bowl I mixed it in. It is always always fine. Who are these people with their oiled bowls and what is the purpose of oiling the bowl?)
Tip #2: If it's cold in your house, stick the bowl with the dough in the oven. Turn the oven on for 1 minute. Then turn the oven off and leave the dough in the warmed oven. (Do not leave the room to go do something in that one minute. You will never remember your dough. It will cook right there in your bowl with a dish towel over it and perhaps your house will burn down. This is not worth what you were going to do in that one minute.)
Let it rise for one hour or until doubled. Then punch it down and shape it into rolls. Put the rolls on a greased baking sheet. Cover them and let them rise again--this time for about 20 minutes.
Bake at 375 for about 10-13 minutes. I like my rolls just a bit on the dough-y end. I always break them open to determine if they're just right and not way too doughy still. It's not the perfect technique, but it works.
You can make the rolls ahead of time and freeze them. You can make the dough ahead and refrigerate it (covered in plastic wrap) for about 24 hours. You can even make them to the rolled roll point and then freeze them and then take them out, let them dethaw and rise, then bake them. The possibilities are limitless. As it seems is my ability to write many many words even when I am so so tired and have said I will not tonight write many many words.
P.S. If you're Jewish or Muslim or someone else who is not interested in remembering Christ on Good Friday, you should make these rolls anyway. Because they are awesome. You can stretch them out (like a Playdough snake) and shape them into bunnies..

...and then use the frosting to paint a little bunny face.

(Or...while we're talking bread, have a look at these cinnamon rolls. They're no-rise and I love the visual effect of the brown sugar, cinnamon, and cocoa.)

We had a lot of traditions growing up. My dad was raised Catholic and said that on Good Friday he and his siblings went to their rooms for 3 hours to think about Christ and his cruxifiction. Then that night they got hot cross buns. When he married my mom, they only kept one of those traditions. Perhaps this is because it was easier to think about Christ when your kids weren't whining and moaning and pitching a fit in their rooms for three hours (not that we as children ever would have done such a thing). At any rate, I love making these every year, and did so even in college (it was some of the very little cooking I did in college, and I like to think my rolls have come a long way since then). And you know, they always remind me what day it is (does anybody else find it easy to forget?), and what that day represents. So I guess my parents succeeded in helping me remember Christ on Good Friday after all.
Hot Cross Buns
Makes 20-24
Prep time: 20 minutes (plus you've got about 2 hours of rise time to figure in)
Cook time: 15 minutes
Cost: $1.70 plus frosting which will add an extra $.15 or so, unless you've got a bunch already in your fridge like I do.
(milk: .15, yeast: .15, butter: .30, sugar: .10, eggs: .20, flour: .80)
I start with my sister's roll recipe (it's copied below).
When you've got the dough formed into balls, I cut a cross into the dough. You don't have to; you can just paint it on with frosting at the end, but I like the frosting to have a gulley to seep into, yes I do.

Bake them for about 15 minutes.


You can use whatever your favorite frosting is. I had several to choose from hanging out in the fridge and picked orange cream cheese frosting (yes, it was totally awesome). If you're at a loss for what frosting to use, have a look here. For the orange cream cheese, add 2 Tbsp orange juice and 1 tsp zest to my Best Ever Cream Cheese Frosting.
Katie's Rolls:1 C warm water
1 C milk, warmed (not hot)
2 Tbsp yeast
1/4 C butter
2 tsp salt
1/2 C sugar
2 eggs
7-8 C flour
Add yeast to water and milk. Let it sit there if you've got five minutes. If you'll get distracted by leaving a thing for five minutes, then just throw the butter, salt, sugar, and eggs in before you forget what on earth you were doing in the first place. Mix it all together. Mix in 4 C flour. Add 2 more cups. Begin kneading with hands when it gets too tough to stir. Of course, if you're a member of the 21st century and have a Kitchenaid
So if you, like me, will be doing things manually, here is #1 best tip for rolls. The dough should be pillowy--like a mother's bosom. We don't want any tight teenage breasts, nor do we want a stretched and sagging grandma shelf. If a three-year-old would just love to lay her head on your dough, it's perfect. (Warning: If you have a real life 3-year-old available, do not invite her to lay her head upon your dough to test it out. You'll get hair in your dough. And possibly boogers. Which is what mother's bosoms also get covered in when they have three-year-olds. Not that we mind because three-year-olds are cute.) I've digressed, haven't I? Anyway, so keep adding flour in 1/4 C increments or so and knead it for about 8 minutes until it is nice and pillowy and perhaps the teeniest little bit tacky, but not sticky. Then put it in a bowl and cover it and keep it in a warm place. (Everyone always says put it in an oiled bowl. I have never, not even once in my life done this. I always just throw it back in the bowl I mixed it in. It is always always fine. Who are these people with their oiled bowls and what is the purpose of oiling the bowl?)
Tip #2: If it's cold in your house, stick the bowl with the dough in the oven. Turn the oven on for 1 minute. Then turn the oven off and leave the dough in the warmed oven. (Do not leave the room to go do something in that one minute. You will never remember your dough. It will cook right there in your bowl with a dish towel over it and perhaps your house will burn down. This is not worth what you were going to do in that one minute.)
Let it rise for one hour or until doubled. Then punch it down and shape it into rolls. Put the rolls on a greased baking sheet. Cover them and let them rise again--this time for about 20 minutes.
Bake at 375 for about 10-13 minutes. I like my rolls just a bit on the dough-y end. I always break them open to determine if they're just right and not way too doughy still. It's not the perfect technique, but it works.
You can make the rolls ahead of time and freeze them. You can make the dough ahead and refrigerate it (covered in plastic wrap) for about 24 hours. You can even make them to the rolled roll point and then freeze them and then take them out, let them dethaw and rise, then bake them. The possibilities are limitless. As it seems is my ability to write many many words even when I am so so tired and have said I will not tonight write many many words.
P.S. If you're Jewish or Muslim or someone else who is not interested in remembering Christ on Good Friday, you should make these rolls anyway. Because they are awesome. You can stretch them out (like a Playdough snake) and shape them into bunnies..

...and then use the frosting to paint a little bunny face.

(This bunny looks like she's up waaaay too late.)
(Or...while we're talking bread, have a look at these cinnamon rolls. They're no-rise and I love the visual effect of the brown sugar, cinnamon, and cocoa.)
Thursday, April 21, 2011
Butter Cream Eggs: Coconut, Peanut Butter, and Chocolate
Cheap Eat Challenge: Watch as our family of 6 tries to eat on $6/day while consuming over many Easter treats.

There are family traditions we choose keep and family traditions we choose to leave behind. And somehow there are family traditions that we sort of slip out of--one year we don't have the time or means to do it and the next year we kind of don't think about it as much and then, whoosh, it's gone.
At least until your mother sends you a package with several butter cream eggs and you give your sister a call and end up talking about butter cream eggs and then find yourself at 9:30 at night experimenting with flavors of butter cream egg fillings--the ones you remember your mother making for the church fundraiser, the ones you got big as an ostrich egg in the center of your basket every Easter. Back then my favorite was peanut butter (tell me it's a shock). As of today it's got some stiff competition.

And here, let me take a little moment to give my mother a call out and a thank you. Thank you, Mom, for sending me those butter cream eggs with all their happy memories. Thank you for making them all those years--for us and the church fundraiser. Thank you for all the effort you gave to providing 5 kids with lots of happy holiday memories--food and otherwise. And thank you for every care package you ever sent. They have all been cherished and I hope you know that.
The butter cream eggs we got as kids were huge. You certainly couldn't eat them in a day. I remember slicing slivers off of mine each day and storing the rest carefully wrapped in the refrigerator (I was one of those kids who was just finishing off Halloween candy when Easter rolled around.) My kids will not be so lucky. The ones I made today are small. (Sorry, kids.) There are a couple of reasons for this (they're so cute, there's more chocolate coating...), but the big one is that my kids get candy all the time. I do not remember having any Easter candy (or any other candy for that matter) before Easter. Also, I walked uphill to school both ways. Also, my parents didn't go nuts with the candy. We got our butter cream egg, one Cadbury egg (it was the only one we saw all year), some peeps (yuck), and jelly beans and robin eggs. It was certainly plenty; it was more than plenty. But these days (and, yes, I know when people start saying 'these days' they are old) kids get more candy. My kids have had a frightening amount of it all week. And so they will receive a miniature version of my beloved childhood favorite. But small or not, they will be given with the same amount of love; and plenty of chocolate coating. Viva tradition.
Butter Cream Eggs
Makes about 30 1 1/2 inch long eggs
Prep time: 30-40 minutes, but there's some wait time while things harden/set.
Cost: $3.05 and if you flavor it with coconut, peanut butter, or chocolate that will add another $.50-1.00
(sugar: .60, butter: .40, chocolate: 2.00, other: .05)
2-4 C powdered sugar (original recipe calls for 1 pound--that seems like way way too much to me)
1/2 tsp salt
1/3 C butter, significantly softened (Note: The original recipe calls for this to be equal parts margarine and butter, but I didn't have margarine, and all was well with all butter. I mean, how could all not be well with all butter?)
1 tsp vanilla
2-3 Tbsp milk (or cream, if you're a stickler about keeping the 'cream' in your butter cream--I used milk and it was very good)
1 bag (12 oz) semi-sweet chocolate chips (or melting chocolate or white chocolate or whatever shivers your timbers)
Combine all ingredents except chocolate by hand. If it's too dry, add a bit more more milk.
Now you can leave it at that. Or you can add some other flavorings (I highly recommend other flavorings; I find the plain buttercream a little uninteresting). I tried coconut, peanut butter, and chocolate. (The chocolate was my favorite, but I thought they were all very good.)

For Coconut: Add 1 1/2 C shredded coconut (You can also substitue the vanilla extract for 1/2 tsp coconut extract if you wish).
For Peanut Butter: Add 1/2 C peanut butter.
For Chocolate: Add 5-6 Tbsp cocoa powder.
For Nutella: Add 1/2 C Nutella
What I haven't tried, but think would be awesome:
1) Orange or lemon--1-2 Tbsp juice and 1-2 tsp of zest ought to do it.
2) Peppermint--add 1/2 tsp peppermint extract and a couple drops of green food coloring.
Refrigerate the filling and then when it's nice and firm, shape it into egg-shaped balls.

Get a sheet of wax paper ready because you're going to coat the eggs with chocolate. Melt the chocolate chips in the microwave by microwaving in 20-30 second intervals until chocolate is mostly melted. When it's nearly melted, take it out and mix it until the last bits of chocolate melt (this method sort of tempers the chocolate--it's not an exact science; I guess I'm not an exact science kind of a girl, but it will help keep your chocolate from getting white streaks in it after it's set.)
Then you're going to coat the eggs with chocolate. Truly I have no idea how my mother used to do this. I tried dipping. That didn't work very well because the chocolate was too thick. I tried using a spoon to sort of drizzle over/cover the eggs. Also not successful. Finally, I settled on holding the egg, smearing the chocolate on the bottom and sides with my finger and then plopping it down on the wax paper and smearing it on the top, again with my finger. I can only imagine the health code violations that were committed via this method. (Of course, I didn't lick the chocolate off my fingers when I was done; what kind of establishment do you think I'm running here. I let my assistant lick them instead. Because she is cute.) Anyway, it might not be the neatest way in the world, but it worked.


And then I looked over and discovered my other assistant sitting on the tray of her high chair, licking 2 spoons. Did I mention I will not be opening a restaurant any time soon?

And then I let them (the eggs, not my assistants) set until the chocolate was firm. This took an hour or two.

Now I was ready to decorate them. Of course, this isn't essential, but Mom always did when we were little and it makes them so much prettier. Even when you have the decorating skills of an aquatic mammal as I flatter myself to have, they will turn out pretty with a few nice Easter colors. Just stick some decorating tips in some Ziploc bags...

And have at it. (I'll post my basic vanilla frosting recipe below.)

If you have assistants you can let them have at it too.

By the way, leftover frosting, no problem.

Oh--and leftover chocolate from earlier. Well, if your mother truly loved you, she probably sent you some chocolate molds from your childhood like my mother did. Otherwise, have a look here  for some on Amazon.
 (The chocolate was getting a little hard and weird by the time I got it in the molds, but better than washing any leftover semi-sweet down the drain, right?)
You can save these eggs for Easter or eat them for dessert tonight or send them off to your children's teachers as gifts (providing you waited to lick the chocolate and icing off your fingers until after you were done with the project).
Basic Vanilla Frosting:
Cost: .60
(sugar: .25, butter: .30, other: .05)
1 C powdered sugar
4 Tbsp butter, significantly softened
1-2 Tbsp milk
1/2 tsp vanilla
Combined butter, sugar, and vanilla and mix. Add 1 Tbsp milk and the other if the frosting needs it. Add food coloring if desired.
PRINTABLE RECIPE

There are family traditions we choose keep and family traditions we choose to leave behind. And somehow there are family traditions that we sort of slip out of--one year we don't have the time or means to do it and the next year we kind of don't think about it as much and then, whoosh, it's gone.
At least until your mother sends you a package with several butter cream eggs and you give your sister a call and end up talking about butter cream eggs and then find yourself at 9:30 at night experimenting with flavors of butter cream egg fillings--the ones you remember your mother making for the church fundraiser, the ones you got big as an ostrich egg in the center of your basket every Easter. Back then my favorite was peanut butter (tell me it's a shock). As of today it's got some stiff competition.

(peanut butter, coconut, chocolate)
And here, let me take a little moment to give my mother a call out and a thank you. Thank you, Mom, for sending me those butter cream eggs with all their happy memories. Thank you for making them all those years--for us and the church fundraiser. Thank you for all the effort you gave to providing 5 kids with lots of happy holiday memories--food and otherwise. And thank you for every care package you ever sent. They have all been cherished and I hope you know that.
The butter cream eggs we got as kids were huge. You certainly couldn't eat them in a day. I remember slicing slivers off of mine each day and storing the rest carefully wrapped in the refrigerator (I was one of those kids who was just finishing off Halloween candy when Easter rolled around.) My kids will not be so lucky. The ones I made today are small. (Sorry, kids.) There are a couple of reasons for this (they're so cute, there's more chocolate coating...), but the big one is that my kids get candy all the time. I do not remember having any Easter candy (or any other candy for that matter) before Easter. Also, I walked uphill to school both ways. Also, my parents didn't go nuts with the candy. We got our butter cream egg, one Cadbury egg (it was the only one we saw all year), some peeps (yuck), and jelly beans and robin eggs. It was certainly plenty; it was more than plenty. But these days (and, yes, I know when people start saying 'these days' they are old) kids get more candy. My kids have had a frightening amount of it all week. And so they will receive a miniature version of my beloved childhood favorite. But small or not, they will be given with the same amount of love; and plenty of chocolate coating. Viva tradition.
Butter Cream Eggs
Makes about 30 1 1/2 inch long eggs
Prep time: 30-40 minutes, but there's some wait time while things harden/set.
Cost: $3.05 and if you flavor it with coconut, peanut butter, or chocolate that will add another $.50-1.00
(sugar: .60, butter: .40, chocolate: 2.00, other: .05)
2-4 C powdered sugar (original recipe calls for 1 pound--that seems like way way too much to me)
1/2 tsp salt
1/3 C butter, significantly softened (Note: The original recipe calls for this to be equal parts margarine and butter, but I didn't have margarine, and all was well with all butter. I mean, how could all not be well with all butter?)
1 tsp vanilla
2-3 Tbsp milk (or cream, if you're a stickler about keeping the 'cream' in your butter cream--I used milk and it was very good)
1 bag (12 oz) semi-sweet chocolate chips (or melting chocolate or white chocolate or whatever shivers your timbers)
Combine all ingredents except chocolate by hand. If it's too dry, add a bit more more milk.
Now you can leave it at that. Or you can add some other flavorings (I highly recommend other flavorings; I find the plain buttercream a little uninteresting). I tried coconut, peanut butter, and chocolate. (The chocolate was my favorite, but I thought they were all very good.)

For Peanut Butter: Add 1/2 C peanut butter.
For Chocolate: Add 5-6 Tbsp cocoa powder.
For Nutella: Add 1/2 C Nutella
What I haven't tried, but think would be awesome:
1) Orange or lemon--1-2 Tbsp juice and 1-2 tsp of zest ought to do it.
2) Peppermint--add 1/2 tsp peppermint extract and a couple drops of green food coloring.
Refrigerate the filling and then when it's nice and firm, shape it into egg-shaped balls.

Get a sheet of wax paper ready because you're going to coat the eggs with chocolate. Melt the chocolate chips in the microwave by microwaving in 20-30 second intervals until chocolate is mostly melted. When it's nearly melted, take it out and mix it until the last bits of chocolate melt (this method sort of tempers the chocolate--it's not an exact science; I guess I'm not an exact science kind of a girl, but it will help keep your chocolate from getting white streaks in it after it's set.)
Then you're going to coat the eggs with chocolate. Truly I have no idea how my mother used to do this. I tried dipping. That didn't work very well because the chocolate was too thick. I tried using a spoon to sort of drizzle over/cover the eggs. Also not successful. Finally, I settled on holding the egg, smearing the chocolate on the bottom and sides with my finger and then plopping it down on the wax paper and smearing it on the top, again with my finger. I can only imagine the health code violations that were committed via this method. (Of course, I didn't lick the chocolate off my fingers when I was done; what kind of establishment do you think I'm running here. I let my assistant lick them instead. Because she is cute.) Anyway, it might not be the neatest way in the world, but it worked.


And then I looked over and discovered my other assistant sitting on the tray of her high chair, licking 2 spoons. Did I mention I will not be opening a restaurant any time soon?

And then I let them (the eggs, not my assistants) set until the chocolate was firm. This took an hour or two.

Now I was ready to decorate them. Of course, this isn't essential, but Mom always did when we were little and it makes them so much prettier. Even when you have the decorating skills of an aquatic mammal as I flatter myself to have, they will turn out pretty with a few nice Easter colors. Just stick some decorating tips in some Ziploc bags...


If you have assistants you can let them have at it too.


You can save these eggs for Easter or eat them for dessert tonight or send them off to your children's teachers as gifts (providing you waited to lick the chocolate and icing off your fingers until after you were done with the project).
Basic Vanilla Frosting:
Cost: .60
(sugar: .25, butter: .30, other: .05)
1 C powdered sugar
4 Tbsp butter, significantly softened
1-2 Tbsp milk
1/2 tsp vanilla
Combined butter, sugar, and vanilla and mix. Add 1 Tbsp milk and the other if the frosting needs it. Add food coloring if desired.
PRINTABLE RECIPE
Wednesday, April 20, 2011
Kip's Brownies
Cheap Eat Challenge: Watch as our family of 6 tries to nurse an excessive chocolate habit while still eating on $6/day.


I know most people don't have strong sentimental feelings about brownies. I know that for most people they're an easy, fast treat that begins with the contents of a box. And I'm not saying there's anything wrong with that. But I will say that there is something better than that. And not much harder. And a little cheaper (when you include the ingredients you add to brownie mix and take its size into account). And did I mention better.
And also (and this is the part where I get a little wonky and sentimental and all) so much more meaningful than that. Brownies were the first gift Kip ever gave me. You may have heard that story before. Those brownies were good. Those brownies were better. And I like remembering that. I like remembering that the start of our homemade life together--the life where we raise children and ducks and trees and flowers, the life where we cannot seem to refrain from digging out an additional garden plot each spring, even though we swear we will not every year--began with a plate of brownies better than any brownies I'd had before, brownies that were made by a loving hand.
Oh, but the story doesn't even stop there. Because in addition to their sentimental gooey loviness, these brownies have a practical side as well. Which of course any marriage that is going to last more than 3 months does too. For starters, these brownies contain a mere 6 ingredients (that's only 3 more than the boxed variety in case your math skills just faltered). They're easy to assemble. My sister-in-law once told me that she sometimes just mixes them up in the pan. And they can be messed up in any number of ways and still turn out great. How, pray tell, can they be messed up? Well, let me tell you.
1. They can be undercooked. We've undercooked them on a couple of occasions, let them cool, cut them up, realized they were raw, put them back in the oven, and then taken them out again 20 minutes later. In fact, it just so happens that that was the case with our last batch--the one pictured above. The top comes out a little crispy, but the middle is still all tender goodness (and for those who enjoy a little diversity in their textures, these might even be better). And if you want a brownie that's going to be perfect in ice cream, this is just the mess up for you. The ice cream will soften the crispy edges without it all getting gooberiffic.
2. The flour can be completely forgotten. I did this once and the sugar and butter made a sort of caramel layer on the bottom that I found so completely awesome, I've been meaning to do it again. We ate it with whipped cream. Oh my. For full discolusure, I should say that although Kip ate plenty of the flour-free brownies, he prefers the original.
3. They can be made in a toaster oven. I know this because before I knew Kip, I knew these brownies. What, you say, incredulous at this plot twist/love triangle; how can this be. Yes, it's true. I didn't know I knew these brownies, but I did. When I was on a mission for my church in a far off land, we had some older missionaries--the Bakkers--in our area. Zuster Bakker made these mission-famous brownies. In the toaster oven. Because those mission apartments were sometimes lacking in the oven department (the Dutch don't bake as much as we Americans do). They were a breath of sweet warm American at times like Christmas when we were feeling a little lonesome. Then I got home, met Kip, and forgot about the Bakkers' brownies in my new love affair with Kip's brownies. And then one day, I learned that Kip's family had gotten the recipe for their brownies from a woman at their church--a woman by the name of Bakker. A woman who showed up at our wedding reception knowing both the bride and the groom. Indeed. No wonder my feelings for brownies run deep.
4. These brownies can be made with margarine. I will not say I recommend this, but it can be done (don't try it with cookies; blech.) I must also say that the margarine brownies are not as good. They taste, in fact, a lot more like a boxed brownie--in other words, perfectly edible, tasty even, but not the utter delightbuttery brownies are.
The only thing these brownies don't withstand well is extreme overcooking. No brownie withstands this well. Sure, you can eat them if you burn them. But they're not nearly as good.
In summary: Homemade brownies plus marriage equals good. Try it. (Hi, Bakkers, thanks for the recipe--we're doing fine and we have four kids now; can you believe it. They like your brownies too.)
Kip's Brownies
Makes 9x13 (we won't discuss how many servings that is or isn't or should or shouldn't be)
Prep time: 5 minutes
Cook time: 25-30 minutes
Cost: $2.65
( butter: 1.15, cocoa: .60, sugar: .35, eggs: .40, flour: .15)
1 C butter (2 sticks)--we use salted; if you don't, you'll want to add 1/4 tsp salt
1 C cocoa
2 C sugar
4 eggs
1 tsp vanilla
1 1/2 C flour
Note: Feel free to add in chocolate chips, white chocolate chips, peanut butter chips, or to sub 1/4 mint extract for the vanilla.
Beat or mix butter and sugar (we usually melt or significantly soften the butter). Beat or mix in eggs and vanilla. Add cocoa. Add flour.
Spread into a lightly greased 9x13 inch pan (unless you've just mixed it in the pan, lazy style--in which case I salute you).
Bake at 350 for 25-30 minutes or until a toothpick inserted comes out clean (be sure you're not sticking it in a chocolate chip).
PRINTABLE RECIPE
Tuesday, April 19, 2011
Chocolate Banana Breakfast Cookies: Low Fat, Low Sugar, Whole Grain, (And there's a tropical variation)
Cheap Eat Challenge: Watch as our family of 6 tries to eat on $6/day.


We all rebel against our parents in some way. Some people let their hair get scraggly. Others take up poker. Some try drugs, stop going to church, or bring home all the wrong guys. As for me, I keep cream on hand. There's a whole pint in my fridge right now. And I'm not afraid to use it.
However. Yesterday when speaking to my little brother on the phone, I was reminded that not everyone keeps cream on hand. And with that I was reminded that not everyone wants butter or peanut butter or coconut in their breakfast (or perhaps in their anything). I can only assume that such people are walking around with very scraggly hair.
And yet, if I look back several years, I can even remember a time when I would have pitched a nice teenage hissy fit before letting anything lacking the label low-fat pass my neurotic teenage lips. Not that I'm accusing anyone of pitching a teenage hissy fit (surely not) or being neurotic, but I suspect that there are some of you out there longing for a nice low-fat, low-sugar, non-gross breakfast cookie. This is a tall order, my friends. But for breakfast cookies I will do it. And for you, of course. And maybe a teensy bit for me, because since I stopped nursing I'm not nearly so ravenously hungry as I was several months ago. Sounds like a win win win.
And if you're still nursing a baby or rebelling against your low-fat parents or just have a thing for coconut, there's a tropical adaptation that's really great too (and even still on the slim side, coconut or no).
Chocolate Banana Breakfast Cookies: Low Fat, Low Sugar, Whole Grain
Makes 12 (although I tend to get only 11 out of this batch on a consistent basis due to a clear spacial disability)
Prep time: 7 minutes
Cook time: 12 minutes
Cost: $.90
(banana: .12, sugars: .08, egg: .10, extracts: .05, cocoa: .40, whole wheat: .10, oats: .05)
Note: If you are a banana hater or just don't have any on hand, you can substitute applesauce for the banana, although the cookies are a bit more bland this way--you may want to try adding 1 Tbsp brown sugar to liven it up and maybe an extra 1/2 Tbsp cocoa.
1 banana, well mashed (1/3-1/2 C mashed banana)
1 tsp canola oil
2 Tbsp white sugar
2 Tbsp brown sugar
1 egg
1 tsp vanilla
1/4 tsp almond extract
1/4 tsp cinnamon
1/3 C cocoa
1/4 tsp baking soda
dash salt
1/2 C whole wheat
1/2 C quick oats (1/4 C ground oats or whole wheat may be substituted if your family dislikes texture of any tasty kind)
1/4 C chocolate chips (optional)
Combine mashed banana, oil, sugars, egg, and extracts. Sift dry ingredients and add to wet. Add chocolate chips if using.
Bake at 350 for 10-12 minutes.
Tropical Variation:
-Substitute 1 tsp coconut oil for the canola oil (if you don't have coconut oil, just follow the other steps and it'll still be great)
-Substitute 1/4 tsp coconut extract for the almond extract
-Substitute 1/2 C shredded coconut for the quick oats.
Prepare as above.
Monday, April 18, 2011
Classic Potato Salad
Cheap Eat Challenge: Watch as our family of 6 learns to eat on $6/day.

Potato salad season, she comes. So does lots-of-leftover-hard-boiled-egg season. Below we present delicious fusion.
Of course if you use your leftover Easter eggs in the potato salad it will come out more colorful than this. Because the egg dye inevitably bleeds onto the whites of the eggs. So then you can call it Easter Egg Salad, which is just the type of thing parenting magazines promise will make your picky kids want to eat such a food. I make no such promises. But, egg dye or no, the adults will enjoy it. (Well, at least they will without the dye; I guess I can't make promises about your weird tie-dyed Easter Egg Salad.)
Potato Salad
Adapted from The New Best Recipe
Serves: 10-12
Prep time: 10 minutes
Cook time: 15 minutes plus you'll need time for the potatoes and boiled eggs to cool before assembly.
Cost: $3.20
(potatoes: 2.00, eggs: .60, mayo: .05, pickles: .50, other stuff: .05)
3 lb red potatoes (I left the skins on)
6 Tbsp red wine vinegar (you can use any, but the red wine flavor does make a difference)
salt and pepper
6 hard-boiled eggs, diced
dash onion powder (or 2 Tbsp minced red onion if you peeps aren't averse to pieces of onion)
1 C dill pickles, chopped small
3/4 C mayonnaise
3 tsp mustard (Dijon is nice, but not essential)
2 Tbsp parsley leaves or dill
Boil potatoes. (I left mine whole, let them cool, and then cut them, but you can just chop and boil if you wish). Hard boil eggs (Put in cool water, bring to boil, boil 10 minutes.)
Drain potatoes (and cut into 1/2 inch pieces if not already cut). Let cool until just warm and add vinegar and 1/2 tsp salt and 1/4 tsp pepper. Gently toss. I put mine in a bowl with a lid and flipped it over a time or two. (Note: Best Recipe claims that the slightly warm--not hot--potatoes will absorb the flavors better than cold potatoes. I admit that I let mine cool completely before reading this tip. The potatoes still absorbed quite a bit of flavor and were good, but I trust the Best Recipe folks, so try it with the barely warm potatoes).
Let cool completely in refrigerator (20-30 minutes). Once cool add remaining ingredients and gently toss. Season with salt and pepper to taste.
PRINTABLE RECIPE

Saturday, April 16, 2011
Chocolate Chip Pull Apart Bread
Cheap Eat Challenge: Watch as our family of 6 tries to eat on $6/day.
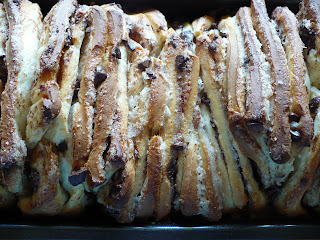

So pull apart bread has gotten a lot of mileage in this house. I'm still not done with it either, as I'm planning to make a garlic or perhaps garlic/rosemary combination at some point. For today, humor me with one more sweet version. This one is Kip's favorite.
Chocolate Chip Pull Apart Bread
Serves: not as many as it should because you'll tear through it
Prep time: 20-30 minutes, plus time to rise (2 hours or so)
Cook time: 30 minutes
Cost: 3.20-->Bread: .95, filling: 1.25, Frosting: 1.00
(butter: .30, milk: .05, yeast: .10, sugar: .05, eggs: .20, flour: .25)
(filling-->butter: .60, sugars: .15, chocolate chips: .50)
Start with the dough recipe for Cinnamon Sugar Pull Apart Bread. I'll post the recipe below, but if you want pic's, have a look here.
1/4 C butter, melted
1/3 C milk
1/4 C warm water
1/4 C sugar
1 Tbsp yeast
1 1/2 tsp vanilla
2 eggs, beaten
2 3/4 C flour
Chocolate Chip Filling:
1/4 C butter, melted
1/4 C white sugar
1/4 C brown sugar
1 tsp cinnamon (optional)
1/2 C chocolate chips, chopped into oddball sized pieces
Heat milk and butter in microwave or on the stove until the butter melts (30-45 seconds in the microwave.) Add water (if the milk/butter is very hot, use cooler water; if not, use warm water--you want it to be about 110 degrees when the liquids are all added).
Mix in sugar, then yeast. Add eggs (it's helpful if you've beaten them before you add them). Add vanilla.
Stir in 1 C flour. Then add the second cup. I turned mine out here to knead. If yours needs a little more flour to be firm enough, add a little more flour. Add about 1/2 C flour and knead it in. Your dough will be slightly different than regular bread dough due to the high butter content of the rolls. When it's ready you'll be able to make a nice impression with your hands in the dough and your fingers won't get dough stuck to them when you pull it out. It'll be a nice soft, slightly oily ball of dough.
Put it in a bowl and let it rise till doubled, about an hour.
Once it's risen, pull it out, punch it down and then put it on a lightly floured surface and roll it out to about 12x20 inches. It should end up a few milimeters thick.
Now add your 1/2 C of melted butter and smear it around evenly with your fingertips. Combine the sugars and cinnamon and sprinkle it about evenly. Sprinkle on your chopped chocolate chips.

Then you're going to cut it into five 12x4 inch strips. Stack these strips on top of one another.
Let rise till doubled--40 minutes or so. The slices will get nice and cozy and touch all the sides (sorry I forgot this picture--too eager to get mine in the oven I guess.)
Beat together cream cheese, butter, and sour cream. Add vanilla. Beat in powdered sugar.
PRINTABLE RECIPE

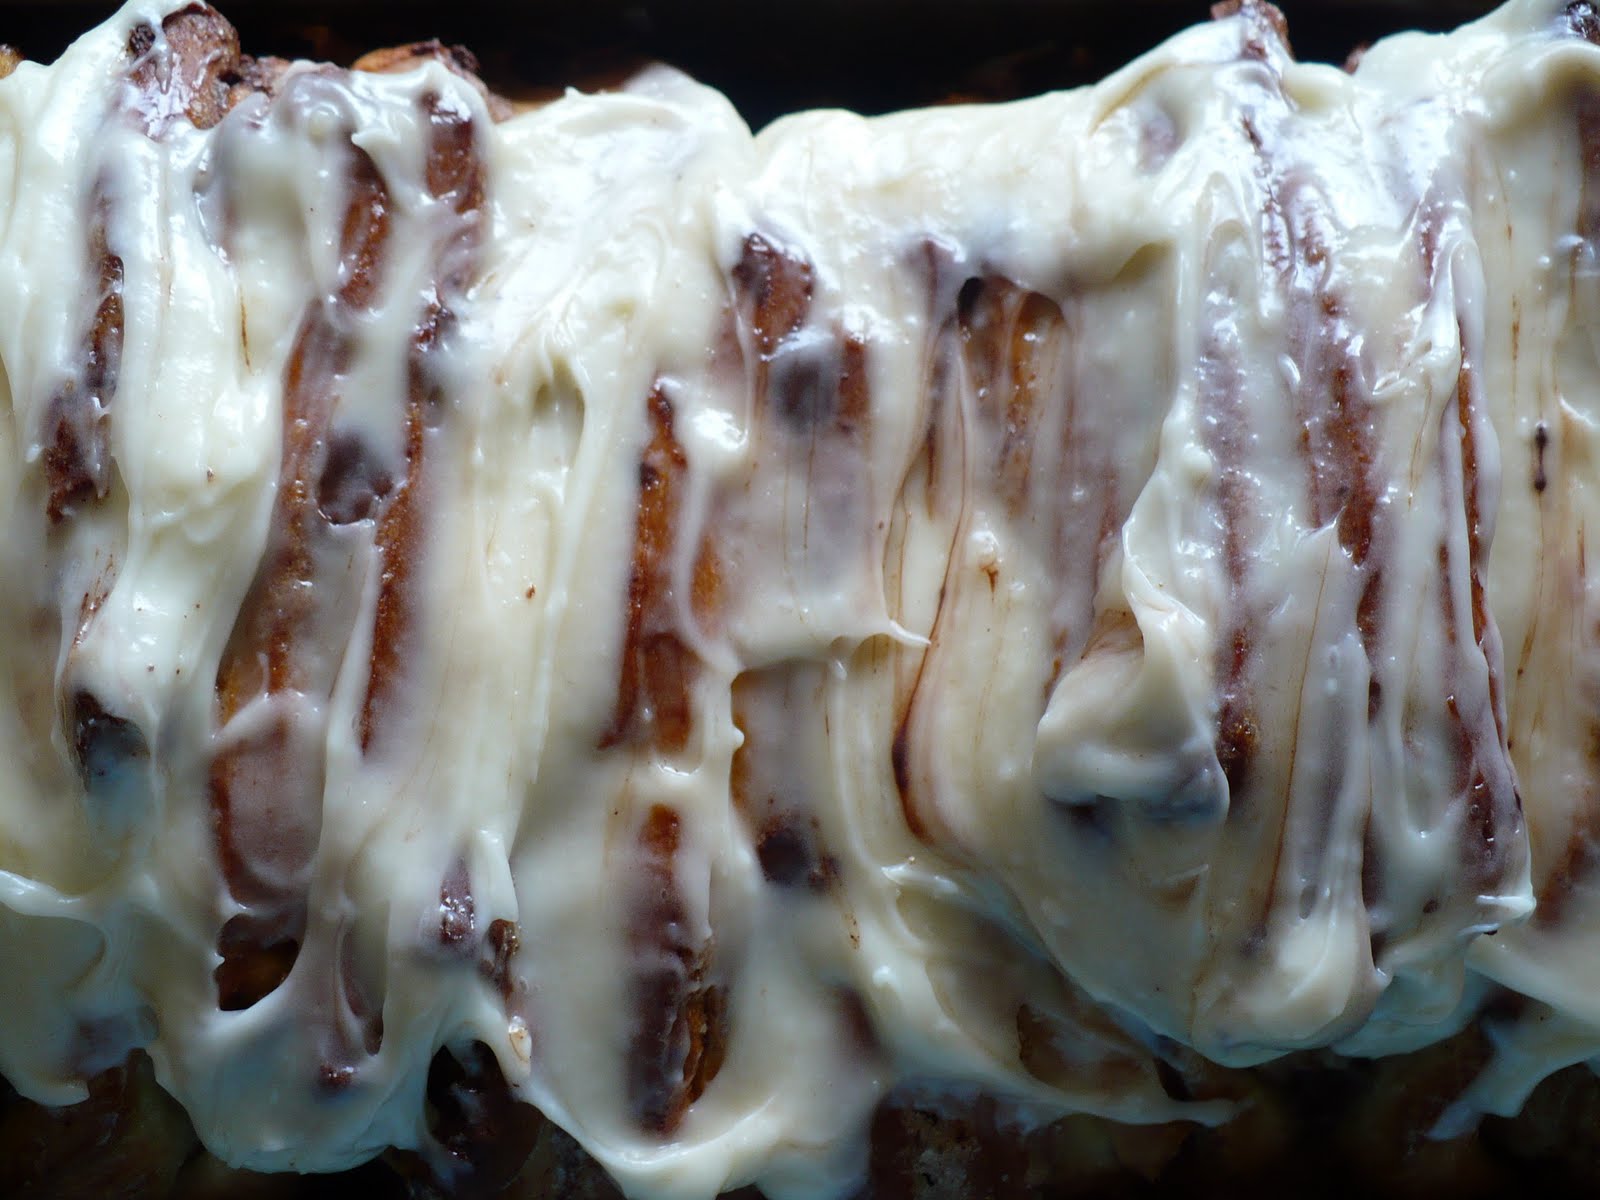
Chocolate Chip Pull Apart Bread
Serves: not as many as it should because you'll tear through it
Prep time: 20-30 minutes, plus time to rise (2 hours or so)
Cook time: 30 minutes
Cost: 3.20-->Bread: .95, filling: 1.25, Frosting: 1.00
(butter: .30, milk: .05, yeast: .10, sugar: .05, eggs: .20, flour: .25)
(filling-->butter: .60, sugars: .15, chocolate chips: .50)
Start with the dough recipe for Cinnamon Sugar Pull Apart Bread. I'll post the recipe below, but if you want pic's, have a look here.
1/4 C butter, melted
1/3 C milk
1/4 C warm water
1/4 C sugar
1 Tbsp yeast
1 1/2 tsp vanilla
2 eggs, beaten
2 3/4 C flour
Chocolate Chip Filling:
1/4 C butter, melted
1/4 C white sugar
1/4 C brown sugar
1 tsp cinnamon (optional)
1/2 C chocolate chips, chopped into oddball sized pieces
Heat milk and butter in microwave or on the stove until the butter melts (30-45 seconds in the microwave.) Add water (if the milk/butter is very hot, use cooler water; if not, use warm water--you want it to be about 110 degrees when the liquids are all added).
Mix in sugar, then yeast. Add eggs (it's helpful if you've beaten them before you add them). Add vanilla.
Stir in 1 C flour. Then add the second cup. I turned mine out here to knead. If yours needs a little more flour to be firm enough, add a little more flour. Add about 1/2 C flour and knead it in. Your dough will be slightly different than regular bread dough due to the high butter content of the rolls. When it's ready you'll be able to make a nice impression with your hands in the dough and your fingers won't get dough stuck to them when you pull it out. It'll be a nice soft, slightly oily ball of dough.
Put it in a bowl and let it rise till doubled, about an hour.
Once it's risen, pull it out, punch it down and then put it on a lightly floured surface and roll it out to about 12x20 inches. It should end up a few milimeters thick.
Now add your 1/2 C of melted butter and smear it around evenly with your fingertips. Combine the sugars and cinnamon and sprinkle it about evenly. Sprinkle on your chopped chocolate chips.

Then you're going to cut it into five 12x4 inch strips. Stack these strips on top of one another.
Mine kind of stretched this time (they didn't last time) I think because I didn't flour my surface and because I let the bread rise too long while I ran errands this morning. I just squished and patched as necessary and all was well.
Then cut your log of strips into 6 equal chunks. And place these in a greased 8x5 inch bread pan with the cut sides up.
Let rise till doubled--40 minutes or so. The slices will get nice and cozy and touch all the sides (sorry I forgot this picture--too eager to get mine in the oven I guess.)
Bake at 350 for 30-40 minutes.
Take it out of the oven. Let it cool for 10 minutes in the pan. Then loosen the sides and turn it out onto a plate to cool completely. When it's still a tinge warm, you can frost it. I recommend the Best Cream Cheese Frosting Ever. Which I'll post below.
Best Ever Cream Cheese Frosting
1/2 package cream cheese (4 oz)
2 1/2 Tbsp butter, softened
1/2 Tbsp sour cream
1/2 C plus 2 Tbsp powdered sugar
1/4 tsp vanilla
PRINTABLE RECIPE
Friday, April 15, 2011
Pantry Pesto Soup
Cheap Eat Challenge: Watch as our family of 6 tries hard despite crazily rising food prices to eat on $6/day.

This soup straddles the line between spring and summer. It is eaten warm, but filled with bright, summery things. It is absurdly simple and, at this point in the year, primarily made of foods from the pantry. However, come summer, fresh ingredients will make it even better. (Home canned tomatoes and home frozen pesto make it nearly as good.)
Below, I give you the bare bones "recipe" I used. It's also good with a sprinkle of Parmesan and I'm sure that bacon, chicken, or little meatballs would match up with it just beautifully.
Pantry Pesto Soup
Serves 4-6
Cook time: 5 minutes
Cost: $1.89
(tomatoes: mine were home canned, but if you buy them, they'll cost about 1.29, beans: .20 for dry, .70 for canned, pesto: mine was homemade, but if you buy it it's kind of expensive. I'm honestly not sure how pricey because I've never bought it. I'm going to make a completely uninformed and out of the air guess and say .30)
1 29-ish oz. can tomatoes with juice (1 1/2 C fresh diced tomatoes)
1 can white beans, drained and rinsed (or 1 1/2 C rehydrated beans)
3-4 Tbsp pesto (2 handfuls of fresh basil, chopped and 1 garlic clove)
If you're using store bought tomatoes, you probably want to throw in 1 tsp of lemon juice or your favorite vinegar to brighten it up.
salt and pepper to taste
Combine ingredients in a pan and warm. (If you're using fresh ingredients, you'll want to saute them in oil for a few minutes and then add the beans and perhaps a bit of tomato juice or broth.)
If desired, serve with a sprinkle of Parmesan, parsley, or finely diced meat.
PRINTABLE RECIPE
Thursday, April 14, 2011
Mango Lassi
Cheap Eat Challenge: Watch as our family of 6 eats on $6/day.

Kip and I were in the yard from about 9:30 until dinnertime. I wouldn't have it any other way, but by the time five o'clock rolled around, we were ready for something tall and cool. (We were also ready to pork out on some pizza.)
Every time I go to an Indian restaurant, I sit there envying these pretty drinks and sipping my water. And then last year my good friend bought me an Indian cookbook. And there was that pretty little picture of that pretty little mango lassi next to a very short recipe. A recipe that was, in fact, so obscenely easy and with so little added sugar that I was sure it wouldn't work. But work it did.
The only thing that makes it better is that even when you figure in the fairly high cost of mangos, you still get a whole blenderful of lassi for nearly half the cost of a glass at a restaurant.
Mango Lassi
adapted from Perfect Indian
Makes 5 cups
Prep time: 5 minutes
Cost: $1.94
(mango: .89, yogurt: 1.00, lime juice: .05)
1 large mango (the book says this is about 10 1/2 oz, though I've never weighed and mine has always turned out well)
3 C plain yogurt
1 C cold water
2 Tbsp sugar (I know this seems low, but give it a go. You'll be surprised at how much the sweet mango tempers that yogurt. If you use an underripe mango, you will need a bit more sugar, but you shouldn't need more than 6 Tbsp absolute tops)
a good squirt of lime juice
ground ginger to garnish (I've never used this)
Peel and cut your mango. Throw it, the yogurt, water, and sugar into the blender. Blend until smooth. Taste and add more sugar if neccessary. Squirt the lime juice in and blend. Pour over ice if desired and garnish with ginger.
PRINTABLE RECIPE

(Somebody's got to learn to take a good picture of a drink. I blame my glasses. And my sloppy pouring skills. )
Kip and I were in the yard from about 9:30 until dinnertime. I wouldn't have it any other way, but by the time five o'clock rolled around, we were ready for something tall and cool. (We were also ready to pork out on some pizza.)
Every time I go to an Indian restaurant, I sit there envying these pretty drinks and sipping my water. And then last year my good friend bought me an Indian cookbook. And there was that pretty little picture of that pretty little mango lassi next to a very short recipe. A recipe that was, in fact, so obscenely easy and with so little added sugar that I was sure it wouldn't work. But work it did.
The only thing that makes it better is that even when you figure in the fairly high cost of mangos, you still get a whole blenderful of lassi for nearly half the cost of a glass at a restaurant.
Mango Lassi
adapted from Perfect Indian
Makes 5 cups
Prep time: 5 minutes
Cost: $1.94
(mango: .89, yogurt: 1.00, lime juice: .05)
1 large mango (the book says this is about 10 1/2 oz, though I've never weighed and mine has always turned out well)
3 C plain yogurt
1 C cold water
2 Tbsp sugar (I know this seems low, but give it a go. You'll be surprised at how much the sweet mango tempers that yogurt. If you use an underripe mango, you will need a bit more sugar, but you shouldn't need more than 6 Tbsp absolute tops)
a good squirt of lime juice
ground ginger to garnish (I've never used this)
Peel and cut your mango. Throw it, the yogurt, water, and sugar into the blender. Blend until smooth. Taste and add more sugar if neccessary. Squirt the lime juice in and blend. Pour over ice if desired and garnish with ginger.
PRINTABLE RECIPE
Subscribe to:
Posts (Atom)
LinkWithin
