Showing posts with label dips. Show all posts

Tuesday, January 30, 2018

Spinach Artichoke Dip

BEST OF THE TASTY CHEAPSKATE


You know how some people don't celebrate Christmas, and everyone who does celebrate Christmas just can't comprehend that (we try, but in our hearts we're really just like, "Huh?").

Well, that's kind of how I am with the Super Bowl. I just wasn't raised with it, okay. And I don't quite get the hoopla. 

Sometimes people will even invite me to their Superbowl parties. And then I always think, "Oh, how nice. I wonder who's playing." And then I think, "Well, it doesn't matter since I basically have no idea who any of those people are anyway." And then I wonder if maybe I should research it or something. I mean, is it rude to attend someone's Superbowl party and be like, "Rah, go faceless men in maroon tights!" Or some such similarly football-educated cheering statement? (Answer: Possibly.)

But then I just bring good food and all is totally well. And the people who eat the food don't even notice that you don't know maroon-tights man's name. And they don't care. Because they're just stuffing their faces and cheering. And if we could all just do more of that in life, then life would probably be a happier place (unless your team loses and then I just try to scooch away as inconspicuously as possible with, hopefully, some uneaten chips and dip). 

So happy Superbowl Sunday and many cheers to whatever men in tights you wish to win!!!


This spinach artichoke dip is the best there is. And I'm kind of old enough now that spinach artichoke chip is just a little, almost, well, retro. You should just embrace that and keep eating it.

Superbowl Sunday aside, we often eat this for dinner with sour dough bread. It's a super quick, somewhat healthy vegetarian thing (so righteous, eating dip for dinner). 


Tips for cheapening: 

1. Buy cream cheese on sale. I almost always buy it when it's $.99. It keeps for many weeks in the refrigerator. You can also freeze it if you're planning to add it to something cooked (the texture changes when frozen, but it gets melty when cooked, so it totally works). 
2. Use frozen spinach. It's cheaper and easier in this recipe
3. Cheese. This is better with decent cheese, but even cheap Parmesan works well, so don't be afraid if you didn't spend a million bucks on cheese. 

Spinach Artichoke Dip
makes one 8x8 inch pan's worth
Prep time: 5 minutes
Cook time: 25 minutes
Cost: $4.20
cream cheese: $1.00, mayo: .10, cheese: 1.00, artichoke hearts: 1.50, spinach: .50, other stuff: .10

Note on spinach: I personally feel that this recipe is better with de-thawed, drained frozen spinach (hurray for the cheaper option). It's already mushy that way and you get a bunch of spinach in that frozen pack. If you're using fresh, cook it just until it wilts and then drain and squeeze the water out before throwing it into the dip. Otherwise, it comes out a little soggy.

Note on cheese: Feel free to mix it up. We've done all Parmesan, a blend of Parmesan, mozzarella, and Romano, a blend of Parmesan and Romano. You do want the harder (stinkier) cheeses to be the bulk of this. Too much mozzarella and it just becomes bland. 

8 oz cream cheese
1/4 C mayo
1 C Parmesan cheese
1 can artichoke hearts, drained and chopped a bit
1 pkg frozen spinach, dethawed with the water squeezed out (or 4 C baby spinach, chopped small or cooked till wilted)
1 clove garlic (or 1/4-1/2 tsp garlic powder in a pinch)
salt and pepper to taste (feel free to taste before cooking--it's still good, not quite transcendent yet, but still good)

Beat cream cheese and mayo. Mix in garlic, salt, and pepper. Mix in cheeses. Mix in artichoke hearts and spinach.

Mix it together well.

Bake at 350 for 20-30 minutes until the edges are brown and bubbly. 

Serve with crusty bread, crackers, or raw veggies.

Thursday, September 11, 2014

Eggplant Dip


Eggplant is a beautiful onyx of a vegetable--hanging off its plant looking all rich and sexy. Until you cook it. And then it is uggally (definition: the state of being so ugly the word must be drawn out and exaggerated, even in written form). I always want to grow eggplant. And buy eggplant. But then after I make it, no one wants to eat eggplant. This must be very sad for eggplant. After all it's still nutritious. It's still valuable. It's still totally delicious. But it doesn't look it. Such is the lot of today's dip. It is not the sexiest dip that will ever grace your table.

True story: I roasted up my eggplant for this dip, scooped out its ugly flesh and put it in my little Magic Bullet cup where it sat in my fridge for three more days. It was just so homely. I nearly threw it away twice--me--fierce opponent to throwing away of food no matter how unsightly it may be. The ugly (ha) truth is that I just couldn't imagine it tasting that good. It's true. And I'm ashamed. Because eggplant, much like women who have birthed four children, should not be discarded merely because the luster of youth has faded away. Eggplant, in fact, (much like women who have birthed four children), only gets better with a little life experience under its belt. Eggplant, in fact, is gross in its raw, uncooked (and still beautiful) state, but perfectly amazing in this not-very-attractive-but-butt-kickingly-tasty dip.

Besides the fact that this dip isn't going to be the next Disney Princess, the only thing I should warn you about is that it takes a while to make because you're going to char and then roast the eggplant. It really really gives it a nice flavor, and it's not hard to do, but it doesn't mean that this won't be on your table in less than 30 minutes. I charred and roasted mine when it was convenient and then just left it in the fridge for several days until I was ready for a quick lunch.


Eggplant Dip
adapted from Smitten Kitchen
makes a couple cups or about 4 small servings
Prep time: 10 minutes
Cook time: 30 minutes to roast and however long it takes you to char (on the grill that will be shorter; under my broiler, it took a while)
Cost: $3.15
eggplant: 2.00 (farmer's market prices), tahini: .75, other stuff: .40

2 medium eggplants (a pound or less each)
1-2 Tbsp olive oil
1 tsp coarse salt
6 Tbsp tahini
2 garlic cloves (smallish, unless you love garlic)
juice of a lemon (or 2-3 Tbsp)
pinch of cayenne pepper
couple pinches ground cumin
parsley for garnish

Char your eggplant. This can be done on the grill, over the flame of a gas stove, or under your broiler. I used the broiler, turning the eggplant a quarter turn every 8 minutes or so. It took a while (which surprised me); I think the other methods would be faster, but the nice thing about the broiler is you don't have to pay it too much attention (as you would holding it over a flame).

Heat oven to 375. Brush a baking sheet with olive oil and sprinkle with salt.

After the eggplants are charred, let them cool enough to handle and then cut them in half. Place them flesh-side down on the baking sheet and roast for about 30 minutes or until they're very tender when pressed or pierced.

Scrape out the eggplant flesh and put it into a blender or food processor (I used a Magic Bullet.) Discard the skins. I cooled my flesh before making the rest of the dip, but you don't have to. Add tahini, lemon, cayeen, cumin, and parsley if you'd like (I skipped the parsley and used it merely as a garnish).

Pulse in blender until it's the consistency you desire (I like mine a bit of the mushy side so that it's more hummus-like, but it can be left chunky if that's your thing.) Taste and adjust seasonings.

Serve with tortilla chips, sour dough bread, or vegetables.

PRINTABLE RECIPE


Wednesday, September 3, 2014

Fluffer Nutter Dip


A few days ago I made some chocolate tortillas to be served with fruit as fruit tacos. These were met with only moderate success (even with plenty of whipped cream thereby). But me, being me--I didn't really want to throw away the leftover chocolate tortillas. But I didn't really want to slather them in salsa either.

I remembered a dip I'd had once at a church gathering. It was fluffy and peanut-buttery. That seemed like a good place to start. So I looked up fluffer nutter. It is a delightful combination of equal parts peanut butter and marshmallow fluff. Well, I'm pretty sure you can't lose with that combo (unless you're a contestant on The Biggest Loser, in which case you could lose rather easily with that combo).

The problem was that I, being a horrible parent and all, do not keep marshmallow fluff on hand. So I decided to experiment with my own slightly healthier version of fluffer nutter. And by slightly healthier, let me clarify that I do mean slightly. As in "to a small degree; not considerably" healthier. Because that, my friends, is the kind of hard core health fanatic I am. Although--in my defense--I have to say that my attitude is not quite as Epicurean as one blogger, who said that one of the advantages of the original dip (a dip which consists of equal parts peanut butter and marshmallow fluff) was that it would cut the carbs. By which she means, I assume, that she would normally just flop the jar of marshmallow fluff on the table and have at it. Thank goodness we added some peanut butter. Now it's a health food. And I, I--promoter of healthy dips for picky kids--will now take it one step further. I think we should call it a super food.

Instead of marshmallow fluff, I added cream cheese and a little powdered sugar. I might have been proud of that adaptation's healthiness except that it wasn't fluffy enough (or quite sweet enough). So I added whipped cream. (What? it was totally homemade--that qualifies as righteous, right?)

This can be served with real bonifide chocolate tortilla chips by making these tortillas, then cutting them and frying them up (health food fanatic--right here). However, I would have to tell you that this would not be worth the work. It'd be a better bet to serve them with apple slices or chunks of banana. Or--if you are not a health nut (ha--puns and sarcasm) like myself--perhaps some graham crackers or pretzels.


Fluffer Nutter Dip
makes about 3-4 Cups (which is enough for a party and probably too much for your family)
Prep time: 10 minutes
Cost: $4.00
peanut butter: .85, cream cheese: 1.00, powdered sugar: .15, whipped cream: 2.00

1 C peanut butter
8 oz cream cheese
1/2 C powdered sugar
2 C whipped cream (I used the real thing, but I expect nasty Cool Whip would work too--yes, I'm a cream snob)

Cream the peanut butter and cream cheese together. Beat in the powdered sugar.

Add in the whipped cream. If using the real stuff be sure not to overbeat it--just beat until it's blended.

Serve with fruit slices or sweet crackers.

PRINTABLE RECIPE

Monday, December 30, 2013

Cranberry Salsa


Okay, so maybe you are an open-minded foodie and not even phased by the idea of cranberries as salsa. But if someone had come up to me five years ago and been like, "Hey, do you want some cranberry salsa?" I would have looked at them like they had just stepped off of Mars. Fortunately, I tasted this without knowing quite what it was. It was with a plate of crackers at a party. It was pretty. So I ate it. And then I loved it. I bet you do too.

It is punchy-ish, with a bit of sweet-ish. It's served with cream cheese, but good by itself as well. You can eat it with crackers (my favorite) or with chips. It's also pretty awesome on a leftover-turkey sandwich.

This is from the same friend who gave me the recipe for cranberry pomegranate relish. She says she can't even claim this salsa recipe anymore because so many people have asked for the recipe and make it for their own parties.

Cranberry Salsa
prep time: 5-10 minutes
Cost: $2.75
cranberries:  (Aldi prices) 1.00, onion: .15, peppers: .15, sugar: .10, cilantro: .15, ginger: .15, lemon: .05, cream cheese: 1.00

1 bag cranberries, rinsed and drained
1/4 C minced green onions
2 jalepeno peppers, cored, seeded, and minced
1/2 C sugar
1/4 C cilantro leaves, minced
2 Tbsp grated ginger
2 Tbsp lemon juice
1 8-oz package cream cheese (don't mix this in--you serve it with the salsa)

Now you could just throw all this stuff into a food processor and have at it. But I didn't. I worried that by the time I got my onions and peppers small enough to not be offensive to anyone that I might have mushy cranberries. So I gave the onions, peppers, cilantro and ginger a good chop first (it only took a few minutes and gave me some piece of mind). Then I processed the cranberries in the food processor until they were somewhat chopped. Then I added the other ingredients and processed for a few more pulses until the cranberries are finely chopped but not mushy (we're not making jam here, although I'd bet with a little pectin, you probably could--hmmm) and the other stuff is well incorporated.


Cover and refrigerate for at least 4 hours (You really must do this; it's not NEARLY as good straight off).

Place your cream cheese on a serving platter (I like to smush it up a bit, but you don't have to). Then dump the salsa over it and serve with crackers or chips.

PRINTABLE RECIPE


Thursday, October 24, 2013

Cheater Caramel Fruit Dip


I love caramel. I love the real stuff that you painstakingly cook on the stove, melting sugar, whisking in butter and cream. I love it. But I don't always make it. I certainly don't whisk it up for an after school snack or to take to a play date with a bunch of young hooligans running around. And I certainly don't do it for a group of boy scouts who (somehow I suspect) would simply not have a proper appreciation for the art of melting sugar and who would just as soon eat burned marshmallows that fell onto the ground as they would lovingly prepared caramel sauce. That said, I wasn't going to send my son to the boy scout campout with burnt marshmallows. My assignment was a fruit salad, but all I had by way of fruit were apples and bananas and I really didn't want to make a run to the store (again--feeling that my efforts to accrue raspberries in October might be wasted on the adorable, yet perfectly clueless group of young boys). Still I wanted to dress our meager fruit offerings up with something. Something loving, something good, something that said, "You might not appreciate meticulously browned sugar, but I think you'll like this." And I did. And they did.

This dip is wonderfully easy, perfect for fall, and a crowd-pleaser. It's not really caramel at all (don't call it caramel to your foody friends; they'll mock you behind they're backs while they slurp oysters together). But there's something about it that tastes caramel-y. As such it's perfect to pair with apples or bananas. Especially at this time of year. I know that it feels a little like cheating. That's because it is a little like cheating. The thing is, sometimes with food it's okay to cheat (Warning: please do not try cheating with actual husbands, teachers, or the IRS; only food. Thank you.) Sometimes you're out of time, out of ingredients, or out of money (this is cheaper than real caramel too). Sometimes you just need something that says, "We're just going to relax and have fun tonight." That's an okay thing to say people; really it is.

And the fact is that this dip is delicious just how it is. So let it be and enjoy it. Call it Brown Sugar Dip if it makes you feel better about things. You can still make real caramel when the mood strikes or when you've got the time or an appreciative audience. But you don't have to tonight.

Cheaper Caramel Fruit Dip
from allrecipes
Prep time: 5 minutes
Cost: $1.35
cream cheese: 1.00, brown sugar: .35

8 oz cream cheese
1 C brown sugar
2 tsp vanilla

Beat it all together until smooth. If it's still grainy after 1 minute, let it sit for a couple minutes (the grainy bits will melt into the mixture) and then beat it again.

PRINTABLE RECIPE

Saturday, December 31, 2011

Clam Dip

Cheap Eat Challenge, Part 2: Watch as our family of 6 eats on less than $10/day. (We're almost done... stay tuned; I'll have a full report come Monday.)


Just grabbing a few minutes.

This is a Pace family tradition. It happens to be a Thanksgiving tradition (which always seems funny to me, but actually makes perfect sense because you're kind of hungry at lunch time, but the big meal won't be ready for a couple hours still; the Paces eat this to solve that dilemma). But that's not the point; they point is that it'd work well for the new year too.

I must warn you, however, that's it's mostly a throw this in and throw that in kind of a gig. Don't worry; you can do it.

Clam Dip
Makes a bowl full (how's that for precise? wait till you see the recipe)
Prep time: 5 minutes
Cost: $2.00
(cream cheese: .99, clams: 1.00?)

1 block cream cheese softened
1 can clams (chopped or minced), drain the juice but reserve some of it
lemon juice
garlic salt
Worcestershire sauce

Beat cream cheese till smooth and creamy. Add chopped or minced clams and mix those in. Now you're going to splash in a bit of the clam juice--let's start with 1/2 Tbsp and see how it goes for you.

Then splash in some lemon juice (try another 1/2 Tbsp). Then put in a bit of garlic salt (start with 1/4-1/2 tsp of that).

Then splash in some Worcestershire sauce. Go for 1/2 Tbsp of that to begin with too.

Now taste your dip. Does it need more fishy, lemony kick or more savory Worcestershire or a bit of garlic or salt. Adjust your seasonings and use it as a dip for crackers or veggies tonight.

PRINTABLE RECIPE

Friday, December 23, 2011

Big Easy Ball o' Cheese and Ham

Cheap Eat Challenge, Part 2: Watch as our family of 6 eats on less than $10/day.


You know what I like about this recipe. Well, a lot. It's easy. It's quick. It's really really good. Plus, it will work for the casual Christmas party you're throwing tonight for a few friends, or the New Year's Eve get-together next week when you don't want to go all out. And if you're one to eat a ham for Christmas dinner, this is an awesome way to use up some of your leftovers.

All that I ask is that you don't underestimate it for its simplicity. These few ingredients pack a mighty tasty punch. You can make it with deli ham, but if you've got that leftover whole ham, that will really take this up a notch.

Big Easy Ball o' Cheese and Ham
Makes 1 big ball
Prep time: 10 minutes
Cost: $3.50-ish
(cream cheese: 2.00, mayo: .15, nuts: .50?, ham: 1.00?--okay, I'm a little sketchy on the costs here, since I used leftover ham and may or may not have forgotten to measure my nuts)

16 oz. cream cheese
1/4 C mayo or Miracle Whip (I used mayo)
1/4 C onion (it gets pureed if you're not into onion-y texture, but if it's the taste that really bothers you, I must warn you, the onion taste is detectable--not overpowering, but yes, it's there)
5 oz. ham
1 C chopped pecans (or walnuts if you happened to be the unprepared type who has no pecans lying around and is not willing to go to the store on Dec. 23rd)

If you're pecans/walnuts are not pre-chopped, put them in a food processor and give them a go until they're good and fine.


Take them out and put them in a different bowl. Wipe or rinse out your processor.

Now put in your cream cheese, mayonnaise, and the onion. Blend until it's smooth and creamy.

Add the ham and pulse or run it on low until the ham is in small bits, but not pureed. This is the part that kind of makes this cheese ball for me. If you get the ham nice and small, the taste and flavors it has are distributed beautifully throughout the cheese ball, but there's enough texture left that nobody feels like they're dipping their crackers in ham-flavored baby food.

Shape your cheese ball. (Confession: I'd never done this before and was a little nervous. It was easy. You just begin plopping it on your serving vessel and shape it into a ball with a spatula.) Sprinkle/pat nuts on until the entire ball is covered.

Serve or cover and refrigerate for later.

PRINTABLE RECIPE

And Merry Christmas from Snowbeard the Pirate here:
Clearly my sense of the aesthetic is defunct.

Thursday, October 27, 2011

Spider de Hummus

Cheap Eat Challenge, Part 2: Watch as our family of 6 eats on less than $10/day.


Okay okay, before the rude comments (not that you would, but I know you're all thinking it), start pouring in about the utter homeliness of this little guy, (not to mention the slightly embarrassing scratched state of my Fiesta ware), not to mention the fact that this poor fellow is missing no less than 6 eyes and those creepy pincer things and his thorax for heaven's sake... Just first hear me out: Each and every one of my kids knew that this was a spider. And they were all delighted by it. Only one joined in dining on the hummus with me, but one is more than none, one is--by my very low standards--practically a conquest.

I got the idea for a savory spider from a much more stunning example over at Apron Strings. I liked the idea of a non-sweet, yet still thematic snack. But I wanted to make mine completely healthy and I had a purple pepper languishing in my refrigerator. I'd never had a purple pepper before, but when I saw Donna's spider, I just knew that dark purple legs would be just the thing, right? I said, right. Okay, well, maybe if Apron Strings had done it. But they didn't; I did. So I confess it, this snack isn't cute enough to take to a party. Unless of course, it is a party with very loving friends. But it is cute enough to delight your kids. And I was thinking it might be just the right pre-trick-or-treat snack: savory and protein-filled, with some veggies thereby. If, of course, your brood is the type to go for the hummus thing. 

But even if they don't, you can. Because my frumpstress spider tasted awesome and there's no use pretending you're not going to dip into any of the kids' candy after they're in bed.

By the way, purple bell peppers have a stronger taste than I expected. I was thinking they'd be along the lines of the sweet reds, but not so. They have a slightly stronger taste than green bells even, at least this one did.

Spider de Hummus
Serves 1-2
Prep and assembly time: 10 minutes
Cost: $.65
(hummus: .35, bell pepper: .25 (farmer's market for a small one), jalepeno: .05)

Your favorite hummus recipe (here's mine)
Bell peppers (one per spider), cut long (I used purple, but green would work too)
Jalepenos, sliced into rounds, for the eyes (or olives or some carrot rounds or whatever)

Plop 2/3 C hummus onto a plate. Add legs. Add eyes. Eat up.

Note: A recipe of my hummus will make 3 or 4 spiders like this.

Thursday, September 15, 2011

Roasted Vegetable Hummus

Cheap Eat Challenge, Part 2: Watch as our family of 6 eats on less than $10/day.


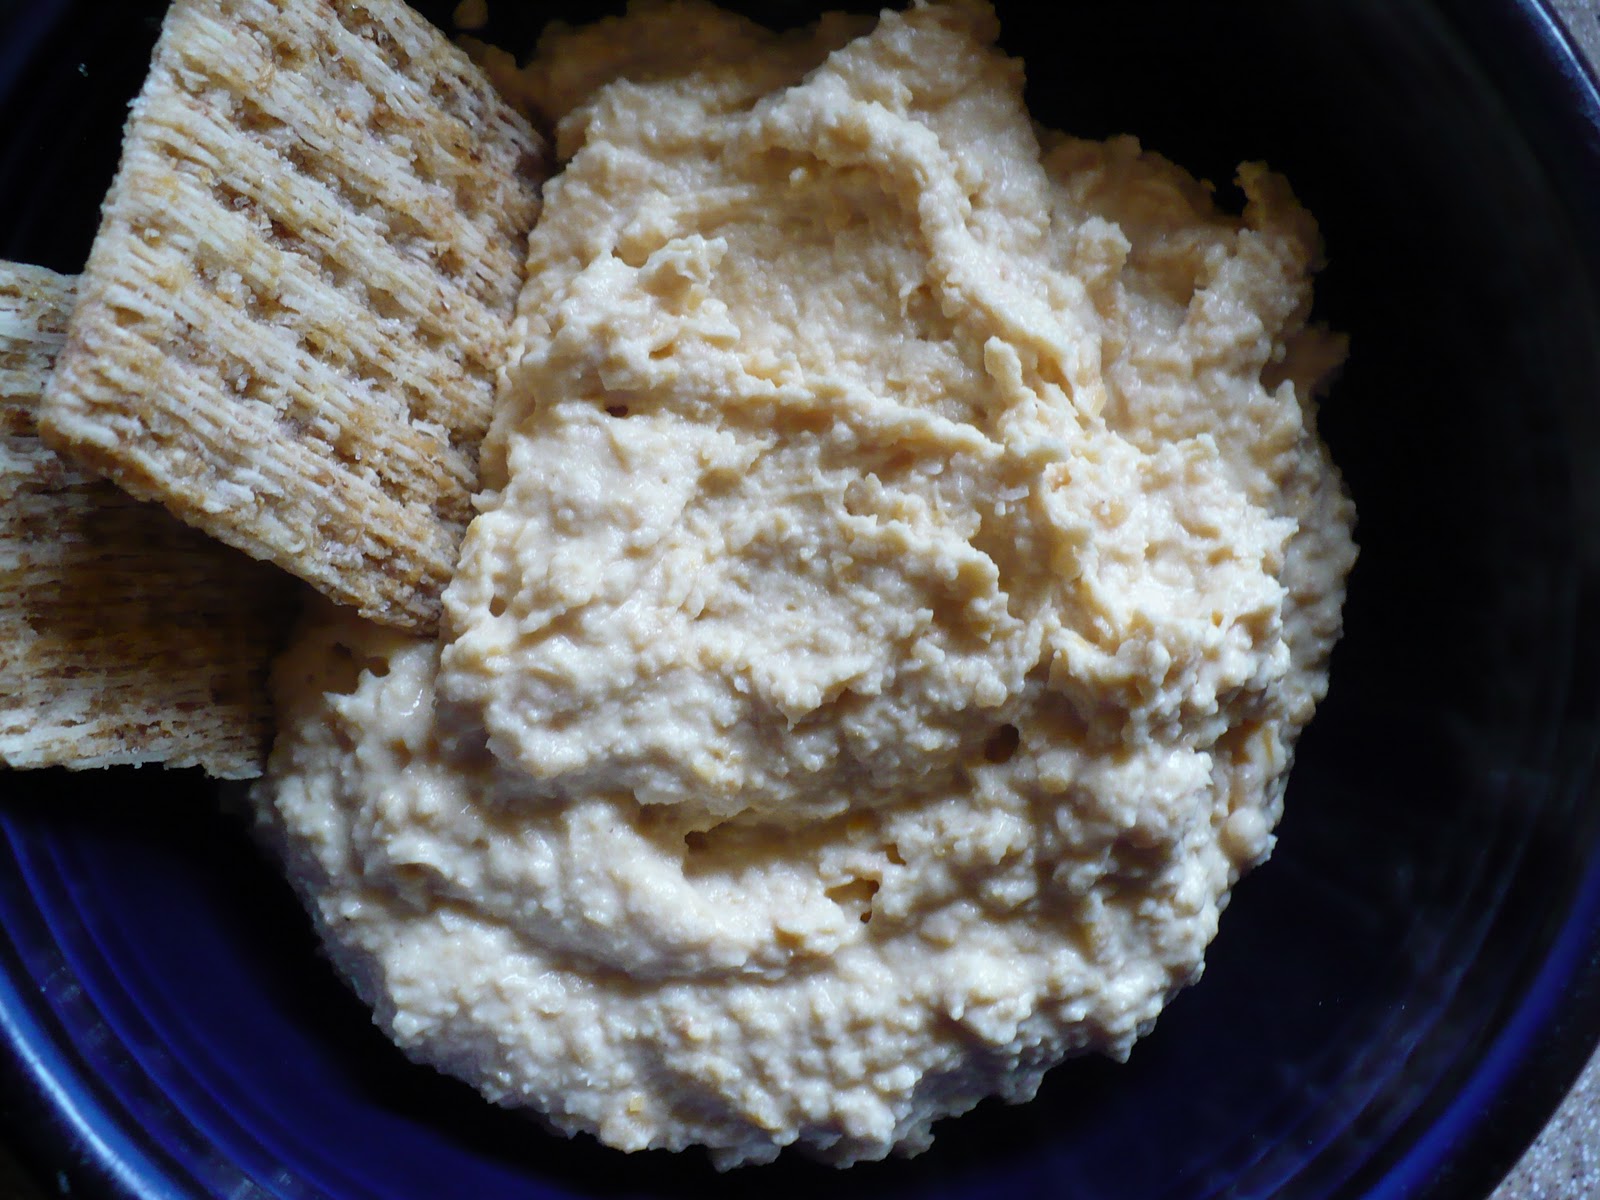
So I took a jillion pictures of this dip, side by side with the plain vegetable dip and the plain hummus that inspired it. The dips were colorful; they were interesting. Unfortunately, the larger images came out with certain of those dips looking a little like poop. So you get this severely cropped version. Note to self: when taking pictures of thick dips, just...just be careful.

A while back, I shared this roast veggie spread. I mused about combining it with hummus. And today that is just what I did. It was really good. It was even healthier than regular hummus. And it was a great way to use up ugly vegetables.

But it does require the good part of an hour for vegetable roasting. I couldn't help but wonder if it would be easier just to bend some raw chopped pepper, tomato, and/or carrot into your hummus. Also, I was hoping it would come out so that you just threw one recipe of hummus in the blender with one recipe of dip. And you could, but I preferred it in both texture and taste when it had more hummus and less vegetable--about 2 parts hummus to 1 part vegetable to be exact. That is the recipe I'll give below, but you'll notice you're using some pesky 1/2 vegetables. Sorry, folks, it tastes better that way.

Roasted Vegetable Hummus
Makes 3 C dip (approximately)
Prep time: 10 minutes
Cook time: 30-40 minutes
Cost: about $2.00 if your vegetables are cheap

Roast at 400 degrees:

1/2 eggplant
1 small tomato, seeded
1/2 red pepper
1/2 onion (1/4 if your onion is huge), optional
1 clove garlic
1-2 Tbsp olive oil
salt and pepper for sprinkling

Dice these and roast them at with olive oil and salt and pepper for 30-40 minutes at 400 degrees until they turn dark at the edges. Note: I think when combining this with the hummus you can skip the onion which will give the final product a more purely hummus-y taste. But it's up to you.

Once roasted, let cool for a minute and then throw them in the blender with this:


1 can chick peas, drained
1/4 C tahini
1/4 C olive oil
1/8-1/4 C water

Blend until smooth.

Eat with crackers or sour dough bread. Oh, and have some gum on hand for afterwards; you're gonna need it.

PRINTABLE RECIPE

Wednesday, March 9, 2011

Lemon Garlic Hummus

Cheap Eat Challenge: Watch as our family of 6 eats on $6/day.


Ever since I read this simple recipe for falafal, I haven't been able to get my mind off of chick peas. The falafal is going to have to wait until my cilantro comes up this spring, so today I indulged myself in some hummus. It was one of those cravings that didn't have time to wait for my chick peas to soak, so I just opened a can of them.

Kip said my can of chick peas smelled like dirty diapers. I said he smelled like dirty diapers. Because that's the kind of mature and nurturing relationship we have.

And then I made hummus, and I left him to feed the real creators of dirty diapers.

Lemon Garlic Hummus
Serves 4
Prep time: 10 minutes
Cost: $1.05
(chick peas: .65, tahini: .15, lemon juice: .10, olive oil: .10)

Note on tahini: You can usually find it at natural foods stores or in the ethnic and/or gourmet sections of your grocery store. If you've never used it before, it's a type of "butter" (as in peanut butter, almond butter) made from sesame seeds.

1 can chick peas, drained and rinsed (or about 1 1/2 C rehydrated chick peas)
3 Tbsp lemon juice
2-3 Tbsp sesame tahini
1/4 C olive oil
1 clove garlic
1/2 tsp salt

Blend it all up in a blender or food processor. Serve on crackers or cut vegetables.

PRINTABLE RECIPE

This recipe, as well as my spinach artichoke dip and Reuben dip, is linked up to the Every Day Sisters bloghop for appetizers. Have a look.

Monday, February 7, 2011

Hot Reuben Dip

Cheap Eat Challenge: Watch, or join us as our family of 6 eats, or tries to on $6/day.


So I'm a little late to the Superbowl. It and I never quite make each other's radar.

Fortunately, this dip/sandwich spread would be good for any old sporting event party you'd like to have. Or any other kind of party. Or any old evening when you're pressed for something quick, hot, and so delicious.

We use it as a sandwich spread and like it best served on slices of sourdough bread. But it's great as a dip served with crackers or cut veggies. Last night we ate it with some homemade white bread, and green drinks on the side.

Hot Reuben Dip
Adapted from Betty Crocker's Quick and Easy Cookbook
Serves 4-8
Prep time: 5 minutes
Cook time: 15 minutes
Cost: $3.72
(cream cheese: $1, corned beef: .58, Thousand Island: .50, sauerkraut: .15, Swiss cheese: 1.50)

Note on substitutions: Don't like sauerkraut, just leave it off (you'll notice in the picture below that half of ours has it and half of it doesn't. I'm sure that doesn't surprise you). And if you hate Swiss cheese, you can use mozarrella or a mild cheddar. But the Swiss is delicious. And of course, it and the sauerkraut make a reuben a reuben.

1 package cream cheese (8 oz), softened
1/2 C Thousand Island dressing
1 1/2 C shredded Swiss cheese (6 oz.)
1 oz deli sliced corned beef (I just used the cheap Budding package), chopped into 1/2 inch (or smaller) bits
1/2 C drained sauerkraut

Heat oven to 400 degrees.

Combine cream cheese and Thousand Island. Add 1 C of Swiss cheese and corned beef. Mix well. Spread onto bottom of 9 inch pie plate.

Top with sauerkraut and remaining 1/2 C Swiss cheese.

Bake for 15 minutes or until edges are brown and bubbly.

Serve warm with crusty bread, cut vegetables, crackers, or pretzels.

PRINTABLE RECIPE

Friday, December 31, 2010

Hot Spinach Artichoke Dip

Cheap Eat Challenge Count Down: 1 Day


That's right, tonight was our last night to eat without calculating how much it will all cost. We had spinach artichoke dip on homemade sour dough bread with polska kielbasa. And then Kip went to work. Which is how New Year's Eve often goes in this house.

I realize I'm a little late if you were looking for the perfect dip for your party tonight. Sorry. This is a good one too. Really good. Kip hates artichokes, but Kip loves this dip. However, I couldn't get it up sooner because I've been spending all my spare time the last couple of days doing some (hopefully) careful shopping in preparation for the beginning of the cheap eat challenge. I'm kind of nervous. Kip is kind of nervous. I'm predicting a lot of eggs and potatoes. But tonight. Tonight we dined on meat and cheese and then after Kip had gone, I made chocolate ginger cookies. I'll save that recipe for sometime in January when folks are missing the sweet indulgences of December.

Hot Spinach Artichoke Dip
Serves 6-10

Note on spinach: I personally feel that this recipe is better with de-thawed frozen spinach (hurray for the cheaper option). It's already mushy that way and you get a bunch of spinach in that frozen pack. If you're using fresh, as we did tonight because I forgot to buy frozen, chop it up small, or cook it just until it wilts before throwing it into the dip. Otherwise, it comes out just a little teeny bit more toothsome that I like it in this dip.

Note on cheese: Feel free to mix it up. We've done all Parmesan, a blend of Parmesan, mozzarella, and Romano, a blend of Parmesan and Romano, and sometimes just mozzarella (though all mozzarella isn't my favorite one--still good, but missing the kick of those harder cheese)

8 oz cream cheese
1/4 C mayo
1/2 C mozzarella cheese
1/2 C Parmesan cheese
1 can artichoke hearts, drained and chopped a bit
1 pkg frozen spinach, dethawed with the water squeezed out (or 4 C baby spinach, chopped small or cooked till wilted)
1 clove garlic (or 1/2 tsp garlic powder in a pinch)
salt and pepper to taste (feel free to taste before cooking--it's still good, not quite transcendent yet, but still good)

Beat cream cheese and mayo. Mix in garlic, salt, and pepper. Mix in cheeses. Mix in artichoke hearts and spinach.

Mix it together well.

Bake at 350 for 20-30 minutes until the edges are brown and bubbly. (Didn't get a good edge picture. We were starving and Kip had to get to work soon.)

Serve with crusty bread, crackers, or raw veggies.

PRINTABLE RECIPE

LinkWithin

Related Posts Plugin for WordPress, Blogger...