Showing posts with label sweet potato. Show all posts

Monday, January 16, 2017

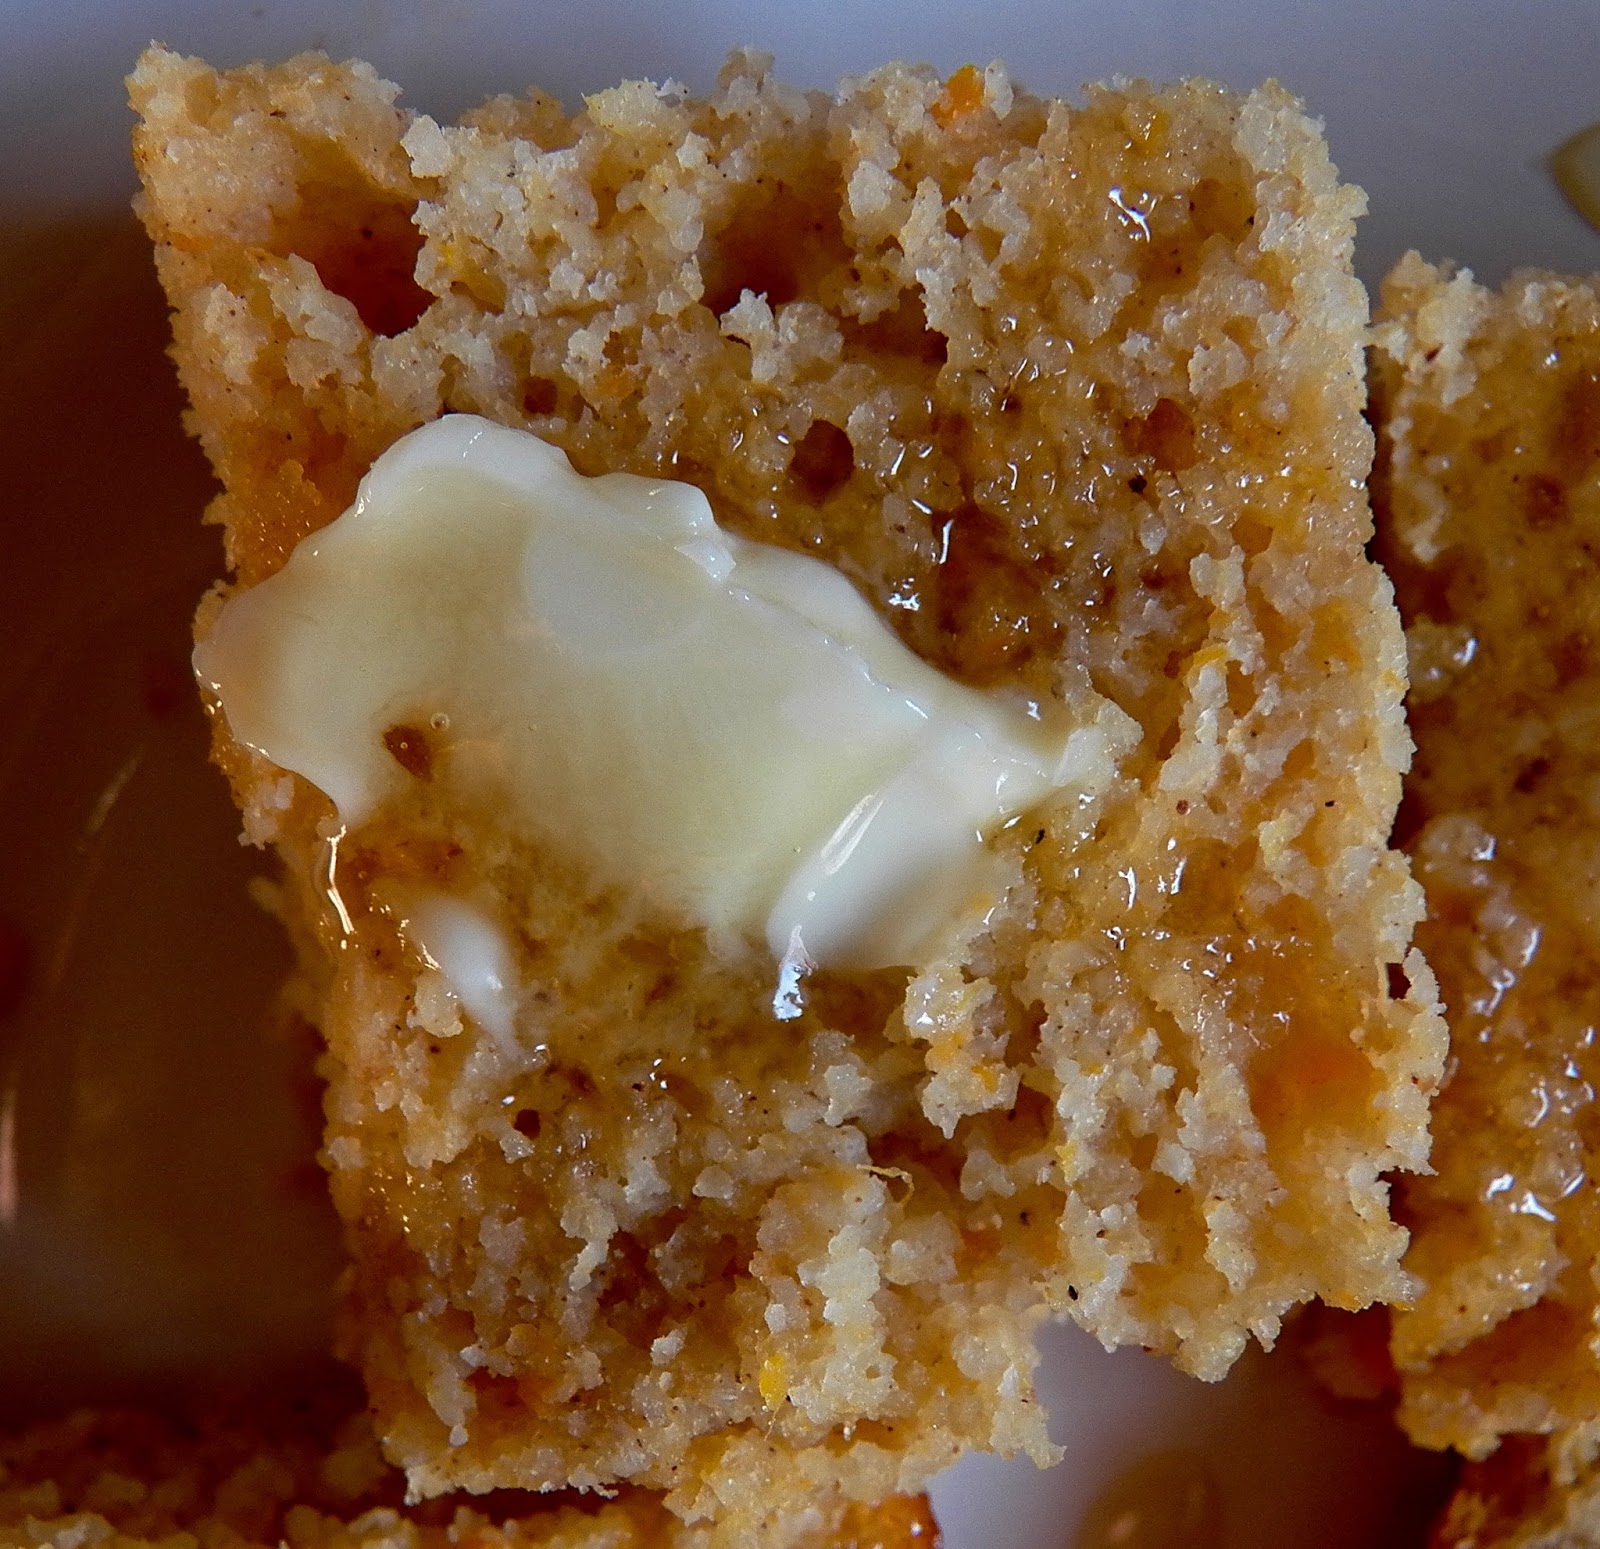
Sweet Potato Cornbread


One of the key things in eating tasty and cheap is packing as much health and yumminess into your dishes as possible. That said, health and yumminess are sometimes kind of difficult to balance.


 In this cornbread, we have a nice balance of homey comfort food and healthy grains and vitamin-A packed sweet potato. There's nothing like working some orange veggies into your comfort foods. I think your grandmothers would all approve.


P.S. I think that pumpkin would work just as well, but I haven't tried it yet.

Sweet Potato Cornbread
adapted from Chew Out Loud
makes one 8x8 inch pan (16 small pieces)
Prep time: 10 minutes
Cook time: 20-30 minutes plus any cook time you need for the sweet potatoes if not using leftovers
Cost: $2.25
sweet potato: .40, cornmeal: .40, cream of wheat: .25, flour: .10, sugar: .10, eggs: .10, Greek yogurt: .50, milk: .10, other stuff: .30

1 large sweet potato (about 1.5 C mashed sweet potato)
1 C whole grain cornmeal (of course you can also use the normal kind and that works too, but it's a little less healthy)
1/2 C Cream of Wheat
1 C all-purpose flour
1/2 C sugar
1 Tbsp baking powder
1 tsp cinnamon
1/2 tsp nutmeg
1/2 tsp salt
2 eggs
1/2 C Greek yogurt, plain
3/4 C milk
2 Tbsp oil (olive of canola)
butter for topping

So first you have to have some cooked sweet potatoes. You can use leftovers (roasted or boiled) or you can peel and boil some up for this (which will take 20-30 minutes). Mash them up.

Combine dry ingredients.

Combine mashed sweet potato and wet ingredients. Depending on how good of a masher you are, you might want to just throw them in a blender and give them a whiz.

Then combine dry and wet ingredients.

Grease an 8x8 inch square pan.

Bake at 400 degrees for 20 minutes or until a knife can be inserted and not come out with dough on it (moist crumbs=fine; wet dough= note fine).

PRINTABLE RECIPE


Sunday, November 13, 2016

Secret Recipe Club: Sweet Potato Waffles


I mean, just, yes. These are awesome. Like perfect fall food. Seems indulgent, but actually super healthy. Perfect texture. Easy to make and work with. Makes your house smell like autumnal heaven as they cook. And cheap, totally cheap. So good in every way.

I made these for my Secret Recipe Club recipe this month. I had A Day in the Life on the Farm--a blog written by Wendy who lives on a farm in a small town. Le sigh. I was looking for something homey and farmy for Thanksgiving, but then I saw these, and one day I needed a quick meal. So I made them. And fell madly in love. Madly. I'm still swooning over their awesomeness. You have to make them and eat them and love them.

Also, if you have leftovers, you can pop them in the toaster (they're fairly sturdy) and then they come out perfect all over again. You know what this means, right? You should make a million.


Sweet Potato Waffles
adapted from A Day in the Life on the Farm
makes 12-14
Prep and cook time: 30-40 minutes
Cost: $1.65
sweet potatoes: .50, buttermilk : .20, eggs: .40, butter: .25, flour: .10, other stuff: .20

2 sweet potatoes (on the larger side)
1/2 C buttermilk (or 1/2 Tbsp vinegar and 1/2 C milk, which is what I did since I had no buttermilk)
4 eggs
6 Tbsp butter
1 tsp cinnamon
1/2 tsp cardamom
1/2 tsp nutmeg
1/2 tsp salt
1 C all-purpose flour
1 tsp baking powder
1/2 tsp baking soda

Peel, cube, and boil your sweet potatoes until they're fork tender. Drain.

Put the sweet potatoes in a food processor (or blender if you don't have a food processor). Then add butter and process. Then add the buttermilk, then eggs, then cinnamon, cardamom, and nutmeg. Blend. Then add the salt, flour, baking powder, and baking soda.

Now you just cook the waffles according to your waffle makers instructions.

Note: I served them with this caramelized pear syrup that was also beyond awesome. I haven't written down proportions yet (coming soon...) because I just throw stuff in and don't measure, but if you'd like an idea of what I do, here you go: Peel and cut the pears. Melt butter in a skillet and then add pears, cooking until soft. Sprinkle generously with brown sugar. When it's cooking and bubbling and smells like sainthood, add a glug of cream and stir. Yeah, it's amazing. But it's not really sainthood...

PRINTABLE RECIPE


Monday, March 10, 2014

Farro with Roasted Sweet Potatoes and Tahini Dressing


So I've stopped hurling desserts at you. You miss them don't you. I know; I know. Everyone's just like, "That woman has a problem" and then when the Nutella-filled dessert items stop coming...

But don't miss them too much. Because some healthy foods are just so good and so deeply satisfying that they practically make you swoon in just the same way. There are many many great meals out there, but some of them just stumble into the realm of perfection--where the flavors balance perfectly and the textures balance perfectly and the flavors and textures meet and then balance perfectly again. This is one such meal. When I read about the tahini dressing, I thought, "Umm, I don't know; tahini is just so bitter." But seriously--it is the perfect balance to the sweet roasted potatoes and the chewy farro. I thought the pine nuts sounded amazing, but then I forgot them and it was still amazing. I'm sure it'd be doubly amazing with them. I mean, it's a perfect meal.

And if perfection isn't good enough for you, it's also vegan. And easy.

Farro is part of the wheat family. Per the bag my farro came in it comes from older varieties of wheat and is therefore something that even people with gluten intolerances can eat because it has not been modified (GMO-ed) over the generations. I hope that's true and it makes sense to me, but I can't promise anything. In a nutshell, farro comes from certain types of wheat (the whole portion of the wheat--it's a whole grain), but not just any wheat could be considered farro. When cooked it should be chewy and pleasantly toothsome. I got mine from my sister in D.C. You can order it online, but then it's a good deal more expensive. Mine was $6 for 3 pounds, which is a good price.

It can be a side or a main dish. It can be left very basic or pumped up with vegetables (I used asparagus in the picture above) or even chunks of chicken.

Farro with Roasted Sweet Potatoes and Tahini Dressing
adapted from Kalyn's Kitchen
Serves: 8 as side dish portions; 4-6 otherwise
Prep and cook time: 20-25 minutes
Cost: $4.80 (That's just about $1.20/meal, but you can cheapen it further by leaving out the pine nuts as I accidentally did--it was still awesome)
sweet potatoes: .75, farro: 2.00, stock: .40, pine nuts: 1.50, other stuff: .15

Note: Okay, I get that farro is weird. It's actually wheat. And it's amazing. If you don't have it you could use barley, which will take longer to cook (or even brown rice in a pinch). But truly the farro is something special. Try it if you can.

2 medium sized sweet potatoes, peeled and cut into 1/2 inch dice (about 4 C total--I probably had a little less than this)
1 Tbsp olive oil
1 tsp dried thyme
salt and pepper
2 C farro (I don't know if you can even buy this locally, but you can order it online)
4 C vegetable stock (or chicken broth)
1/2 C toasted pine nuts
sliced green onion for garnish

Dressing:

1 Tbsp rice vinegar
1 Tbsp Tahini
1/2-3/4 tsp salt
dash pepper
1/4 C olive oil

Heat oven to 400 degrees. Coat the diced sweet potatoes in olive oil, thyme, salt, and pepper. Spread on a cookie sheet and roast for about 30 minutes, tossing/mixing them every 10 minutes or so. You want them to have some good color on the sides by which I mean at least one or two sides should be more brown than orange, even though that can be scary, but it creates a caramelized-type flavor that is unbeatable.

While they're roasting, cook your farro. To do this, put the broth into a pot and heat it. Add the farro. Stir and let it simmer, uncovered for about 15-20 minutes (depending on the type of farro you have, this could take longer--it comes in different sizes). You can stir it occasionally. When done, it should be chewy, but not crunchy. If there's any broth left, pour it out.

When the sweet potatoes are ready, add them to the farro.

Then make your dressing. To do that, just mix all those dressing ingredients.

If you happen to remember, toast your pine nuts. You can do this by tossing them in a hot skillet and stirring them around for a minute or two. Or (if you don't want to dirty another pan) you can put them on the cookie sheet and back in the oven, stirring them every minute or two until they're lightly browned and aromatic.

Add the pine nuts to your farro/sweet potatoes. Then pour the dressing on, mix it up, and garnish with green onions.

You can add other vegetables if you wish. I've made it with and without the asparagus and loved both.

I also think that if you'd like to un-vegan it, chunks of chicken would be delicious with it.

We served it as a side for burgers and I found it so good I could have skipped the burger.

PRINTABLE RECIPE

Sunday, November 10, 2013

Spicy Sweet Potato Soup


This month is Secret Recipe Club. I got Cafe Lynnylu. It was lovely--sophisticated (but not excessively difficult) recipes and gorgeous pictures.

I could not decide whether I wanted to make the sweet potato soup or the Lemon Rice Cake. Finally I chose the soup. I'd like to say that it was my nice, healthy attitude that won out, but it was really that I'd neglected to pick up almonds at the store and just couldn't bear to make the lemon cake without them.

I've been looking for a sweet potato soup for a while that wasn't sweet, but savory. This also has a bit of a kick, which I love.

Spicy Sweet Potato Soup
adapted from Cafe Lynnylu
prep and cook time: 45 minutes
Cost: $2.00
onion: .10, sweet potatoes: .65, chicken broth: 1.00 (made from granules), other stuff: .25

Note: I halved this. Also, I used chili sauce instead of chipotle chilies en adobo because I accidentally bought the wrong thing due to a shopping list malfunction. I added a bit of chili powder because the sauce I bought wasn't very spicy. If you've got it, try this with one chipotle chili en adobo instead of the chili sauce.

2 Tbsp olive oil
1 onion, chopped
salt and pepper
1 1/2 tsp cumin
2 cloves garlic
2 pounds sweet potatoes (about 4 medium)
2 Tbsp chili sauce
1/8-1/4 tsp chili powder
7 C chicken broth
sour cream for garnish (optional)

Heat large pot. Add oil. Add onion, salt, and pepper and cook (5-8 minutes). Add cumin and garlic. Cook for about 1 minute or until fragrant. Add sweet potatoes, pepper sauce, and chicken broth. Bring to a boil. Reduce heat and simmer for 20-25 minutes or until sweet potatoes are soft.

Blend with immersion blender or in batches in a regular blender (be careful--this stuff is hot. If using regular blender, place dish towel over top and don't overfill it). Serve with sour cream. Also, I think this would be wicked good with corn bread.

PRINTABLE RECIPE


Friday, November 30, 2012

Sweet Potato Corn Chowder


Last year I went a little overboard during the holiday season. And not just with food. There were too many activities; there were too many presents; and, yes, there was too much food. It got to the point by the end of December where I'd see a dessert tray and think "Ug." But then I'd eat the desserts off the dessert tray, or at least sample them. Sampling usually works for me, but not when there are 10,000 things to sample, not when you're making cookies at home every other night, not when your kids are bringing candy home by the pocketful.

I gained 10 pounds from October to December. I rarely weigh myself and when I got on that scale after a couple months, I swear I thought it was broken. Nope; the one at the YMCA told me the same thing. I had never gained holiday weight before in my life and I wasn't so happy to be on the bandwagon. I believe there were many factors to that weight gain. I was blessed last year not to get sick, so there was never any kind of forced pause in my sugar plum eating. Foods that weren't normally around and don't normally tempt me were all over the place. I'm not a big candy eater, but if there's a bunch of candy around (think Halloween), I'll eat a piece or two each night--a piece or two I wouldn't have even thought about if it hadn't been there. I was attending too many food-laden activities. And I was making a bunch of sweet, wonderful food for this blog. I didn't think it would matter that much, yet it seemed to. Several months later, after I'd cut my sweets way back and lost my 10 pounds (or at least 9-ish of it), I made a treat. I noticed that before the treat was even in the oven, I'd already probably eaten a couple of servings in licking. That's not a big deal when treats are, well, a treat. But when you're making them constantly, it can kind of add up.

So--forgive me; I didn't mean for this to end up as a Holiday eating confessional--this year I wanted things to be different. I didn't want to look at my calendar or the presents under my tree or desserts on a tray and think "Ug" and then attend/unwrap/scarf them down anyway. I wanted to enjoy the season. I wanted to indulge infrequently enough that it actually felt like indulging.

So far this year, we've gotten sick 4 days after Halloween and I didn't host Thanksgiving, so we're on the right foot:). Tomorrow begins December and I hope to keep things on that right foot (minus the sickness if that's okay with you, universe).

To celebrate that, I give to you this super duper delicious and wonderfully healthy chowder. It's got a lot of good stuff going on. It's homey and warm and comfort-food-like. But without the two cups of cream (not that there's anything wrong with a little cream). It's veggie filled, yet inexpensive. It can be made with roasted summer vegetables in late summer, but here in the fall, it can be made well with canned foods. I got the recipe in the summer and was worried it wouldn't translate well to using canned foods, but it was delicious. In fact, it can be made almost entirely with canned foods if that's what you've got. Which means that it can also be a great pantry meal or the perfect thing to come home and whip up after a long day of shopping/sledding/serving/working.

Merry December.

Sweet Potato Corn Chowder
adapted from Gluten-free Goddess
Serves 10-12
Prep time: 10 minutes
Cook time: 25-30 minutes
Cost: $6.90 or about .70/serving
garlic: .05, onion: .10, corn: 1.00, sweet potato: .25, tomatoes: 2.00, coconut milk: 1.50, broth: 1.00, chicken breast: 1.00,

Note: I didn't have a sweet potato. I swear my kids must have thrown my bag of them out of the cart because I distinctly remember standing in front of them at the store and planning to put them in my cart. Consequently, I used an acorn squash. (I bet a butternut squash would work too.) It was good, but sweet potato would be better. However, my point is that any chunks of winter squash will do.

Another note: I used home-canned tomatoes. They are ridiculously good and their juices did a lot for the flavor of this soup. If using store bought, I recommend an extra big squirt of lemon juice and possibly a few extra shakes of salt (but taste it first) to bring out the best in your tomatoes.

1-2 Tbsp olive oil
1 tsp cumin
1/2 tsp curry
1/4-1/2 tsp chili powder
4-5 cloves garlic, chopped
1 medium yellow onion, chopped (or if you're onion-texture averse like my husband, grated in the small holes of your grater, so it's a pulp)
2 cans corn, drained
1 sweet potato, peeled and chopped
2 15-oz cans diced tomatoes with juices (plain or Italian. I used home canned tomatoes and I have to say they were completely more awesome than store bought, but store bought will do)
1 quart vegetable broth
1 14-oz can coconut milk
1 breast of chicken (optional; you can make this vegetarian if you wish)
salt and pepper to taste
a squeeze of lemon or lime if you wish

Chop your onion and garlic. Cube your sweet potato and chicken (you can used leftover cooked chicken to good effect, or you can cook your chicken here. It's up to you).

Heat the olive oil in a large pot over medium heat. Add cumin, curry, and chili powder. Stir until fragrant (30-60 seconds. Add onion and cook for 5 minutes or so. Add garlic and cook another minute. Add chicken if it's raw and cook until it's browned on the sides.

Add corn (without juices), sweet potato, tomatoes (with juices). Stir it up. Add broth.

Cover and bring to a gentle boil. Reduce heat and simmer gently until the sweet potatoes are tender and chicken is cooked through (about 20 minutes).

Add coconut milk and heat through. Taste and adjust seasonings. Add a squirt of lemon or lime if you wish.

PRINTABLE RECIPE


Wednesday, April 18, 2012

Sweet Potato Chips: A Few Crucial Notes for Success


Only a short while ago, I posted about sweet potato chips. I have lately been thoroughly enamored by them and have been making a batch nearly every day in order to feed my obsession. So I was surprised when my dear friend, who is also a great cook and a sweet potato aficionado told me that she'd tried them several times (once with her mother-in-law who is also a great cook) and that they hadn't worked out yet. Oh dear. I was at her house at the time. There was a sweet potato. There was a knife. There was an oven. We gave it a go and I realized how a few variables (such as a darker pan) could change things up.

Below you'll find a couple more tips to make your sweet potato chips a little more sure fire. And you really must give them a go. They're just so good.

1. You can make these without oil, but it is a much trickier thing to do and you must have very thin slices of sweet potato to do it. I have been making mine with oil. You can use olive oil or canola or probably coconut (oh, now, there's an idea--coconut and sweet potato are soul sisters) or any other vegetable oil you wish. I do mine by greasing my pan (drizzle a Tbsp or so on and just spread it around with your hand). 


Then I put my slices of sweet potato on and use a pastry brush to brush oil onto each chip. It sounds neurotic, but it takes less than 1 minute.


Alternately you could probably throw the sweet potato discs in a bag with oil and shake them.

2. You can slice these very thin and bake them at 350 for about 10-15 minutes. But if they are not super super thin (1/16 of an inch or thinner), they will take longer. My food processor got them very thin, but it also (because it is junky) left a bunch of scraps--mauled sweet potato bits that I couldn't use. So I've taken to cutting the slices very thinly with a knife.


They take a little longer to bake, but I can totally forgive this as my clean up does not involve a pesky appliance and there's no wasted food. Also, you really need to get them 1/8 inch or thinner. If not, they will cook up into yummy sweet potato discs, but it will be hard to get them into crispy chips without burning them or drying them out. 

3. Unless you are the world's most perfect slicer in the world (and I'm pretty good if I do say so myself, but still not good enough), you will have some slices thinner and some thicker. Thus you will want to check your sweet potatoes at 15 minutes. Remove any thin ones that are looking done and leave the others on. After that, check every 5 minutes or so until they're all done. It's a little pesky, but if you're in the kitchen anyway, it's not too big of a deal. Here's how mine look at various stages:

20 minutes (you'll notice some are kind of brown--they're not burned, they still taste sweet. Another minute, however, and they would have been). 

25 minutes

30-35 minutes


4. If you're using a dark pan, you will need to flip these halfway through their cooking time. I know that's obnoxious, but it's true. I use a silver pan and do not ever have to flip mine, but my friend's pan was darker (not super dark, but not silver) and hers started getting too brown on the bottom before the chips were crispy. To avoid this, just give them a flip halfway through. It's also helpful to flip them if your slices are a bit on the thicker end of the spectrum. Flip them at about 20 minutes.

5. Let them sit for a few minutes to cool a bit and crisp up. This is the hardest part, and not just because you want to eat them immediately. Sometimes they are not perfectly crispy when you take them out. You don't want them to feel soft and squishy like a sweet potato fry would--those aren't done yet. But if you wait until they're perfectly perfectly crisp, they may end up over-cooked. Take them off the pan when they're crispy or darkened at the edges even if the middle is a little floppy. (Click on the pictures above to enlarge them if you need a better idea of how they should look.) Let them sit for a minute or few on a paper towel to cool just a bit. They'll crisp right up as they cool.


6. They won't be as perfectly crispy as a store-bought potato chip, but they should have a definite crispy edge to them. When you bite into them, they'll crunch and it's a very satisfying snack in that way.

7. Oven rack should be in the middle.

8. Preheat your oven (350 degrees).

9. These can be made with the skins on or off. I like to leave them on. Occasionally this makes for a bit of skin chewy in your teeth, but not often enough for me to care.

10. These are good the next day too. Not quite as perfect, but very very good.

In closing: Maybe it will take a batch or two of experimenting, but it really is worth it to get them right. I crave them every day.

Monday, April 2, 2012

Baked Sweet Potato Chips


Last month when I was perusing a blog called Savour the Senses I came across these baked sweet potato chips. They weren't tossed in oil or fried or anything. They were thinly sliced, seasoned, and baked on parchment paper or Silpat. I thought, "That sounds too good to be true." And then it worked. Which is always nice. 

I should tell you, however, that my first few experiments with it were extremely over-seasoned. When I'm oven baking with oil, I always salt generously, but the oil must "wash" a fair amount of that salt away because without it, those seasonings just stuck to those chips and sometimes it was a little much. So use a gentle hand

I should tell you also that these are the type of chip that--if thinly sliced as mine were--can burn if they go a minute too long. You want them crispy, but not burned. And that can be--I must confess--a wee bit tricky. So you have to be careful in that regard. 

I should also tell you that even a couple of sweet potatoes yield several batches of these, so while cooking time isn't very long, you'll have to triple or quadruple it if you're doing more than just one sweet potato.

And finally I should tell you that a food processor or mandolin will make your cutting way easier. However, since mine is a cheap lame one that is getting a wee bit dull (in addition to being cheap and lame), my pieces were often way different sizes, which was annoying. I've been wanting to try these with still-thin-but-not-quite-as-thin hand sliced potatoes (for those who have no food processor or mandolin), but I haven't gotten to it yet. Maybe today for an after school snack I will and then I can check that off and update this post. 

Okay, and there's one more thing I have to tell you. Which is that the second time I made these I brushed on a bit of oil with a pastry brush. I wanted to see if oil would fix the problem of these overcooking if they went a minute too long. It did. And it made for a really crispy and still fairly virtuous sweet potato chip. You don't have to do this, but it does give you a little more room for error or distraction. That's something that comes in handy in my life. Also, I think this might be a perfect method for baked regular potato chips. I'll let you know when I get to that project. 

Baked Sweet Potato Chips
adapted from Savour the Senses
Prep time: 5 minutes (with a food processor for slicing)
Cook time: 10-15 minutes per batch
Cost: $.25

Note: I seasoned these in several different ways. I used the original from Savour the Senses. It was good, but a little too garlicky for me. I tried salt and pepper (my favorite) and I tried sugar and sugar/cinnamon (my kids' favorite). They were all good and I really think you could just go nuts with different seasonings. Just be aware that the seasoning will stick, so go light at first. 

2 sweet potatoes, peeled and thinly sliced
salt and pepper or other seasonings
oil (optional)

Cut your potatoes. Try to get them to be as even and uniform as possible. I didn't do so well there, and they were still good, but cooking times will be easier to master if your pieces are about the same size and thickness. 


Place them on parchment paper or Silpat. Sprinkle seasonings on. Be gentle. 

(These were some that were a little over-seasoned, so don't go that crazy, okay)


Bake at 350 (be sure to preheat) for 10-15 minutes if thin and longer if a little thicker. They should be just barely crispy without being brown (although if lightly brown, I found that they still tasted great). Know, too, that they'll crisp up a bit as they cool. If you take them out and then find they're not quite crisp enough for you, you can throw them back in, so don't despair. 

Optional ending for the distracted or low of character among us:

Skip the parchment paper and brush baking sheet with neutral oil (I used canola). Lay chips on the oil and, using a pastry brush, brush each chip with a bit of oil. Season as desired. Bake as directed above. 

Note: After posting these, I realized that a few more tips were in order. You'll find them here


Tuesday, January 3, 2012

Roast Sweet Potato Snacks

You ready for healthy, cheap, easy, good, but...ugly.


We got you covered. Well, actually my friend Vanessa has you covered, but I stole her idea, so watch your ideas people.

A month or two ago, Vanessa and her husband went on a paleo-style diet where they ate primarily vegetables, fruits, and meat. During that time, we had lunch together once. And by 'had lunch together,' I don't mean 'went to a restaurant.' Silly. (Like, with our kids, it would have been a nightmare.) I mean 'went on a cheap Mommy lunch together where we packed stuff and then ate on the floor.' And there sat Vanessa (and her toddler) sitting there eating turd-looking foods as though they were Go-Gurts (which if you really think about it isn't exactly the aesthetic equivalent of a Van Gogh either). She was eating cold sweet potatoes, skin and all just like that. So were her kids. And I thought, "Gross. I like sweet potatoes and all, but not cold and not the skins. Pass the butter and brown sugar, please." And then a few weeks later we were having another mommy lunch at Vanessa's house and she offered me one. I was still hungry and I'm a little daring, not to mention the fact that I'm not one to say no to free food.

They were awesome. Even the skins. I had another.

Vanessa told me that the trick is to roast them nice and long. She'd done her fairly small sweet potatoes at 400 for about 2 hours. In this way, the potato has plenty of time, not just to roast, but to caramelize around the skin parts. Even if you over-do them, the insides will be yummy. She also told me they were a lot of fun to eat in public with your kids because people inevitably cannot control themselves from commenting in that slightly rude way surprised bystanders tend to have. As in, "What are those things your child is eating!?" Notice you never get those comments when your child is eating an unnaturally blue concoction (that will inevitably turn his poop a funky shade of green) being squeezed from a tube.


But I digress. It took me a while to get to making my own sweet potato snacks. I am the only sweet potato lover in this house and I wasn't sure I'd be able to get to them before they went bad. However, I notice that now that they're around (I made 4), they're the perfect thing for finishing off a meal. They're somewhat sweet and appease that natural desire to finish a meal with a bit of sweet. They're also filling without being overwhelmingly so.

So don't fear the cold weird sweet potato with skins on.

Roast Sweet Potato Snacks
Serves 4
Roast time: 2 hours
Cost: .50

4 smallish sweet potatoes

Roast at 400 for 2 hours. Do put a pan with foil under them as they tend to ooze and it's a pain to clean.

If your sweet potatoes are large, you can roast longer. Or you can cut them in half (cut them short-ways, not long-ways). The cut end will harden and you'll have a smaller snack to enjoy.

Store in refrigerator after they've cooled. Vanessa stores hers in a big Ziploc. She says they can get messy. I just threw mine in the fridge without wrapping at all, though I do think it dries out the skins, so I plan to wrap them up next time.

Note: If you decide you hate these after you've made them, then just mash the insides and serve warm with butter and brown sugar. Or puree the insides and slide them into unsuspecting foods like hamburger (it's so good; you'll be shocked), mac and cheese, or smoothies.

PRINTABLE RECIPE

Wednesday, December 1, 2010

Pumpkin Smoothie

Cheap Eat Challenge Count Down: 31 days


In the summer I really like smoothies. My sister, Rebecca, got me hooked on them. I usually make them with spinach or kale, a banana, peaches, or berries of some sort. I still have some peaches in my freezer from the cheap summer crop, but, um, I'm sort of hording them in case I want to make a peach cobbler some dreary winter night. And also, these smoothies with their frozen summer fruits--they're so cold. So I was looking for something a little more wintery, with some sort of seasonal way to get a vitamin punch.

And then I got an email from my sister-in-law about a pumpkin smoothie, and some lights went on.

This smoothie is good. It is also packed with beta carotine, which converts to our friend vitamin A. On the down side, it must be sweetened with something. The original recipe called for almond milk and agave nectar. We're not eating on $6/day yet, so I obligingly bought those ingredients. I'm not sure I've ever had almond milk before, but I was excited about it. I love almonds and I pictured something like coconut milk only with almonds instead. It was much more watery than that and also, as I believe is the case with all plant-product "milks," it was sweetened with cane sugar. Which forces me into a small tangent about "health foods." I believe that almond milk is generally touted as a health food. Perhaps that's true if you make your own in a high-powered blender or food processor. However, from the store, it just struck me as a sweetened processed food that is, ahem, not exactly cheap. I mean, I get it if you're a vegan and don't do animal products. But as a health food just because, well, I don't get it. Feel free to explain this to me if you do get it. Unfortunately, you won't be able to explain it to me before I post this recipe, which has departed from the virginal almond milk/agave nectar to include all sorts of pagan variations such as heavy whipping cream (come to mama).

The original recipe (just in case you're a vegan or you think almond milk is the most transcendent substance on earth, cane sugars and weird additives be darned) as sent to me by my sister-in-law:

2/3 C pumpkin
1 banana
1 C almond milk
agave nectar to taste

I tried it without any sweeteners and found it (forgive me vegan friends) not quite creamy enough or sweet enough. In fact I found it a little bland. And for some reason I couldn't break into the agave nectar because I was already disappointed in my almond milk. I couldn't take 2 expensive disappointments in one day so I decided to save the agave nectar. A mistake perhaps, but oh well. I used sugar instead--2 Tbsp. Still, it seemed too watery-pumpkin for me (vegan friends, we're going to have to agree to disagree here). So I stuck it in the freezer, blender and all and then when it was good and cold and just getting some firmness at the edges, I took it out and added 2 Tbsp heavy whipping cream and blended it all together and that was good. Then I sprinkled some nutmeg on top and that was even better. [Don't get me wrong; you don't HAVE to have the sugar, cream, nutmeg, (well, maybe the nutmeg--it is the body scrub of the angles) but it really helps the smoothie along, especially at the beginning when you're getting used to them. I find as I keep drinking them (and I've been drinking them a lot) that I need them less sweet than I did on that first batch.]

But I wasn't done experimenting. I wanted to see if I could make it with old-fashioned milk (and maybe still a bit of cream). Also, I had some coconut milk leftover from a previous dinner.

The plain milk version was the most practical as I feel most people have it lying about. Also, it's the cheapest option. But it was a bit runny (maybe if I'd gotten it really cold like above it would have worked better, but I didn't). And the coconut milk version was too thick. So I mixed them together. That was pretty much just right. And then I did something out of character for me and which--considering my preaching above about the processed nature of almond milk--was even downright hypocritical: I added some of the sugar-free hazelnut coffee creamer my mother-in-law left. Yes, I did. And I'm sort of embarrassed to admit this (see above preaching), but it was really really good. I might even do it again tomorrow for breakfast. Yes, I might.

And then I didn't get this posted because I made a great turkey salad. And last night I made some sweet potato puree because sweet potatoes were $.10/lb at Walmart and I have a baby and I (like to sneak sweet potato into foods my kids like such as boxed mac and cheese). Anyway, I looked at my sweet potato puree and I looked at my almond milk. And I got another idea. So today I've been feasting on sweet potato smoothies. The texture is slightly thicker and best of all, they don't need the sweeteners (or as much sweetener) as their pumpkin friends. The flavors, of course, are different. I prefer sweetened pumpkin over sweet potato--I think because I associate it with pumpkin milk shakes and pumpkin ice cream and pumpkin pie. But both were tasty.

Not sure how to make sweet potato puree? Basically you roast the sweet potatoes, let them cool a bit, scoop them out of their skins and into a blender. Then add a little water and blend. Need a more specific recipe? Stay tuned because at some point this month (hopefully soon) I'll be posting a hot cocoa recipe which may include a shot of sweet potato puree (though I will not admit this if you are my children). I'll have more specific measurements posted then.

A note on agave nectar: Yes, I broke into it. Agave nectar does blend up nice and smooth. It's further advantage is that it has a lower glycemic index than sugar or honey. Also, it's not refined like sugar is. However, I prefer the taste of sugar or honey.

A note on sweetened coffee creamers: So I happened to lick off my spoon after adding my fake hazelnut cream today. Wow. That stuff is really sweet. Now I know how you coffee drinkers do it. In the smoothies, you can likely skip or lessen the sugar/agave nectar if you use the sweetened coffee creamer, especially if you use sweet potato.

A note for those who don't have coffee creamers on hand: You get a similar effect by using 1 Tbsp whipping cream, 1/16 tsp (just a few drops) almond extract, and a sprinkle sugar.

A note on the garnish spices: I like nutmeg. A lot. But cinnamon, allspice, or even pumpkin pie spice would work.

Now, without further ado, here are a few winter smoothie options. Let me know if you've got a favorite.
Option A: Cheapest Winter Smoothie
Serves 1-2 depending on whether it's a meal in and of itself or a drink with a meal

This one is, for our family, also the most accessible--meaning we tend to have milk and, yes, even cream readily available.

2/3 C pumpkin or sweet potato puree
1 C milk (I used whole (raw) and I expect 2% would be good too. Go lower than that, and I make no promises, but if you're used to it, it'll probably be okay.)
1 banana
1-2 Tbsp sugar or agave nectar
1 Tbsp heavy whipping cream (optional)
1 tsp flavored coffee creamer (optional)
nutmeg (optional, unless you're me and find it of supreme importance in frothy winter drinks)

Blend all ingredients. If you've got the time, put it in the freezer for a half hour or so and then blend again. This will make it frothier and yummier, as will the addition of the optional whipping cream. Add creamer and/or nutmeg if you wish.

Option 2: Almond Winter Smoothie
Serves 1-2

2/3 C pumpkin or sweet potato puree
1 C almond milk (I'm sure rice or soy will also work to good--perhaps even better--effect)
1 banana
1-2 Tbsp sugar or agave nectar
2 Tbsp heavy whipping cream (optional)
1 tsp flavored coffee creamer (optional)
sprinkle nutmeg (optional)

Blend pumpkin, almond milk, banana, and sweetener. If you've got the time, put it in the freezer till very cold and barely beginning to freeze at edges. Then add whipping cream and re-blend. Sprinkle with nutmeg

Option 3: Coconut Winter Smoothie
Serves 1-2

2/3 C pumpkin or sweet potato puree
1/2 C milk
1/2 C coconut milk
1 banana
1-2 Tbsp sugar or agave nectar
1 tsp flavored coffee creamer such as hazelnut (optional)
nutmeg (optional)

Blend it up.

PRINTABLE RECIPE

LinkWithin

Related Posts Plugin for WordPress, Blogger...