Showing posts with label pie. Show all posts

Tuesday, November 13, 2018

Ten Best Pies

BEST OF THE TASTY CHEAPSKATE


So, uh, I noticed something as I was picking the "best of" pies on The Tasty Cheapskate. At least 50% of them are chocolate. I don't know what to say, except that we are people of weak moral values. Why don't we eat more fruit pies? What about nut pies? How can you eat this many of the same pie type of pie and feel good about yourself? What is wrong with getting to know pies that are different from you, huh? I'm sorry, friends, I truly am. We should have a delicious strawberry pie, an amazing cooked peach pie. We should have lemon. And berry. And chess. They are delicious and I love those types of pies.

But I will say this. What we do, we do well. Each and every chocolate pie featured here will make you want to lick the plate. Clean.

But since it's almost Thanksgiving, we'll start today with pumpkin.


1. Pumpkin Pie. This is the best one I know. Pumpkin pie is lovely because it's so much easier than most people think. May you never buy overly-bright-orange pumpkin pie from the Wallymart again.


2. Vegan Pumpkin Pie. In the event that you are a vegan, or want to feel good eating pie for breakfast because it's healthy. This is for you, baby. Also, I think the post is kinda funny. I mean, kinda. In a me, kind of way.


3. Chocolate Pie with Latticed Cookie Crust. This is my favorite chocolate pie for Thanksgiving. It's basically like a big cookie with a chocolate filling. Yeeesss, we have pumpkin and chocolate pies for Thanksgiving. I think we've established that we have issues, okay.


4. Chocolate Orange Mascapone Cheesecake Pie. And this is my favorite pie for Christmas. Yeesss, I have enough chocolate pies on my blog to designate them for different holidays. We've established that a problem exists. Would you please stop harping on it? I'm sure I'll get help for it soon.


5. Peanut Butter Pie. Oh look, a non-chocolate pie. That may or may not have a chocolate crust with chocolate garnish. But, come on, we're branching out, right?


6. Classic Apple Pie. Okay, fine, you win. Here is a classic fruit pie for you. Oh so classic. And oh so amazing. Also, completely gorgeous. And if you make it for the holidays, you're kids can go nuts doing cute little seasonally appropriate dough cut outs. Fun for the whole family!


7. Easy chocolate Pie. Hey, look, we're back to chocolate. What d'ya know? This one was my first chocolate pie love. Simple, rich, delicious. And SO EASY. Three ingredient filling! If you're looking to save time and still be amazing for Thanksgiving, pick this one.


8. Raw Peach Pie. This one is seasonally inappropriate. But it's so good, it needed to make the list. Plus, I needed it to diversify. It's like the one ethnic character on that TV show you like.


9. No Cook Chocolate Mousse Pie. Are you in love? This is the pie for lovers. (Or addicts, I suppose.) So, yes, I it's our Valentine's chocolate pie. So rich. Surprisingly easy. Potentially gorgeous.


10. Chocolate Chunk Chocolate Pie. And I saved the best for last. Yes, it does have the word 'chocolate' twice in its title. (You know, it's rude to keep pointing out my weakness publicly like this.) Creamy chocolate-chess-pie filling with chunks of chocolate throughout. I love this pie. The end.

If you happen to eat things BESIDES pie on Thanksgiving, I've got some tips for baking, brining, and other stuff HERE and HERE.

I hope to get to a cranberry post next week, but just in case I don't, check out some of the recipes in THIS POST.

Tuesday, March 13, 2018

Chocolate Chunk Chocolate Pie


THE BEST OF THE TASTY CHEAPSKATE


Is anyone else starting to believe that all my "best of" recipes will revolve around bread and chocolate? Okay, fine; and I promise to rectify that sometime in the near future.

But not today.

Because tomorrow is pi day/pie day. And you should probably make this if you value happiness in any way. 

I just made it with my darling niece this weekend. Happiness abounded.

Below I'll paste the original post. Because I think I'm just hil-a-ri-ous and stuff:

On Sunday night I wanted pie. And chocolate. So I adapted this recipe I found on Pinterest. It said I could eat it warm or cold. I ate it warm. Because I have the patience of not-Job. I probably have more the patience of Nebuchadnezzar or the King Xerxes or someone who was like,, "Interpret my dream or bring me a new wife (or bring me chocolate pie) or I'll kill you all." Yeah, that's more my speed of biblical patience. Anyway, so I ate my pie warm. And it was delicious. Just like any chocolate pie or chocolate chess pie you might have whipped up for yourself.
(See this crust. It's another example of having the patience of not-Job. I had a pie crust in the freezer, so I got it out, let it "thaw" for, like, 10 minutes, then nuked it for a few seconds, then just tried to bully the thing down into pie crust form. It mostly worked, though it was a bit thick, but still honestly completely amazing with this pie.)


And then today I had a bit of pie after lunch--just a bite (or three). And it was amazing. The chocolate chips I'd added to the batter, which I'd assumed had just assimilated when warm were there and bite-able when cold. So you got this intensely chocolate pie with delicious bursts of cold, hard chocolate within. Amazing.

Even better is the fact that this is easy (as pie, ha!) to throw together (15 minutes, tops for the filling--though you do have to cook it and that takes longer than 15 minutes). And that you can make it the level of darkness that you want (though I wouldn't admit going anything sweet/milkier than semi-sweet). I made mine on the darker side while still sweet (55%-60%). You can do whatever you want.

Chocolate Chunk Chocolate Pie
makes 1 9-inch pie
Prep time: 15 minutes
Cook time: 30 minutes
Cost: $2.75 (that's .35/slice for something decadent and amazing)
butter: .35, 1.10, flour: .05, sugar: .10, brown sugar: .20, eggs: .20, crust: .75

Note: There may be a small chance that I forgot to add the flour to this when I made it. Whoopsie. It still turned out. In fact, it was great. I'll try it again soon with flour and see if it's any different than the thing I actually made. You know what they say--there's nothing better than a competent food blogger. I think our takeaway from this is that this pie can be messed up and still be awesome. 


Updated note: I have since made this with and without flour. I like it much better WITHOUT. Oh, it's good with. It's like a brownie pie. But if you leave that flour out, it's just the most amazing thing (and that is what I did the first time I tried it). Because of that, I'm cutting the flour out of the instructions. If you really want to add it, you can. It's 1/2 C of all-purpose flour, but this recipe is more divine without it. 

1/2 C melted butter, hot
3/4 C chocolate chips (whatever level of dark you prefer)
1/2 C brown sugar
1/2 C white sugar
2 eggs, lightly beaten
1 tsp vanilla extract
1/2 C chocolate chips
1 premade pie crust (store bought or recipe here)

Preheat oven to 350.

Put your crust in a 9-inch pie pan.

Melt butter in microwave (in a large-ish bowl, so you can add other ingredients later). Add chocolate chips, and stir. Let them sit and stir. They'll melt and you can mix them with the butter. If they don't, throw it all in the microwave for another 15-20 seconds. Stir until smooth.

Add in white sugar and brown sugar. Stir. It will be grainy.

In a separate bowl, combine eggs and vanilla and whisk. Now whisk that mixture into the chocolate mixture.

Add the 1/2 C of chocolate chips.

Bake at 350 for 30-40 minutes, or until the temperature reaches 180 degrees or so at the center. It will still be wet and you'll be like, "Should I take this out? Will it hold it's shape? Yes, and yes.)

Let cool somewhat; you can eat it warm, but not hot (it won't hold it's shape is you straight up cut it out of the oven, so take a lesson from Job and let it cool just a little, okay?).

You can eat it warm. Or put it in the fridge and eat it with those amazing chocolate chunks. (I want to go eat some more out of my fridge right now. I want to, but I shouldn't, but I want to...)

PRINTABLE RECIPE

Monday, September 5, 2016

Chocolate Chunk Chocolate Pie


On Sunday night I wanted pie. And chocolate. So I adapted this recipe I found on Pinterest. It said I could eat it warm or cold. I ate it warm. Because I have the patience of not-Job. I probably have more the patience of Nebuchadnezzar or the King Xerxes or someone who was like interpret my dream or bring me a new wife (or bring me chocolate pie) or I'll kill you all. Yeah, that's more my speed of biblical patience. Anyway, so I ate my pie warm. And it was delicious. Just like any chocolate pie or chocolate chess pie you might have whipped up for yourself.

(See this crust. It's another example of having the patience of not-Job. I had a pie crust in the freezer, so I got it out, let it "thaw" for, like, 10 minutes, then nuked it for a few seconds, then just tried to bully the thing down into pie crust form. It mostly worked, though it was a bit thick, but still honestly completely amazing with this pie.)


And then today I had a bit of pie after lunch--just a bite (or three). And it was amazing. The chocolate chips I'd added to the batter, which I'd assumed had just assimilated when warm were there and bite-able when cold. So you got this intensely chocolate pie with delicious bursts of cold, hard chocolate within. Amazing.

Even better is the fact that this is easy (as pie, ha!) to throw together (15 minutes, tops for the filling). And that you can make it the level of darkness that you want (though I wouldn't admit going anything sweet/milkier than semi-sweet). I made mine on the darker side while still sweet (55%-60%). You can do whatever you want.

Chocolate Chunk Chocolate Pie
makes 1 9-inch pie
Prep time: 15 minutes
Cook time: 30 minutes
Cost: $2.75 (that's .35/slice for something decadent and amazing)
butter: .35, 1.10, flour: .05, sugar: .10, brown sugar: .20, eggs: .20, crust: .75

Note: There may be a small chance that I forgot to add the flour to this when I made it. Whoopsie. It still turned out. In fact, it was great. I'll try it again soon with flour and see if it's any different than the thing I actually made. You know what they say--there's nothing better than a competent food blogger. I think our takeaway from this is that this pie can be messed up and still be awesome.

1/2 C melted butter, hot
3/4 C chocolate chips (whatever level of dark you prefer)
1/2 C flour
1/2 C brown sugar
1/2 C white sugar
2 eggs, lightly beaten
1 tsp vanilla extract
1/2 C chocolate chips
1 premade pie crust (store bought or recipe here)

Preheat oven to 350.

Put your crust in a 9-inch pie pan.

Melt butter in microwave (in a large-ish bowl, so you can add other ingredients later). Add chocolate chips, and stir. Let them sit and stir. They'll melt and you can mix them with the butter. If they don't, throw it all in the microwave for another 15-20 seconds. Stir until smooth.

Add in flour and sugars. Stir. It will be grainy.

In a separate bowl, combine eggs and vanilla and whisk. Now whisk that mixture into the chocolate mixture.

Add the 1/2 C of chocolate chips.

Bake at 350 for 30-40 minutes, or until the temperature reaches 180 degrees or so at the center. It will still be wet and you'll be like, "Should I take this out? Will it hold it's shape? Yes, and yes.)

Let cool somewhat; you can eat it warm, but not hot (it won't hold it's shape is you straight up cut it out of the oven, so take a lesson from Job and let it cool just a little, okay?).

You can eat it warm. Or put it in the fridge and eat it with those amazing chocolate chunks. (I want to go eat some more out of my fridge right now. I want to, but I shouldn't, but I want to...)

PRINTABLE RECIPE


Wednesday, March 4, 2015

Classic Apple Pie


Making a pie is an act of love. Making a pie on Pi Day is an act of love and math. Making a pie on Pi Day 2015 is an act of love, math, and geekiness. This is because on 3/14/15 at 9:26:53, the number will actually be 3.141592653. I mean, are you freaking/geeking out or what? Of course you are. Or maybe you're not, but you should still make a pie. Because it's fun. And an act of love. And also fun. Nerdiness just gets bonus points (but it also justifies any mid-morning pie eating that you wish to partake in).

A couple months ago, I set out to find the perfect apple pie. Not Dutch apple pie, or apple pie with caramel filling/drizzle/sauce. Just a plain old classic apple pie. (This was weirdly difficult to find on Pinterst.) I looked up the recipe in my America's Test Kitchen cookbook and also asked my friends for their favorite apple pie recipes. What surprised me about this was little experiment was that the four recipes I ended up getting were really quite shockingly similar. As a cook, it's kind of awesome when they happens--it means you're on the trail to a recipe that is probably pretty spectacular. And it was.

The two main (and in my opinion, weird) differences were the amount of apples used (this varied from 2 1/4 pounds to 3 1/2 pounds); and the baking temps, which varied from 350 degrees to 425/dropping to 375 degrees). But my friends' pies basically agreed on sugar, spice, lemon juice, and that we needed a decent combination of tart and sweet apples. Granny Smith were recommended across the board for the tart apple with things like Golden Delicious, Braeburn, or McIntosh filling out the sweet side.

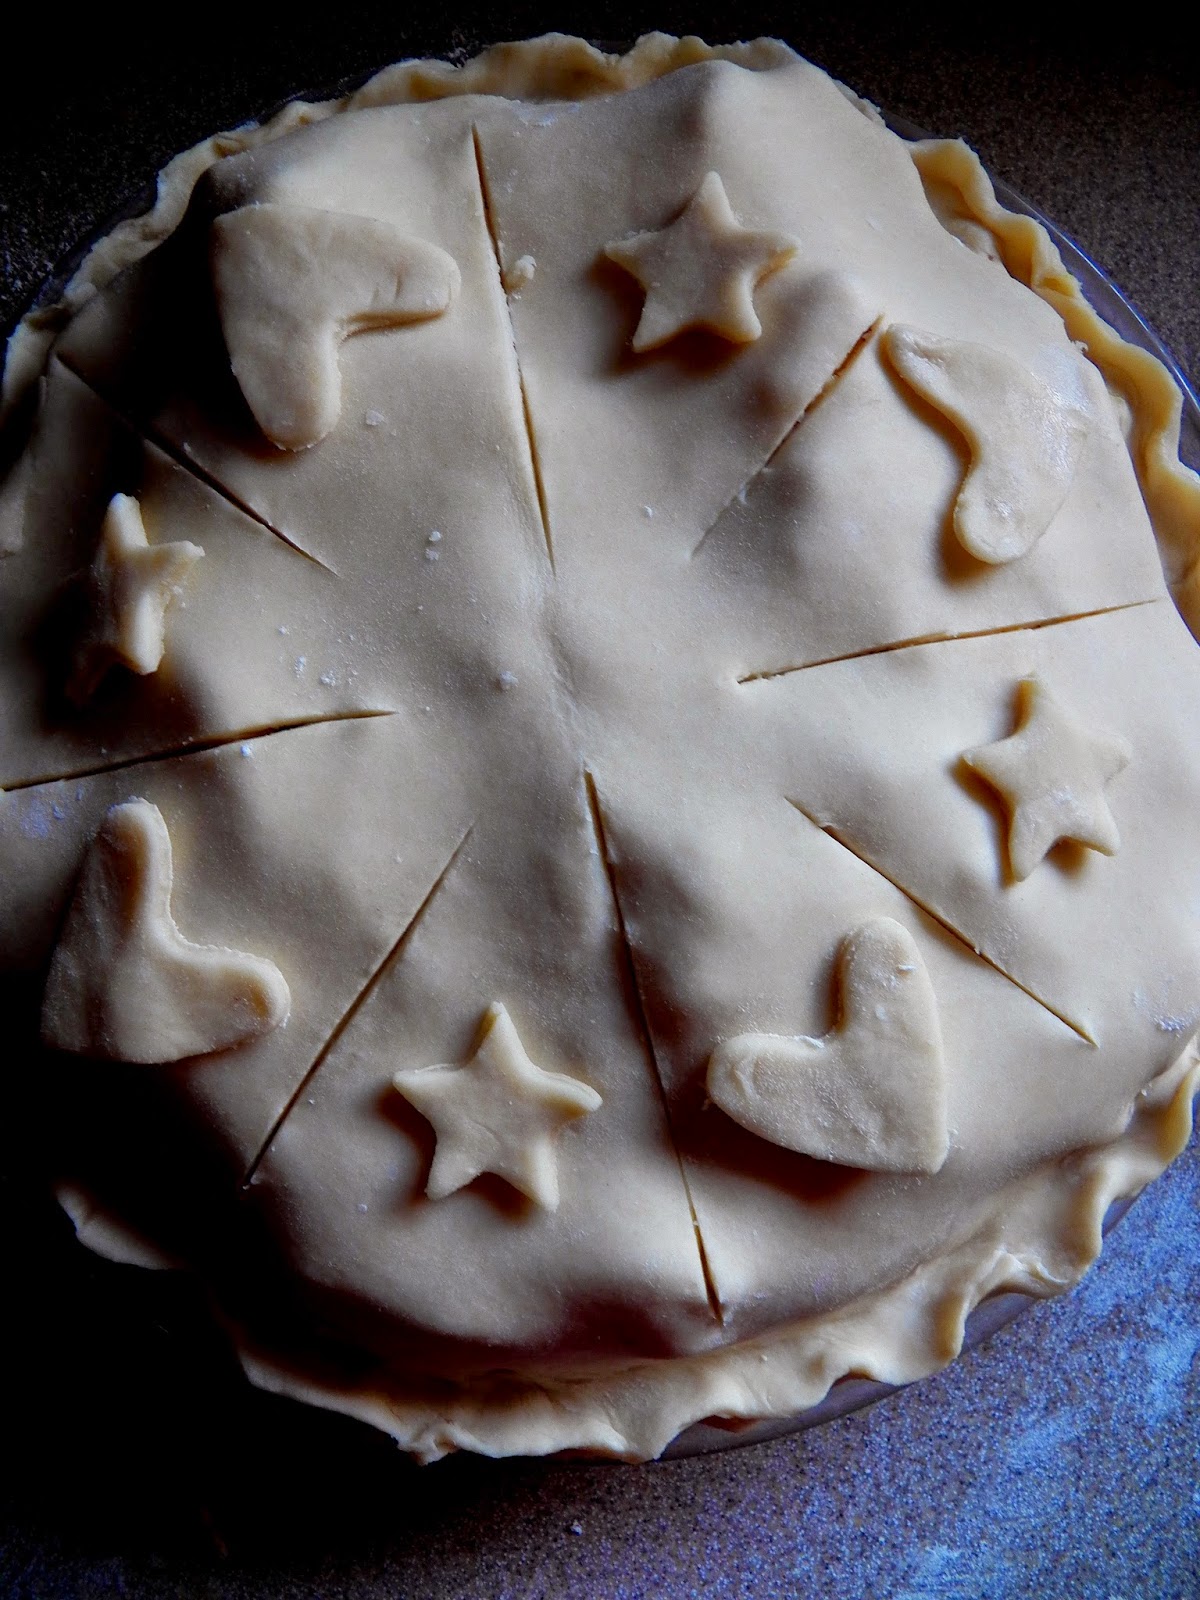
The pie I turned out was perfectly classic and delicious. And I decided to get my crazy on by using the leftover dough to make cut-outs for the crust. My kids helped and it was kind of fun


If you wanted to get your super super really over-the-top slightly mentally ill geek-star crazy on, you could cut out numbers for the number Pi.

Apple Pie
Makes 1 large pie
Prep time: an pleasant afternoon
Cook time: about an hour
Cost: $6.85 (more expensive than many recipes on here, but still less than $1/serving)
crust: 1.35, apples: 5.00, sugar: .20, egg: .10, other stuff: .20

1 recipe Butter Pie crust (or your favorite)
2 Tbsp all-purpose flour
3 1/2 lb apples; this is about 7 large apples (I used a combo of Granny Smith--about 1 1/2 pounds, then filled in the rest with Golden delicious and a fun and sweet variety called Pinata, but any sweet variety will do. I do NOT recommend red delicious or Jonathan. If that's what you've got, I suggest upping the sugar by 1/4-1/2 C)
1 Tbsp lemon juice and about 1/2 tsp zest (the zest is optional; the lemon juice is absolutely not)
1 C granulated sugar
1/4 tsp nutmeg
1/4-1/2 tsp cinnamon
1/8 tsp allspice
1/4 tsp salt
i egg white, lightly beaten, if you wish to brush your crust with it

Prepare your pie crust (or cheat and buy one if that's your thing). Roll it out as you normally do. Note: If you normally do no such thing, have a look here or here. Put your bottom crust into a lightly greased pie pan. Put the other ball of crust dough into the fridge while you do your filling.


Peel and slice your apples. It's going to seem like a ridiculous amount of apple. Trust, friends, trust. They will shrink down so much.

Now take your obscene amount of apples and mix in the flour, lemon juice, zest, sugar, spices, and salt.


Put these into your pie crust. You're going to think I'm nuts because these apples are going to just pile up in that pie pan. I piled mine this high and wound up with a pie like at the top of this post.


Now roll out your other pie crust and put it on top. It's going to look like a breast augmentation gone terrible wrong. Trust.


Trim the edges off. And if you'd like seal the two pie crusts together by putting a little water on your fingers and using that between the two pie crust edges. Just a little water will seal them up if you're worried.


You can now crimp the edges using your amazing artistic skills as you see I've done below. I know, people, sometimes it's just hard to compete with my artistic genius.


 Cut several slits in the top of your crust. This lets steam out and is essential.


Now you can decorate it with those obsessive compulsive pie numbers you cut out (31415926). Or whatever. Or not decorate it at all. Again, use a little bit of water on the dough to get your numbers/hearts/stars to stick. 


At this point you can brush the pie with egg white and sprinkle it with sugar if you want to. I did. Or you can throw that thing in the oven. It's up to you. 

Bake it at 425 for 25 minutes on the center rack. Then--without opening the oven--lower the temperature to 375 and bake for another 35-40 minutes. It's done when it's deep golden and bubbling at the edges and through the slits. You can also stick a fork in it to make sure all apples are tender. 

Note: You will absolutely want to put a cookie sheet or a sheet of aluminum foil on the rack beneath the rack your pie is on. This is because your pie as will ooze and bubble and get all over your oven floor if you do not. Trust. And thank me later. 

Now look how that shrunk down. 


 Allow to cool for several hours until it is just warm or completely cool. If you cut into it while hot, it will still taste good, but it will ooze all over itself and end up looking like cobbler not pie.


PRINTABLE RECIPE

Monday, March 2, 2015

Butter Pie Crust--Photo Redo in honor of Pi Day


Pi Day this year promises to be an epic event. Why not make an epic pie? To get you started, here are some prettier pictures for my butter crust. Wednesday, I'll post an apple pie to go with it.

This is the pie crust I always always use. With a more detailed tutorial here.


And for old time's sake, here's my original photo:

Recipe and instructions below:

Basic Butter Pie Crust
Makes 2 crusts
prep time: 5 minutes with food processor
Cost: $1.35

Note on using a food processor: For me (besides having a non-4-inch rolling pin) this is what has made making pie crust doable. I hate cutting in butter. Hate hate hate it. With the food processor (or a blender, which I hear also works), no butter cutting in is required. You'll sacrifice (supposedly) a bit of flakiness in your crust, but I still think it beats the heck out of anything you buy at the store. Which I guess is my general philosophy about homemade pie crust--it doesn't have to be cooking show perfect to be really great and so much better than the store bought stuff. And it takes less than 5 minutes. Less. than. five. minutes. 

2 1/2 C flour (you can sub in part wheat flour if you wish--start with 1/2 C and see how it works for you)
1 C butter, cold
1 Tbsp sugar (if making a sweet pie; otherwise, omit)
1/4-1/2 C cold water

Process flour, sugar, and butter in food processor or blender until the butter is in pea-sized chunks (my chunks are always a little smaller). (Or cut the butter in with a pastry cutter if you feel the same way about cutting in butter as I do about kneading bread.) 

Add water by the tablespoon till the dough comes together. (I just pulse it in the food processor.) Knead the dough a few times if necessary, but try not to handle it too much with your hands because that warms the butter and that means less flakiness (if flakiness matters to you in your crusts). 

Divide into 2 balls. If you only need one crust, put the other in a freezer bag in the the freezer. 

Sprinkle a generous amount of flour on your work surface and roll out the dough. Try to get it even (even-ish will do just fine). The dough should be about 1/8-1/4 inch thick. Lift it up and transfer to pie plate. (You can fold it and then lift and transfer and unfold, but I find it just easier to lift and flop it into a nearby pan.) Add whatever deliciousness to your pie. Add the other pie crust to the top if that is what you're supposed to do and bake. 

Note on rolling dough: The internet (which we all know is always right) says that a nice, easy, neat way to roll out your dough is to roll it between 2 pieces of waxed paper or parchment paper. Then the transfer is easy. Take off one layer of waxed paper and put your crust in the pan. Then take off the other layer and crimp your edges or whatever edge fanciness suits you. I tried this with 2 pieces of wax paper and it just scooted around annoyingly and wouldn't really roll out. I took off one layer and it still scooted around, but I got it to roll and it really did make the transferring way easier (though I'm still not sure I can recommend this tip), but do flour your wax paper.

Monday, February 2, 2015

Chocolate Caramel Pie: A Book Club Dessert for Unbroken


I'm part of the best, most fun, most fabulous book club ever. We read books. We make food. Usually we make food that goes with the books.

This month we read Unbroken. You might think that this is because we are hopeless trend-followers, but the truth is I'm not sure my friend realized they'd made a movie out of it until she picked it and all the library copies were checked out. That's the way we roll. But, whatever, follow the trend if you must because Unbroken is a truly beautiful book and everyone should read it.

While you're reading it, thinking about all those men having rice balls thrown at them and contracting beriberi, and starving to death, you should eat a chocolate pie with a layer of caramel underneath and a crust made from Oreo cookies and butter. It's the American way. And then you should top it with little Hershey's bars. If you were floating along on a raft with sharks circling you, this is surely one of the recipes you would daydream about and recreate in your mind.

Also--Hershey's bars = thematically appropriate for Unbroken. Because when the POWs were rescued, well, I will just say that Hershey's bars were dropped from planes into the camp. And if that's not heaven to starving 20-year-old boys, I'm not sure what is. This pie--also kind of like being in heaven. If only it could be dropped successfully from a plane. (Note: Do not try that at home; just eat it.)

Also--chocolate pie = thematically appropriate for Valentine's Day. You might want to forgo the Hershey's bars and go for some sea salt to make it sexier.

Chocolate Caramel Pie: A Book Club (or movie club if that's your thing) Dessert for Unbroken
adapted from Kevin and Amanda
Makes 1 pie
Prep time: 5-10 minutes per layer (about 30 total, plus several hours of chill time in between)
Cook time: 5
Cost: $7.70 (no, it's not cheap; I'm sorry)
Oreos: 2.00 (for generic), butter: 1.00, cream: 1.25, brown sugar: .20, chocolate chips: 2.00, Hershey's bar: 1.25

Note: I'm going to confess something here. This caramel was billed as fool-proof. I did not consider it thus. I made it twice and both times it came out slightly (although not excessively) grainy. I almost went for a third, but didn't have it in me. That was okay because next to the cookie crust I did not notice even a tiny bit of graininess as I actually ate. Still, well, it was just kind of annoying. I wanted perfectly-creamy-yet-thick-enough-to-stay-as-a-layer-in-the-pie caramel. Perhaps one day I will work to fix this so that it is perfectly perfect in every way (I have a great caramel recipe, but need something thicker), but for now let me say that it was wonderfully tasty and no graininess was noticed as you ate it--that's good enough.

Another note: You'll note I didn't get a picture of the inside of the pie (which is a pity because it's quite pretty. Yeah--we ate most of it, and the rest that came home with me got smashed--sorry. I will rectify the lack of center pictures next time I make this.)

For Crust:
about 36 Oreos (generic is fine)
8 Tbsp butter. melted

For Caramel layer:
8 Tbsp butter
2/3 C brown sugar
1/4 C whipping cream

For Ganache layer:
12 oz chocolate chips or nice chocolate
1 C whipping cream

To make your crust, put cookies and melted butter into a food processor and process until you've got fine crumbs. Alternately, you can put them in a big Ziploc bag and smash them with a rolling pin via child labor.

Put this crust into a tart, springform, or pie pan. I used a 10-inch, but I think you could get away with a 9-inch. Using a pan with an outside that springs off is nice for presentation, but my pie pan worked just fine too.

Throw this in the freezer or fridge to set up.

In the meantime, make the caramel layer. To do this, add your cube of butter and the brown sugar. On medium or medium low heat, melt the butter as you whisk in the brown sugar. DO NOT melt the butter first, then add the brown sugar, or your finished product will be super grainy. Whisk it gently the entire time it's heating. When it starts to boil, cook it for one minute (whisking) and take it off the heat. Immediately drizzle in the cream, whisking constantly.

Allow it to cool for about 10 minutes.

Then add it to the pie crust and put it in the freezer for 30 minutes (or fridge for a bit longer)--until it sets up.

When it's set, make the chocolate ganache. Do this by putting the chocolate chips and whipping cream in a microwave proof container and nuke it for a minute. Then whisk. If it needs another 30 seconds to whisk smooth, give it that. It should whisk into a smooth creamy chocolate deliciousness.

Pour this onto the caramel layer. Freeze for 30 minutes or refrigerate until set. DO NOT put it in the freezer and forget all about it. This isn't meant to be a frozen pie. You just want it to set up.

When it's set, you can add Hershey's bars if you want (they are perfect thematically for Unbroken, but they do take an already rich dessert over-the-top so be warned). Alternately, you can sprinkle this with sea salt.

Chill for 2-4 hours in the refrigerator and eat.

PRINTABLE RECIPE

Wednesday, November 12, 2014

Dumb Easy Dessert (and a Picture Redo for Easy Chocolate Pie)


Most of the pictures from my early days of blogging are a little of what I'd like to call, well, ugly. Yet many of them are fabulous recipes--my tried and true classics.

Sunday, when I went to make an apple pie only to discover that 3/4 of my bag of apples (from Walmart--land of evil produce) were completely rotten--as in just rotted through after you peeled off the shiny red outside...Anyway, after that, I had a pie crust and no pie. So I decided to fill it with what we had. Which was chocolate. And I was reminded of this lovely and stupidly easy pie. I was also reminded that its picture was ugly.

Today I rectify that.


Easy Chocolate Pie

I also remind you that this pie filling takes only about 5-7 minutes of prep time. A graham cracker crust will add another 5. And then you chill it. You'll be finding it on my dumb easy Thanksgiving line up soon.


Friday, May 16, 2014

Press-Into-the-Pan Pie Crust (Sort of Whole-grainsy, Potentially Dairy-Free and Vegan)


Yesterday, for reasons the universe only truly understands, I had to have strawberry pie. Had to. Had to had to had to. We almost had it for dinner. I tried to justify it so hard. It wouldn't be any worse than pancakes for dinner, right? And I could serve it with, well with... well, something to make healthier right? And I mean, it did have strawberries in it--quite a few. And I made a crust that had both oat and whole wheat flours in it.

At the end of the day, the only thing stopping me from pie for dinner was the simple fact that I would have to admit to my children that we were having a sweet pie for dinner. I mean I didn't want my kids to get it into their dear little heads that things with names like strawberry pie are acceptable dinner options.
Me: "What would you like for your birthday dinner, dear?"
Them: "Strawberry pie."
Me: "You mean before the cake."
Them: "Well, duh, we can't have dinner after cake."

So yes, I had to acknowledge that pie for dinner would create future problems for me. Consequently, I did the responsible thing. We had popcorn for dinner. And then we had strawberry pie.

And now I know what you're asking (besides 'is this woman the worst mom ever or what?'), "Why is this post about only the pie crust and not the whole pie?" Well, because even though the pie was delicious, it did not set up. It was like a delicious crust with runny strawberry shortcake filling inside. Not that there's anything wrong with that. But the blob of goodness that made it to my plate couldn't rightfully be called pie.

The crust, on the other hand, was perfect. First of all, it's dead easy. You don't roll it out--you simply press it into the pan. Secondly, it was kind of sort of healthy containing both oat flours and whole wheat. I wasn't trying to be healthy. I made it the way I did because I remembered my mom making a strawberry press-in pie crust that had oats, flour, and sugar. It was delicious. But the recipe is lost. I wanted to try to reproduce it. The result was pretty perfect.

So while I work on my runny strawberry pie (by experimenting with 100's of strawberry pies for dinner of course), at least I can give you a fabulous and easy crust. I'd dare say that this crust will work with any soft fleshed non-cook fruit pie and probably a whole assortment of other sweet pies as well. It'd also be great with cheesecake. And, hey, maybe if you use it (come on, "whole grain vegan pie crust" sounds pretty virtuous) you can trick yourself into eating it for dinner. I won't tell.

The other thing I should tell you is that I actually made two strawberry pies--one tiny, one large. I made the tiny one because I had a bit of leftover dough from this chocolate pie hanging out in my freezer. It's a slightly cookie-esque dough with a bit of lemon rind in it. I thought it would be the perfect thing for strawberry pie and, oh mother hubbard, it sure was. It's not as easy as press-in pie crust. And you can't even try to justify feeding it to your family for dinner. But it was really delicious combined with the strawberries.

So there you go: Two out-of-the-box and extra delicious options for your strawberry pie crusts. One you can find at this link (you'll only need half that dough for an open-topped strawberry pie). The other I give you below.

And always remember--that which you can't justify eating for dinner can probably be justified for breakfast. Amen and amen.

Press-Into-the-Pan Pie Crust
adapted from The Splendid Table
Makes 1 pie crust
Prep time: 5 minutes
Cook time: 15-20 minutes
Cost: $.70
flour: .05, whole wheat flour: .10, oat flour: .10, sugar: .05, butter: .40

Note: Many recipes use 1/2 C oil instead of the butter listed here. I think this would totally work (and I'm sure it's what my mother did all those years ago), but I love the flavor of butter. However, using oil would give you a vegan/dairy-free option for this pie crust. And let's face it, coconut oil would rock, especially in a strawberry pie.

1/2 C all-purpose flour
1/2 C whole wheat flour
1/2 C oat flour (you can make your own easy peasy)
1/4 C sugar
1/2 tsp salt
10-11 Tbsp butter, melted

Mix all ingredients. Plop into pie pan (I recommend greasing the pan first or even lining it with parchment paper--otherwise it's hard to get out). Press your mixture onto the bottom and up the sides until it's about the thickness of a regular old pie crust (maybe a wee bit thicker). It won't be perfectly flat liked a rolled crust. That's okay--you're going to fill it with something and eat it. If you want you can crimp the edges, but I went for my classic "rustic" look.

If using this for a cold pie, you'll need to cook the crust first and then let it cool. (well, I guess you don't have to  cook it, but then you'll have a sort of crumbly, yet still delicious mess). Bake it at 350 for 15-20 minutes until it's just becoming golden. You could use pie weights if you're compulsive and perfectionistic (and what are you doing on this blog), but I didn't.

PRINTABLE RECIPE

Friday, March 14, 2014

Pi Day: My Favorite Chocolate Pie


I've always meant to make a pie on pi day. And I've always forgotten. But this year I realized (finally) that it was also my friend's birthday and I offered to make her a pie and that commitment kept me on track. Naturally I made us a pie too.

The sad thing about this is the slight amount of grief that was experienced in doing some simple math in the dividing of the two chocolate batters on a day brought about to celebrate math. At a certain point, Kip said, "Let me just get the calculator" and that offended me deeply. But we need not speak of that at this moment. Eventually my brain kicked in and I managed not to ruin anything (at least not that I know of). For now we celebrate pi and also Pie. Good-bye. (Note: We will also celebrate rhyming and also homophones.)

This is the pie I made. I've updated the post with a few more pictures.

I don't have tons of pies on this blog, but let me say that the ones I've got are good ones.

1. A very Chocolatey pie:


2. Vegan Pumpkin Pie:


3. Peanut Butter Pie: When I saw this picture, I swooned for the memory that is this pie.


4. The best traditional Pumpkin Pie I've found:


4. Chocolate Mascarpone Cheesecake Pie: This is a-maz-ing.


5. Not to be outdone by stupidly easy Chocolate No Bake Pie (which needs a picture re-do I'm afraid):


6. But maybe you'd rather have pie for dinner. Onion Hater's Chicken Pot Pie:


7. And let's not forget Pie Crust 101:


LinkWithin

Related Posts Plugin for WordPress, Blogger...