Where tasty and cheap eat together (and hopefully remember to write down the recipe).
Showing posts with label herbs. Show all posts
Tuesday, October 28, 2014
Herb Drying for Dummies
Although my normal garden is nothing to brag about, I do have a fairly lovely herb garden. Which is just great. Until it's the end of October and my basil is falling over itself and everything needs to have something done with it if I want to preserve some for myself over the winter. Which I do. But then the idea of cutting off leaves and hanging it or putting it in the dehydrator for days or making a pesto with it or slow oven-drying it, or any of the other methods for herb preservation that I've ever tried made me want to put my head under the covers and hibernate. Often I do have the time and energy for these things and I enjoy them, but this fall, it just made me heave a fat, dramatic sigh. Still, the cheapskate in me just couldn't let them all freeze and go to waste.
(Note: The following is an unnecessarily long story of how I accidentally learned this herb-drying-for-dummies trick. Interestingly many of my for-dummies tricks are discovered quite by accident while I, myself, am acting (for research purposes of course) like a dummy. Anyway... continue on with the story if you will or hop to the instructions below for the method...)
Finally, I went out and chopped down the basil. I figured I'd let it sit on the table and maybe it would, uh, dry itself or something. It didn't. A few leaves started getting funky and I figured, "Okay, I'm not going to let it just sit here and mold." So I took off all the good leaves and figured I'd just dry them in the oven. I had way too much basil to throw in the dehydrator and oven-drying seemed a little easier than making pesto, (and it didn't involve any expensive ingredients that I may or may not have had).
Generally, to oven dry, I do this: 1) Turn the oven to lowest setting. For me this is 175, which is a little too high for herbs, so I let it get almost there and then I turn the oven off and let it sit, and then when the oven has cooled a few hours later, I turn the oven back and then repeat that process. For a small amount of herb, it's not a big deal. But for a large amount, it takes forever. And you have to keep "tossing" your basil so some doesn't dry while the other stuff accidentally steams/cooks/gets weird. And then if you really have a lot of herb, you need to take the stuff that has dried out and let the other stuff keep going. Blah blah blah.
And I seriously had a lot of basil. It would have taken days and been super annoying and commandeered my oven. And I was sure I'd forget it was in there and pre-heat the oven for something and ruin the basil.
So I turned on the oven and let it heat. Then turned it off and let my basil sit in the warm oven. Then it was bedtime. And my basil sure wasn't all dry. So I gave my basil a toss and then turned on the oven light to remind me the basil was there so I wouldn't accidentally cook it all while preheating the oven for something non-herb-related the next day.
And guess what? The next morning, my basil was perfectly wonderfully, effortlessly dry. Crumbly, fresh-scented, awesome. When I took the pans out, they were warm to the touch. The light I'd left on had kept the oven just warm enough to be the perfect temperature. And leaving it overnight was the right amount of time (though I'm sure they could have been left for longer).
Herb Drying for Dummies
1) Take the leaves off the stems and spread leaves out on large cookie sheets. It's ideal if the leaves don't overlap, but I certainly broke that rule and had overlapping leaves and leaf clusters just everywhere.
2) Heat your oven to its lowest setting. As soon as it gets there or close, turn the oven off.
3) Turn the oven light on.
4) Let sit overnight. Note: If you have a ton of herbs (especially if they're overlapping), give them a little toss before you go to bed to get the bottom ones on top and visa versa).
5) In the morning, they should be crumbly and perfect. If not, leave them a few hours longer with that oven light on.
Labels:
herbs
Monday, March 31, 2014
Four Edible Plants You Can "Recycle" By Growing Again
So I had some trouble with the title of this post. I mean, what was I supposed to call it?
1. "Four Plants You Can Grow From Nubs"
2. "Four Plants You Can Buy at the Grocery Store and Then Grow from the Leftover Remains"
3. "Four Plants You Can Grow Not From Seed Because You're Going to Buy the plants from the Store and Then Sort of Recycle Them by Growing Another Plant" (yeah, that was a good one)
4. "Save Money by Growing Plants You Already Bought" (kind of like that one actually)
5. "Science Monday: Regrow Your Herbs and Vegetables"
You can see the problem here, but the point really is rather beautiful. You can buy these vegetables and herbs and then you can plant part of their remains and get more plants. Of course this saves money (sometimes those herbs can be really expensive). It also provides a good snow day activity to do with your kids. It also provides the starter for that nice little window sill herb garden you've been dreaming of. And finally, it's the perfect solution if you, like me, cannot seem to grow green onions from seed even though it should be crazy easy, but you simply cannot do it even in the spring/summer so you just keep trying and failing and then you have to buy a big bunch at the store so you can use, like, half a green onion for your soup and then... (Now that is what I should have titled this piece.) So it was finally a great way for me to get my green onions. And, although I've never had trouble growing basil from seed in the spring, I haven't ever been able to do it in the winter, but if you use a leftover bit of herb, you can grow basil in the winter and plant it in an indoor pot.
Maybe this doesn't appeal to you. Maybe you consider this the type of crazy-talk that Pinterest posts are so famous for. Well, then, I can only hope that this gets re-pinned two jillion times like so many of those crazy-talk pins.
1. Green Onions
(You'll use this top part in some cooking of course.)
Put this root end down in a pot with very wet potting soil (keep that soil really wet until this starts to sprout up).
You won't completely bury it--the top will show.
Soon it will sprout up. (Unless it rots, which did happen with one or two of mine, but I still got further than I've ever gotten with seed.) You can see a sprouted onion there in the back corner.
When it's grown, clip off the green onion and use it and it will regrow again from the nub left in the pot. It will do this a time or two, but be thinner each time. And then it will eventually poop out. Or at least mine always have. Still, this trick keeps me in onions for a while.
2. Basil.
Save a sprig of your basil. Put this in a vase like you would if it was a cut flower.
After a while it will start to sprout roots. When it's good and rooty, put it in a pot on the windowsill. Naturally I have never remembered to take a picture of my basil when it was good and rooty, so here is one from the internet. This blogger (thanks amykathryn) used a bunch of basil, but just a stem is necessary. Someday I will actually remember to take a picture...
3. Celery. My friend recently did celery. It's another plant I can't dream of growing from seed, but look what happens when you put a stump in a bowl of shallow water:

This is how it looks after two weeks. I'm totally trying this one.
4. Romaine Lettuce. This one's a bonus. I've never tried this or had a friend try it, but was enchanted by the idea and will try it next time I get a head of romaine (another thing I just can't seem to grow from seed). So go here if you want to try romaine. Thank you P's and Q's. Just like the celery, you put the nub from the romaine in a bowl of shallow water, set it by a sunny window and it will regrow. It's like magic.
As for my window sill pots (pictured up top), they were a gift from my sister. They are made from rice hulls and very pretty. I'm not sure where she got them (psst--she just told me she got them from West Elm), but I found some on Amazon. They were not intensely cheap on Amazon, but are awesomely cool since they last several years and then biodegrade. However a perfectly good window sill garden could be done with cheap terra cotta pots or whatever you've got. For indoor plants, you should use an indoor potting soil.
Monday, April 29, 2013
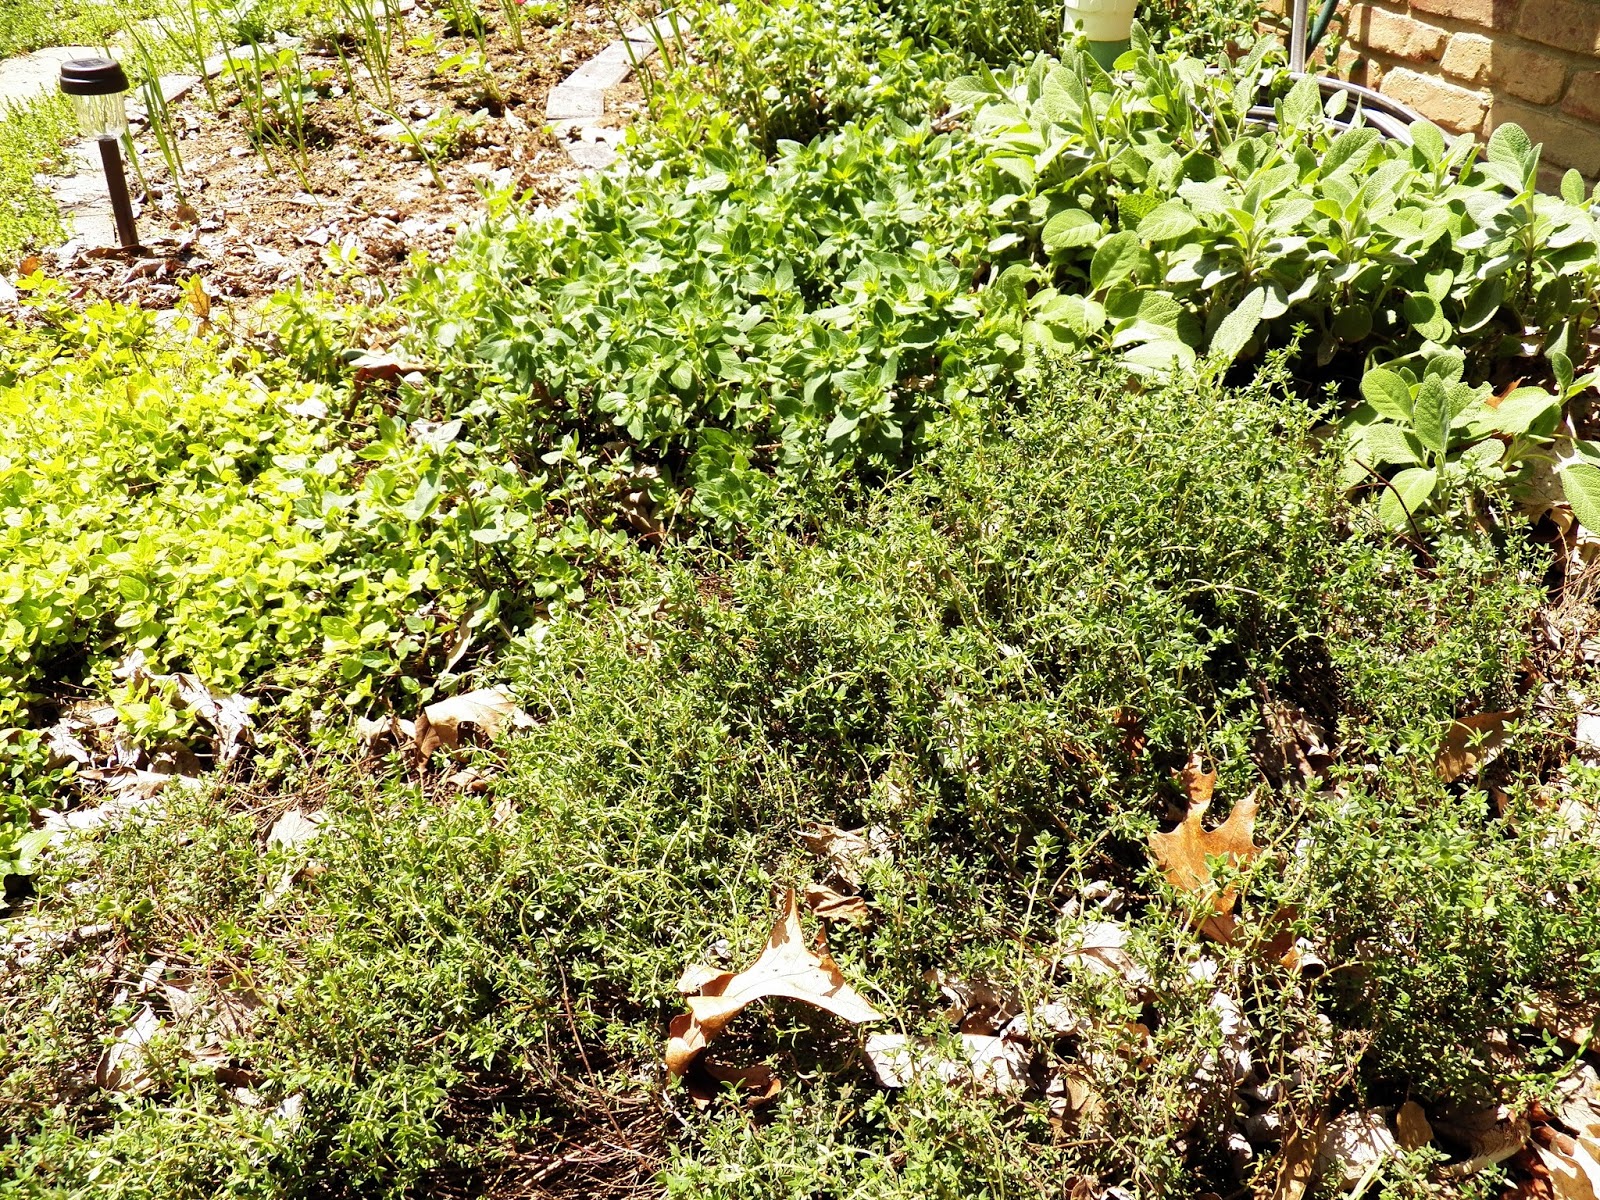
My Favorite Herbs and What They're Good For
And now a poem about herbs:
I love herbs.
It's one of those things that makes me a nerd(s).
Wow. If that has inspired you like it inspired me, here's some more stuff about herbs.
My number 1 favorite herb to grow.
Basil. It just is. It's pretty. It's easy to sow from seed. It's great in pots or garden beds. I love to eat it. I make pestos like a crazed woman and then I freeze them in ice cube trays and eat it all year long. It flowers and attracts bees. It could go in a bouquet if you wanted to (and I've done this before). I just love it. If you have trouble with slugs getting it, surround it with cracked egg shells.
My number 2.
Rosemary. It smells like heaven to me. I could just rub it all over myself and be happy. I love to cook with it and the dried just doesn't compare for me. I grow it in a pot so I can bring it in in the winter since it usually dies in a deciduous area if left outside.
After that I fall apart and have trouble choosing, but here's a decent list that I've kind of sort of ordered according to preference.
Chives. Perfect garnish or stir fry or potato anything. I haven't had success with seeds so I recommend a start. They come back year after year. They taste amazing. They have pretty flowers. Perennial.
Dill. Easiest herb to grow if you're looking for that. Great with fish, soup, salad, summer vegetables. Annual, but reseeds itself like a beast.
Parsley. Pretty as a garnish. Tasty as an herb. Biennial (grows the first year, then grows and goes to seed in the spring of the second year).
Sage. Thanksgiving will never be the same for me without fresh sage. It's very pretty, there are tons of varieties. And it tastes much much better than its dried counterpart. Lots of beautiful varieties to choose from. Perennial.
Thyme. Ditto the Thanksgiving thing. It's not so pretty (well, some varieties are, but the main kind I grow is just kind of gangly), but it sure tastes good with chicken, soup, and a lot of other foods. It's easy to dry because the leaves are small, so you can save some over the winter. There are many many varieties. You can get it tiny and creeping or bigger and flowering. Perennial.
Cilantro. I love this herb so much fresh that it's embarrassing, but I'm not always successful at growing it from seed (alas). That said, it's really easy to grow from seed for most people, so don't ask me what my problem is. Annual, but often reseeds.
Stevia. Must be grown from a start. I use this in smoothies instead of sugar during the summer and love it for this purpose. Also, when I am pregnant and chew the leaves, the taste it leaves in my mouth is awesome when everything else I eat when pregnant leaves a nasty taste in my mouth. I don't know why this is but because of it stevia holds a special place in my heart. Annual.
French Tarragon. I think tarragon can be pretty good dried, but it's even better fresh. Perennial.
There are others that I love for different, non-food reasons.
Scent and attract bees/butterflies:
Lavender (scent and attracts bees/butterflies). If you live in a deciduous area, be sure to get a hardy variety; others will die overwinter.
Bee Balm (beautiful blooms and attracts bees and butterflies)
Cone flower (i.e. echinacea) (pretty, attracts bees/butterflies and bugs)
Lemon Balm (lovely scent, great border plant or one you can stick in pesky open spaces that you don't know what to do with because it grows easily anywhere, attracts bees/butterflies after flowering)
Ground cover potential or rocky border potential:
Creeping thyme is my favorite looking, but not strong enough to grow well in our wet, then dry paths.
Winter Savory (great by rocks, also tastes great in pasta sauce)
Thyme (lots of different varieties so you'll have to ask your garden people for the lower growing types. I have one called caraway thyme that is not so low as the creeping thyme, but is much hardier, spreads better, and is still reasonably low for a ground cover)
Oregano (golden is good for this. It can get tallish later in the summer. you can weedwhack it or tromple it or something, but I like it)
Teas or garnishes:
Mint (Tea, ice cream, also so lovely in cold drinks--even water--delightful). My favorite mint is chocolate mint, but I love them all. Be careful with growing mint as it is invasive so put it in a pot.
Chamomile (Tea--you use the flowers of chamomile, not the leaves)
Lemon Balm (I don't use this in tea. I think it tastes like spinach, but other people successfully use it and have it taste like lemon. Maybe I let mine get too old or something.)
Parsley (curly)
Two years ago I wrote a post about herbs with more detailed info. So read if you are an herb nerd, read on.
Tuesday, December 27, 2011
Fresh Ginger: A Tip
Cheap Eat Challenge, Part 2: Watch as our family of 6 eats on less than $10/day.
We've been doing a lot of work, cleaning, project finishing around here (and a little less cooking due to the enormous amount of leftovers in the fridge).
If you happen to have some leftover ginger root from those batches of gourmet ginger cookies you were making... Or perhaps from the soup you made in order to heal yourself from the batches of gourmet cookies you made...And you're not quite sure what to do with it except to let it sit there and rot in a baggy in your fridge, at which point, you'll get an intense urge for more cookies and/or soup and have to run out and buy another ginger root from the Asian store, which we all know means an extra errand, which we all means know means your kid will try to shop lift some Asian candy at the check out and then we may also know that you just might not have cash and that the Asian store won't take a card for your $.30 of ginger root, which we all know means you'll have to give up or wander around looking for $10 (plus or minus the not-quite-shoplifted candy your kid is whining for even though you know she'll hate it) of stuff to buy so you can use your card , and then you'll finally get out of there, but by then you'll be way too tired to make soup or cookies and will end up using a bit of the ginger over a hot compress on your eyes, and--frankly--I have no idea what that will do, but hopefully it will help.
Or you could just take your leftover ginger root out of the fridge and chop it up nice and small and put it in a freezer bag for later and then when you need a tablespoon of it at some random time, why, you'll just whip it out and it will be done and all will be well and right with the world--no hot compress needed.
Peel it, chop it small, freezer bag, label, freeze. Done.
We've been doing a lot of work, cleaning, project finishing around here (and a little less cooking due to the enormous amount of leftovers in the fridge).
If you happen to have some leftover ginger root from those batches of gourmet ginger cookies you were making... Or perhaps from the soup you made in order to heal yourself from the batches of gourmet cookies you made...And you're not quite sure what to do with it except to let it sit there and rot in a baggy in your fridge, at which point, you'll get an intense urge for more cookies and/or soup and have to run out and buy another ginger root from the Asian store, which we all know means an extra errand, which we all means know means your kid will try to shop lift some Asian candy at the check out and then we may also know that you just might not have cash and that the Asian store won't take a card for your $.30 of ginger root, which we all know means you'll have to give up or wander around looking for $10 (plus or minus the not-quite-shoplifted candy your kid is whining for even though you know she'll hate it) of stuff to buy so you can use your card , and then you'll finally get out of there, but by then you'll be way too tired to make soup or cookies and will end up using a bit of the ginger over a hot compress on your eyes, and--frankly--I have no idea what that will do, but hopefully it will help.
Or you could just take your leftover ginger root out of the fridge and chop it up nice and small and put it in a freezer bag for later and then when you need a tablespoon of it at some random time, why, you'll just whip it out and it will be done and all will be well and right with the world--no hot compress needed.
Peel it, chop it small, freezer bag, label, freeze. Done.
Thursday, July 14, 2011
Week on Waste: Easy Tips to Stretch and Preserve Herbs
Cheap Eat Challenge, Part 2: Watch our family of 6 eat on $10/day.
Fresh herbs aren't usually cheap. And they don't last long. And your recipe usually calls for an annoying 1/4 cup. In a perfect world you would have lots of fertile sunny land and you would grow your own and occasionally snip off what you needed. In that same perfect world you would stagger their plantings so you always had the herb you needed. Yes, well. It is a lovely thought.
But let's head back to real life. Because in real life you've got a bunch of cilantro wilting in your fridge. Maybe it's even past wilting. Maybe it's to the parts-are-getting-slimy stage. Don't you just love that stage?
The thing is, there are lots of ways to keep our herbs fresher longer as well as a couple of ways to keep them fresh-like for several months.
Easy Tips to Stretch and Preserve Herbs
1. Put the herbs in a glass with water in it (as though they were a bouquet of flowers). You can keep this in the fridge for storage; your herbs will last a good deal longer. In the case of some herbs--basil is the one that comes to mind--you can even store your "vase" of basil on the counter or table. Basil will actually start to root from a cutting of it (meaning the roots will start to grow from the portion of the stem that is in water), so if you cut off a stem and put it in a vase of water it will last a very very long time. I kept some basil like this for a month or so last summer. It sat in my kitchen window and I'd just clip off a few leaves when I needed them.
2. Wrap your herbs in a paper towel, put the paper towel in a Ziploc bag and store it in the refrigerator. The paper towel wicks off extra water that would cause the herbs to quickly rot if they were merely in a plastic bag. Then the damp paper towel also serves to provide a pleasantly moist environment for those herbs. Do this and you'll give your herbs an extra week--probably even longer.
3. Freeze them.
Method A: Just pluck off the leaves, put them in a Ziploc bag, and throw them in the freezer. No, you won't be able to use them in a cold salad because they'll be ugly and wilted after they defrost, but you'll be able to cook with them and they will taste very nearly as good as they would have fresh. This is especially true of certain herbs like cilantro and parsley. I have also read that basil, dill, mint, oregano, sage, lemongrass, chives, tarragon, rosemary, and thyme freeze well, but I have not personally tried those. I find that this is the best and fastest method for me when I'm like, "Yikes, my herbs are getting slimy" but I don't have a bunch of time (or maybe a bunch of remaining herb) to preserve my herbs. I did it today with some cilantro and managed to salvage a good bit of it. It took me 3 minutes to pull off the good leaves and throw them in the bag (yup, I checked the clock).
Method B: Pulse the herbs in a food processor or blender with a little bit of olive oil, put this into ice cube trays, and then freeze the herb cubes in a freezer bag. You can throw these herb cubes into stews and sauces later. I bet this works well with all herbs, although something like thyme with itty bitty leaves might not work quite as well. It's an absolute charm for basil and other leafy herbs.
Method C: Chop the herbs or pulse them in a food processor or blender, put them in ice cubes with a bit of water and freeze. You can then use these herbed ice cubes as a fun garnish in drinks. Naturally, it works best with herbs you'd want to have with your water, lemonade, or iced tea--things like mint, tarragon, basil, lavender, or lemon balm.
4. Make a butter with it. Chop up the herbs, mix them with soft butter (not melted butter), roll the butter in wax or parchment paper, and freeze it till you want it. Chives work really well in this as do Italian herbs.
5. Dry them. This is the peskiest method in my opinion, but also the most effective if you've got a booty load of an herb you'd really like to preserve (usually a harvest from the garden). You can do this outside if you live in an arid place. Here in Indiana, a food dehydrator works best. However, you can also dry them in the microwave (keep a close eye on them, so they don't burn) or at a very low temperature in the oven (150 degrees or less if possible). Strip the leaves off the stems. Place them in a single layer on whatever it is you're drying. They're done when you can crumble them in your hand. At that point, put them in an airtight container or the humidity from the air will add some moisture to them again and shorten their storage life.
Fresh herbs aren't usually cheap. And they don't last long. And your recipe usually calls for an annoying 1/4 cup. In a perfect world you would have lots of fertile sunny land and you would grow your own and occasionally snip off what you needed. In that same perfect world you would stagger their plantings so you always had the herb you needed. Yes, well. It is a lovely thought.
But let's head back to real life. Because in real life you've got a bunch of cilantro wilting in your fridge. Maybe it's even past wilting. Maybe it's to the parts-are-getting-slimy stage. Don't you just love that stage?
The thing is, there are lots of ways to keep our herbs fresher longer as well as a couple of ways to keep them fresh-like for several months.
Easy Tips to Stretch and Preserve Herbs
1. Put the herbs in a glass with water in it (as though they were a bouquet of flowers). You can keep this in the fridge for storage; your herbs will last a good deal longer. In the case of some herbs--basil is the one that comes to mind--you can even store your "vase" of basil on the counter or table. Basil will actually start to root from a cutting of it (meaning the roots will start to grow from the portion of the stem that is in water), so if you cut off a stem and put it in a vase of water it will last a very very long time. I kept some basil like this for a month or so last summer. It sat in my kitchen window and I'd just clip off a few leaves when I needed them.
2. Wrap your herbs in a paper towel, put the paper towel in a Ziploc bag and store it in the refrigerator. The paper towel wicks off extra water that would cause the herbs to quickly rot if they were merely in a plastic bag. Then the damp paper towel also serves to provide a pleasantly moist environment for those herbs. Do this and you'll give your herbs an extra week--probably even longer.
3. Freeze them.
Method A: Just pluck off the leaves, put them in a Ziploc bag, and throw them in the freezer. No, you won't be able to use them in a cold salad because they'll be ugly and wilted after they defrost, but you'll be able to cook with them and they will taste very nearly as good as they would have fresh. This is especially true of certain herbs like cilantro and parsley. I have also read that basil, dill, mint, oregano, sage, lemongrass, chives, tarragon, rosemary, and thyme freeze well, but I have not personally tried those. I find that this is the best and fastest method for me when I'm like, "Yikes, my herbs are getting slimy" but I don't have a bunch of time (or maybe a bunch of remaining herb) to preserve my herbs. I did it today with some cilantro and managed to salvage a good bit of it. It took me 3 minutes to pull off the good leaves and throw them in the bag (yup, I checked the clock).
Method B: Pulse the herbs in a food processor or blender with a little bit of olive oil, put this into ice cube trays, and then freeze the herb cubes in a freezer bag. You can throw these herb cubes into stews and sauces later. I bet this works well with all herbs, although something like thyme with itty bitty leaves might not work quite as well. It's an absolute charm for basil and other leafy herbs.
Method C: Chop the herbs or pulse them in a food processor or blender, put them in ice cubes with a bit of water and freeze. You can then use these herbed ice cubes as a fun garnish in drinks. Naturally, it works best with herbs you'd want to have with your water, lemonade, or iced tea--things like mint, tarragon, basil, lavender, or lemon balm.
4. Make a butter with it. Chop up the herbs, mix them with soft butter (not melted butter), roll the butter in wax or parchment paper, and freeze it till you want it. Chives work really well in this as do Italian herbs.
5. Dry them. This is the peskiest method in my opinion, but also the most effective if you've got a booty load of an herb you'd really like to preserve (usually a harvest from the garden). You can do this outside if you live in an arid place. Here in Indiana, a food dehydrator works best. However, you can also dry them in the microwave (keep a close eye on them, so they don't burn) or at a very low temperature in the oven (150 degrees or less if possible). Strip the leaves off the stems. Place them in a single layer on whatever it is you're drying. They're done when you can crumble them in your hand. At that point, put them in an airtight container or the humidity from the air will add some moisture to them again and shorten their storage life.
Subscribe to:
Posts (Atom)