Showing posts with label toppings. Show all posts

Wednesday, July 8, 2015

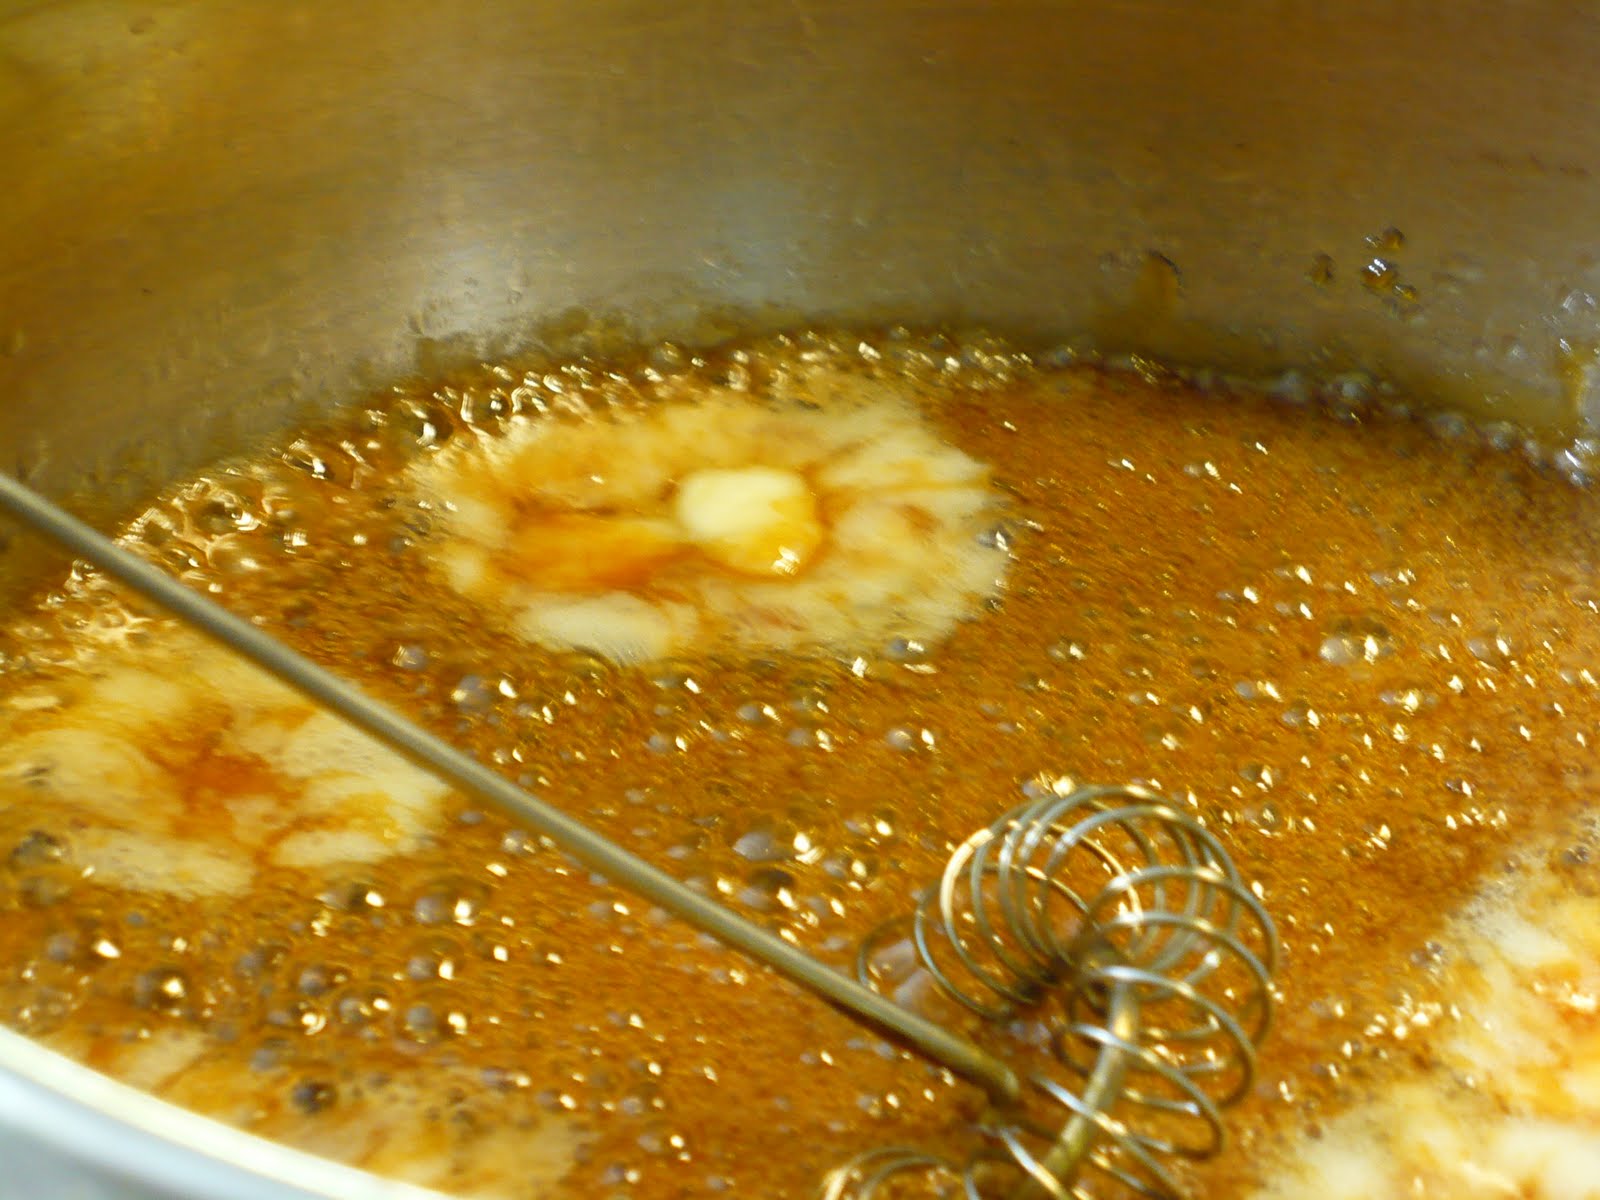
Almond Roca Ice Cream Sauce


A few weeks ago, I heard about Nuts.com's almonds project. I love almonds, so creating something delicious with them didn't seem too challenging.


And sure, there were lots of healthy things I could make with almonds. Because almonds are delicious and a super food and what not. But I still chose to make an ice cream topping with them.


I can't think of a good reason for this except for my low moral fiber (and awesomeness). But if you are a person of similarly poor character (and awesomeness), I can assure you that you'll really thank me for this recipe. Because it's pretty rocking.


I love Almond Roca. Yes, you could chop up Almond Roca and top your ice cream with that, but Almond Roca is more expensive than this. Furthermore, I was looking for something that could be drizzled--a sauce that embodied all the awesome that Almond Roca is. You're welcome.

Of course you don't have to eat it with ice cream. You could use it on pancakes or French toast. You could dip apples or fruit into this goodness. Or put it on plain yogurt. You're still welcome.

Almond Roca Ice Cream Sauce
makes 3-4 C
Prep/Cook time: 10 minutes
Cost: $4.75 (I know that sounds pricey, but this makes double or triple what you'd get if you went and paid for nutless, chocolateless store-bought ice cream topping. We halved it, which cost only about $2.40, which is about the same amount for about the same price as a store-bought sauce. And it had all those nuts and all that chocolate, which is reason for rejoicing and swooning)
corn syrup: .25, brown sugar: .30, butter: .20, milk: .10, almonds: 3.00, chocolate chips: .90

Note: I halved this and that was plenty for us.

1 C white corn syrup
1 C brown sugar
3 Tbsp butter
1/2 C milk
1 tsp vanilla
2 C almonds, chopped
1 C milk or semi-sweet chocolate chips

Bring corn syrup, brown sugar, butter, and milk to a boil. Do this gradually. If you boil foods with milk in them too quickly, the milk will curdle. I start it at low and let things melt, then up the heat to medium low and then medium. Don't go over medium.

Lightly boil for five minutes (that means that once it's boiling you might have to turn the heat down again). Stir constantly while it boils.

Add vanilla and nuts. Allow to mostly cool. Then add chocolate chips. You want them to remain mostly solid with maybe just a little tiny bit of chocolate melting in. (Note: If you don't have the patience of Job for goodness sake, and want to eat this RIGHT NOW, just put the chocolate chips on your ice cream, then pour the hot sauce on and the chips will soften and get just barely melty and everything will be right with the world. This is what I did and it was amazing.) (Another note: I suppose that you could just throw the chocolate chips into the hot sauce and swirl them in. This would probably create a pretty amazing chocolate caramel almond sauce, but I wanted the chocolate to have its own distinct place.)

Serve over ice cream. Die from happiness.

PRINTABLE RECIPE


Thursday, January 31, 2013

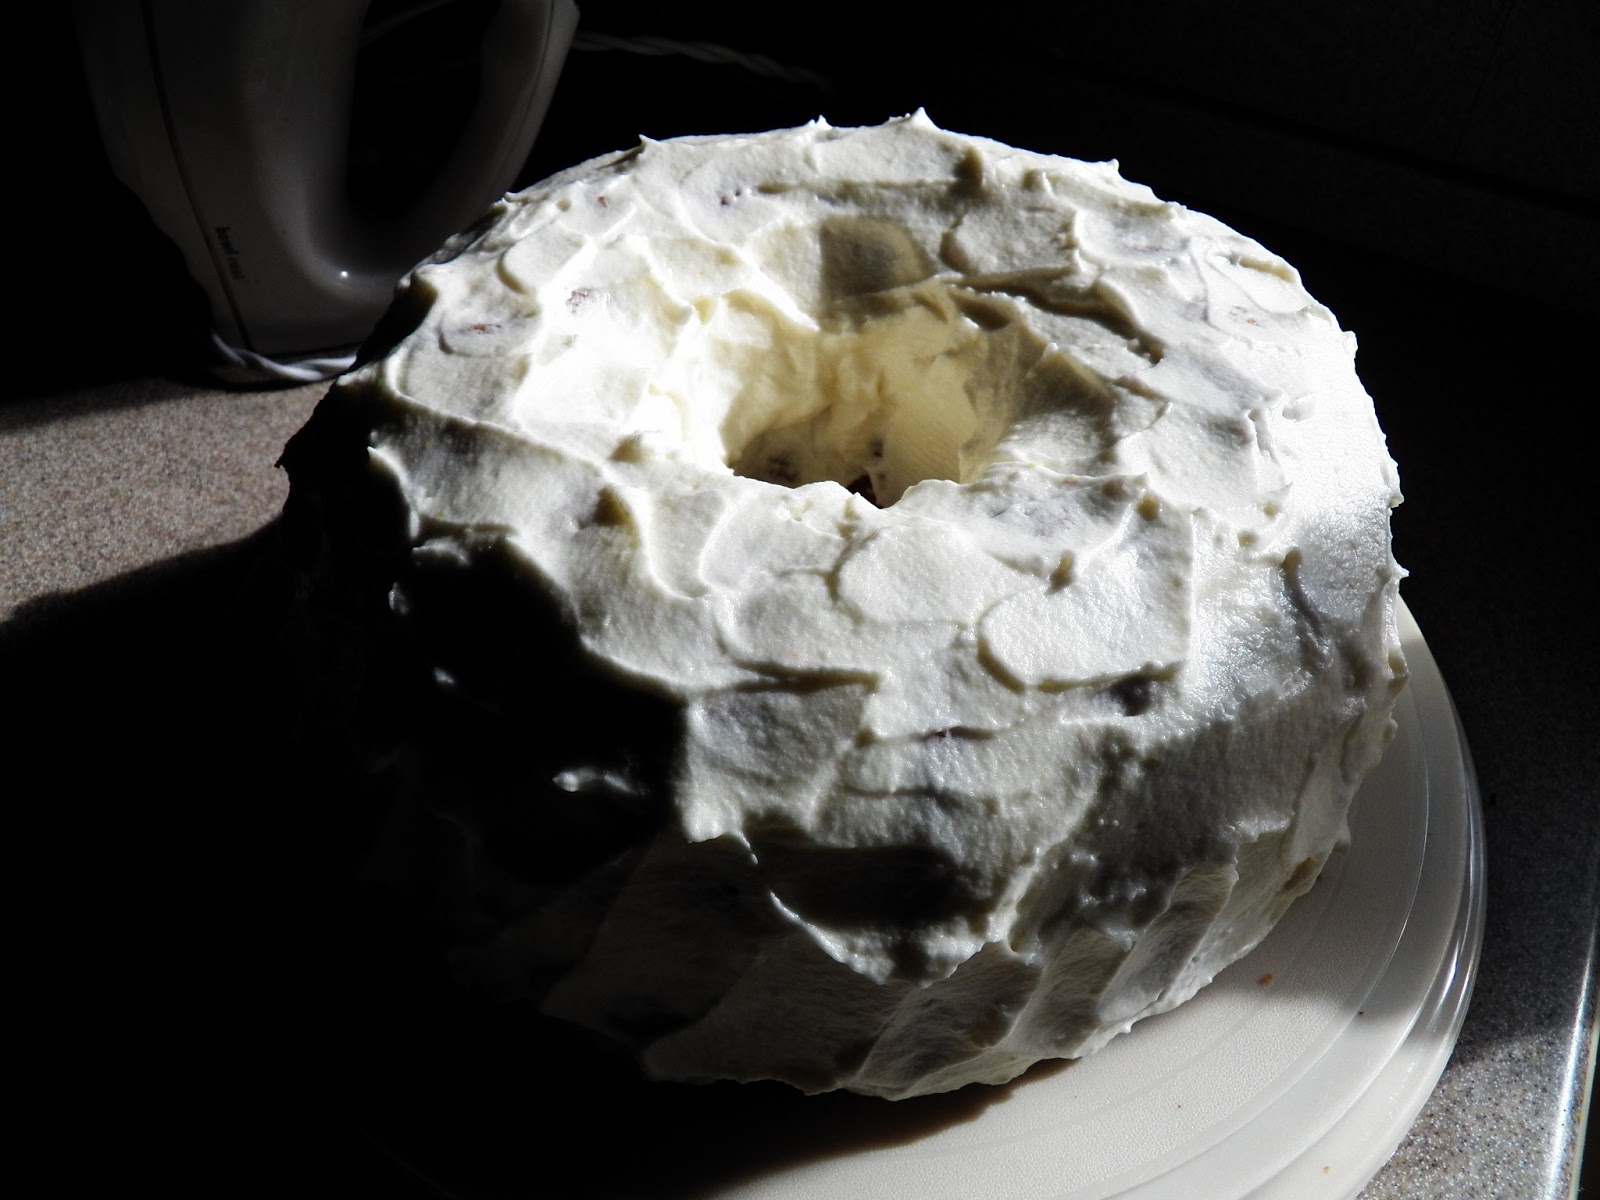
Lemon Buttercream Frosting and an Orange Cake to Put it On


Call me old fashioned, but I really believe that a buttercream frosting should contain the elements butter and cream. Often these days they're made with shortening and, well, shortening. Blah.


Saturday was a birthday party for one of my dearest friends. The cake needed to fit the occasion. What do you give to one of your dearest friends on her special day? You give her orange cake with lemon buttercream frosting and raspberry sauce. (True, the sauce is missing from these pic's. I only put it on just before.) It was really really delicious. I hope she felt the same way. I, myself, checked tact and self-control at the front door and went back for a second piece. 


Lemon Buttercream Frosting
frosts 1 bundt cake
Prep time: 10 minutes
Cost: $2.10
butter: .50, cream: .50, powdered sugar: .80, lemon: .30

6-8 Tbsp butter
4-8 Tbsp cream
1 lb powdered sugar
1 lemon, zested and juiced (you'll use the zest and 1-2 Tbsp juice)

Melt butter. Add powdered sugar, lemon zest, lemon juice and beat. Add cream, starting with 4 Tbsp and adding more as needed (if it's still too thick add more cream or 1-2 Tbsp milk). Beat. It'll get nice and fluffy.

Then, if we wish to make something as divine as a best friend's birthday, make this cake in bundt form. Let it cool, frost it, and add this raspberry sauce (I halved the recipe and drizzled it on top--and, yes, it's called 'filling' in its original post, but totally drizzle-able). One of the best cakes I've ever made. Which is saying something since this is usually a chocolate cake house.

PRINTABLE RECIPE


Monday, July 16, 2012

Peach Butter


It's time for another recipe for the Secret Recipe Club. This month I had A Dusting of Sugar, a blog written by Rebecca, who is in college, which I mention here only because her blog seemed so surprisingly mature and lovely that I just can't get over that fact. (Rebecca, do not be offended--I have merely gotten to the point in my life when 21 seems so very very long ago). Her photography is beautiful and her recipes are fresh and interesting.

I chose peach butter because ever since I had some that a friend made last year, I've been a little obsessed. And beauty of beauty peaches are in season. It was with this cheerful serendipity on my side that I went to a grocery store here in Evansville (one that rhymes with schmucks). This store had peaches that were billed as "local," "sweet," and "fresh." (I bought 6 pounds.) And which tasted of--there's really no other way to describe it--mild dish soap. I'm not sure why. It's like they were underripe and yet starting to go off all at once and the result was a slightly soapy aftertaste. (Come on chemists--tell me why this is). As snacking food they were completely inedible. I could barely even stand the smell of the peels as I peeled them off.

I almost just chucked the lot.

But then, I figured if there was any way to redeem them, a slow simmer with a bunch of sugar would do the trick, although I admit that I went at this recipe with a little bit of fear (was I going to spend my entire afternoon and $13 of peaches creating 7 C of soapy tasting jam?)

Which is why--two sore feet and the most delicious peach butter later--I have to give a super hug to Rebecca and her recipe. It is beyond delicious. Beyond delicious when made with peaches that sort of made me gag to smell. That, my friends, is a recipe fit for cheapskates and foodies alike.

A Few Notes:
-I doubled the recipe below. I got about 7 C from it. If you're going to can to give some away, you'll want to use those cute little jars, not pints (probably not even 1/2 pints).
-Since I doubled the recipe and was a little timid about burning this, it took forever and ever to simmer down (probably 2 1/2 hours). If I could do over, I would have cooked it on a bit higher heat than I did at first (medium or just higher than that; as it was I started at medium low and it took so long) OR put it in 2 separate pots OR left out some of the water and then simmered it on low or medium low. Do watch it at the end, but at the beginning, you don't need to be afraid of a nice steady boil (not a crazy boil, mind you--just a solid husband kind of a boil).
-To remove the skins from the peaches, most people recommend cutting an X in the bottom of the peach, then putting it in boiling water for 30 seconds and then in ice water for 30 seconds. I know that this works as I've done it before. However, as I heated my water, I decided to start peeling and had almost half my peaches peeled by the time the water was boiling. At that point, I decided to just keep sitting at my table and meditatively peeling than running back and forth from hot oven to cold sink, dirtying extra dishes and making my floor sticky. As a note, I do have an excellent peeler. 
-I did a little experimenting with my jars of apple butter. I tried one with vanilla (very good), one with vanilla and cinnamon (also great), and one with vanilla and almond extract (really good). I think the almond was my favorite, but I seriously had trouble choosing. They were all good.

Peach Butter
adapted from A Dusting of Sugar
Makes 3-4 C
Prep time: 30-40 minutes
Cook time: 60 minutes (or, if you're me, 2-3hours)
Cost: $6.85 or about $2.00/cup
(peaches: 6.50, sugar: .35)

4 lb peaches
1 C water
2 C granulated sugar
1 tsp lemon juice
1 tsp vanilla extract
1/4 tsp almond extract, optional

Peel the peaches and cut them off their pits--they just need to be in chunks; nothing neat is required.

Put peaches in a pot, add water, and cook at a steady boil until they're tender. This will take 15-20 minutes. They're ready when you can mash them with a potato masher or fork.

Puree your peaches in a blender or with a submersion blender. Return them to pot. Add lemon juice and sugar. Mix. Return to your steady, solid-but-not-too-aggressive-just-like-a-good-man-should-be boil. Stir them occasionally. By which I mean every 4-5 minutes or so. At first I was stirring every 30 seconds and I was really slowing the cooking process down.

After the peach butter has reduced a bit and is beginning to thicken, you should stir it more frequently and keep your eye on it because you don't want your lovely substance burning on the bottom of your pot. Really, you don't. You've been standing there for a while and burning it will really tick you off.

Note: While you're standing there, you can prepare your jars if you're going to can. Sterilize them in the dishwasher or by putting them in a pot of boiling water. If you're not canning, clean your kitchen or read your child a story or stare vacantly at your pile of peach peels  meditate. Whatever works for you.

As it boils and you occasionally stir, the bubbles will start to seem thick. They'll sort of hold a bit of their shape after they pop, like this bad picture, taken with my sticky hands.


At that point, you're almost done. When you can drizzle a bit over the top and that ribbon of peach butter holds its shape before dissolving into the pot, it's ready. Another good back up test: If you put it on a spoon and it holds its shape for a minute or two, it's ready. You'll see.

When it's ready...

If canning: Pour hot liquid into hot jars. Wipe off the tops and put new sealy lids on and screw the rings on. Then put them in a big pot of water (enough water to cover the jars plus 2 inches) and process (boil) for 10 minutes. Take them out, let them cool, and listen to that satisfying pop as the lids seal. It's sheer retro bliss, that sound.

If not canning, let cool just a bit and pour into containers. This is said to keep for 3 weeks in the refrigerator. I'm betting you can also freeze it like you would freezer jam.

PRINTABLE RECIPE


Tuesday, November 29, 2011

Fail-proof Caramel and Ideas for Frosting with Caramel

Cheap Eat Challenge, Part 2: Watch as our family of 6 eats on less than $10/day.


Looks pretty good, doesn't it. Even in the late night light.

And it was good. But not as good as it looked and not as good as it sounded (chocolate pumpkin spice cake with caramel cream cheese frosting and ganache). You see, for the very reasons it looked and sounded so good, it was just trying to do too much. Way too much. As I ate it, I kept wishing it was pumpkin cake or chocolate cake or spice cake. With cream cheese frosting. Or caramel frosting. Or chocolate ganache. [For the record, the reviews were mixed. My brother-in-law said it was a masterpiece and my daughter who hates cream cheese frosting loved it enough to beg for it for her birthday this week.)

It was fussy too. And as I ate it, I couldn't help but pine for simple pumpkin-y muffins we had a couple weeks ago (don't worry, I'll get them up soon enough). Easy to make, easy to eat. Easy to add a little whole wheat flour to, thank you very much.

The best thing about this cake was that for it I made a perfectly perfect salted caramel. You should too. And with this fail-proof method you can. Only you shouldn't mix it with a cream cheese frosting. Because the cream cheese-y goodness will eat up most of the perfect caramel-y goodness and they're both too lovely to confuse like that.

Thus, today is a reminder about my fail-proof caramel (with an extra, even more fail-proof step compliments of my sister-in-law), so that any ice cream cravings you have at this time of year can meet their autumnal fullness. This sauce also makes a butt kicking gift.

And just to draw a metaphor because that's what people who spent large amounts of time in English departments like to do, let's also make today a reminder to keep the season simple as well. We should all try to remember that it's best like that.  


Note: If you are trying to make a good caramel buttercream frosting, I recommend one of two things.

1. Either mix 1 recipe of the below caramel into your normal vanilla frosting (not a cream cheese frosting--cream cheese has too strong of a flavor and the caramel gets lost). (If you use the frosting in this link, be sure to halve it or double the caramel below.)

2. Frost your cake with a vanilla frosting and then drizzle your caramel topping over it just as you would a ganache. It'll be gorgeous and you'll have some very caramel-y bites of goodness.

Fail-Proof Salted Caramel
adapted from Simply Recipes and New Best Recipe Cookbook
makes a good 1 1/2 C
Cook time: 20-30 minutes
Cost: $.86
(sugar: .16, cream: .50, butter: .20)

1/2 C water
1 C sugar
6 Tbsp butter, cut into chunks
1/2 C cream
1/2 tsp vanilla, optional
1/8-1/4 tsp chunky sea salt (optional, for salted caramel, yum)

1. Put water in a pan. Please do not use the cheapest, flimsiest-bottomed pan you have.


2. Pour sugar in a mound in the middle of the water in the pan.


Don't worry, the water will soak into the sugar. Putting it in a mound in the middle means crystals of sugar are less likely to get on the side of the pan, causing the final mixture to crystallize.

3. Put the lid on the pan and turn the heat to medium or just above medium.


4. Let it boil. Do not stir it or mess with it in any way.


La di da. This is going to take 10 minutes or so. You don't need to watch your pot too much at first. Do the dishes, make the kids lunch. Whatever. (Do NOT leave the kitchen and then forget you were boiling sugar.) This method of caramel making does take a little longer than just letting your sugar melt and adding butter and cream. However, at this point of the process, you don't have to be super duper attentive. Give it a glance here and there to see if it's starting to change color. Also, take a few minutes to get your other ingredients ready... (see step #5). [Note: You can remove the lid when it starts to boil as long as the sugar is entirely dissolved. If it's not, leave the lid on.]

5. Get your other ingredients ready.


At a certain point in caramel making, a little speed is required. It helps to have your cream measured and your butter cut. You can warm the cream if you wish (I used the microwave to get it warm--took me 25 seconds or so). It might make your life a little bit easier, but it's not essential with this method. (Cold cream--and sometimes even warm cream--can cause the boiled sugar to seize--or get kind of hard for a few seconds--worry not, even if it seizes, you just keep mixing and it will, um, un-seize--which is a totally technical term, I assure you.)

Here I'm going to update this post and add a tip from my sister-in-law--a tip which made this easier and less stressful and more perfectPut your butter and cream together in the microwave and microwave (and mix) at 20 second intervals until the butter is melted and the mixture is warm. Then just pour this into your amber caramel. I believe this helps in a couple of ways. It doesn't foam as furiously. It doesn't seize. It mixes in faster, making it less likely for your perfectly amber sugar to burn while it waits to get mixed up. It's faster. And it's just easier.

6. When the boiling sugar turns the color of straw, remove the lid and REDUCE THE HEAT to medium low.


7. It's still going to boil for a few minutes, but watch it now. If you're stove is even the teensiest bit un-level, rotate your pan. DO NOT UNDER ANY CIRCUMSTANCES STIR THIS MIXTURELet it boil until it becomes an amber color. If your stove really is uneven or the sugar is cooking in an obviously uneven way (this is how my stove is), give it the gentlest of swirls every few moments (if it's really really uneven, take it off the heat and swirl it so so absolutely gently with a spoon--I will not even call it stirring; it is like moving the mixture with a spoon). You don't want the melted sugar to swish up on the sides of the pan AT ALL.


This is a bracelet made of actual amber. This is the color you want.


But take care not to go darker or you will probably burn your caramel. If you are nervous as I often am, or if you are making this for guests or a gift, err on the side of light amber. It may not be as rich as complex as the amber caramel, but it will be un-burned and perfectly delicious.

8. When it is an amber color, it's time to move quickly. Don't get nervous, just be ready.When it's amber, take the pan off the stove and whisk in the butter (I use a flat whisk, but any whisk will do--don't use a spoon--too slow). If it seizes and seems to separate and get funky, just keep stirring. If it bubbles up (as it almost surely will), don't freak out, just keep stirring. All will be well. [Note: Again, as an update: Here you'll pour in the mixed/melted butter and cream mixture.]


9. As soon as your butter is incorporated, whisk in the cream--you're still moving quickly here, but you're almost done. When all is incorporated, add vanilla and sea salt if using. 


10. My friends, it is finished. And it is delicious. Stir it for another minute and pour it into a bowl that can handle some heat because it is really really hot. Put some on a spoon, blow it a lot, and taste it. Good, huh?

11. Allow it to cool in a bowl and then cover it for storage. It'll last quite a while just on the counter. It can also be refrigerated for really long-term storage (i.e. if you have a will of iron).


And now, at the end of this very long post, I have a confession. I burned my first batch. Oh, it wasn't the method's fault. I was trying to take pictures you see. And pictures are distracting and they take time to take, especially for me. First of all, I forgot to reduce the heat after I took the lid off. And then, I was trying to nail that right on perfect amber color and, um, my stove is not level and things just got away from me. By the time I'd clicked a few times, the sugar was burned. Just barely--just 30 seconds too long, but yes, it definitely tasted burned. It does give me the chance, however, to blab on a little longerdiscuss the color of your caramel.


The spoon on the right is burned, the one on the left is good (they'll both look darker in a bowl or pot--the one in the bowl above is the good caramel). You'll notice that there's a little place in between these two shades. The name of that shade is 'risk.' Hit it right on and you'll have the best most heavenly caramel to ever cross your lips (this will be easier with the melted butter/cream). It will be deep nutty sweet, complex, and perfect, but miss it and you've burned your sugar and there's no going back. If you wish to try to hit that mark, I have a bit of advice. Go there slowly. Turn your heat to low (as opposed to medium low) after the lid is removed and rotate the pan a bit as it cooks. Remember that your pan is hot, so even when you take it off the stove, it's going to keep cooking for a few moments (which is sometimes all the time it takes to burn sugar), so keep your heat at low which will give you a lot more control and a little more time after the pan is removed from the burner. If your heat/pan is too hot, you're going to go from perfect to burned too fast to get the butter and cream in there.

Now, go forth and conquer thy caramel sauce.

PRINTABLE RECIPE

Linked to Sweets for a Saturday and Fusion Fridays

Tuesday, September 20, 2011

Cinnamon Glaze

Cheap Eat Challenge, Part 2: Watch as our family of 6 eats on less than $10/day.

Forgive my whimsical mounds of whipped cream that were rapidly melting in a most non-whimsical fashion. 

Several months ago, we took our kids to IHOP for dinner. I hadn't been to IHOP in many many years. And my food was gross. In fact, most of the food was gross with one exception. Mark and Elizabeth got some pancakes with cinnamon glaze and whipped cream. After we ate, Mark asked if I could make that at home. Oh, I bet I could, I told him, and better.

Sometimes after a lousy meal at a chain restaurant, I'm a little overconfident. Because it took me several pancake Sundays before I actually got that thing right. And better, of course.

The good news is that it's crazy easy. That's always good news.

We ate ours as a glaze with a bit of regular syrup and more than a bit of homemade whipped cream thereby. But I'm betting the farm that you could mix this in with your regular syrup (be it store-bought or homemade) and have a pretty wicked cinnamon syrup. And I'd bet another farm (it's so easy to do when you have no farms isn't it) that you could pour it into nearly whipped whipped cream for a crazy good cinnamon whipped cream.

Cinnamon Glaze
Makes 1/4 C
Prep time: 3 minutes
Cost: .05

3 Tbsp brown sugar
1 Tbsp corn syrup (I used dark because that's all I have)
1 tsp cinnamon
1 Tbsp water

Whisk ingredients together in a pot. Heat just until sugar melts, stirring every minute or so. If it just starts to boil, that's fine, but you don't want it boiling for long or it will get much too thick. So don't think you can just run downstairs and grab your laundry (all 4 baskets) and bring it up. You can't.

PRINTABLE RECIPE

Saturday, August 20, 2011

Strawberry Sauce

Cheap Eat Challenge, Part 2: Watch as our family of 6 eats on less than $10/day.


We still had more strawberries that needed to be used. And since our church has changed from starting at 9:00 to starting at 11:00, Sunday has become fun pancake day. Fun pancake day meet sketchy strawberries transformed.

Of course ice cream, yogurt, pound cake, angel cake, and possibly oatmeal would welcome this as well.

Strawberry Sauce
Makes a couple cups
Prep and cook time: 10-15 minutes
Cost: $1.15
(strawberries: .99, sugar: .16)

16 oz. strawberries, hulled and cut
1 C sugar
1 Tbsp cornstarch
1/2 C water

In saucepan, combine sugar and cornstarch, so the cornstarch doesn't go all lumpy on you. Whisk in water and bring to a gentle boil. Add strawberries. Simmer until fruit is tender and squishable. Mash with a potato masher. (You can also puree if you want a super smooth sauce, but I leave it a little chunky.) Taste to be sure it has enough sugar for you. Sometimes if you're strawberries are really dreadful, you might need a little more. On the flip side, if they're very sweet, you can start with less sugar.

Serve warm or cold. This will keep refrigerated for several weeks (which is a whole lot longer than your molding strawberries will).

PRINTABLE RECIPE 

Wednesday, June 15, 2011

Raspberry Sauce

Cheap Eat Challenge: Watch as our family of 6 eats, or tries to, on $6/day.


Yesterday I did a little dissing on vampires. They're just not my thing. They have long teeth. They're pale and cold. They consume bodily fluids.

I don't read anything by Anne Rice, the ads for True Blood make me a little queasy (I honestly have to avert my eyes). And, although I may take my eternal salvation in my hands through the awesome blasphemy I am about to reveal, I haven't read the Twilight series. And, I know, those are, like, nice vampires and all.

Yet. Yet I have created the perfect food for a vampire/True Blood/Eclipse party. It was an accident I assure you. But a happy one. Whether you have a thing for vampires or not.

Remember my friend who brought me the raspberries. Well, she brought me some more. These are the people in your life you should keep around. We ate some and I froze a few and I had some vanilla ice cream sitting in the freezer so I made some raspberry sauce. And it was good. It was, if I don't mind saying so, very very good.

This is a fruit sauce that can be used on ice cream, on/in plain yogurt or over pancakes/waffles. And you needn't use fresh raspberries--any berry will do as will peaches or cherries. Fresh or frozen are both fine. Usually I leave the fruits kind of in tact, but in this case I thought the seeds were just too seedy, so I mashed the fruits and then strained them out (which really wasn't very hard at all). And--oh my. The remaining sauce was utterly gorgeous and super full of raspberry punch with just the right amount of sweet (i.e. not overly sweet).

The only problem was that when I drizzled it over my white, creamy, virginal ice cream, all I could see were the words "Twilight Party." If that's your thing, go for it. As for the rest of us, we'll swirl the spooky cryptic messages into our ice cream and eat it anyway. Oh yes we will.

Berry Sauce
makes about 2 C
Cook time: 5 minutes
Cost: $4.00
(sugar: .08, raspberries--free if you've got great friends; otherwise they'll cost you $3-5)

1/2 C water
1/2 C sugar
1 Tbsp cornstarch
3 C raspberries, fresh or frozen (or blueberries or a mix of whatever berries; peaches or cherries work deliciously too)

Whisk sugar and corn starch together. Add water. Bring to boil. Add berries and simmer for a few minutes until soft. (It might seem to thick at first, but give it a few minutes and the fruits will release their juices and all will be right with the world.)

If you don't have seedy raspberries, you're done. You can mash a few of the berries and leave the rest in tact.

With the raspberries, I took a potato masher and mashed them into a sauce right in the pan. Then I strained the sauce through a fine-meshed strainer. I pressed it a bit to get as much syrup as I could.

You could stop here--you've got your lovely sauce. Set it aside; you're not going to mess with it anymore. Still, I thought the seeds still had a bit of raspberriness left on them, so I put the remaining seeds back in the pan, added another cup of water and boiled for a few more minutes. The water turned fairly dark. I strained this again into a different bowl. What I had was a somewhat thick raspberry juice. It would have made beautiful beautiful popsicles. As it was, I just let it cool and gave it to my kids to drink. Yes, there was surely a bit of residual sugar in it, but I still thought it was a pretty healthy drink for them on a hot summer day.

This will keep in the refrigerator for a good couple of weeks. I'm guessing it also freezes very well, although we always use ours up before that point.

PRINTABLE RECIPE

Tuesday, June 14, 2011

Fail-Proof Caramel Sauce (with pictures)

Cheap Eat Challenge: Watch as our family of 6 eats, or tries to, on $6/day.


Caramel is scary. Maybe not as scary as vampires (oh, wait, those are supposed to be sexy--they still seem really scary to me, but, um, I digress). Anyway, caramel can be a little scary. But unlike (or just like, depending on who you talk to) vampires, it can also be one of the sexiest, fanciest things out there. Perfect for romantic desserts, perfect for dinner parties in which you're trying to impress. Perfect for summer ice cream (now that is my kind of summer sexy--bikinis and vampires need not apply). But not if it's burned to oblivion or crusted in crystals to its pan. And not if it's crazy painful to make. Or brings you to tears from your failed attempts and wasted (sob) cream. And certainly not if it comes from a Smuckers jar of flavored corn syrup that you obtained from a superstore of some variety. With all due respect to Smuckers (not really), their ice cream toppings are crap. And they are expensive crap.

Real caramel is full of top-notch stuff that people consider expensive ingredients--butter and cream to be precise. Many of us avoid buying those things for just that reason. And yet we'll get a craving for caramel and go drop $2.50 on a few ounces of corn syrup and, er, "natural flavoring." You can make it for cheaper my friends. Not just a little cheaper. You can make it for $.86. And it doesn't even need to be frightening.

A couple Christmases ago, I wanted to make caramel sauce as part of a Christmas present for my sister. I had to make it three times. I was sweating over my stove. I was teary and nearly cursing. I was hollering at my kids to get out of the kitchen. I was about to stick my head in the boiling, burning sugar. The Christmas spirit was being felt by all. And then I pulled out my New Best Recipe Cookbook and there sat a method for caramel that did not fail me then and has not failed me since. Bless you New Best Recipe Cookbook. Bless you.

Today the recipe I share with you is from, I believe, Simply Recipes. Three purely good ingredients: sugar, butter, cream (oh, and water too). The method is from New Best Recipe. It is perhaps even more important than cream. If you know me, you know that's saying a lot.

Fail-Proof Caramel Sauce
adapted from Simply Recipes and New Best Recipe Cookbook
makes a good 1 1/2 C
Cook time: 20-30 minutes
Cost: $.86
(sugar: .16, cream: .50, butter: .20)

1/2 C water
1 C sugar
6 Tbsp butter, cut into chunks
1/2 C cream
1/8-1/4 tsp chunky sea salt (optional, for salted caramel, yum)

1. Put water in a pan. Please do not use the cheapest, flimsiest-bottomed pan you have.


2. Pour sugar in a mound in the middle of the water in the pan.


Don't worry, the water will soak into the sugar. Putting it in a mound in the middle means crystals of sugar are less likely to get on the side of the pan, causing the final mixture to crystallize.

3. Put the lid on the pan and turn the heat to medium or just shy of medium.


4. Let it boil. Do not stir it or mess with it in any way.


La di da. This is going to take 10 minutes or so. You don't need to watch your pot too much at first. Do the dishes, make the kids lunch. Whatever. (Do NOT leave the kitchen and then forget you were boiling sugar.) This method of caramel making does take a little longer than just letting your sugar melt and adding butter and cream. However, at this point of the process, you don't have to be super duper attentive. Give it a glance here and there to see if it's starting to change color. Also, take a few minutes to get your other ingredients ready... (see step #5). [Note: You can remove the lid when it starts to boil as long as the sugar is entirely dissolved. If it's not, leave the lid on.]

5. Get your other ingredients ready.


At a certain point in caramel making, a little speed is required. It helps to have your cream measured and your butter cut. You can warm the cream if you wish (I used the microwave to get it warm--took me 25 seconds or so). It might make your life a little bit easier, but it's not essential with this method. (Cold cream--and sometimes even warm cream--can cause the boiled sugar to seize--or get kind of hard for a few seconds--worry not, even if it seizes, you just keep mixing and it will, um, un-seize--which is a totally technical term, I assure you.)

Here I'm going to update this post and add a tip from my sister-in-law that made this easier and less stressful and more perfect. Put your butter and cream together in the microwave and microwave (and mix) at 20 second intervals until the butter is melted and the mixture is warm. Then just pour this into your amber caramel. I believe this helps in a couple of ways. It doesn't foam as furiously. It doesn't seize. It mixes in faster, making it less likely for your perfectly amber sugar to burn while it waits to get mixed up. It's just easier.

6. When the boiling sugar turns the color of straw, remove the lid and REDUCE THE HEAT to medium low.


7. It's still going to boil for a few minutes, but watch it now. If you're stove is even the teensiest bit un-level, rotate your pan. DO NOT UNDER ANY CIRCUMSTANCES STIR THIS MIXTURE. Let it boil until it becomes an amber color. If your stove really is uneven or the sugar is cooking in an obviously uneven way (this is how my stove is), give it the gentlest of swirls every few moments (if it's really really uneven, take it off the heat and swirl it so so absolutely gently with a spoon--I will not even call it stirring; it is like moving the mixture with a spoon). You don't want the melted sugar to swish up on the sides of the pan AT ALL.


This is a bracelet made of actual amber. This is the color you want.


But take care not to go darker or you will probably burn your caramel. If you are nervous as I often am, or if you are making this for guests or a gift, err on the side of light amber. It may not be as rich as complex as the amber caramel, but it will be un-burned and perfectly delicious.

8. When it is an amber color, it's time to move quickly. Don't get nervous, just be ready. When it's amber, take the pan off the stove and whisk in the butter (I use a flat whisk, but any whisk will do--don't use a spoon--too slow). If it seizes and seems to separate and get funky, just keep stirring. If it bubbles up (as it almost surely will), don't freak out, just keep stirring. All will be well. [Note: Again, as an update: Here you'll pour in the mixed/melted butter and cream mixture.]


9. As soon as your butter is incorporated, whisk in the cream--you're still moving quickly here, but you're almost done.


10. My friends, it is finished. And it is delicious. Stir it for another minute and pour it into a bowl that can handle some heat because it is really really hot. Put some on a spoon, blow it a lot, and taste it. Good, huh?

11. Allow it to cool in a bowl and then cover it for storage. It'll last quite a while just on the counter. It can also be refrigerated for really long-term storage (i.e. if you have a will of iron).


And now, at the end of this very long post, I have a confession. I burned my first batch. Oh, it wasn't the method's fault. I was trying to take pictures you see. And pictures are distracting and they take time to take, especially for me. First of all, I forgot to reduce the heat after I took the lid off. And then, I was trying to nail that right on perfect amber color and, um, my stove is not level and things just got away from me. By the time I'd clicked a few times, the sugar was burned. Just barely--just 30 seconds too long, but yes, it definitely tasted burned. It does give me the chance, however, to blab on a little longer discuss the color of your caramel.


The spoon on the right is burned, the one on the left is good (they'll both look darker in a bowl or pot--the one in the bowl above is the good caramel). You'll notice that there's a little place in between these two shades. The name of that shade is 'risk.' Hit it right on and you'll have the best most heavenly caramel to ever cross your lips. It will be deep nutty sweet, complex, and perfect, but miss it and you've burned your sugar and there's no going back. If you wish to try to hit that mark, I have a bit of advice. Go there slowly. Turn your heat to low (as opposed to medium low) after the lid is removed and rotate the pan a bit as it cooks. Remember that your pan is hot, so even when you take it off the stove, it's going to keep cooking for a few moments (which is sometimes all the time it takes to burn sugar), so keep your heat at low which will give you a lot more control and a little more time after the pan is removed from the burner. If your heat/pan is too hot, you're going to go from perfect to burned too fast to get the butter and cream in there.

Now, go forth and conquer thy caramel sauce.

PRINTABLE RECIPE

Wednesday, May 18, 2011

Blueberry Syrup

Cheap Eat Challenge: Watch as our family of 6 tries to eat on $6/day.


It's been a pancakes-for-dinner kind of day. The kind of day where you wake up with a shoulder aching from carrying my fussy-for-weeks toddler in my left arm while trying to complete tasks with my right arm. The kind of day where you miss quiet time and end up behind and tired all evening. The kind of day where you pay people to give you bad news. Yeah, that kind of day.

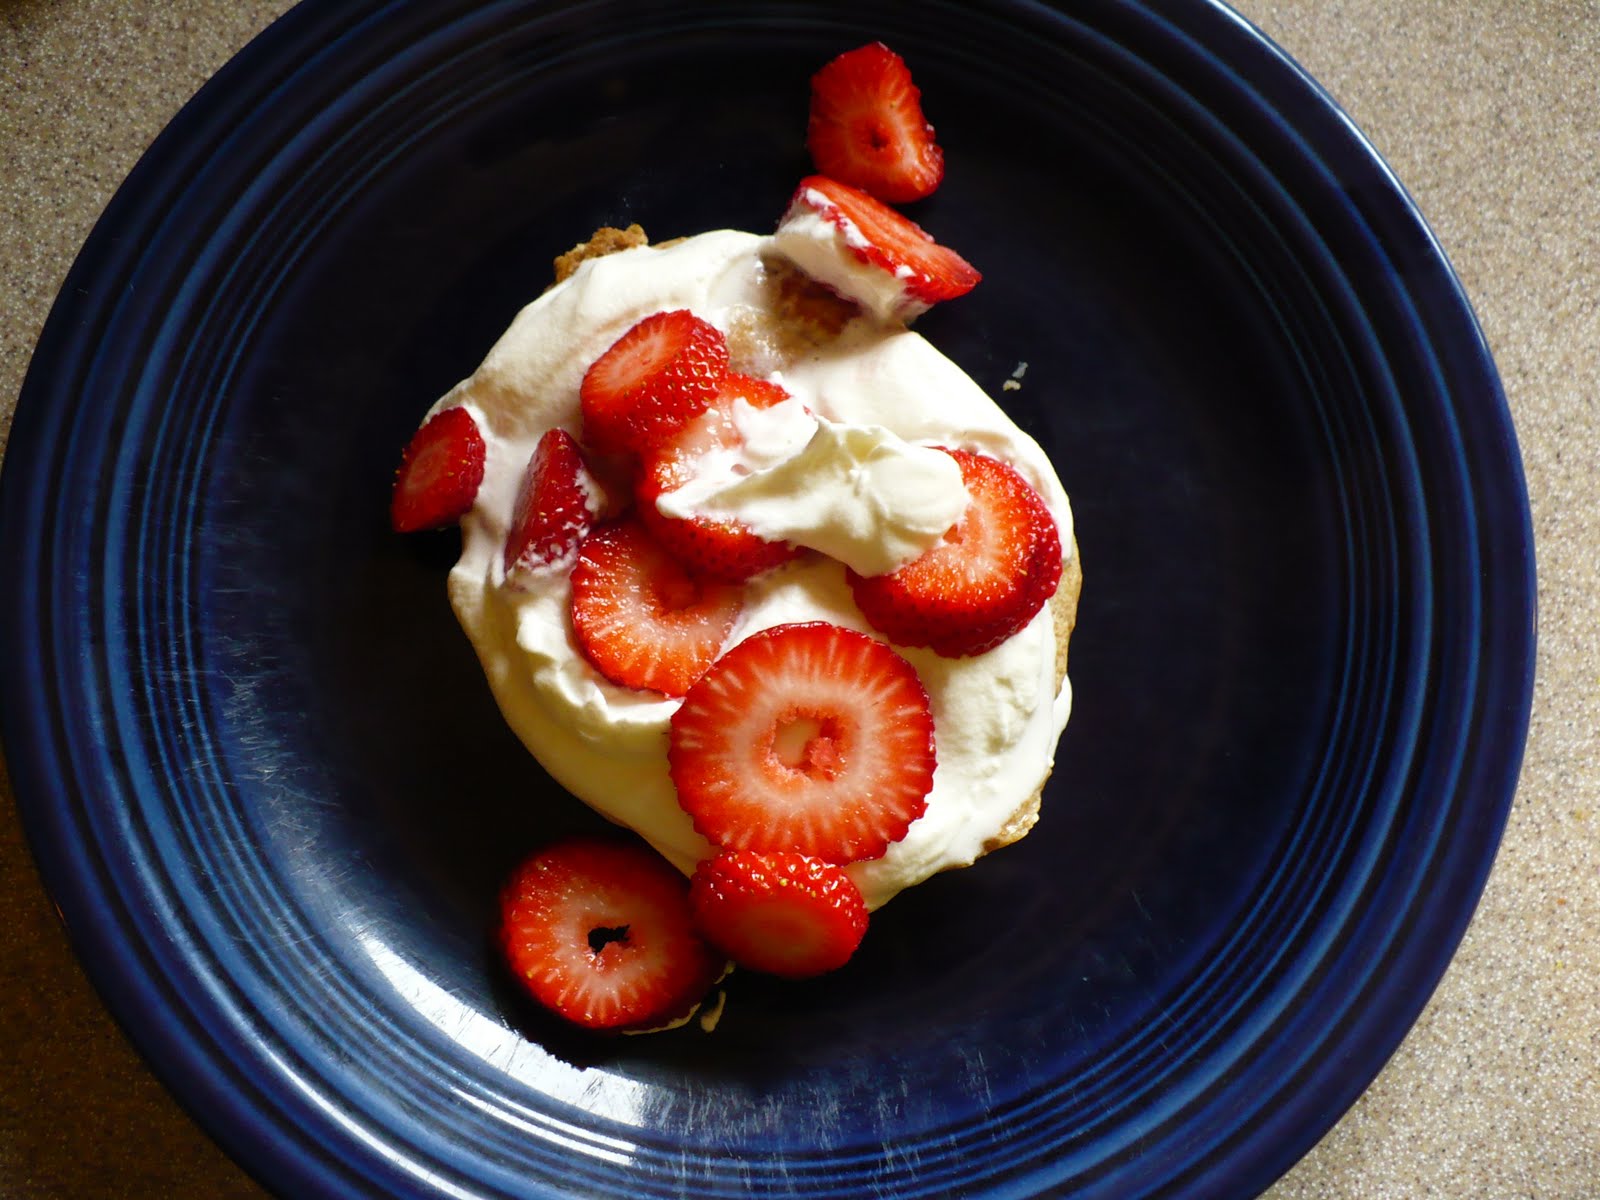
Of course I had nothing planned or remotely started for dinner, so I figured we could have pancakes. Only we have pancakes for breakfast so often that we needed something else. Like IHOP for dinner. No, we didn't go out. But we had blueberry syrup and whipped cream with strawberries. There now, that's a better kind of day.

I actually made this blueberry syrup several days ago. I made it in an effort to healthify our homemade syrup just a bit and to make it fun for my kids--whee, blue syrup!

It's so easy you'll weep for joy. At least until your oldest and pickiest child does not say "Whee, blue syrup!", but instead declares that he doesn't like it because it tastes like blueberries (he wasn't supposed to figure that part out). For the record, he ate it anyway.

Blueberry Syrup
Prep and cook time: 10 minutes
Cost: $1.10
(sugars: .33, flavorings: .02, blueberries: .75)

1 1/2 C granulated sugar
3/4 C brown sugar
1 1/2 Tbsp corn syrup (I use light)
1 C water
1 C blueberries (fresh or frozen)
1/2 tsp vanilla
1/2 tsp maple flavoring (optional)

Combine sugars, corn syrup and water. Heat until sugars dissolve, stirring occasionally. Add blueberries and bring to boiling. Boil vigorously for 3-4 minutes. Take off heat, let it sit for a minute. Pour syrup through a strainer. Reserve blueberries for some other delightful purpose (see note below). Add vanilla and maple flavoring (if using). Serve hot or at room temperature. This will keep at room temperature for at least a couple of weeks. Maybe longer, but ours is gone by then, so no promises.

Note: Of course, if your kids are not picky as heck, you do not need to strain the blueberries out. My kids are picky as heck and I was going for a smooth blue/purple syrup. If you do strain them out, save them for yourself. You can add them to your own syrup, which is yummy. But what is even better is to put them in your pancakes (plop them onto the batter after you've poured it onto the pan). These blueberries are perfect perfect perfect in pancakes because they're extra sweet and not quite as mushy as blueberries that haven't been boiled in a couple cups of sugar. You can practically eat pancakes made with these blueberries without any syrup at all. I'd wager they're awesome in yogurt or over ice cream or things like that as well.

PRINTABLE RECIPE

LinkWithin

Related Posts Plugin for WordPress, Blogger...