Where tasty and cheap eat together (and hopefully remember to write down the recipe).
Showing posts with label fruit. Show all posts
Monday, August 31, 2015
Grape Pretzel Trees
This year, after about 13 years of being an at-home mom, my youngest child began school and my oldest child began junior high. It's been an adjustment for all parties involved. Last week, in an effort to aspire to the noble parenting aspiration of healthy after-school snacks, I determined that I, too, would make healthful after-school snacks. School, after all, left my kids starving and surely immuno-weakened due to their fresh exposure to approximately 10 trillion new germs every nanosecond; besides now I had all this time, so I would don my cap of awesome and make some granola bars and orange smoothies and other beautiful and amazing after school snacks. Unfortunately, my cap of awesome got lost somewhere in my junk drawer and I was forced to don my cap of low-end mediocrity (I'm thinking C- ish). So attired, I made not one, not two, not five, but ZERO after school snacks for my kids of healthful or other varieties (it must be noted that once, on grocery shopping day, I did in fact buy a healthy-sounding, Vitamin C boost juice for my children and fed it to them). That's right, Pinterest. Even with you hovering over our shoulders, we can still strive for low-end mediocrity. And we can still succeed.
So maybe next week you'll get that peach, carrot, and orange smoothie, or some tiny granola bars wrapped up in parchment paper and tied with twine (okay, you will really never get any bars wrapped in parchment paper and tied with twine; sorry). But this week you're going to have to settle for something I did for our Mom co-op preschool last year that was kind of cute and a big success. Behold, the grape pretzel tree. The good news is that it's fully attainable even for parents of low-end mediocrity, (or even other parents of higher ability levels should they become so busy making burlap wreaths and upcycling their Tic-Tac containers that they are in rare instances unable to wrap any food items in parchment paper and tie them in twine).
This grape pretzel tree takes about 3 minutes to do, and even if you cannot sketch out a stick tree on paper, this will still likely end up looking tree-ish. Good luck.
Needed:
Pretzel sticks (stale, broken ones are acceptable)
Grapes (preferably green, but you know, some trees like Japanese maples do have purple leaves)
1. Place your pretzel sticks in a tree like manner. It doesn't have to be perfect. You can copy my perfect design from the picture above if you must.
2. Cut your grapes in halves and position them around the pretzel sticks.
3. See if your children notice you have made a grape tree before they eat it (seriously--I'm curious).
Labels:
fruit
Monday, August 3, 2015
Easy Home-Canned Grape Juice
Once upon a time, I bought a grape plant. It was labeled as a seedless green table variety. Well, they did turn out to be green, but other than that were a complete disappointment. Each grape has several huge seeds and the skin is thick and leathery. The grapes themselves are edible, but sour and hard to chew with that skin and those seeds. There was really just about nothing to do with these awful grapes and I considered ripping the plant out and cutting my losses (namely the three years it took me to get an actual crop from my original little plant). We couldn't eat them, or at least no one wanted to. I used them in my juicer and made a raw juice that was almost undrinkable in its awfulness.
But I remembered that my husband had said that his mom used to can concord grapes for juice. Naturally, this conjured up nightmarish images of me peeling grapes and then squeezing them through cheesecloth like some kind of Roman slave girl. But wait--Kip said that his mom had just put the grapes into jars with some sugar and water and canned them. Then, when they wanted the juice, they poured out the liquid and there it was.
And that, my friends, is pretty much how it is. Grapes, sugar, boiling water into a jar. Process for 25 minutes. Done.
The first year I made these, I followed the recipe I will give you below. This recipe will give you juice at just the right sweetness and consistency. However, Kip said that his mom put more grapes into the jars and made a sort of grape juice concentrate, which they then added water to until it was just right. I liked this idea because it saved on jars and canning time. This is what I have experimented with this year (I'll let you know how it turns out later). The reason I'm telling you this is to invite you to experiment as well if you wish (or have limited jars or time for canning stuff). But if you want the tried and true recipe, then go with the one below.
There's really no way to make this picture pretty. I'm sorry about that. This stuff looks super ugly in the jars. It probably looks prettier if you have concord grapes, but even then the grapes are going to get wrinkly and pale and burst and just generally look like grumpy grape spinsters. However, once you strain them out and just have the juice, it's really perfectly normal-looking. I hope to get a pretty picture of that for you in a week or so when we can't wait any longer and open up our first jar. But until then you have these ugly pale bald grapes to look at. So, sorry.
An opinion: I realize that this has added sugar. I realize that if you go to the store and buy grape juice it will say that it's 100% juice and doesn't have any added sugar. This may lead you to believe that that juice is more healthy than this one, but I'm not so sure it is. I'm not sure how store-bought juices get their mega sweetness,but it has something to do with using a concentrate (aka--syrup, which is, yes, made from fruit, but still a concentrated sugary form thereof) and then has water re-added. It's processed and pasteurized, and I suppose that's good since you're buying it from the store, but you've lost a lot of the good stuff juice can have through that process. We've processed (cooked) our grapes too, but in this processing process, we've left on the skins and left in the seeds, which will sit there for months imparting their goodness (that's what makes for all those good anti-oxidants in wine and grape seed extract) to your juice. Anyway, sugar or no sugar I just think this is better for you. And you don't have to add the sugar. My grapes are kind of the grossest grapes ever so I do, but if yours are kind of alright, then you can leave the sugar out. If you taste the juice after it's done and decide that leaving the sugar out was a terrible mistake, you can always add it and stir it into your juice.
Easy Home-Canned Grape Juice
adapted from Cooking, Canning, and Gardening
Makes: recipe for 1 quart sized jar--multiply as necessary
Prep time: This depends on how many grapes you have. One thing I like about this recipe is that it can be done with a small or large amount of grapes. So if a friend gives you a few clusters of extra Concords from her garden, you can whip up a few jars of this and it's no big deal. Or you can do a bunch if you've got the grapes and time/inclination for such a project. If you're doing a batch of five jars, the prep is going to be about 30 minutes if you know what you're doing and can multi-task (sterilize jars as you pluck the grapes off the stems and clean them).
Processing time: 25 minutes
Cost: My grapes are free, so I don't know what it would be if you bought them, but who buys grapes to can them? You'll also need to buy jars, but--again--if you're canning you probably already have those. Sugar is about $.05/jar, and you'll need fresh lids, which will cost a couple bucks for 12 lids.
Note on grapes: As I said above, I have no idea what kind of grapes I'm using since they were obviously mislabeled at the store where I bought them. I know that Concords work beautifully in this recipe. And I'm guessing that any grape with seeds and a thick skin is going to juice well with this process as long as it's not some crazy wild grape.
1 1/2-2 C grapes, cleaned, stems removed
1/4-1/2 C sugar
boiling water to fill the jar
Sterilize as many quart jars as you think you'll need for the amount of grapes you have. You can do this by washing them in the dishwasher or putting them in a pot of boiling water. You'll also want to sterilize your lids.
Clean your grapes. I put mine in water and rinse them off. Then you remove them from the stems (yes, friends, that is a pain, but not as much as squishing your grapes and/or putting them through some frankensteinian machine would be). As I remove them I rinse them again. You want all the dirt and bugs and spiderwebs off. (Unless spider juice is your thing--I'm not here to judge.)
Put 1 1/2-2 C worth of grapes in your sterilized jars.
Add 1/4-1/2 C sugar. (Note: You can always add more sugar after processing if you strain out your juice and find it too tart.)
Pour boiling water into your jar, leaving 1/2 inch head space.
Put your lids on. Then put your metal rings on.
Put jars into a big pot full of water to process. You should have enough water in the pot that the water is about 2 inches above the jars you're processing. You'll process (boil) for 25 minutes (so don't start the timer till the water is boiling).
Take them out and put them on the counter. The lids will pop and seal. If they don't for some reason, just put that jar in the fridge and drink it within the next couple weeks.
I think this juice is best when it's had a week or two at least to sit and do whatever it does, but you could pop one open that night and drink it if you wanted.
When you want to use this, pour the juice through a fine-mesh strainer. I wouldn't crush or press too much on the grapes--if you do, a cloudier, more potent tasting, pulpier part will come through--that's fine if you're okay with it, but if you want juice that looks like juice, not cloudy weird stuff, then just pour your juice through the strainer.
PRINTABLE RECIPE
But I remembered that my husband had said that his mom used to can concord grapes for juice. Naturally, this conjured up nightmarish images of me peeling grapes and then squeezing them through cheesecloth like some kind of Roman slave girl. But wait--Kip said that his mom had just put the grapes into jars with some sugar and water and canned them. Then, when they wanted the juice, they poured out the liquid and there it was.
And that, my friends, is pretty much how it is. Grapes, sugar, boiling water into a jar. Process for 25 minutes. Done.
The first year I made these, I followed the recipe I will give you below. This recipe will give you juice at just the right sweetness and consistency. However, Kip said that his mom put more grapes into the jars and made a sort of grape juice concentrate, which they then added water to until it was just right. I liked this idea because it saved on jars and canning time. This is what I have experimented with this year (I'll let you know how it turns out later). The reason I'm telling you this is to invite you to experiment as well if you wish (or have limited jars or time for canning stuff). But if you want the tried and true recipe, then go with the one below.
There's really no way to make this picture pretty. I'm sorry about that. This stuff looks super ugly in the jars. It probably looks prettier if you have concord grapes, but even then the grapes are going to get wrinkly and pale and burst and just generally look like grumpy grape spinsters. However, once you strain them out and just have the juice, it's really perfectly normal-looking. I hope to get a pretty picture of that for you in a week or so when we can't wait any longer and open up our first jar. But until then you have these ugly pale bald grapes to look at. So, sorry.
An opinion: I realize that this has added sugar. I realize that if you go to the store and buy grape juice it will say that it's 100% juice and doesn't have any added sugar. This may lead you to believe that that juice is more healthy than this one, but I'm not so sure it is. I'm not sure how store-bought juices get their mega sweetness,but it has something to do with using a concentrate (aka--syrup, which is, yes, made from fruit, but still a concentrated sugary form thereof) and then has water re-added. It's processed and pasteurized, and I suppose that's good since you're buying it from the store, but you've lost a lot of the good stuff juice can have through that process. We've processed (cooked) our grapes too, but in this processing process, we've left on the skins and left in the seeds, which will sit there for months imparting their goodness (that's what makes for all those good anti-oxidants in wine and grape seed extract) to your juice. Anyway, sugar or no sugar I just think this is better for you. And you don't have to add the sugar. My grapes are kind of the grossest grapes ever so I do, but if yours are kind of alright, then you can leave the sugar out. If you taste the juice after it's done and decide that leaving the sugar out was a terrible mistake, you can always add it and stir it into your juice.
Easy Home-Canned Grape Juice
adapted from Cooking, Canning, and Gardening
Makes: recipe for 1 quart sized jar--multiply as necessary
Prep time: This depends on how many grapes you have. One thing I like about this recipe is that it can be done with a small or large amount of grapes. So if a friend gives you a few clusters of extra Concords from her garden, you can whip up a few jars of this and it's no big deal. Or you can do a bunch if you've got the grapes and time/inclination for such a project. If you're doing a batch of five jars, the prep is going to be about 30 minutes if you know what you're doing and can multi-task (sterilize jars as you pluck the grapes off the stems and clean them).
Processing time: 25 minutes
Cost: My grapes are free, so I don't know what it would be if you bought them, but who buys grapes to can them? You'll also need to buy jars, but--again--if you're canning you probably already have those. Sugar is about $.05/jar, and you'll need fresh lids, which will cost a couple bucks for 12 lids.
Note on grapes: As I said above, I have no idea what kind of grapes I'm using since they were obviously mislabeled at the store where I bought them. I know that Concords work beautifully in this recipe. And I'm guessing that any grape with seeds and a thick skin is going to juice well with this process as long as it's not some crazy wild grape.
1 1/2-2 C grapes, cleaned, stems removed
1/4-1/2 C sugar
boiling water to fill the jar
Sterilize as many quart jars as you think you'll need for the amount of grapes you have. You can do this by washing them in the dishwasher or putting them in a pot of boiling water. You'll also want to sterilize your lids.
Clean your grapes. I put mine in water and rinse them off. Then you remove them from the stems (yes, friends, that is a pain, but not as much as squishing your grapes and/or putting them through some frankensteinian machine would be). As I remove them I rinse them again. You want all the dirt and bugs and spiderwebs off. (Unless spider juice is your thing--I'm not here to judge.)
Put 1 1/2-2 C worth of grapes in your sterilized jars.
Add 1/4-1/2 C sugar. (Note: You can always add more sugar after processing if you strain out your juice and find it too tart.)
Pour boiling water into your jar, leaving 1/2 inch head space.
Put your lids on. Then put your metal rings on.
Put jars into a big pot full of water to process. You should have enough water in the pot that the water is about 2 inches above the jars you're processing. You'll process (boil) for 25 minutes (so don't start the timer till the water is boiling).
Take them out and put them on the counter. The lids will pop and seal. If they don't for some reason, just put that jar in the fridge and drink it within the next couple weeks.
I think this juice is best when it's had a week or two at least to sit and do whatever it does, but you could pop one open that night and drink it if you wanted.
When you want to use this, pour the juice through a fine-mesh strainer. I wouldn't crush or press too much on the grapes--if you do, a cloudier, more potent tasting, pulpier part will come through--that's fine if you're okay with it, but if you want juice that looks like juice, not cloudy weird stuff, then just pour your juice through the strainer.
PRINTABLE RECIPE
Monday, July 27, 2015
Whole Grain Strawberry Rhubarb Crisp
This summer, I've pretty much only posted ice cream related items and desserts. And desserts that would go well with ice cream. I'm trying to feel properly ashamed. But I don't. However, to make it up to you I'm not only posting a dessert that could go well with ice cream, but one that is also wholesome-ish enough to pass for breakfast. (So now I'm officially posting desserts that go with ice cream that I'm encouraging you to eat for the first meal of your day.) But wait...I know it is a bit on the decadent side for breakfast, but let's talk about muffins and pancakes before we go giving this poor little crisp a bad rap. After all, it is full of whole grain and fruit plus some nice healthy fats. And, yes, it has sugar, but not in crazy amounts. So have it for dessert if you consider yourself too righteous for this post, but if you'd like to get your epicurean on, then come on over. You can put a dollop of Greek yogurt on it instead of ice cream. Promise.
I made this because I had rhubarb coming out of my ears from my rhubarb plant, but one of the things I like about this is that it doesn't take much rhubarb, so if you have a young plant you can make this, or if it's a little more expensive to buy, you can still make this. Also, if you have a husband who insists he doesn't like rhubarb, he will still eat this. I also used strawberries I'd frozen and then dethawed, and that worked out just fine.
Also, this is just mixed up in the pan. Yes, you do have to chop your fruits. But once that's done, this is a dump into the pan and bake recipe--no bowl, no stirring with anything more complicated than your fingers (unless you want to be civilized and break out the spoon).
Whole Grain Strawberry Rhubarb Crisp
adapted from Smitten Kitchen
Makes 1 8x8 inch pan or 16 pieces
Prep time: 15-20 minutes
Cook time: 40 minutes
Cost: $2.10 or about $.15/serving
oats: .15, flour:. 10, sugar: .20, butter: .40, rhubarb (I have honestly no idea--I have NEVER bought it; let's say .50), strawberries: .75
Note: This was really really delicious as is, but if you wanted to add some coconut flakes or chopped almonds to your crumble, I think it'd be pretty darn incredible.
1 C rolled oats (I used a combination of quick and regular--about half and half)
3/4 C plus 2 Tbsp whole wheat flour (or you can do a combo whole wheat and all purpose; I'd recommend 1/2 C whole wheat and 6 Tbsp all-purpose)
1/2 C brown sugar
1/4 tsp salt
6 Tbsp butter, melted (or 3 Tbsp coconut oil and 3 Tbsp butter, which is what I did)
1 tsp cornstarch
1 Tbsp lemon juice
1 Tbsp granulated sugar
1 C diced rhubarb (I dice mine small)--about 1 1/2 stalks
1 C diced strawberries (also dice them small)
Heat oven to 375. You can line your pan with parchment paper if you want, but once cooled, I think this would come out of a plain greased pan just fine.
Put oats, flour, brown sugar, and salt in the bottom of the baking pan and mix. Pour melted butter over it and stir until clumps form.
Set aside 1/2 C of this mixture. Press the rest of the crumb mixture into the bottom of the pan.
Mix the fruit with the cornstarch and lemon juice. Spread this over the crumb bottom. Then sprinkle on the tablespoon of sugar.
Put remaining crumb mixture on the top.
Bake for 30-40 minutes. (Note: I doubled this and the cook time was quite a bit longer--at least an hour total, possible an hour and 10 minutes, so be aware of that if you double.) The top will be browned golden and the fruit may bubble (though mine didn't).
Let cool in pan. Cut into slices. I like this best cold, but at room temperature and even warm would be delicious too (especially if you just hang the whole breakfast thing and have ice cream thereby).
PRINTABLE RECIPE
Monday, June 1, 2015
Banana Yogurt Breakfast Plate
My kids are out of school! And I've been on a little food jag. It seems wrong not to tell you about it, even if it is dumb easy (especially if it is dumb easy). But this little "recipe" sat on my shelf for a couple weeks. Yes, I'm ashamed to say, but even though it tastes just as good as a banana split and maybe even better, I just hadn't gotten it posted. And then this weekend when my son and his friend went through our neighborhood and gathered mulberries from all the trees they could find. Mulberries, should you have no idea what they are, are a berry that grows on a tree. They taste like a cross between a cherry and a blackberry to me and are purely delicious. They grow all over the place around here and the trees are actually considered a bit of a pest because they'll sprout up wherever they please and grow like mad. I'm not sure you can find them on the grocery shelf anywhere. And I'm not sure why. Maybe they're too delicate to store/ship/whatever. I didn't even know what they were until we moved to Indiana several years ago. Interestingly, we've tried to get several adult friends to eat them from the tree and they Would Not Touch Them. Well, my kids touch them and eat them until their faces and hands are purple. And so my son and his friend rode their bikes around with a large bowl somehow balanced on their ?laps? or something (my son claims to be the best no hands biker around, but still--how did they transport an enormous bowl of berries on bicycles--it's a gift, I suppose). And then they came home and told me that now I could make mulberry jam.
How could I refuse? They'd been biking around with a bowl of berries on their laps for two hours.
Now, I would love to be sharing a perfect mulberry jam recipe with you today, but after digging out my only package of somewhat expired, low-sugar pectin and making a jam with a weird fruit in it, our jam came out delicious but slightly runny.
We also had a couple bunches of very ripe bananas on our hands and that runny jam and some Greek yogurt just called to me. Over and over again my friends. Because this is delicious. And easy. And kid-friendly. And kind of pretty. And well--rounded. It's got your fruit, protein, calcium, nuts. It could be eaten for breakfast, snack, pre/post workout food, or as a side dish with dinner. Which is how we first ate it several weeks ago when we had it.
It's hard to call this quite a recipe exactly, but when you're on a delicious, wonderful food jag, who cares?
Banana Yogurt Breakfast Plate
adapted from Natural Noshing
Prep time: 2 minutes
Cost: $.70
banana: .15, yogurt: .25, jam: .10, other stuff: .20
1 ripe banana
1 dollop plain Greek yogurt (I like it best thick)
1-2 spoonfuls jam or real maple syrup or this
maybe a squirt of whipped cream if you're feeling evil
nuts or shredded coconut
Cut your banana in half. Plop on the yogurt, then jam, then optional whipped cream. Sprinkle generously with nuts. And eat.
Monday, December 29, 2014
Warm Banana and Coconut Bowl
So Christmas is over and the Pinterest boards and Yahoo articles and advertisements are filling up with exercise routines and weight loss challenges and work out clothes. It kind of makes my head spin--like we're a bunch of schizo lunatics on some trippy joy ride. Hey--Let's eat too much chocolate and ham until our stomachs bloat and our fingers swell and we feel kind of like crap. But we won't stop. Well, not until we decide to do the four-day juice fast and choose (of all body parts?) to focus on the intense exercising of our inner thighs. And then we'll give up whole food groups at a time or adapt recipes made with sugar to recipes made with...wait for it...maple syrup. This lunacy continues on to about February when everyone either has yoyo-ed back to a normal weight or given up. I sound kinda judge-y, don't I? I don't mean to. Honestly, I don't. It's just that I've driven to crazy town and back a time or two in my life. I did not eat any fat in all my high school years except for these occasional "binge days" when I would eat all and everything I wanted. In college I did a couple of sugar free years (better than the no-fat thing, I think, but still a focus on restriction that employed many fake sugars so I could get an occasional sweet fix). And this type of disordered eating--it's just not the place I think we should all be aiming for (and pinning) right now (or ever). So I'm trying to be helpful, not judge-y, and to speak from the voice of experience--of past disordered eating. Please forgive me if I've missed the mark there and come off sounding like a total jerk (at least I could try to sound like a funny jerk, right).
Ironically, the recipe today is Paleo, Vegetarian, Void of refined sugar, and involves plenty of Coconut. People, it's positively righteous. But I'm not posting it for those reasons. I'm posting it because it tastes good. And it's wicked quick (like, 60 seconds) to make. Easy. One bowl. One serving (but can be made for more). And it tastes good. And, yes, it does leave you feeling better after eating than you did before. That, I suppose, is the goal I'm shooting for. Most wholesome food gets us there, and occasionally a really good treat.
The truth is that I actually discovered this little snack/meal in December one super busy Saturday night when I came home from singing at a nativity exhibit, then shopping for presents (in heels--oh the agony; how do women do it) and then hurrying home to rush my son and his friends over to the church to clean up from the nativity exhibit. I was starving, but already running late and I had three tweenage boys waiting for their ride. This meal was like heaven--satisfying, healthy, but light enough to eat at 7:00 pm without regretting it. It can be an instant breakfast as well, or healthy dessert, or a post workout snack. It can be anything you want it to be (maybe it should move to Vegas).
So try it. I hope you like it. Also--don't let the whole "warm banana thing" frighten to you. They're very lightly warmed--just enough to bring out a bit of sweet comfort-food-ness, not warm enough to be, like, you know banana mush.
Warm Banana and Coconut Bowl
adapted from Fast Paleo
serves: 1
prep time: 60 seconds
Cost: $.75
banana: .15, coconut milk: .25, pecans: .25, coconut: .10
1 ripe banana (yes, ripe)--cut into "coins"
1/4 C coconut milk (canned or other)
2 Tbsp pecans
1-2 Tbsp shredded coconut (unsweetened works just fine)
a drizzle of maple syrup (optional) (you could also use a sprinkle of any sugar of your choice)
Combine all of this (except maple syrup) in a bowl. Nuke it for 30 seconds. Stir it. Add the maple syrup if it's not sweet enough for you, although taste it first because you might be surprised.
PRINTABLE RECIPE
Monday, December 8, 2014
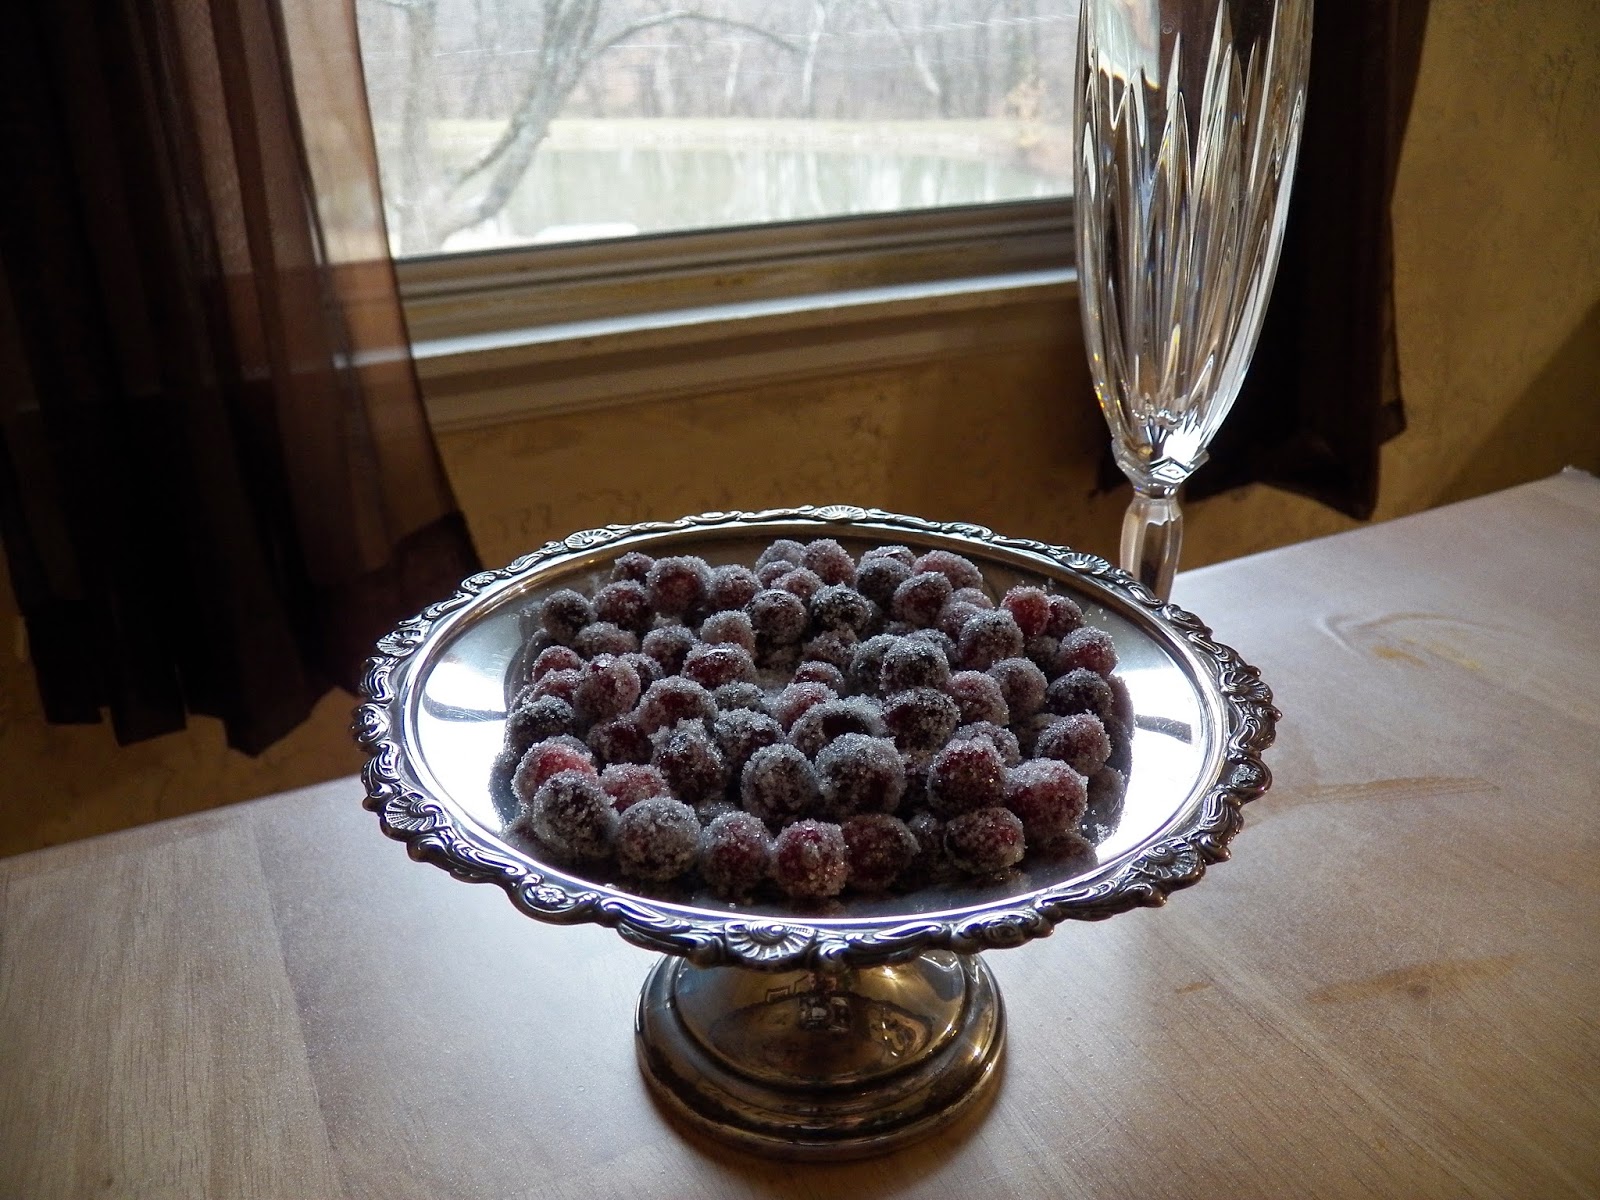
Sugared Cranberries
When you bite into them, there's this delightful snap/pop thing that happens. And a sweet sour thing going on. I love them.
Sugared Cranberries
adapted from Kleinworth and Co.
Prep time: overnight soak, plus 15 minutes, plus hour rest
Cost: $1.75
cranberries: 1.50, sugar: .25
1 C sugar
1 C water
2 C cranberries
3/4 C sugar
Heat sugar and water in a pot until sugar is dissolved (try not to boil, but if you do, the world probably won't end; you just don't want to hard candy your syrup). Then let that cool (if you put the cranberries in when it's hot, they'll pop open). After it's cooled, add cranberries. You're going to leave them in this sugar water to soak overnight, so be sure they're all submerged. This will keep your cranberries from being intensely sour--they'll still be a bit sour, mind you, but not as sour as plain old cranberries rolled in sugar would have been.
Soak them for 8 hours or overnight.
When you're ready, strain off the sugar syrup (or use it for some other purpose), and let your cranberries dry just a bit. You don't want them dripping wet. You want them a little damp or tacky.
Now roll them in sugar. I did this by putting the sugar on a plate and shaking those berries around till they were coated. It worked perfectly.
Let them sit for an hour or so so that they sugar can set. Then put them in something pretty and throw a party.
Labels:
fruit
Tuesday, September 16, 2014
Oven-Baked Plantains (Tostones)
And while we're posting ugly recipes, you really should try this one. I'd only had plantains one other time--maybe 10 years ago--and even though I'd enjoyed them, I had no idea how to make them. Then this past month, I found a recipe and made them. Delicious. But not gorgeous.
Plantains are meant to be cooked before they're eaten because they're starchier than a normal eating banana. These are baked. In the original recipe, Ellie from The Hobo Kitchen made a savory garlic sauce to pour over them. I thought this sounded amazing, but I knew that my kids would not find savory garlic banana-looking things amazing. So I opted to introduce them as a sweet side dish. I did not regret it.
Obviously, these are fussier than just peeling a banana and eating it, but I love switching things up sometimes and I find that occasionally my kids will respond to a new foreign-ish fruit. It helps us get out of our little eating ruts sometimes. Also, even though these require 30 minutes of foresight, they don't require more than 5 minutes of your hands-on attention.
Oven-Baked Plantains
adapted from The Hobo Kitchen
Serves 2-3
Prep time: 3 minutes
Cook time: 26 minutes
Cost: $.65
plantain: .55, other stuff: .10
1 large plantain
oil (I used canola; coconut might be amazing as well)
sugar and cinnamon
1. Cut off each end of the plantain.
2. Slice it along on opposite sides of the plantain.
3. Microwave for 6 minutes.
4. Remove (it's hot) from microwave and let it cool for a minute. Then remove skin and cut into 3/4 inch rounds.
6. Toss with a little oil (I used canola). Or generously grease your baking dish (I used a cookie sheet). You don't want to skimp on the oil too much--these things get sticky. I used foil hoping that would make it easier, but I'm not sure it helped.
7. Bake at 425 for 10-12 minutes on one side until they're golden on the bottom side. Then flip and bake about 8 minutes on the other side.
8. Remove from oven and sprinkle generously with sugar and cinnamon.
9. Serve.
Labels:
fruit
Friday, August 15, 2014
Sour Patch Grapes
You ready for a dumb easy recipe that will change every bag of horrible grapes forever?
Surely I'm not the only person who occasionally ends up with a whole 2-pound bag of crappy grapes. And what do you do with them? I don't feel like grapes work well in smoothies, you can't make sweet bread out of them, I suppose you could juice them if you have a juicer, but many people don't and the juice is okay, but comes out kind of thin and sometimes chalky tasting if your grapes are particularly awful. So you either do the cheapskate thing and eat the nasty things. Or you do the non-cheapskate thing and throw them away. Neither is highly appealing to me.
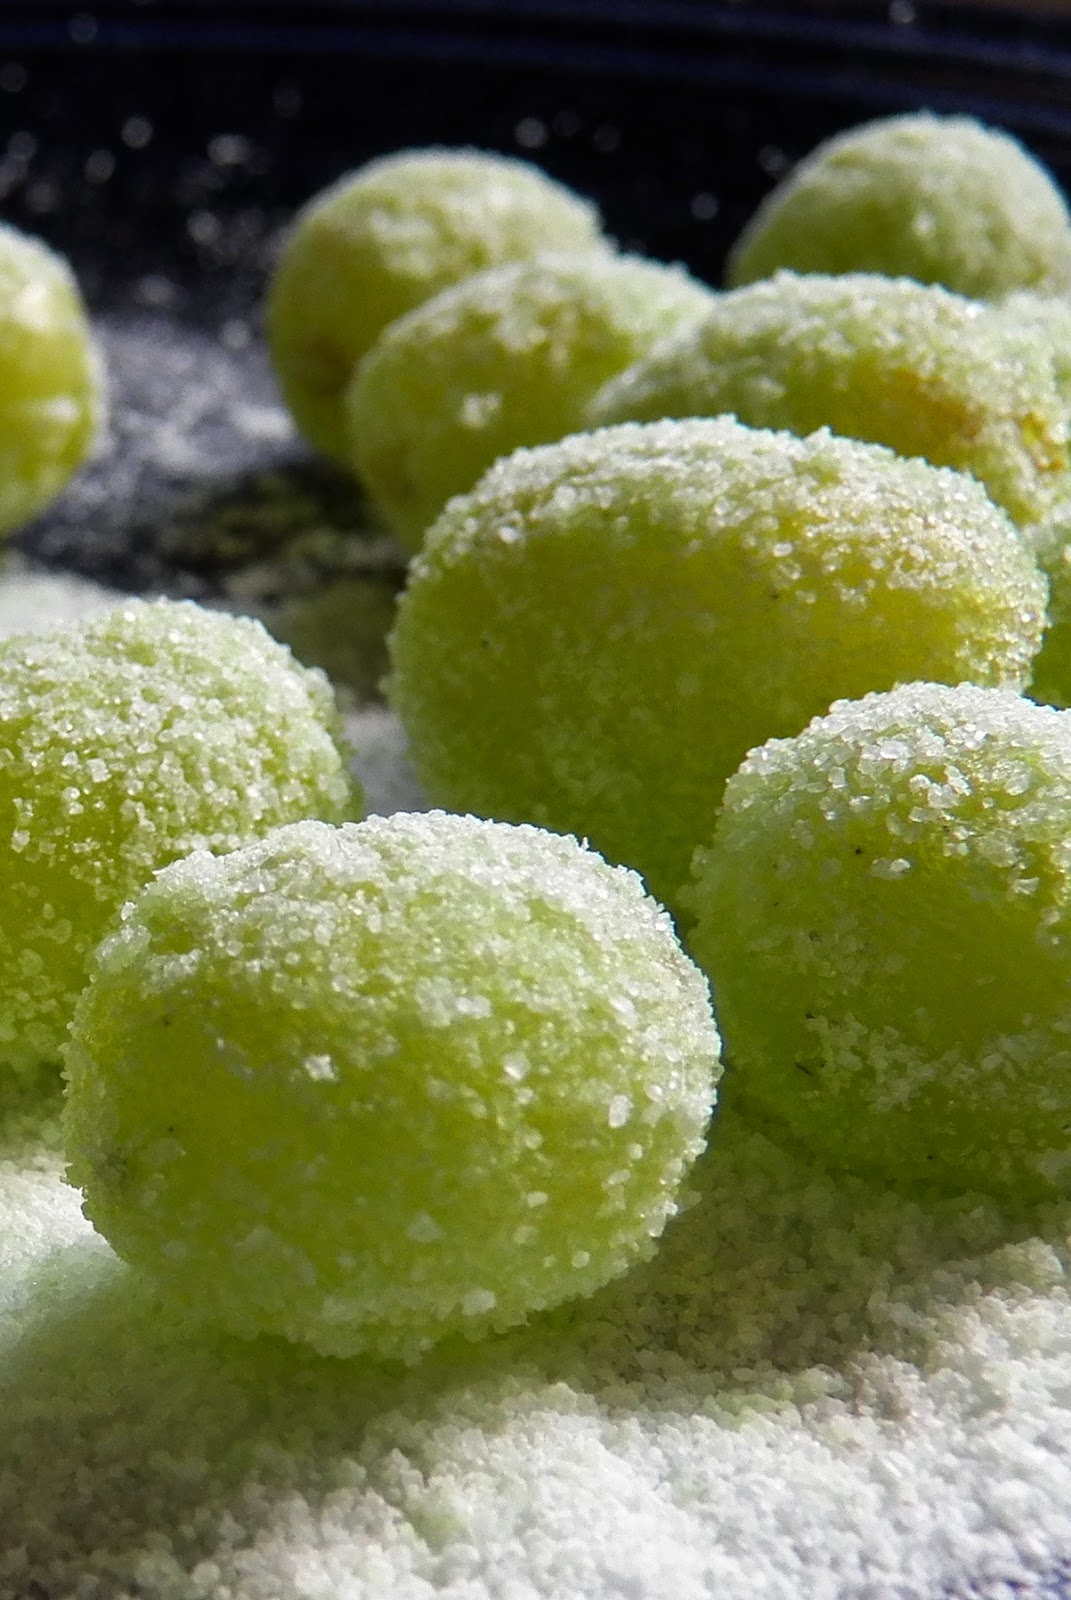
But now... now I have the perfect solution for you. I recently got some awful grapes. Two whole bags--four pounds total. My kids wouldn't touch them. Every grape came home from the school lunches. And then I read about these candied grapes on Pinterest (good old Pinterest). The writer claimed they tasted just like sour patch candies. Also, they were dumb easy. And cheap. And super beautiful. In fact, I thought they would be perfect for a baby shower or party (you could coat them in pink or blue pretty easily).
I'm not going to pretend that these things are super healthy. They're not. But they're healthier than, say, cookies. Or fruit snacks. Or Sour Patch candies. Which is what they most remind me of. They are more along the lines of dessert that has some nutritional value. I can live with that.
I can especially live with that when my kids come home from school and snarf down an entire bunch of grapes they would not touch one day before. These babies really are a lot like candy--in flavor and even a bit in texture. If you are a lover of sour candy, you MUST try these grapes.
Here's what you do:
You coat grapes in dry Jello powder.
Now I know what you're thinking: Jello is Satan's dessert. Oh, wait, maybe that's what I was thinking. But you may be thinking it too, since it is true. Jello by itself is the most disgusting dessert I can think of. Why not just harvest boogers and sweeten them--that is how I feel about Jello. But in this recipe it worked PERFECTLY. They sweet and soured the grapes and the gelatin gave the grapes a little coating that kind of set (which you wouldn't get if you just rolled damp grapes in sugar). Jello is also cheap.
I tried three kinds--Tropical Fusion (Jello brand), Watermelon (Jolly Rancher brand--no, I didn't know that existed either, but if we've got it in Evansville, you probably have it too), Green Apple (Jolly Rancher brand). My favorite was watermelon, followed by Green Apple, but my kids loved them all and consumed them before I could get a cute picture so I had to make them again.
tropical fusion far left, green apple back, watermelon front
Sour Patch Grapes
Makes 2 pounds
Prep time: 5 minutes
Set time: 1 hour
Cost: $2.64
grapes: $2 (Aldi prices), Jello: .64
Note: I made less than this and just saved the rest of my Jello powder by folding up the bag tight.
2 lb grapes
1 package flavored (and sugared) Jello
Remove grapes from stems. Rinse and let strain in a strainer. You do not want your grapes dripping, but you do not want them completely dry either. A damp grape is perfect.
Put Jello powder onto a plate or stretch of waxed paper. Put grapes on the plate (if you're doing 2 pounds, you're going to have to do this in batches) and shake the plate so the grapes roll around and get coated.
Let the grapes sit for an hour (you can eat them right after you make them, but if they set they're better and the texture is amazing and surprisingly candy-like).
Labels:
fruit,
healthy desserts
Tuesday, July 1, 2014
Mango Lime Pops
Ah. Lately I occasionally feel (as I stumble into bed after midnight) that I am a little bit drowning in summer.
Well, if you're going to drown in summer, these pops are the way to go. They are bright and fresh and perfect. Lime and mango together are perfect partners. Occasionally after I've peeled a mango to eat, I'll just rub a cut lime all over it and eat it like that.
Generally, mangoes aren't cheap, but this summer they've gone on sale for $.39/each at least three times. Each time, I've bought the limit (10) and then wondered what to do. Mangoes seem so decadent to me that just cutting them all up seems boring. Because of this I let some of them sit there until I was worried my precious fruits would go off (like a woman who buys a dress she doesn't wear because it's so nice). So I tried to get over that. Still, I wanted to do something special with at least some of them. And then the temperature pushed into the nineties, which is when summer popsicle ideas are born (or at least extracted from Pinterest).
Mango Lime Pops
adapted from Love and Lemons
makes 4-6
Prep time: 5-10 minutes
Freeze time: 4 hours
2 ripe mangoes, cut
2 limes (or about 1/4 C juice)
1/4 C coconut milk
2-4 Tbsp sugar
Put it all in a blender or food processor and puree. Taste and adjust sugar. I always start with just a bit and add more as necessary. Pour into popsicle molds or, if you're cute and Pinteresty, something like Dixie cups that you will them make look amazing. (I was born a little too much without the cuteness gene, but at least what we eat tastes good.)
PRINTABLE RECIPE
Tuesday, November 19, 2013
Cranberry Pomegranate Sweet Relish
So apparently Thanksgiving is coming. It's one of my favorite holidays. Partly because of the food (of course). Partly because it's a time to get together with family and/or friends. Partly because we certainly need a holiday to celebrate thanks. And partly--perhaps largely--because in its way it's a simpler sort of holiday. Since it's just a month away from Christmas businesses and advertisers tend to leave it alone and place their focus on the big Yuletide moneymaker. And although we do have to reserve a little fear those crazed Pinterest posters who would have you gluing together acorns in order to make a basket in order to put your centerpiece of pears and squashes (preferably dipped in crystalized sugars of course). But even those ideas often get bumped out by the next big craft for a homemade Christmas stocking. So, while Christmas commandeering Thanksgiving is one of the frustrating things about this season, it can ironically be one of of the blessings as well. On Thanksgiving you don't have to give a gift; gifts will come next month. On Thanksgiving you can go simple with your decorations--we can go all crazy soon enough. On Thanksgiving you can sleep in and then later when it's time to eat pie, you won't have already maxed out on chocolate Santas (just turkey and stuffing).
Still--in our modern and apparently somewhat luxurious American lives--we sometimes find it hard to resist going big. Each year has to be better (by which I mean more fabulous and intense) than the last. Each child has to (by which we sometimes mean 'deserves to') have this holiday permanently imprinted on his or her tiny brain as yet another epic event of childhood holiday lore.
Maybe I'm just getting old, but the last couple of years, I've felt a little over it. That's not always a good thing for a food blog, but it might be a good thing for our lives. I want to make delicious food, but I want to keep it simple. On the years I host Thanksgiving you won't find any oxtail soups on our table (or any soups at all; there's enough food already don't you think). You won't find cake and pie and pudding. And you certainly won't find nuts glued together into a basket. What I hope you'll find is some of the most basic, traditional recipes done very very well.
Today's recipe is one for cranberries. It allows you to keep it simple. There's no cooking. You can prep it in about ten minutes total. Also, you can totally make this way ahead (like--you could make it today and it would still be good on Thanksgiving--if you can keep from eating it, that is). It has several healthy players in its ingredient list.
Yet in its way, it allows you to go big too. It's beautiful--the fruits slightly indulgent, exotic, and glittering like little Thanksgiving gemstones on your table (who needs a nut basket right?). It's delicious--so so so delicious--I could eat it for every meal. It combines tart and sweet beautifully (with sweet ultimately winning out). It is a side dish that will seem wonderfully luxuriant.
Also, although cranberries play a big role, it doesn't taste cranberry-y (totally a word, right?). My husband hates cranberries; he's not a big fan of pomegranates either, but he--much to his surprise--liked this. So it's a good recipe for pleasing cranberry lovers and those who don't--all in the same dish.
Note: Though called a relish, I eat it like a fruit salad--just spooned into a bowl. However, with some cream cheese and crackers on the side, it could easily be served as an hors d'oeuvres and serve a more sweet relish-y role.
I need to thank my friend Vanessa for introducing it to me and letting me inhale it at her house. And then giving me the recipe--a family recipe from her husband's side (thank you Stanfills). You know you've married well when you can inherit recipes like this.
So make it. Enjoy the indulgence. And the simplicity.
Cranberry Pomegranate Sweet Relish
a Stanfill family recipe
Makes a big bowl full
Prep time: 10 minutes
Cost: $6.40 (This is only about $.50/serving, but if you wish to cheapen it, cut out the raspberries--I almost forgot them and when I tasted this I still loved it without them)
(holiday sale prices) pomegranate: 1.00, cranberries: 1.00, apples: 1.00, oranges: .25, raspberries: 3.00, sugar: .15
Tip: This video is the best way I've found for removing pomegranates. (Parent warning: He uses the 'h' word once.) You cut along the equator, hold the half pomegranate seed-side down in your hand over a bowl. Then you whack it with a wooden spoon like it's getting the spanking of its life. The seeds will fall into your hand and the bowl and it will take you only about 1 minute. I thought the first time I tried it that I would surely whack my hand, but I've done it a bunch of times now and still haven't. It's completely awesome. Try it.
Note on sugar: This is a very sweet relish. I bet you can reduce the sugar if you wish. I bet you could take it down to 1/2 cup, although you'd be getting a much tarter finished product. I intend to try this next time. That way I really can justify eating this for every meal, right?
Note on fruits: You can leave out the oranges or the raspberries (but not both). Everything else I consider a must.
2 tart apples, fairly large (I recommend Granny Smith)--cored
1 10-oz bag cranberries
1 pomegranate (see tip)--seeds
1-2 oranges--peeled (I used one; they do add some juice to this so be aware of that)
1 10-oz bag raspberries--thawed and drained
1 C sugar
1 tsp lemon juice
Put apples in food processor and pulse for a couple seconds to break them up into big pieces. Add cranberries to food processor. Pulse until you've got smallish, relish-looking chunks. Add the orange and pulse a couple times.
Put in bowl. Add pomegranate seeds, raspberries, sugar, and lemon juice. Mix to combine.
Let sit for several hours (or preferably overnight).
Eat. I just eat this out of a bowl, but I bet it would be incredible with plain Greek yogurt.
PRINTABLE RECIPE
Labels:
cranberries,
fruit,
Thanksgiving
Thursday, January 24, 2013
Fruit, Spinach, and Yogurt Smoothie
There is much to love on Pinterest. But today I'm going to tell you about one thing I do NOT love: those bogus posts that a) do not link to any kind of real page, b) do not look in the least like the actual thing you make--as if they took a stock photo (yeah, they probably did) and posted it for whatever lame/lousy recipe they made, and c) do not in any way, shape, or form actually work.
Let's take that hair straightening tonic I made last week for example. It called for 2 Tbsp brown sugar and 1 C warm water. Shake together, spray on hair, comb through, and--boom--straightened, shiny, supermodel hair. I like to consider myself a thinking woman. I should have realized that brown sugar + water equals stickiness (do I or do I not have 4 young children?). And, yet, there on the pin was a picture of a girl with the most beautiful, shiny, straight hair ever. How could I not believe? After the surface of my bathroom was entirely covered in a thin layer of sticky (from spraying my long, thick hair with sugar water), after my hair was not straight and distinctly crunchy, and after I felt like I needed a another bath from the sticky mist wafting down to my arms and everywhere else, I realized that some posts on Pinterest aren't really posts at all. What they are exactly, I'm not sure. I would call them advertisements because they do everything an advertisement does--give you an unrealistic picture of a subpar item or idea. But there's nothing for sale so I don't understand what is to be gained by posting bad advice with gorgeous picture. Anyone get it?
Okay, okay, so why the rant? Because I planned to make a greenest of green green smoothie. I even wanted to call it that. To look at the deep green elixir on Pinterest that seemed like it must have been formed from the rivers and greens of the garden of Eden itself, I was a little surprised at the light greenish, (kind of sort of almost brownish), speckled with pink drink (doesn't make for the best post title, does it) that I wound up with. It just didn't seem quite as virtuous as the lovely shot o' green pictured here (which, incidentally, also has no real post to go to--hmmm). But I drank it anyway. Almost all of it, as a matter of fact. And it was very very good (just like the garden of Eden after all). And then I realized that for breakfast I'd already consumed 1 apple, 1 banana, 1/2 C strawberries, 1 C plain yogurt, 1 C spinach, and half an orange. Welcome 5 fruits and vegetables and one healthy dairy into my January system. And thank you.
So although you don't get a Greenest of Green Green Smoothie, I present to you the Light Greenish (maybe a little brown on the color spectrum) with Specks of Pink Smoothie. Bottoms up.
Fruit, Spinach, and Yogurt Smoothie
adapted from random post-less pin on Pinterest so go ahead, pin this instead
Prep time: 5 minutes
Cost: $1.55 for about 3-4 C
apple: .50, banana: .15, yogurt: .40, strawberries: .40, orange: .10
1 generous C spinach (mine was actually a combo spinach, baby bok choy, and baby chard because I'm an amazing human being--or maybe because I stumbled upon such a big bag of greens at Walmart last week by accident)
1 apple (I used a very sweet pink lady--pink lady I love you)
1 banana (mine was frozen, but doesn't have to be)
5 strawberries (frozen)
1 C yogurt (I used full fat)
1/2 orange (I sliced the rest and fed it to the minions)
1/2 C water (maybe in a high-end blender you can skip, but mine wouldn't blend without this)
Blend. If you've got a mediocre blender like me what you want to do is pulse it a few times and then start blending on a low-ish setting until it's getting chopped up/mixed. Then up it to a higher setting so that it actually smoothie-i-fies and you don't feel like you're drinking fruit salsa (not that there's anything wrong with that).
PRINTABLE RECIPE
Saturday, January 19, 2013
Winter Fruit Dip
Today one of my friends had a baby shower. I really really wanted to bring a nice wintery fruit tray. I looked online and found several fruit trays labeled as "winter" which contained berries and melons. This irritated me. Just like it irritates me to go a restaurant in the winter and order a "seasonal vegetable medley" and get zucchini and yellow squash.
Unless you live in, say, Florida, I'm sure you can see the problem with a winter fruit tray as--if we were going to do it true North American style--it would contain cranberries and perhaps some old apples you've been keeping in the cellar. Yum. Even if you're willing to push the definition of winter fruit and call upon our Californian/Floridian neighbors for a little help, you're going to wind up with orange slices, apples (going to brown), pears (going to brown), and maybe a pineapple or some pomegranate seeds. You could also use dry fruit and nuts, which I did think was a nice idea--especially mingled in a tray with real fruit--but it can also be a very expensive idea.
So I settled on an average-ish fruit tray.
But I did find a great dip. It's tasty, simple, and sort of healthyish.
Even if you already have your favorite fruit dip, you can "winterize" it by grating in a bit of orange rind. It's pretty and adds a nice flavor and gives it that wintery something special. (Garnish it with a few pomegranate seeds if you really want to be belle of the ball, but I was running late, which must be why I am never ever the belle of the ball.)
Winter Fruit Dip
Makes about 3 C
Prep time: 5 minutes
Cost: $2.00
yogurt: 1.10, whipped cream: .60, sugar: .15, orange for rind: .15)
2 C yogurt (I used whole fat. Greek would be best, but normal worked too)
1 C whipped cream (this can be homemade or Cool Whip if you want to cheat--I did homemade)
1/2 C powdered sugar (or to taste)
1 tsp grated orange rind
Mix it all together. I cut out half a pineapple and served it in that, which was kind of fun, and easy enough for those of us with cuteness impairments. Add a few more grates of orange to the top if you've got the time for garnish.
PRINTABLE RECIPE
Labels:
condiments,
fruit
Monday, March 26, 2012
Coconut Macaroons
These taste like the insides of a Mounds bar. Only better.
Not only that, they are comprised of a cast of 4 characters: unsweetened coconut, applesauce, egg whites, and sugar. All but the last of these live in the good food camp and even the sugar is given in a fairly moderate amount.
In fact, these seemed so extremely virtuous and unlike any other macaroons I had made that I was pretty confident they'd be a flop. At best, I thought they'd have a sort of I'm-a-junk-food-trying-to-be-healthier sort of quality to them. I ask you, do the insides of Mounds bars remind you of health food. I think not. Now, make no mistake, these are not, in fact, health food. They are a cookie. But they are definitely just as good for you as any granola or granola bar, just as good for you as most children's cereals, just as good for you as many things we consider to be healthy enough to consume for breakfast or lunch or the snacky places in between. But have I mentioned that these taste like a certain candy bar I tend to steal from my children's Halloween baskets (even though I am not, generally, a candy stealing parent)? Yes, well, I can't quite get over it.
These lovelies come from Simply Recipes where it is tough to go wrong with a recipe. I haven't changed the recipe at all, though I have made the instructions (which are a wee bit on the fussy end for a cookie) a little simpler.
For us, these will kick off the first day of spring break. I'm hoping to spend this week sending you recipes that will be fun to make and eat with the extra snackers you might have around during your spring break.
And as one final note: I haven't done this yet, but I can picture these mounded into smallish egg shapes and coated with dark chocolate. Oh, yes, I can. And I will sometime within the next couple of weeks. Stay tuned.
Coconut Macaroons
from Simply Recipes
Makes about 18 small cookies
Prep time: 10 minutes
Wait time: 10 minutes
Cook time: 5-7 minutes
Cost: $1.65
coconut: 1.25, sugar: .15, eggs: .20, applesauce: .05
Note: You must make this with unsweetened coconut or it just won't turn out the same. Also, if you choose a finely grated kind, you can save yourself a step and the washing of a food processor. If you're local, I found mine for a right good price at the River City Food Co-op in downtown Evansville.
2-2 1/4 C unsweetened coconut
2 large egg whites (about 1/3 C)
3/4 C sugar
2 Tbsp SMOOTH unsweetened applesauce
If you could not find finely grated coconut, throw your coconut in the food processor or a blender for about a minute. If your coconut is finely grated, don't worry about it. Mine was grated small and I put it in the food processor and noticed barely a difference after I'd pulsed it for a while.
Preheat oven to 425.
Put all ingredients in a pot, mix, and heat on low, stirring constantly, until the mixture is warm when you stick your finger in (about 120 degrees). I'm betting you could do this in 20 second intervals in the microwave, but I haven't tried it, so I can promise nothing.
Line a baking sheet with parchment paper or Silpat.
Elise at Simply Recipes piped hers onto the pan in neat little rounds. I plopped mine with a spoon. I'm a plopper.
Let them sit until they dry out just a bit. I left mine for about 10 minutes. Maybe you could skip this, but I don't know.
Bake for 5-7 minutes or until they become just golden on the bumpy parts. Mine went about 30 seconds too long, but they still tasted completely awesome--in fact, I rather enjoyed the brownier bits.
Let cool. Don't cover them with chocolate unless you want to be compelled to steal them from your children.
Elise says these store for several days. I can add that they also freeze perfectly.
Wednesday, February 22, 2012
Banana Orange Smoothie
Yesterday I almost had a cold. I could feel it coming on strong. My throat was scratchy, my nose was runny, I was tired, I was blah. I think we know that blah is a very bad symptom indeed and that it means we're going down hill fast. I figured I had nothing to lose at that point, so I combated it with a not really scientifically proven method: namely the consumption of a whole lot of Vitamin C. I took several actual vitamins and at lunch time I juiced about 4 oranges for myself. Supposedly juicing allows the vitamins/minerals to be absorbed much more quickly and efficiently into the system. And supposedly fresh juice is the only way to go if you want that benefit. I don't know if any of that is true, but I know that by that evening I was feeling much better and today I feel even better. So thank you Vitamin C and thank you nutrition myth that seemed to work and thank you Aldi for making the oranges affordable.
This, er, recipe is a result of a little experimenting I did yesterday while juicing bajillions of oranges. I made this for Kip since I was going for straight up orange, but I did have a little taste and it was well worth tasting.
Whether you use fresh juice or not, this smoothie is worth making because it is so non-controversial. It contains nothing green or chunky or un-sweet. That's usually a win for us, so even though I'd just love to sneak some spinach in, I might just go with the heavy doses of C and Potassium and call it good. It's better than graham crackers for an after school snack, that's all I have to say.
Additionally, this isn't a smoothie that requires a food science and nutrition degree. But it's a good idea anyway.
Banana Orange Smoothie
Serves 1-2
Prep time: 2 minutes unless you have to juice the oranges, which will add several more minutes
Cost:
Tip for bananas: When they get brown and spotty, I usually break mine up into inch-long chunks when they and throw them in a Ziploc bag in the freezer.
1 ripe banana, frozen
1-1 1/2 C orange juice, can be freshly squeezed or not
Put in blender and puree. Yeah, not food science. If you want it thicker and more milk-shake-like, add more frozen banana. If you want it wetter and more like a cold, slushy sort of party drink (what we went for), add more OJ.
Monday, November 21, 2011
Easy Cranberry Sauce
Cheap Eat Challenge, Part 2: Watch as our family of 6 eats on less than $10/day.
Although I have more than my share of homemade Thanksgiving memories, our family never made cranberry sauce. As I recall, most of us didn't like it and those who did preferred theirs from a can. Consequently, cranberry sauce is something I had to marry into. Last year my mother-in-law walked me through it. It was sort of embarrassingly easy--like simpler than getting my 75-year-old can opener into (and then around) one of those cans. It's also so so good. Like a nice, incredibly pretty, non-gelatinous homemade jam.
Easy Delicious Cranberry Sauce
Makes a couple cups
Cook time: 5-10 minutes
Cost: $1.15
(cranberries: 1.00, sugar: .12, other stuff: .03)
12-16 oz. bag cranberries
1 C water
3/4 C sugar
1/4-1/2 tsp lemon juice
a grate of lemon zest (optional)
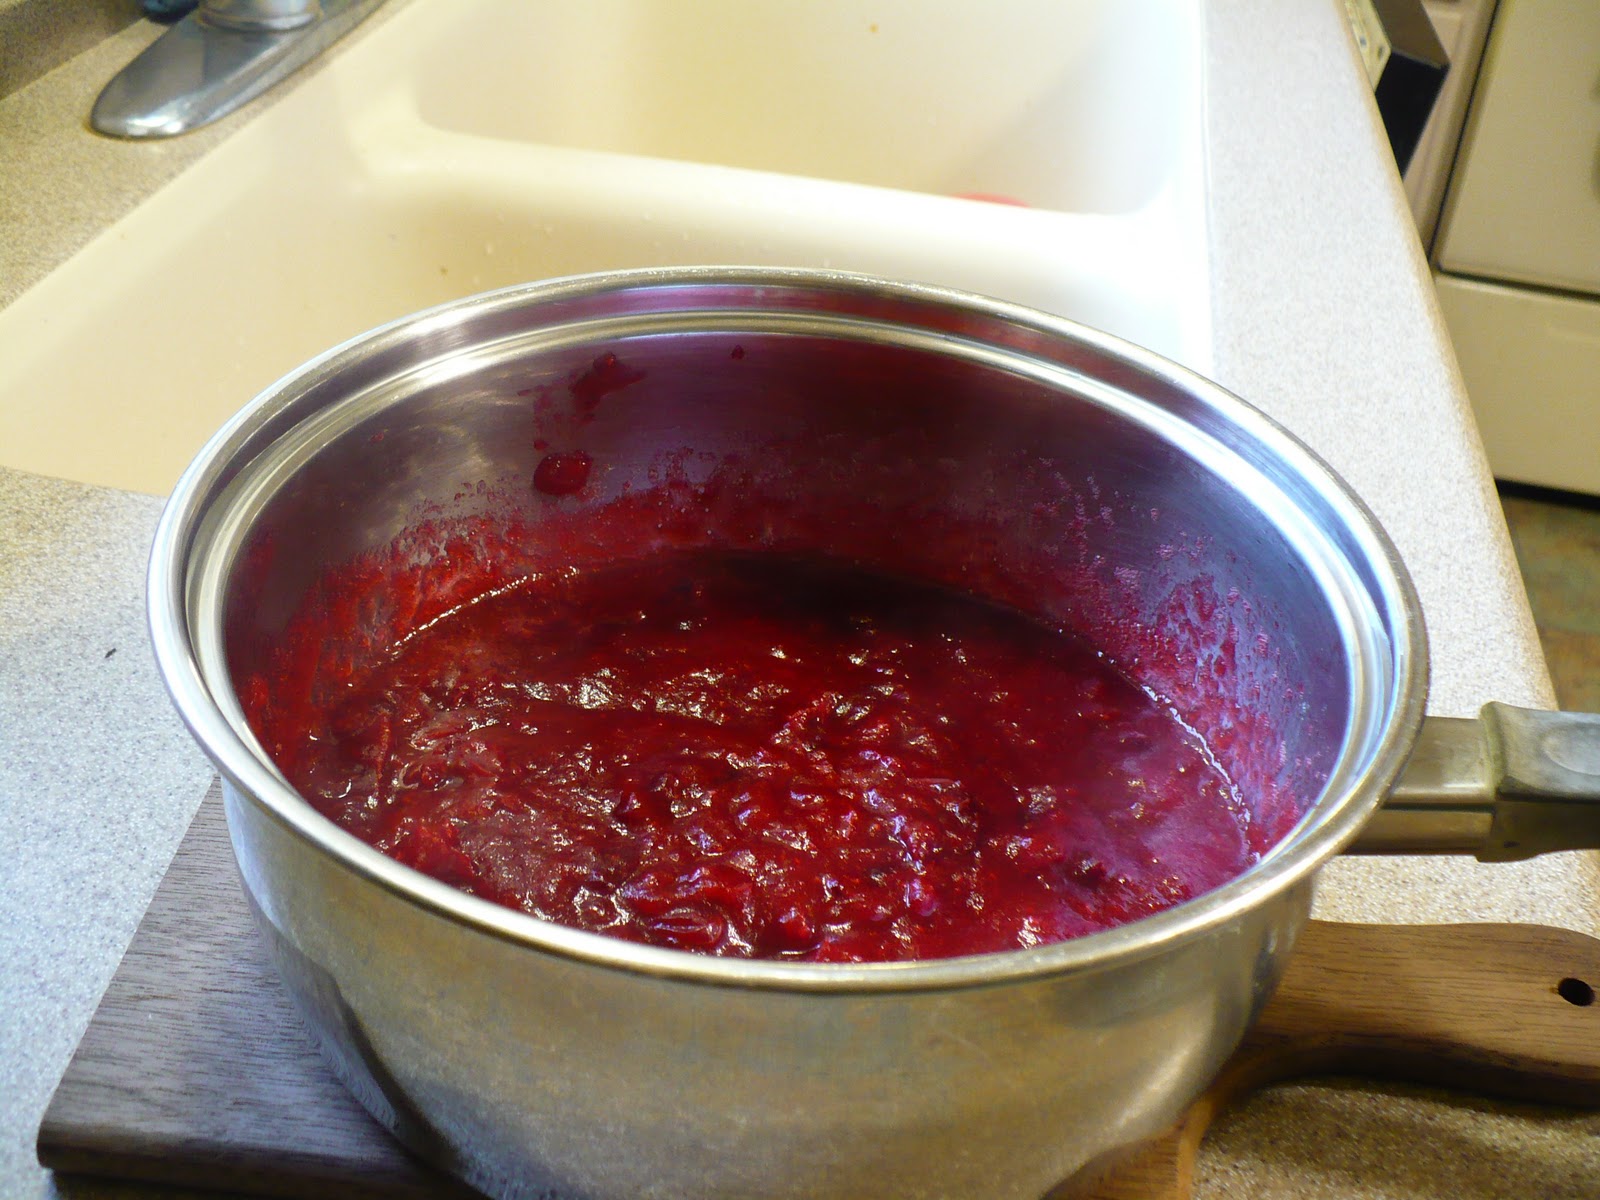
Put cranberries and water in a pot and let cook on medium, stirring here and there, until they pop open (some of them actually make a popping sound--how thrilling) and get kind of mushy-like.
Then mash them to the consistency you like (I use a potato masher).
You can even run them through the blender if you like, though I like more texture. Add sugar. Spoon out a bit and taste. If it's not sweet enough for you add more sugar by the tablespoon-full until it is. Then add a wee bit of lemon juice to brighten it up and bring out the flavor. And a scrape of zest if you've got an actual lemon lying around and if you like lemon.
Let it cool and you're done.
The other awesome thing about this is that you can do it on a Monday and by Thursday it'll still be just as good. As long as you can keep your paws out of it, that is.
PRINTABLE RECIPE
Although I have more than my share of homemade Thanksgiving memories, our family never made cranberry sauce. As I recall, most of us didn't like it and those who did preferred theirs from a can. Consequently, cranberry sauce is something I had to marry into. Last year my mother-in-law walked me through it. It was sort of embarrassingly easy--like simpler than getting my 75-year-old can opener into (and then around) one of those cans. It's also so so good. Like a nice, incredibly pretty, non-gelatinous homemade jam.
Easy Delicious Cranberry Sauce
Makes a couple cups
Cook time: 5-10 minutes
Cost: $1.15
(cranberries: 1.00, sugar: .12, other stuff: .03)
12-16 oz. bag cranberries
1 C water
3/4 C sugar
1/4-1/2 tsp lemon juice
a grate of lemon zest (optional)
Put cranberries and water in a pot and let cook on medium, stirring here and there, until they pop open (some of them actually make a popping sound--how thrilling) and get kind of mushy-like.
From this...
To this...
Then mash them to the consistency you like (I use a potato masher).
You can even run them through the blender if you like, though I like more texture. Add sugar. Spoon out a bit and taste. If it's not sweet enough for you add more sugar by the tablespoon-full until it is. Then add a wee bit of lemon juice to brighten it up and bring out the flavor. And a scrape of zest if you've got an actual lemon lying around and if you like lemon.
Let it cool and you're done.
The other awesome thing about this is that you can do it on a Monday and by Thursday it'll still be just as good. As long as you can keep your paws out of it, that is.
PRINTABLE RECIPE
Labels:
fruit,
Thanksgiving
Friday, September 2, 2011
Cantaloupe Smoothie
Cheap Eat Challenge, Part 2: Watch as our family of 6 eats well on less than $10/day.
Cantaloupe are tricky fruits. They have a short shelf life. It's easy to get a less than great one. And then, well, you've got so much of it. Sure, it's still good for you and low-calorie and all that, but wouldn't it be nice if it tasted great too.
Cue the almond milk and a nice ripe banana.
Why did I have almond milk (Aldi sells it; who knew) on hand? Because of some experimentation with cold summer oatmeal (but more on that later). And after my oatmeal experimentation, I had plenty of almond milk left. Abundance of almond milk meet abundance of mediocre cantaloupe. Ah, symbiosis.
I froze my cantaloupe. To do so, I cut it into inch-size pieces and put it on parchment paper on a cookie sheet in the freezer for several hours. Then I threw the cubes of cantaloupe in a freezer bag. You'll want the parchment paper; otherwise it will stick to your pan and you'll wind up hacking away at it with a metal spatula and ruining your pan and a' cussin' away; or a' bitin' your lip and wishing you could cuss away. So, yes, parchment paper.
My first round of smoothie was made with just frozen cantaloupe and almond milk. It was a bit icy. I liked it well enough, but the peanut gallery wanted something smoother. Enter the ripe banana. There's nothing better than a nice ripe banana to smooth things out. I was worried it would taste like all banana, but it didn't.
Would regular milk work instead of almond? I believe it would, though you might need to sweeten it just a tinge with a teaspoon or a few of sugar, but taste it first because that banana sweetness goes a long way.
Oh, and today when I made another batch, I may or may not have thrown in a few tablespoons of whipped cream (I had to; it would have gone bad on our trip). I didn't mind that one little bit, no I didn't.
Cantaloupe Smoothie
Serves 2-4, depending how piggy you are
Prep time: 3 minutes (after your cantaloupe is frozen)
Cost: $1.85
(cantaloupe: 1.00, almond milk: .70, banana: .15)
2 C frozen cantaloupe
2 C almond milk
1 ripe banana
Puree together till smooth. If your cantaloupe is really a super dud, you may want to add a tablespoon of sugar.
PRINTABLE RECIPE
Cantaloupe are tricky fruits. They have a short shelf life. It's easy to get a less than great one. And then, well, you've got so much of it. Sure, it's still good for you and low-calorie and all that, but wouldn't it be nice if it tasted great too.
Cue the almond milk and a nice ripe banana.
Why did I have almond milk (Aldi sells it; who knew) on hand? Because of some experimentation with cold summer oatmeal (but more on that later). And after my oatmeal experimentation, I had plenty of almond milk left. Abundance of almond milk meet abundance of mediocre cantaloupe. Ah, symbiosis.
I froze my cantaloupe. To do so, I cut it into inch-size pieces and put it on parchment paper on a cookie sheet in the freezer for several hours. Then I threw the cubes of cantaloupe in a freezer bag. You'll want the parchment paper; otherwise it will stick to your pan and you'll wind up hacking away at it with a metal spatula and ruining your pan and a' cussin' away; or a' bitin' your lip and wishing you could cuss away. So, yes, parchment paper.
My first round of smoothie was made with just frozen cantaloupe and almond milk. It was a bit icy. I liked it well enough, but the peanut gallery wanted something smoother. Enter the ripe banana. There's nothing better than a nice ripe banana to smooth things out. I was worried it would taste like all banana, but it didn't.
Would regular milk work instead of almond? I believe it would, though you might need to sweeten it just a tinge with a teaspoon or a few of sugar, but taste it first because that banana sweetness goes a long way.
Oh, and today when I made another batch, I may or may not have thrown in a few tablespoons of whipped cream (I had to; it would have gone bad on our trip). I didn't mind that one little bit, no I didn't.
Cantaloupe Smoothie
Serves 2-4, depending how piggy you are
Prep time: 3 minutes (after your cantaloupe is frozen)
Cost: $1.85
(cantaloupe: 1.00, almond milk: .70, banana: .15)
2 C frozen cantaloupe
2 C almond milk
1 ripe banana
Puree together till smooth. If your cantaloupe is really a super dud, you may want to add a tablespoon of sugar.
PRINTABLE RECIPE
Tuesday, August 30, 2011
Watermelon Milk
Cheap Eat Challenge, Part 2: Watch as our family eats on $6/day or less.
Lately Mark has had a terrible sore throat. This has made him unable, or at least unwilling, to eat much peanut butter. Since peanut butter is the very food that keeps the child alive, this has been a small problem.
As a result of this and the fact that we've got an overabundance of various melons in the refrigerator right now, you'll be seeing a smoothie recipe or two popping up this week as I try to feed my child and use up my food (why is it that such a simple-sounding thing should take so much creativity).
Now onto watermelon milk. It sounds weird. I get it; it sounded weird to me too when I first tried it. I think this is especially true since the word 'watermelon' contains the word 'water' and that we generally don't like to speak of combining water and milk because we all know what that makes: skim milk, right. Okay, okay, I'm kidding. Just a little jab there at my skim-milked past (although technically skim milk and all milks sold at the store, including organic milks, are in fact dry milks that have been reconstituted with water at high heat). But yes, I digress. My real point is that watermelon milk is totally awesome.
I first had it when I was in Taiwan for several months. In Taiwan the street vendors sell "milks" of various sorts, which are really a lot more like milkshakes (fruit, milk not of the skim variety, and plenty of sugar) only without the freeze.
For whatever reason I'd never recreated this, probably because I believed in my heart of hearts that it contained 4 gallons of sugar to every cup of watermelon. Maybe that was true at the stands in Taiwan (though probably not), but what I found when I began experimenting is that a decent summer watermelon is sweet enough to carry a lot of the sugar load on its own. I could have drunk my watermelon milk without any sugar, but I wasn't sure my kids would. And I have to say that by adding 1 1/2 Tbsp sugar this drink really soared to a whole new level. A level I like to call dessert--healthy style.
A few notes:
1. Do not oversweeten it. Sure, it'll taste, well, sweet, but you'll lose some of the pure watermelon-y goodness.
2. If you use skim milk, I can't guarantee it will turn out as well. A bit of fat does this recipe good. (Frankly, I think it does the body good too, but you can argue with me if you wish.) I used raw milk which is quite whole. I wouldn't recommend going below 2% milkfat.
3. If your melon is kind of blah, bland, this drink is a great way to redeem it, but yes, you'll probably want to add a bit more sugar.
4. Since different watermelons have different amounts of watery-ness to them, you're going to get slightly inconsistent results with this. Your drink is not meant to be thick--remember it's a 'milk' not a 'shake', but if it really just seems kind of overly thin (after you drink it), you may want to add a dash of cream to it. (Heck, why wouldn't you want to do that whether it's thin or not).
5. Use cold watermelon. It's just so much better.
Watermelon Milk
makes 3 C
Prep time: 3 minutes
Cost: $1.05
(watermelon: 1.00, milk: .03, sugar: .02)
3 C seedless watermelon
1/2 C whole milk
1 1/2 Tbsp sugar (more if watermelon is blah)
1 Tbsp cream (optional--I didn't do it, but wouldn't fault anyone who did)
Blend in blender until smooth and pink-frosty.
PRINTABLE RECIPE
Lately Mark has had a terrible sore throat. This has made him unable, or at least unwilling, to eat much peanut butter. Since peanut butter is the very food that keeps the child alive, this has been a small problem.
As a result of this and the fact that we've got an overabundance of various melons in the refrigerator right now, you'll be seeing a smoothie recipe or two popping up this week as I try to feed my child and use up my food (why is it that such a simple-sounding thing should take so much creativity).
Now onto watermelon milk. It sounds weird. I get it; it sounded weird to me too when I first tried it. I think this is especially true since the word 'watermelon' contains the word 'water' and that we generally don't like to speak of combining water and milk because we all know what that makes: skim milk, right. Okay, okay, I'm kidding. Just a little jab there at my skim-milked past (although technically skim milk and all milks sold at the store, including organic milks, are in fact dry milks that have been reconstituted with water at high heat). But yes, I digress. My real point is that watermelon milk is totally awesome.
I first had it when I was in Taiwan for several months. In Taiwan the street vendors sell "milks" of various sorts, which are really a lot more like milkshakes (fruit, milk not of the skim variety, and plenty of sugar) only without the freeze.
For whatever reason I'd never recreated this, probably because I believed in my heart of hearts that it contained 4 gallons of sugar to every cup of watermelon. Maybe that was true at the stands in Taiwan (though probably not), but what I found when I began experimenting is that a decent summer watermelon is sweet enough to carry a lot of the sugar load on its own. I could have drunk my watermelon milk without any sugar, but I wasn't sure my kids would. And I have to say that by adding 1 1/2 Tbsp sugar this drink really soared to a whole new level. A level I like to call dessert--healthy style.
A few notes:
1. Do not oversweeten it. Sure, it'll taste, well, sweet, but you'll lose some of the pure watermelon-y goodness.
2. If you use skim milk, I can't guarantee it will turn out as well. A bit of fat does this recipe good. (Frankly, I think it does the body good too, but you can argue with me if you wish.) I used raw milk which is quite whole. I wouldn't recommend going below 2% milkfat.
3. If your melon is kind of blah, bland, this drink is a great way to redeem it, but yes, you'll probably want to add a bit more sugar.
4. Since different watermelons have different amounts of watery-ness to them, you're going to get slightly inconsistent results with this. Your drink is not meant to be thick--remember it's a 'milk' not a 'shake', but if it really just seems kind of overly thin (after you drink it), you may want to add a dash of cream to it. (Heck, why wouldn't you want to do that whether it's thin or not).
5. Use cold watermelon. It's just so much better.
Watermelon Milk
makes 3 C
Prep time: 3 minutes
Cost: $1.05
(watermelon: 1.00, milk: .03, sugar: .02)
3 C seedless watermelon
1/2 C whole milk
1 1/2 Tbsp sugar (more if watermelon is blah)
1 Tbsp cream (optional--I didn't do it, but wouldn't fault anyone who did)
Blend in blender until smooth and pink-frosty.
PRINTABLE RECIPE
Saturday, August 20, 2011
Strawberry Sauce
Cheap Eat Challenge, Part 2: Watch as our family of 6 eats on less than $10/day.
We still had more strawberries that needed to be used. And since our church has changed from starting at 9:00 to starting at 11:00, Sunday has become fun pancake day. Fun pancake day meet sketchy strawberries transformed.
Of course ice cream, yogurt, pound cake, angel cake, and possibly oatmeal would welcome this as well.
Strawberry Sauce
Makes a couple cups
Prep and cook time: 10-15 minutes
Cost: $1.15
(strawberries: .99, sugar: .16)
16 oz. strawberries, hulled and cut
1 C sugar
1 Tbsp cornstarch
1/2 C water
In saucepan, combine sugar and cornstarch, so the cornstarch doesn't go all lumpy on you. Whisk in water and bring to a gentle boil. Add strawberries. Simmer until fruit is tender and squishable. Mash with a potato masher. (You can also puree if you want a super smooth sauce, but I leave it a little chunky.) Taste to be sure it has enough sugar for you. Sometimes if you're strawberries are really dreadful, you might need a little more. On the flip side, if they're very sweet, you can start with less sugar.
Serve warm or cold. This will keep refrigerated for several weeks (which is a whole lot longer than your molding strawberries will).
PRINTABLE RECIPE
We still had more strawberries that needed to be used. And since our church has changed from starting at 9:00 to starting at 11:00, Sunday has become fun pancake day. Fun pancake day meet sketchy strawberries transformed.
Of course ice cream, yogurt, pound cake, angel cake, and possibly oatmeal would welcome this as well.
Strawberry Sauce
Makes a couple cups
Prep and cook time: 10-15 minutes
Cost: $1.15
(strawberries: .99, sugar: .16)
16 oz. strawberries, hulled and cut
1 C sugar
1 Tbsp cornstarch
1/2 C water
In saucepan, combine sugar and cornstarch, so the cornstarch doesn't go all lumpy on you. Whisk in water and bring to a gentle boil. Add strawberries. Simmer until fruit is tender and squishable. Mash with a potato masher. (You can also puree if you want a super smooth sauce, but I leave it a little chunky.) Taste to be sure it has enough sugar for you. Sometimes if you're strawberries are really dreadful, you might need a little more. On the flip side, if they're very sweet, you can start with less sugar.
Serve warm or cold. This will keep refrigerated for several weeks (which is a whole lot longer than your molding strawberries will).
PRINTABLE RECIPE
Friday, August 19, 2011
Balsamic Strawberries
Cheap Eat Challenge, Part 2: Watch as our family of 6 eats on less than $10/day.
We had a refrigeration malfunction yesterday. Which is kind of a pain when you went big-shopping on Tuesday. As a result, I felt like we needed to get a bunch of that food into either usable condition or extended-life condition. What better way to do that than to add sugar? Oh, I know, let's add sugar and vinegar.
I've heard tell of these strawberries for a while and today with my fading strawberries and barely rejuvenated fridge, it seemed like the perfect time to try them out. I found several recipes that were pretty much identical except for the amount of balsamic vinegar which was used. It ranged from a mere teaspoon to a whopping 2 tablespoons. I tried both and decided I prefer to settle in the middle with 1 tablespoon. If you are afraid, start with a teaspoon and see what you think. It gives it a little kick and some complexity that strawberries with only sugar lack (for the record, I'm perfectly happy with strawberries coated only with sugar as well).
This can be eaten alone if you're sort of a strawberry pig like me. It can be used as a sauce on cakes, ice cream, or yogurt. It can rescue dodgy strawberries from their compost bin future. And it can impress your gourmet friends.
The best part about this, however, is that because of it I got my kids to consume fruit for dessert. Big deal, right? Not in this neighborhood. Fruit and fruit-like things have no birthright as desserts in this chocolate/ice cream/peanut butter obsessed family. So even though the fruit had plenty of added sugar, and even though I served it with a lovely heap of whipped cream, I feel the experiment a success. We can eat fruit in some form for dessert. We can call it dessert. And we can be excited about it. You should be too.
Balsamic Strawberries
Serves 4 (in a smallish sort of way)
Prep time: 1 minute
Cost: 1.05
(strawberries: .99, sugar: .05, vinegar: .01)
1 lb strawberries, hulled and sliced
1/4 C sugar
1 Tbsp balsamic vinegar
dash pepper (everyone swore this was completely awesome in every way, but I forgot it so I can't say)
Put the first three ingredients in a bowl. Mix gently. Let sit for at least an hour at room temperature. Some recipes said not to let it go for more than 4 hours, but mine sat all day and tasted good at the end of it. (For the record, I also tasted it at various points throughout the day and found that after the first hour or two there was little change in taste. I refrigerated them in our now working refrigerator after 4 or 5 hours.)
Right before serving, add a dash of black pepper.
Snark them up.
Note: You can stop there. However, there was a bit of vinegar sweet strawberry juice left (probably about 1/4 C). I kept it and plan to add a bit of olive oil and salt to it tomorrow and see how it tastes as a salad dressing. I'm betting it will be pretty good. It would also be a stunning glaze for chicken or fish. Oh, and while we're throwing out ideas, I sliced some peppers and let them marinate in it for an hour or so this afternoon and thought it did right by them as well. Think of the possibilities: cucumber, daikon radish--the sky's the limit.
PRINTABLE RECIPE
Linked up to Sweets for Saturday
We had a refrigeration malfunction yesterday. Which is kind of a pain when you went big-shopping on Tuesday. As a result, I felt like we needed to get a bunch of that food into either usable condition or extended-life condition. What better way to do that than to add sugar? Oh, I know, let's add sugar and vinegar.
I've heard tell of these strawberries for a while and today with my fading strawberries and barely rejuvenated fridge, it seemed like the perfect time to try them out. I found several recipes that were pretty much identical except for the amount of balsamic vinegar which was used. It ranged from a mere teaspoon to a whopping 2 tablespoons. I tried both and decided I prefer to settle in the middle with 1 tablespoon. If you are afraid, start with a teaspoon and see what you think. It gives it a little kick and some complexity that strawberries with only sugar lack (for the record, I'm perfectly happy with strawberries coated only with sugar as well).
This can be eaten alone if you're sort of a strawberry pig like me. It can be used as a sauce on cakes, ice cream, or yogurt. It can rescue dodgy strawberries from their compost bin future. And it can impress your gourmet friends.
The best part about this, however, is that because of it I got my kids to consume fruit for dessert. Big deal, right? Not in this neighborhood. Fruit and fruit-like things have no birthright as desserts in this chocolate/ice cream/peanut butter obsessed family. So even though the fruit had plenty of added sugar, and even though I served it with a lovely heap of whipped cream, I feel the experiment a success. We can eat fruit in some form for dessert. We can call it dessert. And we can be excited about it. You should be too.
Balsamic Strawberries
Serves 4 (in a smallish sort of way)
Prep time: 1 minute
Cost: 1.05
(strawberries: .99, sugar: .05, vinegar: .01)
1 lb strawberries, hulled and sliced
1/4 C sugar
1 Tbsp balsamic vinegar
dash pepper (everyone swore this was completely awesome in every way, but I forgot it so I can't say)
Put the first three ingredients in a bowl. Mix gently. Let sit for at least an hour at room temperature. Some recipes said not to let it go for more than 4 hours, but mine sat all day and tasted good at the end of it. (For the record, I also tasted it at various points throughout the day and found that after the first hour or two there was little change in taste. I refrigerated them in our now working refrigerator after 4 or 5 hours.)
Right before serving, add a dash of black pepper.
Snark them up.
Note: You can stop there. However, there was a bit of vinegar sweet strawberry juice left (probably about 1/4 C). I kept it and plan to add a bit of olive oil and salt to it tomorrow and see how it tastes as a salad dressing. I'm betting it will be pretty good. It would also be a stunning glaze for chicken or fish. Oh, and while we're throwing out ideas, I sliced some peppers and let them marinate in it for an hour or so this afternoon and thought it did right by them as well. Think of the possibilities: cucumber, daikon radish--the sky's the limit.
PRINTABLE RECIPE
Linked up to Sweets for Saturday
Labels:
fruit,
healthy desserts
Wednesday, July 13, 2011
A Week on Waste: Easy Homemade Applesauce
Cheap Eat Challenge, Part 2: Watch as our family of 6 eats on $10/day.
Oh sure, I could post this in the fall when apples are cheap and abundant and just falling off the trees. But the thing is, in the fall, apples tend to be really yummy--crisp, fresh, and perfect. They beg to be eaten as they are or to be baked into sweet oven-dependent confections like pie and crisp. In the summer, apples are usually coming to us from cold storage. They're a little pricier and generally just not as tasty. And yet we buy them anyway. Maybe we have a hankering for one, maybe we're making a salad that requires a few, maybe our CSA throws some in to fill in the gaps before the summer vegetables have come on crazy strong. At any rate we wind up with some apples. And those apples are mushy or bland or mealy. We could throw them away or feed them to our compost or make something sinfully sweet out of them. Or, I have discovered, we can make applesauce.
Why have I never made applesauce before? Because I remember it as a big fall project. My mother used an enormous metal appliance for making applesauce, which looked to be right out of a torture chamber. I can't even remember what it did, but its memory and the thought of trying to clean such a thing has intimidated me all these years. Not only that, but we would can our applesauce. Canning is not my idea of a pleasant afternoon activity in mid-July.
Yet when I found myself with several almost rotting apples from my CSA, I remembered a recipe I'd seen from a site about making baby food. She had just softened them in a pan. I figured that if it didn't work out, I had a toddler and could pawn the applesauce off on her.
I made it and, oh, oh it was so so easy and so so good. Tart and sweet and interesting. It could be made chunky or perfectly smooth. You could make just a little if you had a mere 4 apples left. Or you could make a whole lot more if you wished. With my mushy apples it took only about 10-15 minutes on the stove. Do you know what else? I bet you could make it in a crock pot if you had a bunch of apples. I plan to give it a whirl next time.
And if you do end up with a booty load, just throw some in the freezer.
Easy Homemade Applesauce
adapted from smittenkitchen
serves 4
Prep time: 10 minutes (possibly less if your toddler isn't helping you)
Cook time: 10-15 minutes
Cost: that of a pound or two of apples
4 C largely diced apples (I bet pears would work too, or a combination of pears and mushy apples)
1/2 C water
a few grates lemon rind (1/8-1/4 tsp) or perhaps a small splash of juice--you want it to help keep the color of your sauce
a good dash cinnamon (1/8-1/4 tsp)
2-4 Tbsp sugar (optional)
Note: If your apples are actually crispy, the cook time will likely be longer.
Put all ingredients in a pot and allow to simmer, covered, for 10-15 minutes. Give it a stir every few minutes. The apples will begin to break apart. When they're completely soft, you can leave the sauce chunky or use a potato masher to mash the fruit (which is what I did).
Taste a bite (make sure it's not too hot) and add sugar if you like. My apples were quite tart to begin with so I added 2 Tbsp sugar. This gave my son reason to accuse me of making our applesauce less healthy than that from the store. I believe that he is officially at the age of reason when and only when reason involves challenging your mother.
PRINTABLE RECIPE
Oh sure, I could post this in the fall when apples are cheap and abundant and just falling off the trees. But the thing is, in the fall, apples tend to be really yummy--crisp, fresh, and perfect. They beg to be eaten as they are or to be baked into sweet oven-dependent confections like pie and crisp. In the summer, apples are usually coming to us from cold storage. They're a little pricier and generally just not as tasty. And yet we buy them anyway. Maybe we have a hankering for one, maybe we're making a salad that requires a few, maybe our CSA throws some in to fill in the gaps before the summer vegetables have come on crazy strong. At any rate we wind up with some apples. And those apples are mushy or bland or mealy. We could throw them away or feed them to our compost or make something sinfully sweet out of them. Or, I have discovered, we can make applesauce.
Why have I never made applesauce before? Because I remember it as a big fall project. My mother used an enormous metal appliance for making applesauce, which looked to be right out of a torture chamber. I can't even remember what it did, but its memory and the thought of trying to clean such a thing has intimidated me all these years. Not only that, but we would can our applesauce. Canning is not my idea of a pleasant afternoon activity in mid-July.
Yet when I found myself with several almost rotting apples from my CSA, I remembered a recipe I'd seen from a site about making baby food. She had just softened them in a pan. I figured that if it didn't work out, I had a toddler and could pawn the applesauce off on her.
I made it and, oh, oh it was so so easy and so so good. Tart and sweet and interesting. It could be made chunky or perfectly smooth. You could make just a little if you had a mere 4 apples left. Or you could make a whole lot more if you wished. With my mushy apples it took only about 10-15 minutes on the stove. Do you know what else? I bet you could make it in a crock pot if you had a bunch of apples. I plan to give it a whirl next time.
And if you do end up with a booty load, just throw some in the freezer.
Easy Homemade Applesauce
adapted from smittenkitchen
serves 4
Prep time: 10 minutes (possibly less if your toddler isn't helping you)
Cook time: 10-15 minutes
Cost: that of a pound or two of apples
4 C largely diced apples (I bet pears would work too, or a combination of pears and mushy apples)
1/2 C water
a few grates lemon rind (1/8-1/4 tsp) or perhaps a small splash of juice--you want it to help keep the color of your sauce
a good dash cinnamon (1/8-1/4 tsp)
2-4 Tbsp sugar (optional)
Note: If your apples are actually crispy, the cook time will likely be longer.
Put all ingredients in a pot and allow to simmer, covered, for 10-15 minutes. Give it a stir every few minutes. The apples will begin to break apart. When they're completely soft, you can leave the sauce chunky or use a potato masher to mash the fruit (which is what I did).
Taste a bite (make sure it's not too hot) and add sugar if you like. My apples were quite tart to begin with so I added 2 Tbsp sugar. This gave my son reason to accuse me of making our applesauce less healthy than that from the store. I believe that he is officially at the age of reason when and only when reason involves challenging your mother.
PRINTABLE RECIPE
Subscribe to:
Posts (Atom)