Showing posts with label bread. Show all posts

Tuesday, September 18, 2018

My Favorite Naan

BEST OF THE TASTY CHEAPSKATE


Naan is one of my very favorite breads. It is good with something exotic like dal or chicken tikka masala. But it is just as good plain or with peanut butter.

If you want to go fancy, you can work garlic, rosemary, basil, tarragon, dill, or parsley into the dough. And people will basically think you're the bread goddess of the universe.

Or, well, like I said keep it simple. Or add jam or honey. It's hard to go wrong with jam or honey. It's just amazing no matter what you do.

I have two go-to naan recipes. They're both completely amazing. The first is my absolute favorite. The second is a very very close second and it does not require the rise time the yeast naan does, which makes it mightily convenient some days.

You'll find both recipes below. (Quick naan is pictured above, but they both look basically the same.)

Naan
adapted from mybakingaddiction.com
makes about 15
Prep time: 15-20 minutes
Cook time: 20-30 minutes

Rise time: 45-60 minutes
Cost: $.80 (that's about $.06/piece)
(yeast: .05, sugar: .05, milk: .03, egg: .10, whole wheat flour: .36, white flour: .21)


Note: You're going for about 4-4 1/2 C total flour. I usually like to work in some whole wheat flour. I wouldn't add more than 2 C of whole wheat, but hey, if you're a hundred percent kind of person, go for it, and let me know how it turns out. Generally, I use more like 1/2-1 C whole wheat flour in my naan. 

1 Tbsp active dry yeast
1 C warm water
1/4 C white sugar
3 Tbsp milk
1 egg, beaten
2 tsp salt
1 C whole wheat flour
3 1/2 C all-purpose flour

In large bowl, dissolve yeast in warm water. Stir in sugar, milk, egg, salt, and 1-2 C flour. Add another cup flour and then add flour y 1/2 cups until you can't mix it with a spoon anymore. Turn it out onto the counter to knead, add extra flour as it becomes necessary. Remember that you want to keep your ball of dough nice and supple--not sticky, but not a hard ball of dough either. (Although naan is much more forgiving of mistakes than a loaf of bread or rolls; that's one of the things to love about it.)

Let rise an hour or until it's doubled in size.

Punch it down. Note: At this point, if you'd like to get fancy, you can knead in minced garlic, rosemary, or any other herbs you'd like to fancify your bread.

Pinch off pieces of dough about the size of golf bass. Roll into balls and let these rise for about 20 more minutes. (Note: If you're pressed for time, you can skimp on this rising time and still get great bread.)

Heat cast iron skillet (or another skillet that can get hot; the grill would work too if you're skilled in that area). I heat to a bit above medium-medium high. Lightly oil skillet.

Roll out dough as thin as you can and as circular as possible. Place dough on skillet. You can brush it with butter for a special treat, but I usually don't. Cook 1-2 minutes on first side until it starts to get little puffy air pockets. It'll look like this:


(If by any chance it doesn't look like this, don't despair. It will probably still be fine. Check your heat and make sure it's not too low.)

Flip it and cook on other side for another minute or until lightly browned. And then keep going.


Quick Naan
adapted from The Good Loaf
makes 12-15 6-7-inch naan
Prep time: 5 minutes
Rest time: 30 minutes (it can be shortened; oh yes, it can)
Cook time: 20-30 minutes
Cost: $1.00
whole wheat flour: .20, flour: .30, yogurt .50

1 C whole wheat flour
3 C all-purpose flour
1/4 C sugar
3/4 tsp baking powder
3/4 C plain yogurt (I used full-fat, but any will do)
3/4-1 1/4 C water

Combine flours, sugar, baking powder.

Add yogurt and 1/2 C water. Mix. Add more water as necessary to get your dough to come together into a nice ball of dough. It will feel dense and just a tiny bit tacky, but it won't stick to your fingers at all.

Let it sit for 30 minutes, or less if you're pressed for time.

Roll it into 2-inch balls. Heat skillet (I used cast iron skillet) to medium high while you roll the dough balls as flat as possible with rolling pin. Add a little oil to skillet. Cook one at a time on medium high heat. When one side is golden browned, flip. Cook briefly on other side; it will probably bubble puff in a few areas and should only need 30-90 seconds.

Remove to plate and continue the process.

Monday, April 23, 2018

Katie's Rolls

BEST OF THE TASTY CHEAPSKATE


As BBQ season pokes its head out of the dismal clouds of freezing cold spring, I felt inspired to make us some pulled pork with these amazing rolls. Do not save them only for BBQ season. They're also perfect for Thanksgiving and Christmas and Easter and Sundays and winter and dreary spring and summer picnic and pretty much every day ever in the whole world.


Katie's Rolls
Makes 16-24

Prep and cook time: 2 hours (1.5 hour rise, 15 minute bake, 15 minute prep)
Cost: $2.05 ($.10-.15/roll)
milk: .15, yeast: .15, butter: .30, sugar: .05, eggs: .20, flour: 1.20

1 C warm water
1 C milk, warmed (not hot)
2 Tbsp yeast
1/4 C butter
2 tsp salt
1/2 C sugar
2 eggs
7-8 C flour

Add yeast to water and milk. Let it sit there if you've got five minutes. If you'll get distracted by leaving a thing for five minutes, then just throw the butter, salt, sugar, and eggs in before you forget what on earth you were doing in the first place. Mix it all together. Mix in 4 C flour. Add 2 more cups. Begin kneading with hands when it gets too tough to stir. Of course, if you're a member of the 21st century and have a Kitchenaid, you can use that too with the dough hook. I myself haven't quite made it to the 21st century and that's okay with me because (weird mental disorder alert) I kind of like kneading. It relaxes me. I like how the dough smells. I like how it feels. 

So if you, like me, will be doing things manually, here is #1 best tip for rolls. The dough should be pillowy--like a mother's bosom. We don't want any tight teenage breasts, nor do we want a stretched and sagging grandma shelf. If a three-year-old would just love to lay her head on your dough, it's perfect. (Warning: If you have a real life 3-year-old available, do not invite her to lay her head upon your dough to test it out. You'll get hair in your dough. And possibly boogers. Which is what mother's bosoms also get covered in when they have three-year-olds. Not that we mind because three-year-olds are cute.) I've digressed, haven't I? Anyway, so keep adding flour in 1/4 C increments or so and knead it for about 8 minutes until it is nice and pillowy and perhaps the teeniest little bit tacky, but not sticky. Then put it in a bowl and cover it and keep it in a warm place. (Everyone always says put it in an oiled bowl. I have never, not even once in my life done this. I always just throw it back in the bowl I mixed it in. It is always always fine. Who are these people with their oiled bowls and what is the purpose of oiling the bowl?) 

Tip #2: If it's cold in your house, stick the bowl with the dough in the oven. Turn the oven on for 1 minute. Then turn the oven off and leave the dough in the warmed oven. (Do not leave the room to go do something in that one minute. You will never remember your dough. It will cook right there in your bowl with a dish towel over it and perhaps your house will burn down. This is not worth what you were going to do in that one minute.) Note: You can also turn the oven on and off, and then put the dough in if you value not setting off any fire alarms. 

Let it rise for one hour or until doubled. Then punch it down and shape it into rolls. Put the rolls on a greased baking sheet. Cover them and let them rise again--this time for about 20 minutes. 


(They should look kind of like this.)

Bake at 375 for about 10-15 minutes. I like my rolls just a bit on the dough-y end. I always break them open to determine if they're just right and not way too doughy still. It's not the perfect technique, but it works. 

You can make the rolls ahead of time and freeze them. You can make the dough ahead and refrigerate it (covered in plastic wrap) for about 24 hours. You can even make them to the rolled roll point and then freeze them and then take them out, let them dethaw and rise, then bake them. The possibilities are limitless. As it seems is my ability to write many many words even when I am so so tired and have said I will not tonight write many many words.


PRINTABLE RECIPE


Monday, June 19, 2017

Overnight Cinnamon Rolls


If you want cinnamon rolls for breakfast, you have a few options: 1) Wake up at the crack of dawn, 2) Eat breakfast at 10 in the morning after all your children have completely melted down and have been condemned to spend the rest of eternity in time out, or 3) figure out how to do the bulk of the work the night before.

Option 3 is clearly preferable, but it's also tricky. What if your rolls rise to the sun in your refrigerator and you open it to find yeasty bread bursting out of ever seam and crevice? Or what if they don't rise at all and you wind up serving tiny rocks of sweet calorie bombs to your loved ones (I won't say it's never happened before...)? What if what if what if?

On Father's Day I had the chance to experiment.

And the truth is that I don't know if there's exactly a one-size-fix-all solution. Yeasts act differently depending on how old or fresh they are, and also how the yeasting gods are feeling today. Every batch of dough has a slightly different amount of flour. Even changes in weather and humidity are going to affect your bread. So should you just give up? Um, no. We're talking about morning of cinnamon rolls here.

Below you'll find a how-to with a little bit of trouble shooting advice. May it make your mornings glorious.

How to Make Cinnamon Rolls Overnight:

1. Make your dough.
2. Roll out your rolls and add all the yummy stuff
3. Cut them and put them in a greased baking vessel
4. Cover that baking vessel with plastic wrap and possibly a lid and put it in your refrigerator.
5. Remove it the next morning and let it warm up a bit as your oven heats.
6. Cook your cinnamon rolls.
7. Enjoy bliss.

Trouble Shooting:

Scenario A: Your rolls don't rise at all. This happened to me. In this case, you'll need a few extra minutes, but only about fifteen.

Put the sad, un-risen rolls in an oven heated to a very low temperature--about 175 or 200 degrees. Leave it there for 3-5 minutes. Turn OFF the heat. Then leave it for another 10 minutes.

Take the rolls out, cover with a towel, preheat the oven, and cook. By the time the oven is heated, those rolls will have risen and you'll be good to go.

Total time: 15 minutes to get jump started, 10-15 minutes for your oven to heat, 15 minutes to cook (45, which is a lot, but way less than the 2 1/2 hours you're looking at if this is a from-scratch thing)

Scenario B: Your rolls rise to the heavens, leaving us mere earthlings behind to mourn their air-bubbled loss.

The most important way to stop this is just to get that dough cold ASAP. Put it into the refrigerator immediately. If your house is particularly warm and/or your yeast is particularly sassy (in other words, did your dough rise like a boss on its first rise?), put it in the freezer for about 20 minutes and then put it in the refrigerator (don't forget or your dough will freeze and when that happens, no amount of trouble shooting will save you).

And of course, if you want a fantastic recipe, HERE you go.

Wednesday, April 12, 2017

Good Frostings for Cinnamon Rolls


Since I made you cauliflower mash last week (which, btw, was perfectly amazing in every way despite the words 'cauliflower' and 'mash.' And you should try it and love it and feed it to your soul.) But anyway, since I made you vegetables mashed up (no matter how good they were), I figured that I owed you something perfectly unrighteous. Like cinnamon rolls. With several choices of frosting.


The great irony of this post is that there are all of ZERO posts of cinnamon rolls WITH frosting actually on them. Because as we all know if we are amateur photographers, it's easier to take a good picture of cinnamon rolls without frosting that with it.


Despite these nude photos of cinnamon rolls we shall persevere with the holy act of discussing how to properly dress them. Because there are so many wonderful ways to do this.


1. Cream Cheese Frosting. I remember coming out of college and having cream cheese frosting on cinnamon rolls at some church function. It was a coming-of-age experience for me. 

2. Bec's Buttercream Frosting. I want to disapprove of this one because it contains my nemesis, shortening. But I can't. It's fluffy and yummy and great on cinnamon rolls. 

3. Browned Butter Frosting. Introduce this into your life or die sad. 

4. Lemon Buttercream Frosting. If, say, you put blueberries and apples in some of your cinnamon rolls. Come on, guys. A-maz-ing. 

5. Orange Frosting. Here's that Lemon Buttercream's delightful fraternal twin. 

6. Salted Caramel Frosting. Because you love people and puppies and all good things. 

7. Vanilla Butter Frosting. Classic. The End. 


(This is the Lemon Buttercream in case you were wondering.)

Sunday, September 11, 2016

Secret Recipe Club--Pretzel Bites


If I've learned anything from Pinterest, it's that the moment September hits, I'm supposed to start craving pumpkin. Now, with all due respect to pumpkin, it's not my true fall craving. The thing I really start craving when autumn hits is BREAD. Bread bread bread. Clearly I'm bracing for a hard winter by padding my body with those carbalicious calories or something. Like this week, how I went to the store to pick up a loaf of Italian bread to go with our pizza dip (recipe coming soon), and then was compelled to purchase several bagels as well. And then, because I clearly hadn't had enough, I sought out bread on the blog I had for this month's Secret Recipe Club.


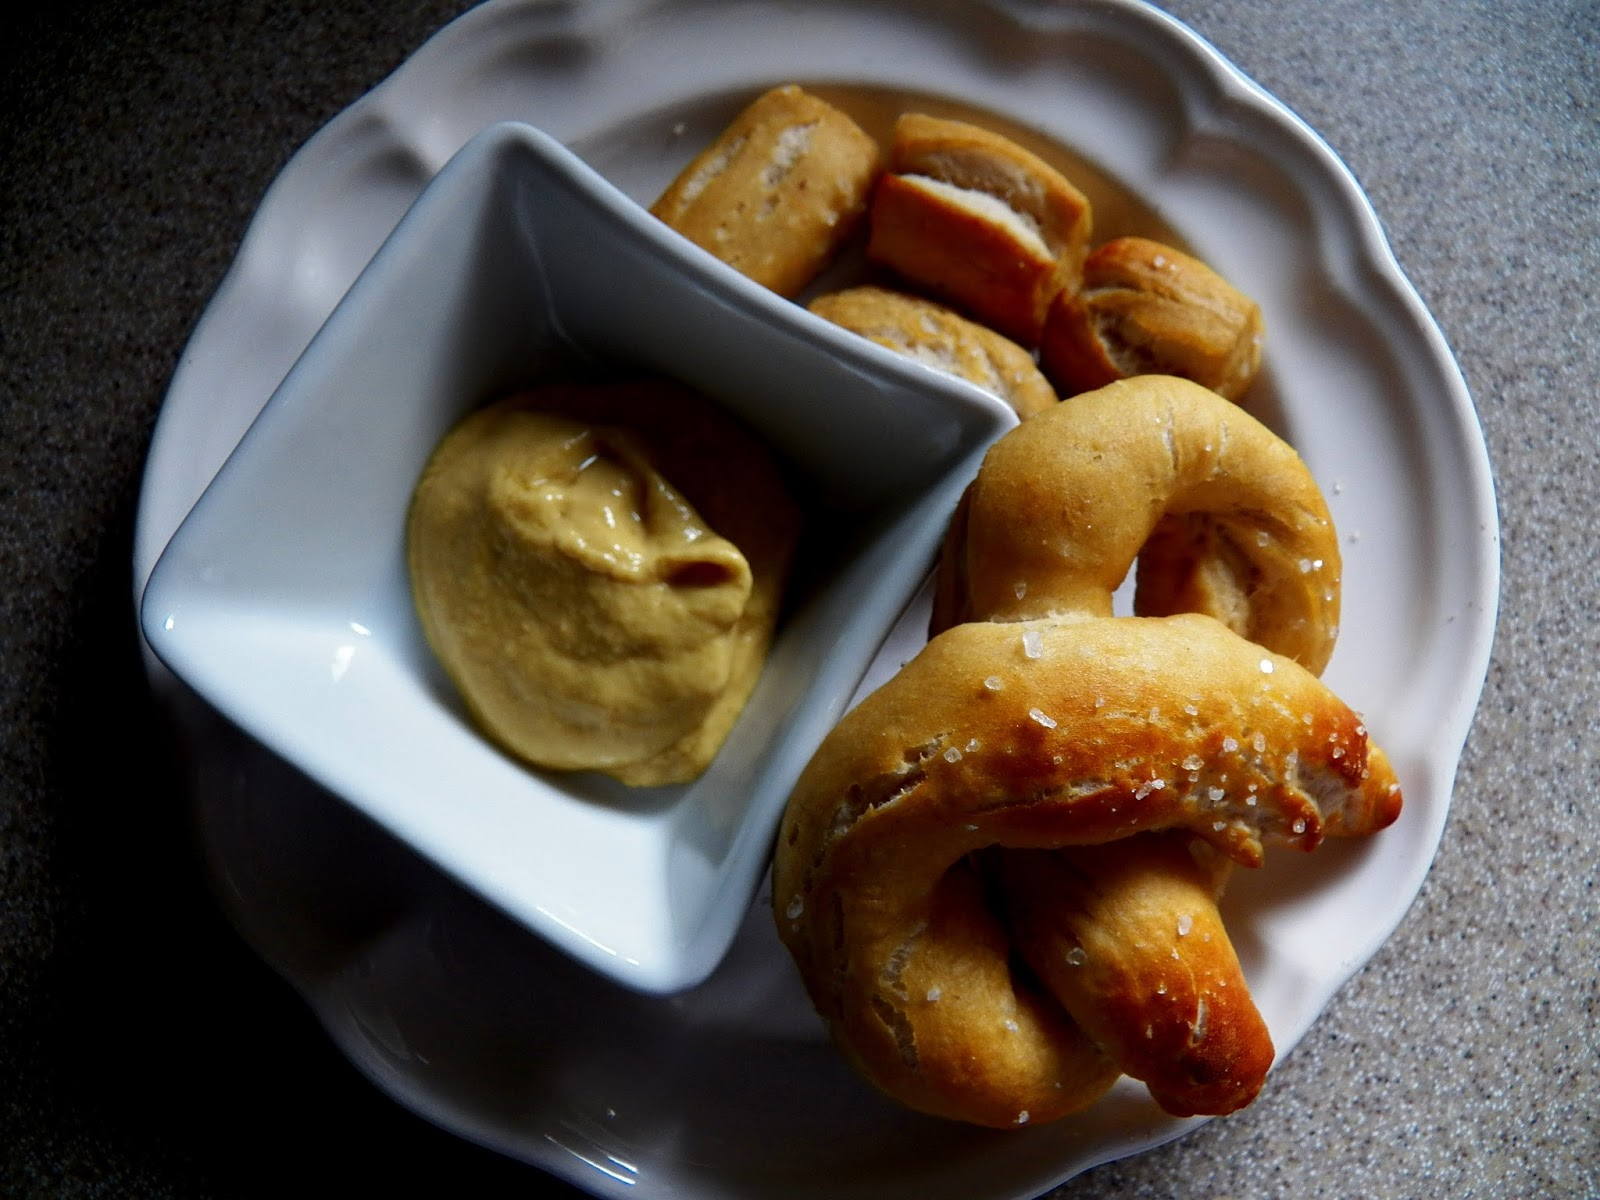
And I was richly rewarded. My blog this month was I am a Honey Bee, which has delicious food lurking on every page. It's created by Nicole (you can call her Nic)--a mom/wife/architect/crafter/builder/creator. I chose to make these pretzel bites due to my autumnal bread addiction and they were FANTASTIC. Delicious texture and flavor, and they kind of burst open like some pretzels do, creating a seam of awesome. Delicious.


We made several bites and several pretzels and my kids went nuts making all kinds of crazy stuff and adding all kinds of crazy toppings. I think my favorite were the sesame seed. (Mmmm, and I'm already dreaming of bread for breakfast; I have a problem.). 

Pretzel Bites
adapted from I Am a Honey Bee
Makes: a whole lot
Prep time: 15 minutes
Rise time: 1-2 hours
Cook time: 30 minutes (about 8 minutes a batch, and we had several batches)

4 tsp active dry yeast
1 tsp white sugar
1 1/4 C warm water
1 C white whole wheat flour
3 1/2 C all purpose flour
1/2 C sugar
1/4 C light brown sugar
1 1/2 tsp salt

For the bath before baking (Note; I used 1/2 C baking soda; I think you could go less for a less salty-ish pretzel)
1/2 C baking soda
4 C water

Your choice of toppings. We tried cinnamon sugar, sugar, salt, poppy seed, and sesame seed (my favorite). 

To Make:

In a small bowl, dissolve the yeast and 1 tsp sugar in warm water. 

Let it stand while you mix the dry ingredients in a large bowl: flours, sugars, and salt. 

Make a well in the center of your dry ingredients and add the wet. Then use a stand mixer with the hook to mix. If it's too wet, add a bit more flour up to 1/2 C (but don't go over that). (Note: If you don't have a mixer or like to make bread by hand, I would add the dry ingredients cup by cup to the wet ingredients--so you'll need the wet ingredients in the big bowl. Then mix until you have to turn it out to knead it. Then knead it, adding more flour mixture as necessary.) 

Knead until smooth and then put in a bowl and cover with a clean dishtowel. Let rise 1-2 hours. 

When you're ready to make the pretzel bites, cut the dough into long pieces, then roll them (like you're rolling playdough snakes). Then cut the snakes into bite sized pieces, unless you're making traditional pretzels (though I really do recommend the bites because they were delicious--perfect texture and so easy to cook, so easy to dip). 

Boil your four cups of water and add 1/4-1/2 C baking soda (as water dissolves, add more or the pretzels start tasting too salty). Drop the bites into this liquid. Give them 30 seconds or so and they'll float to the top. Put them on a pan, covered with parchment paper (yeah, you want it; otherwise, these can stick). Sprinkle with desired toppings. Bake at 450 degrees for 6-8 minutes. 

Snarf them down. Prepare body for hibernation. 


Monday, August 29, 2016

Avocado Egg Toast


It's the simple things. I have been eating this too-good-to-be-true breakfast on and off all summer. Why is it too good to be true, you ask? (You always ask just the right questions.) Because it's perfectly balanced health food that tastes like the most decadent, indulgent breakfast that you would probably eat if you were a queen living on an island paradise somewhere. And it costs less than anything on the dollar menu would. And it only takes about 5 minutes to prepare (which is less time than you'll spend in the drive thru waiting to get your food).

It's just so so good. Yet it's full of vitamins, healthy fats, protein, and (maybe if you go righteous on the bread) whole grains. But beyond healthy, it's just amazing. I mean, you'd want to eat this regardless. You'd be happy if someone was like, "Hey, that's got 2% vitamin C in it like fruit snacks." You'd be like, "Morning meal justified." But you don't even have to be like all that because it really is so nutritious (vitamin K, folate, Vitamin C, potassium, Vitamin B5, Vitamin B6, Vitamin B12, Vitamin B2, Vitamin E, iron, phosphorus, selenium, I could go on). It makes you feel good in 100 ways. Eat it.

Avocado Egg Toast
Prep time: 5 minutes
Cost: $.80
bread: $.20, avocado: .50, egg: .10

Note: Don't skimp on the quality of the bread. Life will go on if you do and this will still be very good, but if you get a good loaf of bread, it will be out of this world amazing, fantastic, exclamation points!!!! kind of good. I had this with a sourdough Parmesan bread when we were on vacation and I still have sweet dreams about that. Although any good sourdough is delicious or a nice hearty whole wheat. Whatever bread you love--use it with this.

1 piece of toast
1/2 avocado
1 egg
mayonnaise
a little salt
maybe butter (you don't need it but since when do people eat butter on toast because they need it? the butter ups this to a whole new celestial level. That said, I've eaten this without it and it's still amazing)

Cook your egg so that the yolk is just the tiniest bit runny. You can poach it or do it over easy (which is what I did). If you cannot handle any runny at all, that's okay; just get it so it's barely firm. I've done this lots of times by accident and it's still delicious. Also, salt your egg as it cooks.

While your egg is cooking, toast your high quality bread. Then spread it with butter if you like to eat like monarchy.

Slice up your avocado and add that to the bread. Top with your hot egg, and some mayo (you can also put the mayo on the bread if you wish).

Eat warm. Imagine being royalty. Make your kids act like they're your servants for the day (well, we can still dream, right?)


Monday, November 16, 2015

Pumpkin Dinner Rolls


For the last couple weeks I've been out of whole wheat flour. Whole wheat flour provides an important function for me and my bread-eating family. It allows me to eat all kinds of wonderful breadsy things without guilt. It allows me to feed all these wonderful breadsy things to my kids without guilt. When we have whole wheat (or even part wheat) bread at dinner and the kids are picky and hardly eat anything else, then I can say to myself, "Well, at least they got some whole grains with their 1/2 teaspoon of soup/salad/casserole/vegetable." But when you don't have whole grains in your bread, then what do you say, "Well, at least they got some gluten candy with their two drops of tomato soup." It's less comforting.

(Here's a picture of them in different light, so don't freak out if they're not as orange as the above picture; they were more orange than regular rolls, but not flaming.)

One night I had promised my kids I would make bread. And a promise is a promise. Still, I had to do something to add nutritional value to their bread candy to make myself feel like a better person and all. I had a bit of pumpkin leftover and added about 1/3 C in. It wasn't a lot--let's face it; it was still gluten candy. But it was gluten candy with a bit of extra vitamin A. Aaaannnndddd even more importantly, it was fantastic. They were delicious and soft with a kiss of autumn (and a kiss of vitamin A, and--yes--I am still trying to make myself feel like I fed my kids better than I did). The color was pretty and I just thought it might be a nice addition to your Fall/Thanksgiving repertoire. They are made exactly like my go-to roll, only instead of using two eggs you use 1 egg and 1/4-1/2 C pumpkin puree (I used canned). That's it. I'll copy that recipe below with changes.


Pumpkin Dinner Rolls
Makes about 20-24 rolls
Prep time: 20 minutes
Rise time: 1 1/2-2 hours
Cook time: 10-15 minutes
Cost: $2.00 (that's $.10/roll)
milk: .15, yeast: .20, butter: .25, sugar: .10, egg: .10, flour: 1.00, pumpkin: .20

1 C warm water
1 C milk, warmed (not hot)
2 Tbsp yeast
1/4 C butter
2 tsp salt
1/2 C sugar
1 egg
1/4-1/2 C pumpkin puree
7-8 C flour

Add yeast to water and milk. Let it sit there if you've got five minutes. If you'll get distracted by leaving a thing for five minutes, then just throw the butter, salt, sugar, and eggs in before you forget what on earth you were doing in the first place. Mix it all together. Mix in 4 C flour. Add 2 more cups. Begin kneading with hands when it gets too tough to stir. Of course, if you're a member of the 21st century and have a Kitchenaid, you can use that too with the dough hook. I myself haven't quite made it to the 21st century and that's okay with me because (weird mental disorder alert) I kind of like kneading. It relaxes me. I like how the dough smells. I like how it feels. 

So if you, like me, will be doing things manually, here is #1 best tip for rolls. The dough should be pillowy--like a mother's bosom. We don't want any tight teenage breasts, nor do we want a stretched and sagging grandma shelf. If a three-year-old would just love to lay her head on your dough, it's perfect. (Warning: If you have a real life 3-year-old available, do not invite her to lay her head upon your dough to test it out. You'll get hair in your dough. And possibly boogers. Which is what mother's bosoms also get covered in when they have three-year-olds. Not that we mind because three-year-olds are cute.) I've digressed, haven't I? Anyway, so keep adding flour in 1/4 C increments or so and knead it for about 8 minutes until it is nice and pillowy and perhaps the teeniest little bit tacky, but not sticky. Then put it in a bowl and cover it and keep it in a warm place. (Everyone always says put it in an oiled bowl. I have never, not even once in my life done this. I always just throw it back in the bowl I mixed it in. It is always always fine. Who are these people with their oiled bowls and what is the purpose of oiling the bowl?) 

Tip #2: If it's cold in your house, stick the bowl with the dough in the oven. Turn the oven on for 1 minute. Then turn the oven off and leave the dough in the warmed oven. (Do not leave the room to go do something in that one minute. You will never remember your dough. It will cook right there in your bowl with a dish towel over it and perhaps your house will burn down. This is not worth what you were going to do in that one minute.) Alternatively, you could turn the oven on, then off, then put your dough in just to be sure you don't flake. 

Let it rise for one hour or until doubled. Then punch it down and shape it into rolls. Put the rolls on a greased baking sheet. Cover them and let them rise again--this time for about 20 minutes. 

Bake at 375 for about 10-13 minutes. I like my rolls just a bit on the dough-y end. I always break them open to determine if they're just right and not way too doughy still. It's not the perfect technique, but it works. 

PRINTABLE RECIPE

Monday, September 21, 2015

Five-Minute Artisan Corn Grain Bread


Dear Friends,
Don't ever lend me a book and say something like, "Oh, sure, take your time. I don't need it back anytime soon." If you do this, I will take your word (and then some) for it. I will take my time, even if that means, say, 10 years, and I will trust that you don't need it back anytime soon. This isn't to say you can't lend a book to me and expect it back. If you say simply, "Here's my book. I need it back in a week." Then I will most certainly have it back to you in a week. Or if you lend me a book and then text me and say, "Hey, are you done with my book." I will get my little self done with your book and get it back to you. But if you say, "Oh, sure, whenever" then I'm sorry, there are simply no promises.

Recently, by which I mean--oh five or six months ago--a friend lent me such a book. A lovely lovely book called My Bread by Jim Lahey about how to make beautiful artisan breads the easy way. Unfortunately for me and for you (and certainly for my sweet friend who lent it to me), I didn't crack that book open for months. And then one day I cleaned my shelf and there it was. Oh dear. Book borrower's guilt. So I got it down. It still took me a while to open it. It's just that I had my own little lazy method for artisan bread as well as pizza dough, and I was happy with them. I assumed that this book used the same basic method (which it does) and I thought to myself, "How much more is there to know?" Oh dear. It's not that there's so very very much more to know as there is so very very much more to imagine. He takes one method (flour, water, salt, yeast, time, heat) and turns it into the most amazing breads you could dream of by making simple alterations. Coconut chocolate artisan bread, yes please. Peanut butter bread--not a sweet bread, but a loaf made with peanuty water instead of just regular water and then peanuts cooked right into the crust. Or add some jelly and fold it in. It's a delicate touch, a bit of innuendo. Oh dear oh dear oh dear. Every page I turned was a new and beautiful (yet still almost stupidly simple) idea.

And the wonderful thing about a book like this--a book that uses a basic sort of method and opens the imagination--is that it opened up my mind. And today when I made my browned butter butternut soup (yes I will get you the recipe), I kind of thought it'd be good with bread and I kind of thought it'd be good with cornbread. And then I realized it'd be really just perfect with artisan bread that had a crunch of chunky-ish cornmeal in it. And it was. Not sweet, but textured and interesting. Oh--and beautiful. 


The method:
1. Combine grain/flour, yeast, salt, and water.
2. Let it sit/rise for 12-18 hours (yeah--that's the part that's kind of not five minutes)
3. Turn it onto a tea towel dusted with flour, wrap it up, and let it rise another 1-1 1/2 hours.
4. Plop it into a hot Dutch oven and put it in a hot oven. (475 degrees)
5. Bake until it's brown.
6. Let it cool so that the moisture isn't lost and the bread is awesome. The end.


Five-Minute Artisan Corn Grain Bread
inspired by My Bread
Prep time: 5 minutes
Rise time: 12-18 hours
Cook time: 1 hour
Cost: $.60
flour: .30, cornmeal: .25, yeast: .05

2 3/4 C flour (I used all-purpose, but Lahey recommends bread flour)
1/4 medium  ground cornmeal (regular old cornmeal will probably work, but I was going for a rustic, chunky look and feel)
3/4 tsp salt
1/4 tsp yeast
1 1/3 C water

Combine all ingredients until incorporated. No kneading or anything else is required.

Let sit for 12-18 hours. Yes, you have to think ahead of time. Yes, I--of all people--am aware of the difficulty in that.

When the dough is ready, it won't look like regular kneaded dough. It will be wet looking with a bunch of air bubbles in it. It won't have a nice round shape, but will take the shape of your bowl. Don't worry--it's still going to come out round. Now, get out a tea towel. Dust the tea towel with some more corn meal. Plop your dough onto the tea towel and dust it with more corn meal. (Sounds like a pain, but was surprisingly easy). Wrap it up in the towel and let rise another hour or 1 1/2 hours. When you stick your finger in, the indentation should stay.


(See that lovely finger poke)

During the last 1/2 hour of rise time, heat your oven to 475. Put a Dutch oven (with lid) in the oven and let them heat up together.

When your oven's hot, plop your dough into the Dutch oven (I use a bit of parchment paper at the bottom just to make life easy), cover with lid. Bake for 30 minutes.

Uncover the pot (now remember that this pot is crazy, wicked hot--please be careful). Let it cook 15-30 more minutes until the top is a deep golden or darker brown (this won't mean the inside is burned at all--don't worry).

Let it cool. Lahey insists on this and I was going to, but then--oh--dinner was running late and I needed to feed everyone. So I cut into it while it was still warm. But Lahey says if you let it cool, the moisture will remain in and that as the steam escapes your bread will sing to you (make a sort of whistling sound--yeah--awesome) and then it will be perfectly moist and wonderful and chewy and amazing. I want to hear my bread sing and so next time, I intend to let it cool. But now I can tell you that even if you don't, your bread will be pretty darn awesome.

PRINTABLE RECIPE


Sunday, October 12, 2014

Honey Oat Bread--Secret Recipe Club


This month for Secret Recipe Club, I had Cindy's blog, "Hun...What's For Dinner?" She had a ton of recipes, but the ones that attracted me most were the breads. Maybe that's because autumn is here and I'm ready for some hot-from-the-oven loveliness. The bread I finally settled on was this Honey Oat Bread. It seemed virtuous, but not overly so--which is really nice in a bread. And I'm so glad I picked it. Truly it's the perfect autumn loaf. It's just a little sweet, just a little earthy. I absolutely loved it. I made it to go with a homemade bowl of soup and found I liked it best with butter and honey. Enjoy!

Honey Oat Bread
adapted from Hun...What's For Dinner?
makes 1 loaf bread
Prep time: 10 minutes
Cook time: 30 minutes
Rise time: 90 minutes
Cost: $1.20
honey: .50, roller: .10, whole wheat flour: .20, flour: .20, oat bran: .10, other stuff: .10

1 C warm water
1 T vegetable oil
1/4 C honey
1 tsp active dry yeast
1 tsp salt
1/2 C rolled oats
1 C whole wheat flour
1 1/3 C bread flour (or all-purpose, though you might need a tiny bit more)
1/4 C oat bran (optional, but I used)

Combine water, oil, honey, and yeast.

To this add oats, salt, and whole wheat flour and oat bran.

Then add the rest of the flour in 1/2 C increments. When it gets too difficult to stir, turn it out to knead. Knead it for 5-8 minutes or until it doesn't stick to your hand, but is still soft and pillowy. [Note: For bread maker instructions, see Cindy's blog post.]

Let rise in bowl--45-60 minutes.

Shape into loaf and put in smaller loaf pan (7x3 1/2 inches I believe). Let rise again--about 30 minutes.

Bake for 30 minutes or until top browned and is about 180 degrees on an instant read thermometer.

PRINTABLE RECIPE

Thursday, October 9, 2014

Bacon Jalapeno Cheesy Bread


This isn't the type of bread that usually flies in my house. It is not smooth. It contains a real-life vegetable. And it is not "normal," by which I mean that you cannot put jam and peanut butter on it (well, I guess you could...).

But my sister raved about this recipe, repressing any doubts about the fact that I might get stuck eating a loaf of cheesy bread all by myself. And then I found myself with a bag of jalapenos from a friend. And a pot of potato soup for dinner. That potato soup called to this bread.

And so I made it. And, yes, it is completely awesome. For purposes of full disclosure, I should tell you that Kip picked his jalapeno bits out. But otherwise, he really loved this bread. I count that as a win in the house of pickiest people on earth.

It's almost biscuit-like, but without the bad qualities of biscuits (namely their dryness, flavorlessness, or sometimes-too-salty-ness). This bread is seriously the perfect savory bread. And if you hate jalapenos, leave them out. If you're vegetarian, skip the bacon. You can't skip the cheese though. Sorry vegans.

Bacon Jalapeno Cheesy Bread
adapted from Call Me PMC
Makes: one 9x5 inch loaf
Prep time: 10 minutes to cook bacon, 10-15 minutes to mix up the bread
Cook time: 50-70 minutes
Cost: $4.60
bacon: 1.00, flour: .30, cream cheese: 1.00, jalapeno: .30, cheddar: 1.50, buttermilk: .35, other stuff: .15

6-8 slices of bacon, cooked and chopped into little bits (the original recipe called for 2 cups of chopped bacon; I used significantly less than that)
3 C all-purpose flour
1 Tbsp baking powder
1 tsp salt
2 Tbsp sugar
8 oz cream cheese, softened
1/4 C diced jalapeno--2 medium (I left out the seeds, but you could chop and use if you like heat)
2 C cheddar cheese (I used sharp, but milder will work)
1 1/2 C buttermilk (or scant 1 1/2 C milk with 1 1/2 Tbsp vinegar)
1 Tbsp canola oil

Preheat oven to 350 degrees. Spray 9x5 inch loaf pan

In large bowl, combine cream cheese, jalapenos, bacon, and cheddar cheese. Stir to combine.

In another bowl, combine flour, baking powder, salt, and sugar. Whisk.

To the flour mixture, add cream cheese mixture, the oil, and the buttermilk. Mix until just combined. Don't overmix.

Pour into greased pan. Bake 50-70 minutes (original recipe said 45-50, but mine took much longer, so check it early, but don't be surprised if it takes longer. The top should start to brown and when you stick a knife in it, it should come out clean.

Let cool for a few minutes. Then turn out and cut. It's delicious warm or cool. And it rocks a bowl of potato soup.

PRINTABLE RECIPE

Monday, April 8, 2013

Coconut Lime Pull Apart Bread


I am a terrible shameless fan of pull apart bread with all its buttery white floured goodness. I've made cinnamon/sugar, chocolate chip, and--my favorite--orange. This weekend, I made another winning combination: coconut lime. It was very very good. Although my son did look at the green zest between layers and ask if it all contained spinach. Ha (and, no, there is no spinach, okay).

You'll find the instructions for pull apart bread here.

To make coconut lime, sub the zest of two limes for the orange zest. Then frost it with this to-die-for coconut lime glaze. Let me give this glaze a little gush because it's awesome. It would be fabulous on bundt cakes, muffins, cupcakes, donuts, whatever. It's just really really wickedly good.

Coconut Lime Glaze

4 Tbsp coconut milk (the canned kind)
1- 1 1/2 C powdered sugar
juice from one lime
a few scrapes of zest for looks

Mix together and pour over bread while it's still warm. Note: You can add more powdered sugar and it will still be a glaze, but I really liked the pop of the limey coconut with a thinner glaze.

Wednesday, March 13, 2013

Pain au Chocolat (American-style)


The French like bread. The French like chocolate. I like bread. I like chocolate.

The French wrap chocolate into croissant-like bread and eat it for breakfast. I decided I could wrap a bit of Nutella into a whole wheat roll. You see, one night I was making some rolls when a jar of Nutella in our cupboard caught my eye. And I figured it was time to go a little French, so I wrapped about 1 teaspoon of that Nutella into my whole wheat rolls and we ate it for dinner. And it was blissfully good--even better than I'd expected. The blob of Nutella tended to spread out into the roll, so that when you bit in you didn't just get one really great bite, you got nearly a whole warm roll with a layer of warm chocolate spread throughout. Yeah. Did I mention it being awesome. Because it was. (You can personally note this awesomeness in the above picture--that was a little blob--see how much it spread)

To further beautify its awesomeness, it was really just a small little blob of Nutella--a tiny indulgence that went a very long way and made for something that tasted undoubtedly decadent although it was really just a little sin (as the French might say).

Pain au Chocolat (American-style)

1. Make a roll recipe you enjoy. I adore this one, which can be made white, part whole wheat or 100% whole wheat (I often do part whole wheat--about 1/2). Let rise as you normally would.

2. When you're about to wrap the dough into rolls, plop 1 tsp of Nutella into the center and roll the rolls around it.


See how it's just a tiny blob.

Then wrap the dough around it and put this folded side down in the pan, so they look smooth(ish) like in the picture below.


3. Let rise.

4. Bake at 375 for 10-15 minutes.


5. Eat. These are amazing warm. I bet they are cold as well, but I can't tell you because we ate all of ours before they hit that point.


Monday, March 4, 2013

Quick Naan


I have one recipe for naan on this site. I considered it all I would ever need because I love love love it. And then Friday as I fought to get dinner on the table while teaching my youngest daughter a piano lesson and getting ready for our Friday night singing night with some friends, I suddenly realized the error in my ways. My other naan recipe is completely delicious, but it uses yeast and requires rising time (which equals a certain level of forethought I am not always capable of--cue that crammed in Friday evening piano lesson).

This recipe is almost equally delicious, but uses baking powder and requires only a bit of a "rest" for your bread (which you could probably shorten or even entirely skip if you wanted to). It uses yogurt which gives it a lovely soft finished texture (and makes you feel healthier, though I'm never really sure if cooked yogurt actually is much healthier). And--to be honest--it is easier for bread novices than a traditional yeasty bread. It is not quite as good the next day (you just can't beat yeast for next day goodness), but it was still good enough to make me drool when I thought about eating up those leftovers. So there you go. Now you can have your belated piano lesson and eat your naan too. Or, um, something like that.

Quick Naan
adapted from The Good Loaf
makes 12-15 6-7-inch naan
Prep time: 5 minutes
Rest time: 30 minutes (can probably be shortened)
Cook time: 20-30 minutes
Cost: $1.00
whole wheat flour: .20, flour: .30, yogurt .50

1 C whole wheat flour
3 C white flour
1/4 C sugar
3/4 tsp baking powder
3/4 C plain yogurt (I used full-fat)
3/4-1 1/4 C water

Combine flours, sugar, baking powder.

Add yogurt and 1/2 C water. Mix. Add more water as necessary to get your dough to come together into a nice ball of dough. It will feel dense and just a tiny bit tacky, but it won't stick to your fingers at all.

Let it sit for 30 minutes.

Roll it into 2-inch balls. Heat skillet (I used cast iron skillet) while you roll the dough balls as flat as possible with rolling pin. Add a little oil to skillet. Cook one at a time on medium heat. When one side is golden browned, flip. Cook briefly on other side; it will probably bubble puff in a few areas and should only need 30-90 seconds.

Remove to plate and continue the process.

PRINTABLE RECIPE


Wednesday, December 12, 2012

100% Whole Wheat Cinnamon Swirl Bread


This is nice. This is nice when you're craving cinnamon and sugar and warm-from-the-oven goodness, but you want it to have some redeeming value.

This is also nice when you've got a party or some other activity to go to and you need a sweet, but you don't want it to be quite all that crazy sweet. I feel this way about after school snacks and other children's/adolescents'  events. The kids are kind of expecting a treat (especially at this time of year). But that treat doesn't necessarily have to be dripping with sprinkles or icing or otherwise bonboned goodness.

And you know, I actually like the cinnamon swirl even more in a good moist whole wheat loaf than in a white one. I don't know why--the structure of the sturdier bread holds hands really beautifully with the ooey gooey swirl.

Here's what you do:

1. Use this recipe for 100% whole wheat bread (or any other that you love)
2. Instead of shaping it into a ho-hum loaf, roll or press it out into an 8x12 inch rectangular-ish blob.
3. Soften to the point of near meltiness 4-6 Tbsp butter per loaf (so if you're doing 2 loaves, you're going to need about 1/2 C butter. Spread this on rolled out dough.
4. Combine 3/4 C sugar (per loaf) with 1 1/2-2 Tbsp cinnamon (per loaf). Sprinkle this on butter.
5. Roll it up, tucking any edges. Place it seem side down into your loaf pan and let rise.
6. Bake as you otherwise would. (Until an instant read thermometer reads 180 or so, but make sure you've got the tip of the thermometer in the bread and not the butter/sugar mixture.

Wednesday, May 23, 2012

Stuffed Pretzels


I first discovered homemade pretzels last October. Because it was National Pretzel Month (like, duh). And because I had three cute 4-year-olds at my house. What wouldn't you do for cute 4-year-olds?

And I discovered that homemade pretzels are not too hard to make. They are a quick 2-steps past making a regular old loaf of bread. I can make bread. I can make Playdough snakes. This is the skill set you need for pretzels. But bread/pretzels does not itself a dinner make. (Unless of course you're only serving 4-year-olds, in which case, you're good.) If, however, you are serving people who are not 4-year-olds, people we will, for illustration's sake, call grown men, well, you might need something more. Possibly something with meat. Or cheese. (Vegetables are still optional). You see, man does not live by bread (or pretzels) alone. And your man will probably complain if that's all your make for dinner. Or at least he will go out later and buy a burger and shake while he's at work (nope, still no vegetables).

Yet, making pretzels--while it need not be considered impossible or daunting--is not exactly a 15-minute process. So...how to make your pretzels and eat them too? In other words, how to have fun making pretzels with your kids and still wind up with a dinner to put on the table? You stuff them of course. Everyone wins. In fact, if you make enough, everyone can win the next day (or the day after that) too because these needn't be served hot and are therefore perfect for lunchboxes or snacks or meals one grabs on the go.

I made a few plain pretzels for the breadatarian among us. I also made pizza stuffed pretzels and hot dog stuffed pretzels. I was thinking today how fun a Mexican stuffed pretzel or a jam and cream cheese stuffed pretzel would be.

Here's what you do:

1. Make this recipe. Or double it.
Note: I've tried a couple of different recipes since October and I still like this one the best. However, I have learned that you can greatly reduce your baking soda bath if you wish. I cut it in half for my recipe, but some recipes just put a couple teaspoons baking soda with a a cup of water in the microwave and let it get really hot. This came out not quite exactly the same, but pretty close. And it was less hassle. So don't skip the baking soda bath, but feel free to reduce and/or nuke it.

2. Chop up whatever you plan to stuff. Unless it's something already skinny like a hot dog (or cheese stick or pepperoni stick). I chopped up my pepperoni and added shredded mozzarella cheese. I could have mixed a little sauce in, but instead we chose to dip our pretzels in sauce (easier and it doubles the fun--men and children alike love dipping).

3. Roll your dough into a long snake as your would if you were making a regular pretzel and then flatten your dough into a 2 or 3 inch wide rectangle (my "rectangles" would have displeased my geometry teacher, but they worked for pretzel-making).

4. Add the stuffing and seal the stuffing inside by pressing the dough together (perhaps with a bit of water on your fingertips).

5. Make whatever pretzel-y shape you wish. I couldn't get mine into bonafide pretzel shapes so I went for rings. The hot dogs I just made into, um, hot dog shapes.

6. Do the baking soda bath/boil.

7. Sprinkle with salt, cheese, herbs, or whatever seems appropriate for your stuffed pretzel.

8. Bake per the recipe.

Ideas for Types of Stuffings (that I have either tried or think would be great)

1. Pizza Pretzels. (Tried and true) Mozzarella and chopped pepperoni sealed in the pretzel and served with sauce for dipping. You can sprinkle some Parmesan or some Italian herbs on top.

2. Hot dogs. (Tried and true--Kip loved these) You can dip in ketchup or mustard or whatever.

3. Cooked sausages, string cheese (or any long cheese), pepperoni sticks.

4. Mexican pretzels. Chop some cheddar, olives, and peppers. Dip in sour cream or guacamole.

5. Chicken broccoli pretzels. Chop chicken and broccoli (chop it small) and mix it with some cream cheese, salt, and pepper.

6. Sweet fruit pretzels. Spread cream cheese on your "rectangle," then spread it with a good jam. Seal up, twist, and bake.  Go all out and sprinkle with some chunky sugar.

7. (And while we're spreading things...) I bet you could even do a PBJ pretzel with peanut butter and jam spread on your rectangle, then sealed, twisted, and baked.

LinkWithin

Related Posts Plugin for WordPress, Blogger...