Showing posts with label drinks. Show all posts

Thursday, January 9, 2020

Thoughts on a Juice Fast and a Recipe for Homemade Almond Milk (Raw, Delicious)


If you just want that almond milk recipe, skip to the end. If you're interested in my experiment with a juice fast, keep reading.

Back in October, I did something slightly insane. I tried a juice fast. Interestingly, I almost did the same thing at about this time last year. Apparently, Mark and Kip's birthdays (nine days apart) kind of do me in and make me feel gross.

My main goal was to re-set my body. I wanted good things in it. I wanted my bowels to have a bit of a break. And I wanted to re-set my appetite away from junk and towards better things. I even kind of wanted to see if my stomach would feel smaller and I would eat less afterwards. (And was curious if the deprival would actually make me eat more afterwards, thereby backfiring.)

Juice fasts are NOT cheapskate things to do. In fact, in my first search while doing research I was admonished to be sure I planned a day at the spa because this was tough stuff (insert eye roll). And another said they couldn't possibly have done the juice fast without going to a retreat. Seriously, America. But now I'm one of them (minus the spa or retreat, but still the crazy). I will say that I did it in a fairly cheap way. For a juice fast. Which, as I said, still isn't cheap (at least $10/person/day and that's with homemade juices, which is tough because you're kind of tired anyway).

Last year, I did some research on a juice fast, bought ingredients, and then...I had a juice instead of a meal or two and felt better and called it good. Part of me firmly believes that that, in fact, was the right choice and all any of us needs to or should ever do.

But this year, I decided to go for the whole three-day fast. I wanted to do it as an experiment if nothing else. Would it really make my body feel better? Would I be toxin-free, less bloated, and basically glowing when I was done? Uh...

It has, indeed, been interesting.

Below you'll find my experience and thoughts. You'll also find a perfectly perfect almond milk recipe because, well, some might say, I cheated (depends on who you talk to in the juice fasting community).

Also, I didn't always follow all the rules (didn't drink juice every two hours and stuff like that; I had a life to live, but I see how that would have helped keep sugars steady and I did my best).

Day 1:

Expectations:

I did not expect this day to be particularly hard. I regularly fast two meals once a month for religious purposes (no food and NO water--ouch it's hard). So I thought this juice thing would be a breeze.

Actual experience:

-It was not hard until dinner.
-My teeth felt dirty and I determined to brush them more often the following day.
-I took a HUGE, deep nap in the afternoon. To be fair, I'm not sure if juicing is to blame. We'd hosted Kip's parents over the weekend, and I could have been just tired. Also, everyone warns you that you'll be tired, so I kind of expected that a little, but not 1 1/2 hour nap level.
-I felt weirdly dehydrated. I suppose this is because I was drinking so much juice with all those natural sugars, and drinking more seemed like so much fluid.

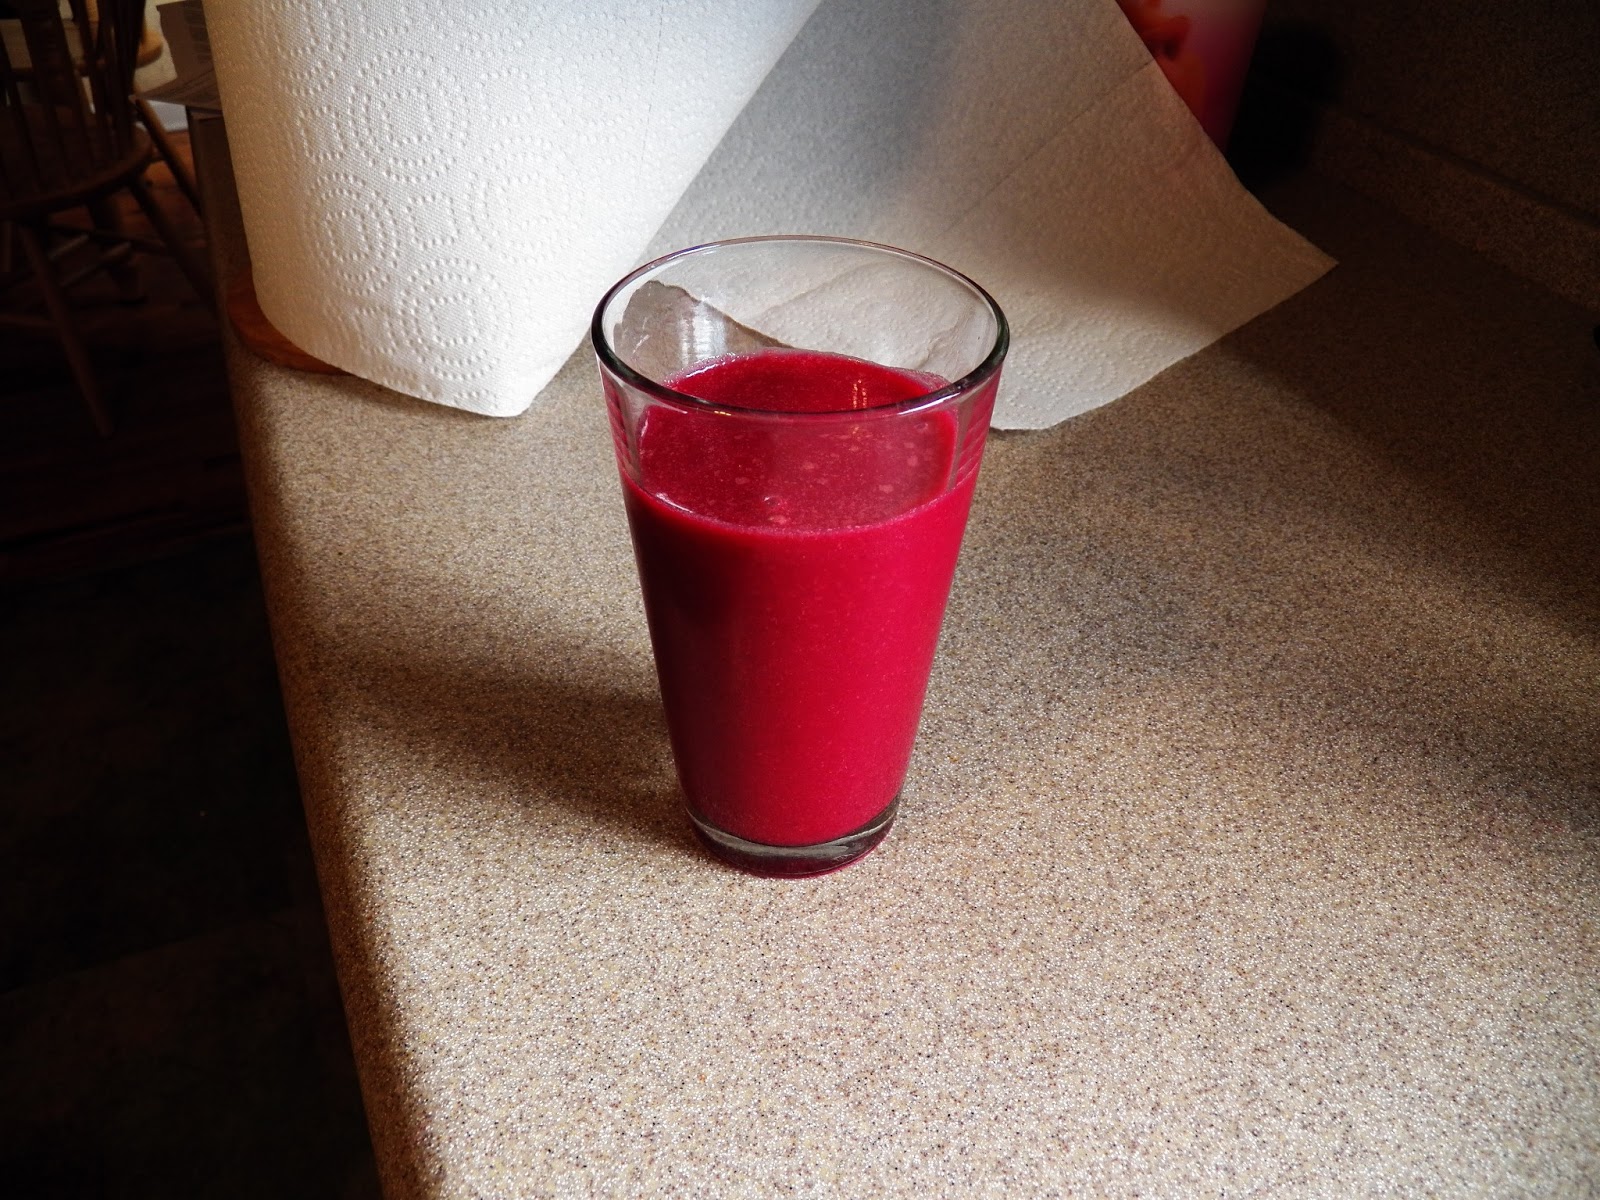
-In the morning I had a beet juice combo and it honestly seemed like a perfectly reasonable breakfast, especially since the last week and a half had been so full of food. It felt good to enjoy that simple breakfast. I worked out as usual (core class followed by reading while walking on the treadmill--about 50-60 minutes total). Life proceeded as usual. By 11, I was hungry, but that's not way out of the usual.
-For lunch I had a carrot orange juice. It was perfectly delicious, but also intensely sweet. Then I did some work and took my huge nap.
-At dinner, I truly missed food. I was somewhat prepared for this, but what I wasn't prepared for was to have trouble drinking my juice (a green kale/spinach/apple combo). I was just juiced out. I almost felt like I'd rather eat nothing than drink another juice. I got about 2/3 through the juice and just couldn't drink the rest. It was a strange feeling--I was hungry, and I enjoy that juice (I've had it before and consider it a "treat" not an obligation to my health), but thinking of drinking the rest made me want to hurl. In fact, I had a slight dull headache also.
-This is when I decided to kind of sort of cheat. I googled whether nut milks were allowed on juice fasts. Depends on who you talk to. Nut milks are, after all, basically, nut juices. But sometimes people are doing a juice fast as a type of elimination diet (see what is irritating your gut or whatever) and nuts are a common thing to eliminate. But I really really felt like I needed something besides that dang juice. So I made my first ever almond milk and if nothing else good comes from this experiment, it was worth it just for that. That almond milk was just what I wanted and it seems it was just what my body needed. When it was done later that night, I slammed two glassfuls down. Just chugged them. Now, I'd been warned not to do this with the juices, but the truth is that I'd never been tempted to. I just sipped along on them for, like, an hour. I don't know if I could have chugged them if I'd tried. As I said, sometimes even consuming the whole thing was a challenge. But I chugged those almond milks. And it felt amazing. Until about 45 minutes later when it didn't. But it was fine.
-I was way tired, a bit foggy headed, and a bit head-achy. Went to bed and slept a fantastic sleep.

Day 2:

Expectations:

-Not to be too miserable. Dinner would be hard. Looked forward to trying a cashew milk.

Actual things that happened:

-I woke up feeling great. In fact, every morning, I felt pretty great and I slept extremely well throughout this experiment (except the last night). Beet orange juice for breakfast (I actually preferred these beet combo juices in general--they felt a bit more substantial than the others)
-Did a 30 minute weight workout with Kip. Felt a bit sluggish, but okay. Consumed nut milk post workout. Loved it.
-Lunch was a green juice. Was bored out of my mind of juice. Wanted more variety, but couldn't find it in the raw juices Evansville has to offer for purchase. Bought some stuff to make my own juice, plus a Naked (not raw and not unpasteurized) juice for dinner (which also had pulp in it making it not a true juice either. Didn't care; I felt desperate for some variety and it promised coconut!)
-Did a butt ton of work in the afternoon and did not take a huge, ridiculous nap.
-Felt blerg.
-Brushed my teeth three times instead of two.
-Really sluggish in the evening. Very low level headache. Also very low level ache in mouth teeth. No idea why. From not chewing. From so much acid from the vegetables/fruit.
-Was NOT glowing. In fact, I felt kind of low-level sick. It seemed that this whole trend was just a way for healthy, wealthy people to force their bodies to feel less optimal. That seemed pretty stupid to me. Also, when I confessed my juice fast to my sister on the phone, she told me they'd just had a specialist on eating disorders talk to their youth group and cleanses and juice fasts of all types were on her naughty list. At this point, they were kind of on my naughty list too, and I wondered if I should finish it up or not. I wondered if it was setting a poor example for my children and even talked to my girls about how this was an experiment and how I might even end up feeling it was bad for me in the long run.
-Naked juice for dinner. It was a cheat (pulp of some of the fruits/veggies included) and it was repulsive (sorry, spirulina; you just don't belong in juice...). I literally had to try to let the juice flow past most of my tongue. And, again, I struggled to drink the whole thing because I was so juiced out.
-Warm cashew milk for an evening snack. Yeah, it sounds gross, but when you've been drinking juice all day, it's pretty delicious.
-Very tired in the evening. Very FOGGY brained. Felt a little low level sick--like when you're not really sick, but somewhat under the weather.
-I did not experience crippling hunger (I credit this to the nut milks, though that is not logical since they only have, like, 35 calories and are mostly water. But somehow they felt much more filling than the juices.)

Day Three:

Expectations:

-Hard. Hungry. Might break and have normal dinner. Wasn't sure.
-I considered eating dinner this night. I felt I had sufficient "data" for my experiment. And I was just so juiced out. What about a nice salad. I kept it on the table (hehe puns) as an option, but kind of wanted to try the whole three days to see if any miracles happened. If I ate, I would lose the last twelve hours of my experiment. But if I was too miserable to care, then I was going for dinner.

Actual Results:

-Again in the morning, I felt just fine. In fact, I felt good. Energetic, not starving, and extremely well rested. Beet combo juice for breakfast.
-Did a yoga workout and my stomach started growling in the middle. This is 9:30 or so. This was the first morning, I'd felt that hungry.
-Cashew milk post workout snack. Prepared more almond milk because I'm an addict now.
-Cucumber grapefruit juice for lunch (my own creation and perfectly amazing, though not filling at all).
-Afternoon hunger. This truly was the first day where I felt significantly hungry. The other days I experienced hunger, but nothing too significant. The third day my stomach growled much of the day.
-Kept with the juice that night. Didn't want it, but drank it. Just wanted to see what happened.
-Did NOT sleep well. The other night's I'd slept so much better than usual, but this night, I slept worse. Don't know why.


Overall:

-Some people report an, um, cleansing of the bowels. This, I believe, is a sometimes effect of any type of fasting and I'm not sure why. But I didn't experience that (nor do I during my monthly religious fasts). In fact, after day one, my bowels just kind of hung out and chilled. This was interesting and, honestly, kind of nice. I had almost (TMI warning) no gas whereas in usual food-eating life, I have plenty (though it smells perfectly neutral unless I'm sick) as do most food-eating humans.
-I also slept like a log (except for the last night). I can't help but think that part of the reason for that is that my body wasn't trying to digest a huge dinner and/or dessert still.

Pros:

-I slept like a freaking angel (most of the time). My takeaway is that it might be beneficial for me to eat earlier in the evening and then to not eat anything else until bed. I wonder if my digestive track is just working overtime while I sleep. Or it could have been cause by low blood-sugar levels. Not sure.
-Because of my great sleep, I enjoyed fairly energized mornings.
-I did feel mostly completely unbloated (except when I chugged the almond milk that one night). That said, I don't often feel bloated, but I definitely noticed less gas. That said, gas is just an indication that our bowels are moving so... is having non-moving bowels a good thing. Jury's out on this one, especially since I don't have offensive stinky gas anyway (usually).
-I suppose I consumed many vitamins and minerals.
-I learned to make delicious nut milks and became an addict.
-Do I feel like I re-set my body? This was my main goal. I wanted to wash out the crap (maybe literally though that didn't happen) and re-adjust my appetite and junk eating expectations. On some level, this definitely happened. When I craved food, it was nuts and real, delicious wholesome foods. I did NOT want sweets of any kind. The thought made me sick (perhaps because of all the sugar in the juices already?) [Several months later update: This craving healthy food effect lasted for over a month and may have lasted longer if the holidays hadn't hit. I didn't crave sugar, almost at all. When I did, a bite or two of something would fully satiate me, and more than that felt a little icky. I had some pie at Thanksgiving and then slid into Christmas and began eating more sweets again, but the long-term effects of reduced unhealthy cravings makes me feel like the fast may have been worthwhile after all.]


Cons:

-I felt kind of sick at several stages of this. I'm not sure how wealthy you have to be as a culture to invoke sick-feeling-ness in the name of healthy.
-I felt foggy as heck at night. Like, wondered if I should drive a vehicle foggy. I just wasn't as sharp feeling as usual and had very low energy. I went to bed early (maybe this is a very good thing), but didn't have my usual evening energy.
-No bowel cleanse, though I'm not sure I'm sad about that.
-Sure, I lost weight, but come on, it's not going to stay that way [Several months later update: Half of it did stay away until the holidays due to my healthier eating and cravings, so about 2-3 pounds].
-This would seriously wreck your teeth if you did it often enough. I brushed extra, but chewing really does a lot to cleanse the teeth (I mean, maybe not if you're chewing cookies, but fruits or veggies or other foods get a lot of junk off your teeth; I hadn't realized how much. And the sugar/acid bath that is juice (yes, even veggie juice on some level) would be hard on teeth over time.

TAKEAWAYS:

-Eat less several hours before bed.
-Juice for breakfast as an occasional mini-fast is very cleansing and nutritious. I fully support it. If you're really desperate, do breakfast and lunch, or breakfast and dinner. Juice all day every day for three days is blerg, but did have some long-term effects that I considered fully helpful. I think a juice fast (I would say no longer than 3 days) would be helpful once, maybe twice a year (but definitely not more than that, or your just disordering your eating).

Almond Milk
Make: 3-4 C
Cost: $4
Prep time: 5 minutes
Wait time: 1-5 hours (the almost must sit in water)
adapted from Detoxinista

Ingredients:

1 C almonds
8 C water (4 four soaking and 4 fresh for blending)

Optional ingredients:

-2-4 dates
-1 tsp vanilla
-1 Tbsp cocoa
-warm spices

Put one cup almonds with 4 cups water. Soak for 4 hours. Want to speed this up? Use very hot water, and you'll only need an hour or so. This is what I did.

Drain water.

Add 4 more cups water to almonds. Blend away in a good blender (though you DON'T need a super fancy one like BlendTec)

Strain through cheesecloth, nut cloth, or just a plain old tea towel (that's what I used; purchased from Walmart and very cheap). I set my cloth over a wire mesh strainer. It strains quickly (as opposed to something like cheese) so this should only take a few minutes. Then squeeze the rest out, which takes another minute or two.


Drink. But don't chug. Seriously, I never chug store bought almond milk, but this stuff is so creamy and good, I have to stop myself. I thought that had just been an effect of the fast, but today when I made it, I had to put on the breaks again. It's so good.

If using optional ingredient, include them when blending. Or you can add the vanilla and cocoa after straining. Up to you.


What to do with that pulp? My true advice? Nothing. Throw it out. If you've got chickens, feed it to them. I know that is so un-cheapskate of me, but truly, it's not very good. It has, supposedly, very few nutrients/flavor left (though I'm sure it's got fiber). And the truth is that I tried two recipes using it--one from the same blogger who gave us this delicious recipe and one of my own nut balls--and they were both flavorless, requiring so much more sugar and huzzah to make them taste good. You got your nutrition in the nut milk. The pulp doesn't have much left. If you find an amazing way to use it, however,  I'd love to hear about it in the comments, though.


Monday, January 15, 2018

Hot Chocolate: Two Ways

BEST OF THE TASTY CHEAPSKATE


It's hot chocolate season around here. (See picture below.)


My kids have been playing in the snow every day and today we went to enjoy a friend's huge hill. 

So I thought I'd share a few of my favorite hot chocolate recipes. 

The first is the recipe I grew up with my mom making on snow days just like these. It's incredibly easy, fantastically cheap, and so much more delicious than anything you'd get out of a packet. 

The second is a Creamy Milk Chocolate that will cost a little extra. It's high-falutin' like that. But so amazingly creamy and rich that we often have it for dessert. 

Easy, Perfect Homemade Chocolate
Serves 1 (or 2 small mugs) 
Prep time: 3 minutes
Cost: $.20 ($.10-.20/serving)
sugar: .02, cocoa: .03, milk: .15

2 Tbsp sugar
1 Tbsp cocoa
1 C milk

Stir sugar and cocoa together in a saucepan and then whisk in milk. Heat, stirring as you do. Don't boil. 

Creamy Milk Chocolate Hot Chocolate
serves 4
Prep time: 4 minutes
Cost: $1.05, or about $.26/serving
Chocolate chips .75, milk: .30

3/4 C milk chocolate chips (preferably something higher quality like Ghiradelli or Guittard)
2 C milk
1/2 tsp vanilla (or 1/4 tsp almond extract)

Melt chocolate chips with a portion of the milk, Gradually whisk in remaining milk, stirring as you do. Whisk until smooth and to the desired heat. Don't boil. 


Wednesday, August 2, 2017

Natural Gatorade


I guess I better confess and say that I can't exactly call this natural Gatorade because what is Gatorade exactly? It's like watered-down Koolaid with electrolytes mixed in, right? And this isn't really an natural version of that sugared, electrolyted drink. What it IS is water that's been pimped up with some natural electrolytes. 

That's right. I just told you that today's recipe is water. Maybe I should feel embarrassed about the state of my lameness, but the truth is that this drink is really very lovely and kind of addicting. I find that I now crave it when I've been out in the heat or had a really hard workout or both (nothing better after hot yoga). You get the hydration and the electrolytes without drinking a lot of sugars and/or sweeteners and food dyes. 

And I do feel that it has more oomph and helps me recover more quickly than plain water. Sometimes after a hot or hard workout, I get headaches and this seems to help with that. I'm not going to call it a miracle tonic, but maybe it kind of is. 

And is it dumb easy? Yes

And is it super cheap? Yes. ($.25 at its highest price compared to the $.99 of Gatorade)

And is it tasty? Surprisingly. 

Half the time when I take a swig of Gatorade, I want to spit it out. It just tastes so fake and almost thick to me. This natural Gatorade is just so refreshing. Note: If you drink Gatorade because you like sweet, red/blue/purple/orange drinks, then you won't get that sweetness from this drink and you might find that disappointing. This isn't sweet. It's a barely flavored water, but what it lacks in sweetness, it makes up for in refreshingness (totally a word). 

Now I'm going to warn you: In this drink I'll instruct you to add salt to your water. And you'll go, "Ew, gross. Who puts salt in your water?" Um, you do if you drink any type of Powerade or Gatorade or probably any other number of processed drinks (Gatorade checks in with a whopping 11% of your daily sodium intake--270 mg). But that's not the point. The point is that we're going to add salt, but this still won't taste salty. It's just a pinch. Even alone in the water, you probably wouldn't notice it, but with that lemon, it's actually a really nice complement. Just be sure to mix it in (or you'll get a somewhat nasty last swig of water). Also, you MUST use a natural salt. First of all, it supposedly has more benefits (the naturalists will tell you that iodized salt is really just a processed food), but perhaps even more importantly--it tastes better. There's not that little hint of iodine that you can sometimes taste in regular table salt.


Natural Gatorade
Cost: $.28
lemon: .25 (I can usually get my lemons for cheaper, especially from somewhere like an Asian market), salt: .03

2 C water
1 pinch (or 1-2 grinds) natural sea salt (I used pink Himalayan because I had a tiny sample from a market, but any natural sea salt will work)
juice from 1/2 lemon or lime

Mix it all together. Be sure to get the salt dissolved and mixed in (just stir it a few times) or you will taste a big swig of saltiness at the bottom. 

Drink it. That's right. It's not the rocket science of recipes, but try it. I'd love to hear what you think of it after a workout. If it works for you, leave a comment below. 

Monday, February 22, 2016

Uber Dark European Hot Chocolate with Chocolate Whipped Cream and Sea Salt


For purposes of full disclosure, I've never been to Paris or Italy and I've never drunk European hot chocolate made by an actual European. All I've done is drooled over Pinterest pictures of things people say are European hot chocolates, which seems kind of sadly American. Until you taste this hot chocolate and then you won't feel American and sad anymore. Well, maybe you'll still feel American, but you won't feel sad. At least in the moments you're drinking this. After that, I guess it's up to you (helpful hint: don't read the news feeds; just drink chocolate beverages).

Truthfully, you can make this as dark or light as you want to. We went with dark. You're going to choose 5 ounces of whatever level dark chocolate you want (or you can mix and match). Our first time we went with about 60% and the second time we went darker with 70%. It's easiest to use chocolate bars as they melt better than chips, but the truth is that decent-quality chips will work too (especially if you give them a little extra time to melt--tip below), and then you add milk.


But what really takes this above and beyond amazing is the chocolate whipped cream and sea salt. I'm going to be honest--the chocolate whipped cream is not very sweet on its own and I thought that putting that on top of an already very dark, thick hot chocolate was kind of a recipe for disaster, but they just really work well together. The creamy compliments the dark even without being overtly sweet. And now I want to put barely sweetened chocolate whipped cream on everything (note: this is not the best healthy choice). So don't be too afraid if your hot chocolate tastes a little dark and your whipped cream tastes a little unsweet--they work together. Especially when you add the sea salt to the top, which acts to accentuate the sweetness of the chocolate--it's like bringing out the color of your eyes. Maybe they're blue and kind of average until you put that shirt on and then they're blue and not average. That's how the sea salt works in this. It brings out the sweetness and the flavor. Although I have to say that if you hate dark chocolate and hate the whole sea salt trend, this dessert probably isn't for you (and you can go back to watching the presidential debates and living your sad and lonely life). But seriously, if you taste this and think it tastes like eating cocao beans, just sprinkle in some sugar or honey to balance your world again, and all will be well.


Dark European Hot Chocolate with Chocolate Whipped Cream and Sea Salt
adapted from Adventures in Cooking
Makes 4 small or 6 very small servings
Prep time: 10 minutes
Cost: $3.20
chocolate: 2.00 (that's on the cheap side; I actually got mine for $1 because it the high quality chocolate was on clearance and I pillaged the store, but $2 can get you an okay chocolate; $3 will get you a perfectly good one and more will make this phenomenal), milk: .10, cream: 1.00, cocoa: .10

Note: This might look like normal hot chocolate, but it is thick and filling. Do not fill up a mug and think you can polish it off without getting a tummy ache. Pretend your Parisan and get one of those tiny espresso cups or something.

Note on using chips instead of bars: This can work, but you'll want to melt it all on the heat, then let it sit for a while--ten minutes or so--and then heat it again. When we did this, we had a thoroughly melted cup of cho despite the chips we used in our first batch.

Note on chocolate: You don't have to use the best chocolate in the world, but you can't use junk if you want this to taste good. Save the generic waxy chocolate for some kid's birthday party and use something better for this.

For hot chocolate:

5 oz dark chocolate (I suggest 60-50%, but if you're brave, you can go 80% or 90% and if you're a wimp, try a nice semi-sweet 50%)
3/4 C milk

For whipped cream:

1 C heavy whipping cream
3 Tbsp cocoa powder
1 Tbsp sugar (I used about 1 1/2 T because I was afraid)
chunky sea salt for sprinkling

To prepare hot chocolate:

Heat a small saucepan on medium or medium low. Heat chocolate in it until melted (watch it at this phase; you don't want to burn your chocolate; just mix it almost constantly and this will be fine). When it's melted or nearly so, whisk in the milk. Whisk until ingredients combined and then heat until smooth. I like to let it sit for a few minutes. I feel this helps the chocolate get silky smooth (especially if you used chips, but even if you used a bar).

To Prepare whipped cream:

Add cream to a bowl and blend away. Start on a lower speed and make it higher every 30 seconds or so. When it's starting to get lots of air bubbles, add the cocoa powder (turn the speed down or you'll dust your house in cocoa powder). This will make it thicken faster (no, I don't know why, but it does). Then add the sugar.

To assemble hot chocolates:

Pour chocolate into a tiny adorable cup. Add a generous scoop of chocolate whipped cream. Sprinkle with chunky sea salt. Drink. Or spoon it out if you'd rather (that's totally what I did).

PRINTABLE RECIPE

(Look. I was playing with my camera and I made a senior picture of my hot chocolate. In a slightly disturbing way it reminds me of the cover on Drinking: A Love Story. Except this is chocolate. We all know chocolate isn't addicting. Okay, well, at least we know we can drink this and drive.)

Monday, January 4, 2016

Grape Peach Spinach Smoothie


You're welcome.

I mean, I kind of owe it to you after last week. Happy New Year, friends. May you enjoy your resolutions as much as I enjoyed this smoothie.

P.S. One thing I love about this recipe is that it involves grapes (which many smoothies do not), making it the perfect use for any imperfect grapes you have. Surely I'm not the only one who's always getting sour-ish and/or thick-skinned grapes.

Grape Peach Spinach Smoothie
adapted from Simple Green Smoothies
Serves 4 (6 small portions, which is what we did; or 2 large ones)
Prep time: 5 minutes
Cost: $5.00
grapes; 2.00, coconut water: 1.00, peaches: 1.50, spinach: .50 (Buying things on season, on sale will reduce the cost for this.)

Note on coconut water: It's expensive--a couple bucks for a couple cups. I've never bought it before, but I wanted to give it a try. I had a sip and it was very anti-climactic. It's good in this smoothie, but I think any mild juice like apple juice or white grape juice would be great too. Also, I'm not sure how healthy some pasteurized coconut water from Walmart is. That said, if you actually got it out of a a coconut I might buy into its superfood status a little more. And it might be a little less expensive if you were to use the whole coconut in other ways. If you wish to simplify this recipe, just use some juice or water.

2 C grapes (I used green)
1 C coconut water
2 C peaches (I used frozen)
2 C spinach or other greens (I used mixed baby greens)

Blend in a decent blender that blends things smooth. Enjoy.

PRINTABLE RECIPE

Monday, August 3, 2015

Easy Home-Canned Grape Juice

Once upon a time, I bought a grape plant. It was labeled as a seedless green table variety. Well, they did turn out to be green, but other than that were a complete disappointment. Each grape has several huge seeds and the skin is thick and leathery. The grapes themselves are edible, but sour and hard to chew with that skin and those seeds. There was really just about nothing to do with these awful grapes and I considered ripping the plant out and cutting my losses (namely the three years it took me to get an actual crop from my original little plant). We couldn't eat them, or at least no one wanted to. I used them in my juicer and made a raw juice that was almost undrinkable in its awfulness.

But I remembered that my husband had said that his mom used to can concord grapes for juice. Naturally, this conjured up nightmarish images of me peeling grapes and then squeezing them through cheesecloth like some kind of Roman slave girl. But wait--Kip said that his mom had just put the grapes into jars with some sugar and water and canned them. Then, when they wanted the juice, they poured out the liquid and there it was.

And that, my friends, is pretty much how it is. Grapes, sugar, boiling water into a jar. Process for 25 minutes. Done. 

The first year I made these, I followed the recipe I will give you below. This recipe will give you juice at just the right sweetness and consistency. However, Kip said that his mom put more grapes into the jars and made a sort of grape juice concentrate, which they then added water to until it was just right. I liked this idea because it saved on jars and canning time. This is what I have experimented with this year (I'll let you know how it turns out later). The reason I'm telling you this is to invite you to experiment as well if you wish (or have limited jars or time for canning stuff). But if you want the tried and true recipe, then go with the one below.


There's really no way to make this picture pretty. I'm sorry about that. This stuff looks super ugly in the jars. It probably looks prettier if you have concord grapes, but even then the grapes are going to get wrinkly and pale and burst and just generally look like grumpy grape spinsters. However, once you strain them out and just have the juice, it's really perfectly normal-looking. I hope to get a pretty picture of that for you in a week or so when we can't wait any longer and open up our first jar. But until then you have these ugly pale bald grapes to look at. So, sorry.

An opinion: I realize that this has added sugar. I realize that if you go to the store and buy grape juice it will say that it's 100% juice and doesn't have any added sugar. This may lead you to believe that that juice is more healthy than this one, but I'm not so sure it is. I'm not sure how store-bought juices get their mega sweetness,but it has something to do with using a concentrate (aka--syrup, which is, yes, made from fruit, but still a concentrated sugary form thereof) and then has water re-added. It's processed and pasteurized, and I suppose that's good since you're buying it from the store, but you've lost a lot of the good stuff juice can have through that process. We've processed (cooked) our grapes too, but in this processing process, we've left on the skins and left in the seeds, which will sit there for months imparting their goodness (that's what makes for all those good anti-oxidants in wine and grape seed extract) to your juice. Anyway, sugar or no sugar I just think this is better for you. And you don't have to add the sugar. My grapes are kind of the grossest grapes ever so I do, but if yours are kind of alright, then you can leave the sugar out. If you taste the juice after it's done and decide that leaving the sugar out was a terrible mistake, you can always add it and stir it into your juice.  

Easy Home-Canned Grape Juice
adapted from Cooking, Canning, and Gardening
Makes: recipe for 1 quart sized jar--multiply as necessary
Prep time: This depends on how many grapes you have. One thing I like about this recipe is that it can be done with a small or large amount of grapes. So if a friend gives you a few clusters of extra Concords from her garden, you can whip up a few jars of this and it's no big deal. Or you can do a bunch if you've got the grapes and time/inclination for such a project. If you're doing a batch of five jars, the prep is going to be about 30 minutes if you know what you're doing and can multi-task (sterilize jars as you pluck the grapes off the stems and clean them).
Processing time: 25 minutes
Cost: My grapes are free, so I don't know what it would be if you bought them, but who buys grapes to can them? You'll also need to buy jars, but--again--if you're canning you probably already have those. Sugar is about $.05/jar, and you'll need fresh lids, which will cost a couple bucks for 12 lids.

Note on grapes: As I said above, I have no idea what kind of grapes I'm using since they were obviously mislabeled at the store where I bought them. I know that Concords work beautifully in this recipe. And I'm guessing that any grape with seeds and a thick skin is going to juice well with this process as long as it's not some crazy wild grape.

1 1/2-2 C grapes, cleaned, stems removed
1/4-1/2 C sugar
boiling water to fill the jar

Sterilize as many quart jars as you think you'll need for the amount of grapes you have. You can do this by washing them in the dishwasher or putting them in a pot of boiling water. You'll also want to sterilize your lids.

Clean your grapes. I put mine in water and rinse them off. Then you remove them from the stems (yes, friends, that is a pain, but not as much as squishing your grapes and/or putting them through some frankensteinian machine would be). As I remove them I rinse them again. You want all the dirt and bugs and spiderwebs off. (Unless spider juice is your thing--I'm not here to judge.)

Put 1 1/2-2 C worth of grapes in your sterilized jars.

Add 1/4-1/2 C sugar. (Note: You can always add more sugar after processing if you strain out your juice and find it too tart.)

Pour boiling water into your jar, leaving 1/2 inch head space.

Put your lids on. Then put your metal rings on.

Put jars into a big pot full of water to process. You should have enough water in the pot that the water is about 2 inches above the jars you're processing. You'll process (boil) for 25 minutes (so don't start the timer till the water is boiling).

Take them out and put them on the counter. The lids will pop and seal. If they don't for some reason, just put that jar in the fridge and drink it within the next couple weeks.

I think this juice is best when it's had a week or two at least to sit and do whatever it does, but you could pop one open that night and drink it if you wanted.

When you want to use this, pour the juice through a fine-mesh strainer. I wouldn't crush or press too much on the grapes--if you do, a cloudier, more potent tasting, pulpier part will come through--that's fine if you're okay with it, but if you want juice that looks like juice, not cloudy weird stuff, then just pour your juice through the strainer.

PRINTABLE RECIPE

Thursday, November 20, 2014

Sunrise Juice


Photo


I don't hate the winter; in fact, I kind of like it. But that doesn't mean there aren't those days that feel like a black and white postcard, only colder. To make matters worse, those days often come on the cusp of too much food or perhaps just the wrong types of food. Never fear, this juice will fill your life with a pop of color and nourish you while we're here. It comes in two versions. Both have a citrusy base with a bit of carrot. But one uses beet for fabulous color. It's seriously bright, dark pink and lovely. It does, however, have a bit of the beet flavor. If you don't like beets, you just won't like it. The other version uses ginger for fabulous fabulousness (seriously, if you ever have a cold or feel under the weather, drink this--you'll never need ginger ale again). This ginger version is my favorite juice I've ever made. It really is like ginger ale in juice form and is amazing. Also, it clears your sinuses and just is awesome. 

I realize that juicing can be a pain and that juicers can be expensive. I got a big juicer once off of freecycle. It was a score to be sure, but it's worth looking at freecycle or cheapcycle or craigslist. Juicers tend to be the types of things people buy in a fit of zealousness and then never use. I also have an attachment for my Magic Bullet (purchased from a yard sale by my husband, and possibly the best yard sale find ever). Even if you don't get it from a yard sale, a Magic Bull might be a worthwhile investment. The juicer attachment is small and super easy to use AND CLEAN (which is saying something for a juicer), and it can make a single-serving juice wonderfully. That said, you can enjoy the citrus of this juice with a simple (and much less expensive) citrus juicer (you can get the electric one for under $10 and the ones where you just press the orange onto the juicing top for probably a buck or two at Walmart). If you have no juicer at all, you could blend this with a glug of carbonated water, (and tell me how it turns out). 

Sunrise Juice
Makes about 1 C 
Prep time: 5 minutes
Cleaning up time: 5 minutes--yup, that's juicing; sorry
Cost: about $1
grapefruit: .40, orange: .40, carrot: .05, ginger: .05, beet: .15

1 grapefruit, peeled
1 orange, peeled
5 baby carrots, or half of a normal carrot
1 inch of ginger, peeled
OR
1 very small beet or 1/4 of a normal beet, peeled

Juice it all in a juicer. 

Drink immediately. 

Note: If using a citrus juicer, but you want to add that ginger, try mincing it and letting it "steep" for a few minutes (by using one of those tea things) in the juice and then removing it. Might not have the same kick, but should give a little flavor. 

Note on juice: I'm not a hard-core juicer, but I do enjoy it and I consider home-made, non-pasteurized juice quite healthy. However, it does oxidize quickly, which means it becomes less nutritious the longer it sits (although a juice with a lot of citric acid like this will keep the nutrients longer than other juices). Also--the purists are going to tell you that you should always drink your juice alone and not with any solids. And you shouldn't eat a meal right after either. You're supposed to wait at least 15 minutes (or more) before having solid food. This is because they say that the benefit of juicing comes from the fact that the nutrients can get more quickly and efficiently into your blood/body without those solids slowing it down. I don't know if this is true, but if I can I try to drink my juice by itself. If I'm starving, however, I don't stress too much about eating food with it. It's still good for you. 

Saturday, December 28, 2013

Mock Champagne (with raspberry option)


Sometimes people drink to loosen up (not at Mormon parties--there we play Qwirkle). But sometimes I think people drink just because it's hard to resist such a pretty drink in such a pretty glass.

Well, non-alcoholic-beveraged friends, now you get to join the pretty party. No more standing around with your Dixie cup, looking twelve while everyone else at the party/restaurant celebrates the season with important-looking stemware. Grab yourself a glass and ring in the new year.

This drink is intensely beautiful. It starts out a light amber color with the raspberries floating on top.


As it sits, a little blush starts to seep into the drink from the berries and over time it becomes redder and redder.

(You can see that this drink has been sitting for a while and is now quite red)

Tip: Get your glasses from a second hand store. They usually have a trillion and you can find a fun assortment or pretty ones for cheap. And then it won't matter if you, your kids, or your party-goers break one.

Note: I should tell you that I don't drink and therefore have no idea if this actually tastes anything like champagne. All I know is that it's bubbly and the color is right (before that raspberry color seeps in).

Mock Champagne (with raspberry option)
adapted from here
prep time: 1 minute
serves 20
Cost: $5.50 (this is about $.27/serving--ha! take that alcohol drinkers)
ginger ale: 2.00, grape juice concentrate: 1.50, raspberries: 2.00

2 quarts ginger ale
1 frozen white grape juice concentrate
raspberries (frozen or fresh)

Combine ginger ale and white grape juice concentrate.

Add raspberries if you wish.

PRINTABLE RECIPE


Thursday, January 24, 2013

Fruit, Spinach, and Yogurt Smoothie


There is much to love on Pinterest. But today I'm going to tell you about one thing I do NOT love: those bogus posts that a) do not link to any kind of real page, b) do not look in the least like the actual thing you make--as if they took a stock photo (yeah, they probably did) and posted it for whatever lame/lousy recipe they made, and c) do not in any way, shape, or form actually work.

Let's take that hair straightening tonic I made last week for example. It called for 2 Tbsp brown sugar and 1 C warm water. Shake together, spray on hair, comb through, and--boom--straightened, shiny, supermodel hair. I like to consider myself a thinking woman. I should have realized that brown sugar + water equals stickiness (do I or do I not have 4 young children?). And, yet, there on the pin was a picture of a girl with the most beautiful, shiny, straight hair ever. How could I not believe? After the surface of my bathroom was entirely covered in a thin layer of sticky (from spraying my long, thick hair with sugar water), after my hair was not straight and distinctly crunchy, and after I felt like I needed a another bath from the sticky mist wafting down to my arms and everywhere else, I realized that some posts on Pinterest aren't really posts at all. What they are exactly, I'm not sure. I would call them advertisements because they do everything an advertisement does--give you an unrealistic picture of a subpar item or idea. But there's nothing for sale so I don't understand what is to be gained by posting bad advice with gorgeous picture. Anyone get it?

Okay, okay, so why the rant? Because I planned to make a greenest of green green smoothie. I even wanted to call it that. To look at the deep green elixir on Pinterest that seemed like it must have been formed from the rivers and greens of the garden of Eden itself, I was a little surprised at the light greenish, (kind of sort of almost brownish), speckled with pink drink (doesn't make for the best post title, does it) that I wound up with. It just didn't seem quite as virtuous as the lovely shot o' green pictured here (which, incidentally, also has no real post to go to--hmmm). But I drank it anyway. Almost all of it, as a matter of fact. And it was very very good (just like the garden of Eden after all). And then I realized that for breakfast I'd already consumed 1 apple, 1 banana, 1/2 C strawberries, 1 C plain yogurt, 1 C spinach, and half an orange. Welcome 5 fruits and vegetables and one healthy dairy into my January system. And thank you.

So although you don't get a Greenest of Green Green Smoothie, I present to you the Light Greenish (maybe a little brown on the color spectrum) with Specks of Pink Smoothie. Bottoms up.

Fruit, Spinach, and Yogurt Smoothie
adapted from random post-less pin on Pinterest so go ahead, pin this instead
Prep time: 5 minutes
Cost: $1.55 for about 3-4 C
apple: .50, banana: .15, yogurt: .40, strawberries: .40, orange: .10

1 generous C spinach (mine was actually a combo spinach, baby bok choy, and baby chard because I'm an  amazing human being--or maybe because I stumbled upon such a big bag of greens at Walmart last week by accident)
1 apple (I used a very sweet pink lady--pink lady I love you)
1 banana (mine was frozen, but doesn't have to be)
5 strawberries (frozen)
1 C yogurt (I used full fat)
1/2 orange (I sliced the rest and fed it to the minions)
1/2 C water (maybe in a high-end blender you can skip, but mine wouldn't blend without this)

Blend. If you've got a mediocre blender like me what you want to do is pulse it a few times and then start blending on a low-ish setting until it's getting chopped up/mixed. Then up it to a higher setting so that it actually smoothie-i-fies and you don't feel like you're drinking fruit salsa (not that there's anything wrong with that).

PRINTABLE RECIPE

Monday, January 21, 2013

Hot Pink Smoothie


This is the most beautiful smoothie you'll ever make. It's also one of the most unusual. It's also one of the most well-rounded (protein, fruit, veggies). It's vegan if you skip the honey.

If you hate beets, you WILL NOT like it. I'm sorry and I wish it wasn't so. But the beety undertones are inescapable, even if you add a bunch of sugar to it like I did for my kids. So if you don't like beets, you might want to omit them and go for a Light Pink Smoothie instead. That said, if you are going to eat raw beets, I can't think of any other or better way to do it than this smoothie. Also, as just one more note on taste: The first sip is kind of like, "Whoa, earthy/beety." But the more you drink, the less striking/shocking that flavor is. So, unless you really hate beets, it might be worth giving a try. Just give it more than one sip of a chance.

Having a fancy (Vitamix or Blendtec) blender would be nice for this. I don't and even my mediocre blender could turn out a decent smoothie, but without the very high-end blender you will still have a few small chunks here and there and will never achieve silky smooth nirvana. That said, I will give some tips for how to make this as very smooth as possible in a mediocre blender.

The other comment about this is that it's not cheap. The Thai (young) coconut cost me $2 at the Asian store, dates are pricey, and cashews are pricey. It's somewhat balanced out by the uber cheap beets and carrots, but not entirely.

I've wanted to try this recipe for a long time. Green Smoothie Girl created it and talks about it though she never gives the recipe, hoping instead that one will buy her book (who can blame her). But even Green Smoothie Girl cannot escape Pinterest and that's where I found this.

Hot Pink Smoothie
Makes 2-6 servings (2 large--full glass, 4 "normal", and 6 small)
adapted from The Royal Cook
Prep time: 15 minutes
Cost: $2.55 (still only about $.60/serving. You can't even get a soda for that at McDonald's)
beet: .15, carrot: .10, cashews: .40, dates: .40, strawberries: 1.50

A note on Thai coconut: First of all, it is also known as "young" coconut because (shocker) it is actually an underripe coconut--it hasn't developed that tough brown cover we associate with coconuts. Usually you will find them with the outside (which is green) shaved off and it will look white and naked like this. You can also visit that link for tips on how to get it open. I, being ignorant, didn't visit any sites about how to get it open and just took a (sharp) knife and cut the bottom (not the top, like everyone recommends) off and then, whoosh, stuff started leaking out, so I held it over my blender and voila. Ignorance is bliss right. After you've cut the bottom off or whatever method you choose to get it open and gotten the liquid out, stick a spoon in it and scoop out the soft, gelatinous flesh (it doesn't look like something you'd love to eat, but trust me, it's good). If your milk or flesh smells rotten, it is. Don't eat it. You want to look for a coconut that is firm and doesn't have any moldy or soft spots on the outside. Another tip is to shake your coconut. The coconut water shouldn't slosh around. If it does, there is a leak in the coconut and this is allowing bacteria into your coconut (not to mention the fact that you're getting less bang for your buck, people). The flesh can be white, but mine was light pinkish-purple. Some say that that means it's got bacteria in it, but (again--blissful ignorance) I ate it and it was fine. It also smelled perfectly good and coconut-y.

1 Thai (otherwise known as "young") coconut
1/2 beet, peeled and diced
1 carrot, peeled and diced
1/4 C raw cashews
1/4 C dates, pitted
1 1/2 C frozen strawberries
1-2 Tbsp honey (optional, but I liked it better this way)

Instructions for making this in a mediocre blender:

Open your coconut using my expert (not really) instructions above. Pour the liquid into your blender and then scoop out the gelatinous flesh and add that. Blend this.

Add beet and carrot and blend. Add dates and blend. Add cashews and blend. The idea being that you want to get one thing fairly well blended before you go adding other things and overloading your sadly mediocre blender. When this stuff is all blended to the best of your blender's abilities, add the strawberries. Pulse and blend. The smoothie should get thicker and smoother. It should be the consistency of a very melty milkshake. If it's too runny (as in looks like just a juice), then your coconut may have had a generous amount of "milk." Add some more strawberries and blend.

Add honey if you like (or sugar or agave or whatever it is you use as a sweetener).

PRINTABLE RECIPE

Monday, December 10, 2012

Cranberry Orange Juice


This morning when I did my weekly fridge look through, I found 2 bags of cranberries that needed to be used. From one I made my stand-by cranberry sauce. The other I planned to use for more cranberry relish, but as they sat there in all roly-poly glory on my countertop, I realized that if I juiced them, my kids might actually consume them.


It's tough to be brilliant, especially when it involves peeling a bag full of citrus that seem to have no desire in this world to lose their skins. Nevertheless I persevered. I'm glad I did because what I got was a pretty little juice with a good girl kind of a bite. I liked it. The kids and Kip wanted a little sugar and I gave it to them--figuring that it was still a good turn better than Ocean Spray (fingers crossed).

I know that juicing requires a special tool (like this one: Breville BJE200XL Compact Juice Fountain 700-Watt Juice Extractor), but in the winter it's something we do once a week or so when the oranges, etc. start to sell for really cheap (right now I can get them for $1.50/3 lb at Aldi and/or Ruler foods).

And now I will give you what wasn't supposed to sound like an advertisement for juicing, but that sounds like an advertisement for juicing (when all I really want to do is explain why the heck I bother posting juice recipes here now and again). Supposedly juicing allows you to absorb nutrients more efficiently from your food (because there isn't all that refuse to slow the nutrients down or carry them out of your body). You don't get that from store-bought juices because they are pasteurized (heated), which kills many nutrients and because they are stored for a long time, which kills nutrients. Is juicing the cure all for your December? Well, um, it depends on how many cookies you've eaten. But let me say this: I don't know if juicing will fix all your health problems, but a couple of times when I have had a cold, I've juiced a bunch of oranges and felt better the next day. Yes, that is a little witch-doctory. However, if nothing else, juicing allows you (or your kids/husband) to get some extra fruits/veggies into your/their diet, and for us, it allows a nice, comfortable, safe way to introduce unusual fruits.

And yes it is the best OJ ever, so it's just a bonus if you can sneak in some other stuff too (carrots, pomegranate, cranberry). It's a good foil for the 17,000 cookies my kids ate this weekend. Amen.

Cranberry Orange Juice
Makes 3-4 C juice
Prep time: 20 minutes
Juicing time: 10 minutes
Cost: $2.33
cranberries: .83, tangerines: 1.50

1 12-oz bag cranberries (ours probably ended up as less, since we had several wilty cranberries that got thrown out)
3 lb bag tangerines or oranges (we used tangerines because that's what I had)
2 Tbsp sugar (optional)

Wash your cranberries. Peel your oranges.

Juice them per the instructions of your juicer.

Taste. If it's too sour for you, just give it a second and think about it. You might decide you kind of like it--I did. I loved it. In fact, I'm craving more right now. Unfortunately I added sugar to the rest so my kids would drink it. However, if you taste and think and it's still got too much kick for you, you can add a bit of sugar. 2 Tbsp was plenty for us (and we are not exactly Spartan in our sugar usage).

We came out with about 4 cups of juice. It's not a lot, but since the produce was very cheap, it still came out at a good price for fresh juice.

PRINTABLE RECIPE

Monday, October 15, 2012

Crock Pot Apple Cider


Today is our Secret Recipe reveal day. I'm pretty excited about it because this month I got to make a recipe I've always wanted to learn to make and that has always seemed too esoteric for normal people. Apple cider. I mean, traditionally it's made from a press. And then spiced. In fact, I have heard (possibly from a children's picture book, though I can't remember my source) that cider was spiced differently by different apple farmers, so each orchard had its own variety of apple cider. Some of the recipes were kept secret and carefully guarded so others couldn't replicate them and therefore there'd be a monopoly on the tastiest ciders. Come on, it's kind of interesting.

Lucky for you, this month--thanks to Jennifer at Peanut Butter and Peppers--I now have a cheater way to make a cider that is really delicious. No press required, thank you very much. I thought it tasted so much better than cider from a store. And just like cider makers of bygone eras, you can try different spices until you get it just how you like it.

You know what else I love about apple cider? It's a cheapskate thing at heart. Originally, it was a way to use the fallen, bruised apples--the ones the couldn't be sold for their beauty and grace. Those ones got made into sauces and ciders. That's right up my ally. Even for those of us without apple orchards, this is pretty cheap if you make it in season. My generous gallon ran me under $4.00. At the store, it's usually at least that much.

You know what else is right up my ally? Laziness. Is there any peeling or deseeding in this recipes? Nope nope and nope. You cut things into a couple big chunks and throw them into the pot. Love it. Then at the end you strain/press them out and you've got your cider.

You know what else is right up my ally. Drinking hot cider on cold, cozy nights. Even though it has some added sugar, I still feel better about it than a cup of hot chocolate or eggnog. I mean, it's not gazpacho or anything, but as far as hot festive drinks go, it's pretty virtuous.

Jennifer made this on the stove top. It takes about 3 hours (mostly in simmering time, not in active cooking time). I thought it'd be interesting to give it a try in the crock. It was delicious and super easy. I loved that I could put it in at night and have hot cider in the morning (who needs coffee--blech). And it sure smelled good.

Crock Pot Apple Cider
adapted from Peanut Butter and Peppers
makes approximately 1 gallon
Prep time: 5 minutes
Cook time: 8-12 hours in crock; 3 hours in pot
Squeeze/strain time: 10 minutes
Cost: $3.35-3.75
(apples: 2.00, orange: .50, sugar: .35, spices--these are much pricier since they're whole, but I'm guessing on cost here--.50)

Note: If you don't have all these spices whole, you can make a little packet of spices. Use some coffee filters or a bit of linen cloth and wrap your ground spices into it. Then tie it with a twist tie and put it in your pot. I did this with nutmeg and a bit of cinnamon (I only had 2 whole cinnamon sticks on hand). You might have to guess the measurements a bit (I did), but I used 1/4 tsp nutmeg and 1/2 tsp cinnamon and all was well with the world.

12 small or medium apples (Jennifer recommended assorted types, but I only had honey crisp since my kids ate all my golden delicious)
1 orange
1/2-1 C brown sugar (I actually used 1 1/4 C and did about 1/2 C of that granulated sugar)
4 cinnamon sticks
1 whole nutmeg
1 Tbsp whole cloves
1 tsp whole allspice
water to cover

Cut the apples and orange into quarters (or halves if you're extra lazy). Throw them in the crock pot (no peeling, no coring). Add the spices and 1/2 C sugar (you can add more later if you'd like). Cover it with water. (This filled to the brim my 4-6 quart crock pot--that's right; I'm not sure which size it is.) Put the lid on and set it to low. I left mine overnight (probably for about 14 hours total, though it would have been ready before then). If you wanted it quicker, you could set it to high.

When everything is mushy and fragrant, mash the fruit up. It'll look a little apple-saucy. Then pour it through a cheesecloth or tea towel into a large container. Squeeze out all the deliciousness (though you may have to let it cool a bit before you do this). Taste it for sugar and add more if you need to, and stir until dissolved.

Serve warm or cold. I love it warm (love love love), but most of my family prefers their cider cold (weidos).


PRINTABLE RECIPE

Thursday, February 23, 2012

Banana, Almond, and Oat Breakfast Drink


You know how they say that you shouldn't shop hungry. Well, maybe you shouldn't look at the Pinterest home page hungry either. Yes, definitely not. I'm lucky that I stumbled onto a banana smoothie instead of, like, Quadruple Chocolate Bipass Brownies. Anyway, I don't know what it was about this picture--there were almonds and a banana and some oatmeal, but the Pinterest link to the recipe wasn't even working and I didn't let that stop me. I was hungry; I was dedicated; I had to do a manual search on the internet where I typed in key words. I assure you that it was a grueling 47 seconds. But I did it all for you. Okay, I didn't. I did it for me. And I'm really glad I did. And you'll be glad I did too. Because this is so ridiculously good and I don't even know quite why. The flavors, they're just meant for each other.

And now I gush. I realize that I posted a smoothie yesterday and that it is surely against some type of food blogging commandment to post two smoothies in a row. Which is partly why we'll be calling this a breakfast drink. The other reason is that while it could perfectly well be called a smoothie, it really is a sort of breakfast drink. It's filling (nuts, oats, banana, milk, and yogurt) and well rounded (protein, whole grain, fruit, dairy, healthy bacterial cultures, calcium) and very satisfying to drink. Also, it takes two minutes to make. Also, the way I made it it could be a raw food. Also, my version is--if I don't mind tooting my own horn, and where good food is concerned I really don't--my version is approximately 700 times more amazing that their version in taste, ease, and even healthiness (and potential for rawness). Chiquita's recipe used cooked oatmeal (in a smoothie--ehhh, I don't know) and ice, which my blender simply cannot handle and which waters the whole thing down so that it requires honey or sugar to sweeten it). With this recipe, you throw frozen banana, nuts, quick oats, yogurt, and milk into a blender and there you go. I wasn't sure how the nuts and oats would do in my cheap-o blender, nor did I know how the texture would be with oats and milk hanging out together (would it thicken into an unbearable consistency/texture?). On both counts I was really pleased with the results. I have a lame blender, but I'll be darned if those nuts or oats gave me any trouble. And the texture (while not perfectly smooth and therefore not acceptable to some members of this family) was, in my opinion, perfectly perfect in every way and not gloppy or gooey at all, which had been my concern. Seriously, it's an awesome drink. It's like taking the best of oatmeal and the best of banana smoothies and creating a perfect offspring. And if that's not good enough, it's so so fast--no more than 2 minutes. And so transportable. I'm not going to advocated eating on the run because we all know it's not the best habit in the world, but if the need arose you could totally consume this in the car on your way to work, soccer practice, or the gym (where it is especially well suited as it's a filling, but not heavy-feeling energy-giver). Move over Slim Fast. In fact, why don't you take a nice ride down the porcelin express. We won't be needing you and we certainly won't be wanting you any more (if, um, we ever did).

Banana, Almond, and Oat Breakfast Drink
adapted from chiquita banana
Serves 1-2
Prep time: 2 minutes
Cost: $.75
banana: .15, milk: .08, yogurt: .10, nuts: .40, oatmeal: .02)
Calorie count, should you care for that sort of thing (about 400 calories if eaten as 1 serving)

Note: Your banana must be frozen in order to make this smoothie. I always have frozen bananas on hand since I take my old ones and break them into chunks and throw them into Ziploc bags. However, if you are not me, and don't have any on hand, you can freeze them fairly quickly by slicing them and putting them single layer on a tray or cookie sheet in the freezer. (They should be smoothie-able in about 20 minutes.)

Another note on banana: The riper, the better. Not rotten, mind you, but brown spots=good.

1 banana, frozen and broken into chunks
3 Tbsp yogurt (I used vanilla since I'm out of plain, but the banana has enough sweetness to carry plain yogurt)
scant 1/4 C or about 25 almonds (other nuts are good too; I made it with walnuts this morning and I think peanuts would rock as well)
1/4 C quick oats (old-fashioned oats would probably work wonderfully too)
1/2 C milk
1 tsp crunchy peanut butter (optional, but I like it)

Throw it in a blender and blend until smooth.

If you want to be a super star with this, you can also add 1/3 C baby spinach (you won't taste it and you'll barely see it, although there will be a greenish hue to your drink) and 1-2 Tbsp kefir (again, you won't taste this amount and it'll give you a little probiotic boost).

PRINTABLE RECIPE

Wednesday, February 22, 2012

Banana Orange Smoothie


Yesterday I almost had a cold. I could feel it coming on strong. My throat was scratchy, my nose was runny, I was tired, I was blah. I think we know that blah is a very bad symptom indeed and that it means we're going down hill fast. I figured I had nothing to lose at that point, so I combated it with a not really scientifically proven method: namely the consumption of a whole lot of Vitamin C. I took several actual vitamins and at lunch time I juiced about 4 oranges for myself. Supposedly juicing allows the vitamins/minerals to be absorbed much more quickly and efficiently into the system. And supposedly fresh juice is the only way to go if you want that benefit. I don't know if any of that is true, but I know that by that evening I was feeling much better and today I feel even better. So thank you Vitamin C and thank you nutrition myth that seemed to work and thank you Aldi for making the oranges affordable.

This, er, recipe is a result of a little experimenting I did yesterday while juicing bajillions of oranges. I made this for Kip since I was going for straight up orange, but I did have a little taste and it was well worth tasting.

Whether you use fresh juice or not, this smoothie is worth making because it is so non-controversial. It contains nothing green or chunky or un-sweet. That's usually a win for us, so even though I'd just love to sneak some spinach in, I might just go with the heavy doses of C and Potassium and call it good. It's better than graham crackers for an after school snack, that's all I have to say.

Additionally, this isn't a smoothie that requires a food science and nutrition degree. But it's a good idea anyway.

Banana Orange Smoothie
Serves 1-2
Prep time: 2 minutes unless you have to juice the oranges, which will add several more minutes
Cost:

Tip for bananas: When they get brown and spotty, I usually break mine up into inch-long chunks when they and throw them in a Ziploc bag in the freezer.

1 ripe banana, frozen
1-1 1/2 C orange juice, can be freshly squeezed or not

Put in blender and puree. Yeah, not food science. If you want it thicker and more milk-shake-like, add more frozen banana. If you want it wetter and more like a cold, slushy sort of party drink (what we went for), add more OJ.

Saturday, February 18, 2012

Pumpkin Smoothie: A Comparison


Throughout the winter we tend to eat a bunch of pumpkin-y things. Most of them aren't really that healthy, but we like to pretend that they're just bursting with nutritiousness on account of their being orange and all. And I do make pumpkin smoothies, which really are pretty darn nutritious. My go-to is a pumpkin smoothie with a bit of banana and a lot of room for experimentation and interpretation. It is good, but it is not perfectly perfect in every way. There is a part of me that suspects that the flavor I'm looking for in my smoothie is really the flavor you find in milkshakes not smoothies. And, yeah, it'd be nice to replicate that in a perfectly virtuous, non-iced-dessert environment, but I'm not quite sure it's ever going to happen. Still I'm not one to shut my eyes to opportunity.

Several months ago, I noticed this smoothie on Pioneer Woman's blog. It used pumpkin pie filling which, while not my nemesis, is far from being my favorite thing. Foods that contain liquid syrup--I don't know--they're just not the kinds of pumpkin foods you can settle down with and make a life together. So I dismissed her recipe and figured I could do even better with a few small tweaks. My first batch was made with pumpkin, plain yogurt, milk, and even a bit of kefir. It ended up needing some serious love--love to the tune of 1/2 C extra sugar.

The next time I went to the store, I bought some pumpkin pie filling. It was just one of those things I had to do. I had to see if I'd been outdone by a slightly grody prepared food product. Answer: Yes, I had been outdone by a slightly grody prepared food product. With the help of Pioneer Woman of course--I have to admit she's pretty good at helping a lot of foods along into something really good. At any rate her version was way better than mine. Okay, okay, I thought, maybe I should just throw in the towel and accept defeat. Her smoothie was, after all, still loaded with vitamin A, not to mention the protein, calcium, and even some good bacterial cultures from the yogurt.

However, when I did a little number crunching I noticed that her pumpkin pie filling version contained less Vitamin A than mine--about half as much. Yes, both were loaded with it, but mine was double loaded (100% of the daily recommendation/serving as opposed to 50% of the daily recommendation/serving). Also, hers had  more sugar. This gave me the motivation to give my smoothie a few more tries.

The result: If I added a bunch of sugar I got mine pretty darn close to her version and still with double the Vitamin A. However, in the end I just accepted less sweetness and used a bit less sugar and felt less guilty and I guess that's just how I roll.

Pumpkin Smoothie
adapted from Pioneer Woman
Serves 4
Prep time: 3 minutes
Cost: $1.65
(pumpkin: 1.00, milk: .40, yogurt: .25)

1 small (15 oz) can pureed pumpkin
1/2 C vanilla yogurt (you can use plain, but to compete with Pioneer Woman's smoothie, you'll have to add another Tbsp or 2 of sugar)
3 C milk (it's best with whole or raw)
4-6 Tbsp sugar
1 tsp pumpkin pie spice

Freeze pumpkin in a plastic container (or in ice cube trays).

Put frozen pumpkin, yogurt, sugar, and milk in blender. Blend until smooth. Blend in pumpkin pie spice and garnish with another sprinkle of it or a sprinkle of nutmeg.

Thursday, January 5, 2012

Three Ways to Healthify (And Justify) Your Hot Chocolate

Generally speaking, I don't need me a cup of cho.


But lately it's been cold here, and at night when I'm tired and wishing to relax, wrapping my hands around a hot mug of something chocolate steamy... Well, it helps me understand people's coffee addictions a little better. It was more than just the satisfaction of a sweet craving. It was kind of soul-satisfying: relaxing, warm, comforting.

What it wasn't was a really healthy choice (because I wasn't about to whip up something with frozen berries and spinach in it). Oh, sure, there could have been worse choices made (I'm looking at you 16 oz Starbucks caramel hot chocolate. Or you, box of truffles left over from Christmas.) My hot cocoa at least contained a bit of calcium and some much-loved vitamin D and let's not forget all those, um, antioxidants from the chocolate. Who am I kidding? This is, like, health food. I think I'll have another.

And yet. And yet, it would make me feel a little better to give my cold weather indulgence a bit more of a golden halo. Because self deception can never be too thorough.

1. Add 1 Tbsp pumpkin puree or sweet potato puree. One tablespoon doesn't sound like a whole lot, but it actually packs a fairly decent nutritional punch. Just 1 Tbsp pumpkin puree accounts for 35% of your daily Vitamin A needs. Whisk it in well and you won't notice it, until perhaps the last gulp. Be warned that the last gulp might be a bit, er, pulpier than normal (depending on your whisking skills and all, so whisk it well).

2. Add 1 tsp coconut oil. I know it seems slightly counter-intuitive to add oil to your chocolate to make it healthier, but the coconut lovers have lots to say about how healthy it is. According to them (and who am I to disagree with science), it increases immune function, fighting viruses and bacteria and lots of other good stuff too. Also, it tastes wicked good.

3. Add 1 tsp kefir. Add it after you've warmed your hot chocolate so you don't cook out the probiotics in the kefir. This is good for your intestinal health and adds a wee bit of protein and calcium). Which you'll be needing of course with your new unhealthy, but thoroughly justified habit.

LinkWithin

Related Posts Plugin for WordPress, Blogger...