Showing posts with label dairy. Show all posts

Monday, February 5, 2018

Crockpot Greek Yogurt for Dummies

BEST OF THE TASTY CHEAPSKATE 


I mean, really. It's so easy it will change your life forever

Before I begin with this INCREDIBLY LONG post, let me say that this is super easy. In a nutshell, this is what you do. 
1. Heat 1 gallon milk in crock pot to 180 degrees.
2. Let cool to 120 degrees. 
3. Whisk in 1/2 C yogurt. 
4. Put lid on crock pot and put crock pot in oven (an oven that is OFF). 
5. Let sit for 6-10 hours in oven. 
6. Strain through tea towel to desired thickness. 

But below I've detailed all those steps and tried to trouble shoot and everything. 

(Note: If you want something EVEN EASIER that doesn't involve actually making yogurt, scroll to the bottom for a trick to make normal store bought yogurt into Greek yogurt.) 

Now on to the post. 
Besides being life-changing in every way, this yogurt will save you a stinking butt load of money if you like Greek yogurt. For $2 (TWO DOLLARS!) I got no less than 10 cups (TEN CUPS!) Greek yogurt--that's $.20/cup if you're math impaired (don't worry--math unnecessary for this recipe; brains in general unnecessary for this recipe). Twenty cents for creamy, perfect Greek yogurt.

You can eat it with anything. I like it for breakfast with some jam mixed it. My kids like it best blended with jam and put into popsicle molds and frozen. My friend serves it as a dessert. She mixes it with jam and then adds a squirt of whipped cream to the top. But don't think it can only be served sweet. This thick Greek yogurt can be used as a substitute for sour cream and cream cheese. It can be used in savory dips, for ranch dressing, with tacos.

And in case you missed the whole Greek yogurt bandwagon (or were maybe too poor to buy a ticket), Greek yogurt is awesome and loveable because it is a) delicious and creamy, b) higher in protein, lower in sugar (lactose), and lower than sodium than regular yogurt. And did I mention creamy awesomeness? It's also just way versatile--it can really be subbed for a lot of things.

Let me say that making yogurt is not entirely new to me. I even have a yogurt maker (which I may now sell) that has cute little cups with lids. I used it faithfully when we lived in California, but when we moved here, it became cost INeffective. I couldn't find small amounts of plain yogurt and after I'd bought 32 oz of plain yogurt, well then it seemed silly to bother making little cupfuls of yogurt. And my homemade yogurt always came out somewhat runny. This is true of yogurt. Most (if not all) of what we find in the store has been artificially thickened--cornstarch and gluten are both in Dannon. Homemade yogurt tends to be thinner. Real Greek yogurt, on the other hand, is thick because much of the whey has been strained out of it. But because of that, it is often very expensive. Thus, for the last several years I haven't made my yogurt; I've just bought it. Until the fateful day when my friend (the dessert yogurt making one) brought over some yogurt with raspberry jam in it. It was better than ice cream. Oh, yes, it was. Thick, creamy, and beautiful. And it had cost her almost nothing. And it had been stupidly easy. Now that's what I'm talking about. Because many of the other homemade yogurt recipes I knew of (the ones without the handy yogurt-maker) seemed hard. There seemed to be lots of variables that could cause it to fail. Some required you to double boil your milk (I double boil nothing, people, nothing). Some gave detailed instructions for putting it in a cooler or oven and then keeping it consistently warm but not hot. If you got too cool or too hot, you'd wind up with curdled, runny nasties instead of yogurt. Yes, it was all too frightening. I needed fail proof. I needed dummy proof. I needed distracted mom proof. My friend provided that. 

She had used a pot to make the yogurt. You can too if you don't have a crock pot. A regular pot works great, but it requires more of your attention. A crock pot, on the other hand, requires only a one-minute attention span and perhaps and IQ of 32 or so.

Now, what do you do? Let me pull back the curtain so you can be amazed.

1. Put 1 gallon whole milk into your crock pot. Put lid on. Heat until 180 degrees. (Note: I recommend heating it on low. You can heat it on high, but sometimes that means the bottom will get a little too hot, which is--honestly--fine, but sometimes it makes your yogurt come out browner in color.) This should take between two and four hours (depending on your crock pot). If you don't have a thermometer (though one is useful), it will be bubbly/foamy all over on top without actually boiling.) Note: If you get this too hot, it's okay. It does turn into a browner colored yogurt, but tastes normal, unless you were to actually burn the bottom, which I never have in a crock pot.)
2. Remove lid and let cool to 110-120 degrees (if you don't have a thermometer, this will feel warm when you stick your finger in, but not hot--this is the temperature you'd kind of want to get baby formula to--warm, but nothing that would scald a baby's throat). Note: It will sometimes form a skin. My kids hate this because they claim it makes chunky bits in the finished product, so I take a slotted spoon and scoop it off. 
3. Add 1/2 C PLAIN yogurt and whisk it in. (I add yogurt to a small amount of milk in a bowl and whisk in order to keep it from lumping up. Then I put that into the big pot of milk and whisk.)
4. Put lid back on.
5. Put crock pot in oven for 6-10 hours. You don't have to heat your oven or leave the oven light on (though you can and it makes for a steady, warm temperature). You don't have to do ANYTHING. The crock pot provides natural insulation, so it doesn't cool too quickly and the oven provides a space to trap the necessary warmth for your yogurt to yogurtify (it should be kept at a fairly stable 110 degrees; it does this naturally in a crock pot in the oven, so don't worry). That said, I would not recommend you put it into a cold oven (not a problem for us in the summer, but in winter it gets chilly around here). If your oven is cold, turn it on for 1 minute BEFORE you put the yogurt in. Then turn it off. Then put the yogurt in. (Ah, now the IQ requirements have moved up to 45). It will need 6-10 hours to yogurtify. It's nice if you can time this overnight. If you do it during the day, you may want to put a little post it note on your oven that says, "Do not turn on." I do this (yes, I do) because if you or someone you love comes in and decides to make cookies and pre-heats the oven before realizing there's yogurt in there, your yogurt will be ruined and you will be sad. 
A few notes: 
Note #1: Since the original post, I have legit turned the oven on and forgotten I had yogurt in there. Guess what? It was still okay. The yogurt didn't have enough time to get too hot in the preheat stage. Just get it out of there as soon as you remember. 
Note #2: Occasionally, for reasons only the universe understands, my yogurt comes out either very thin, or a little clumpy. Who knows... Imprecise temperature, atmospheric shifts, unhappy yogurt gods. But the great thing is that once strained, this yogurt is still delicious. If it's extra thin, you'll have a little more whey and less yogurt--but still a lot). And the clumps won't matter once it thickens.) 
6. When you take it out, you'll have regular yogurt. Reserve 1/2 C of this for your next batch of yogurt and put that 1/2 C in the fridge.

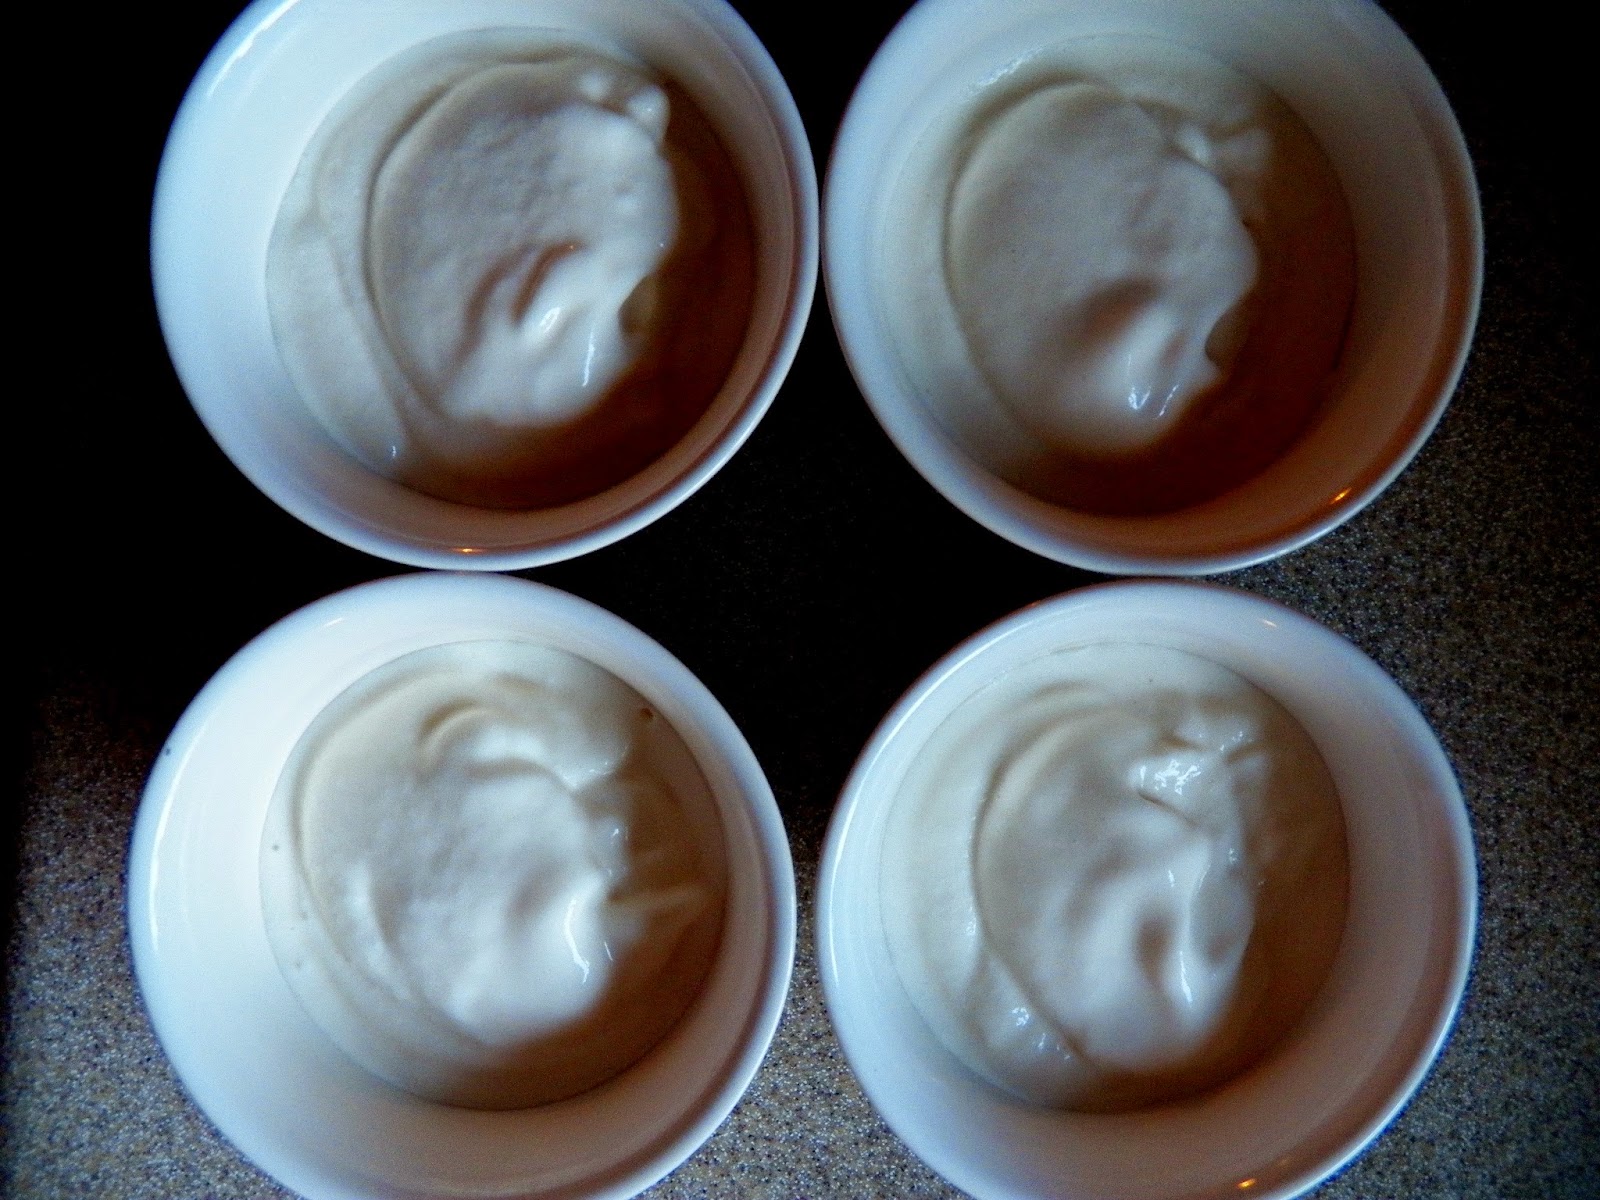
 (It will look like this.)


7. Now: You can eat the rest of the yogurt regular-style if you want (it was actually a little thicker than that which my yogurt maker used to make). But I HIGHLY recommend straining it and making Greek yogurt (because it's awesome, that's why). Get a tea towel. Put it over a colander, and strain your yogurt. You can do this in the sink if you don't want the whey. Or you can strain it over a pan or large pot/bowl if you want the whey (Note: Whey can be used as a milk or buttermilk substitute in some recipes. It works well in muffins and things like that. It's also good in smoothies. I usually save a cup or two because that's all I use. And I throw it away in a week if I haven't used it by then. Straining will take between two and six hours depending on how thick you want your yogurt. I like mine thick. You might give it a stir after 2 hours to get it to strain more quickly. 

I really love mine thick (almost as thick as cream cheese), but the great thing about this recipe is that you can get it to any thickness you like. Here are some pictures from another post on cheater Greek yogurt I did (with a much smaller amount of yogurt). 
 
(Before)

(After)

(See how super thick it CAN get if you want it to.)

Leave it for 8-24 hours and it will get super thick--to the consistency of a soft cheese. You can then use it as a substitute for cream cheese (it has more protein and more healthy bacterial cultures.)


And you're done. You will have a TON of Greek yogurt. In Evansville, we can currently get milk for $.99 at Aldi. And then you'll need a bit of plain yogurt as a starter. Greek yogurt from the store occasionally goes on sale for $1.00/6 oz., but is usually much more. The nice brands can cost as much as $5.00(ish) for 16 oz. or so.

Now to answer some questions:

1. Do I need an instant read thermometer? No, but it is helpful; it takes any and all guesswork away from the process. And you will pretty much earn back the cost of your $9 thermometer in the first yogurt making, so it's a reasonable purchase. Still you don't have to have one. You just might need an IQ slightly higher than 32.
2. What will I do with all that yogurt? The sky is the limit. If you make this stuff, you can stop buying yogurt, sour cream, and (in some cases) cream cheese. You can make amazing smoothies and popsicles. You can do tons of stuff with it. 
3. Do I have to use whole milk? Probably not, but I always do. Still, I'm pretty sure you can make it with any type of cow's milk . However, I won't vouch for taste. True Greek yogurt is whole fat. It's only us Americans who've freaked out about that and developed lower fat versions. It is my opinion that skim Greek yogurt isn't really Greek yogurt at all. It is skim, strained yogurt. Eat it if you want. But my other opinion is that fat (without a lot of sugar) is NOT the enemy. I think natural fats are healthy and filling and great.
4. Why do I heat it and then let it cool? I don't have a complete scientific answer for you. All I know is that if you heat it to 180 you wind up with thicker yogurt than if you don't. I imagine you don't have to heat it that much. I know there are even raw yogurt recipes out there. You'll just likely end up with thinner yogurt. Of course, you'll be straining it, so will still end up with thick Greek yogurt--you'll just have a bit less of it because more will have strained out. Note: Since the original post, I've tried making this recipe "raw" meaning that you only heat it to 110 degrees and then just add the yogurt. It is thinner, but it works. 
5. How do I make it on the stove top? Let's say you don't have a crock pot. You can still make this stove top. It's best to do when you have other jobs to do in the kitchen because it takes a while to heat and needs to be stirred occasionally so you don't want to burn on the bottom. (You can cook it faster, but you'll have to stir frequently or even constantly so it doesn't burn on the bottom.) Also, you'll want to make it in a heavy pot. The time I made it on the stove top, I used a porcelain-covered Dutch oven pot (WITH A LID). You need to do this because when you put it in the oven, it needs a sort of heat-holding pot. Otherwise it will cool too quickly and not set properly. I suppose you could use a normal pot and insulate it with towels or something, but for me the IQ requirements and fail factor get too high with that.
6. Can I make less? Probably. The problem you're going to come up against with this no fail method is that if you only have a little milk/yogurt in your pot, it will cool off faster. If it cools off too fast in your oven, you'll wind up with runny, curdled mess, not yogurt. If you really really want to make less, I recommend putting it in a small cooler instead of an oven. Or you might just have to babysit your oven a bit more and turn it on here or there throughout the setting process to ensure that your yogurt doesn't get too cool. Anyway, I'd really encourage you to make more simply because yogurt lasts a long time, which leads to...
7. How long does it last? I don't know. Ha. Because it's never gone bad on us and we've kept it in the fridge for upwards of two weeks. I imagine it would last a good month, maybe two, but can't promise that. I will try to do a little experiment next time I make yogurt and set some aside and see how long it takes for it to go bad.

Did you get discouraged with all those steps? Do you want something even easier, albeit not quite as cheap (but still cheap). Here's a method for making regular plain yogurt into Greek yogurt. It's not quite as cheap, but still much cheaper than buying it from the store (where it often has various thickeners mixed in). Also this post has handy-dandy pictures about how it will look as it strains. 

Want to take this to a level of unrighteous decadence. Try this Almond Joy variation


Or you could use cashews, which is my absolute favorite.


Monday, November 6, 2017

Almond Joy Yogurt


In honor of the Halloween candy that was, but isn't anymore... Or for those trying to wean themselves off of their Halloween candy dependence... Or for people still trying to figure out the yogurt craze.. This post is for you. 


It's pretty healthy, but it feels utterly indulgent. If I could always live my life that way, it'd be pretty much perfect. I've been eating this for breakfast almost every day. It's so so good. It feels like dessert, but with dark chocolate and healthy nuts, it's so nutritious. 

Also, simple as heck. 


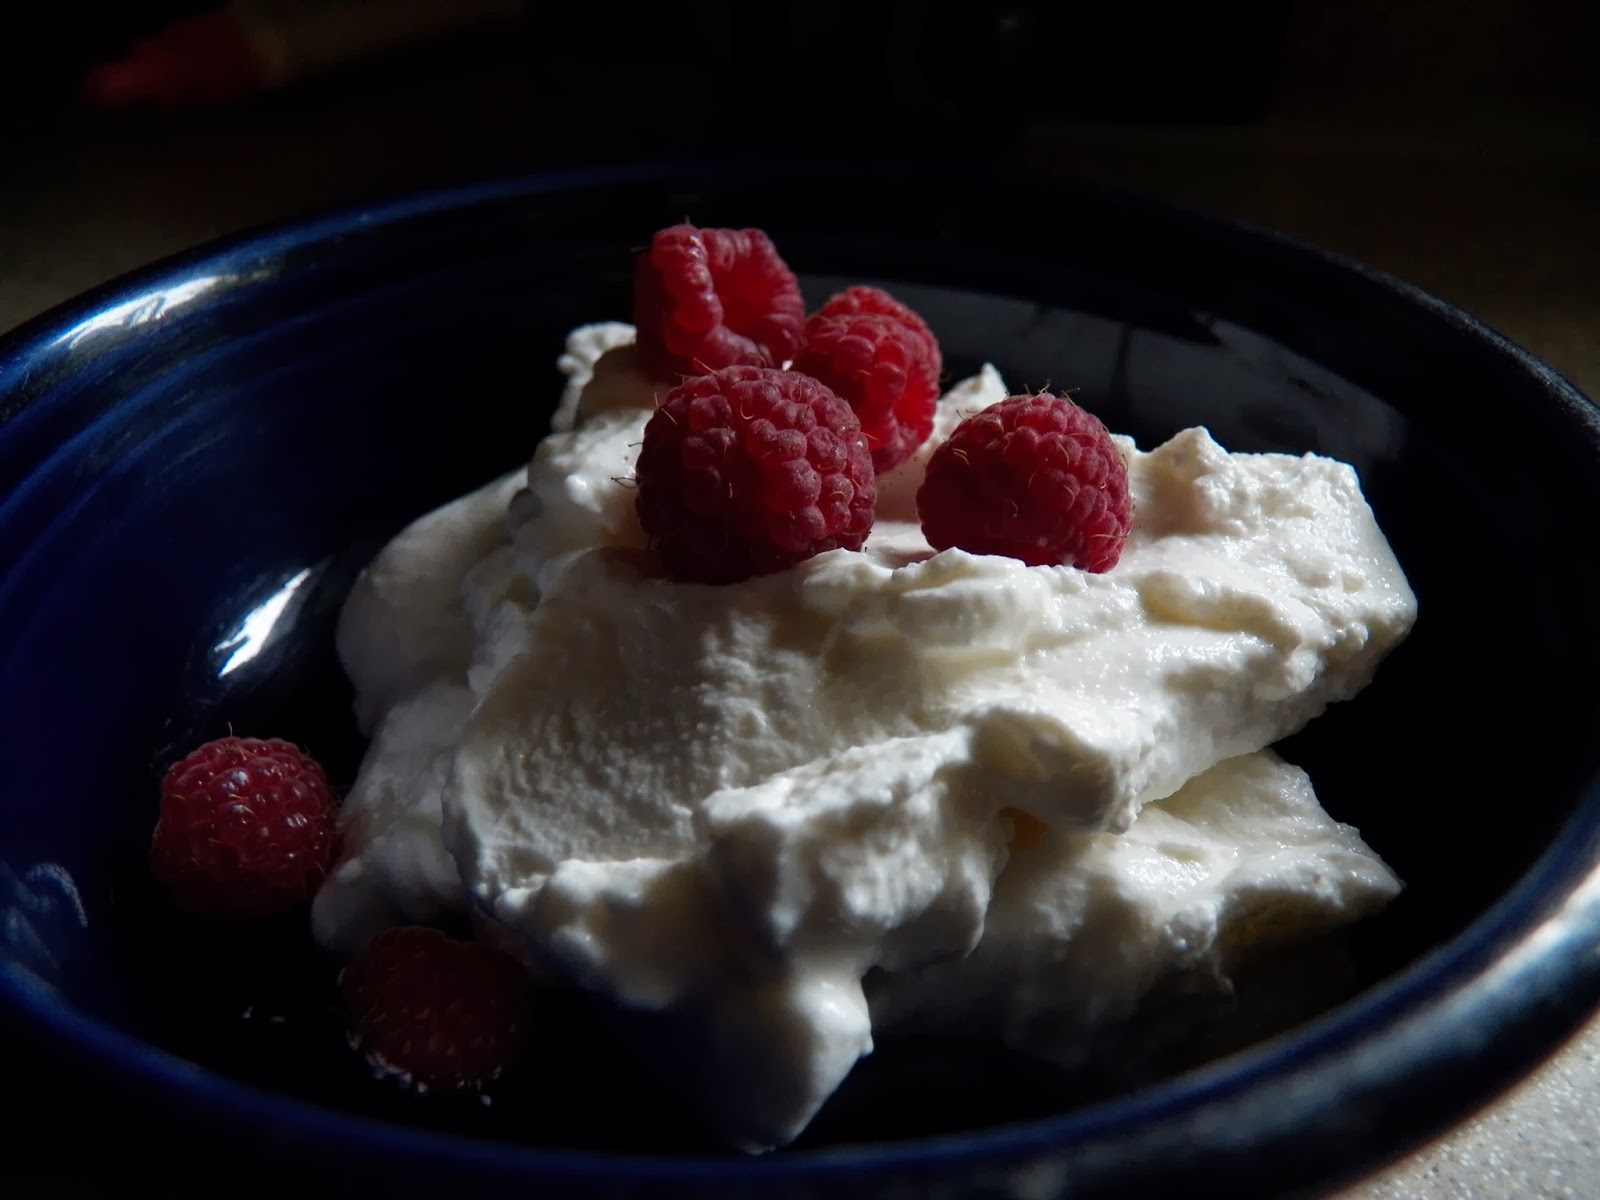
(Does it look like a cloud of pure deliciousness to you? Because it is.) 

Here's what you do. 

1. Get some thick, full-fat Greek yogurt. Or make your own in the crock pot
2. Add dark chocolate chips, coconut (sweetened or unsweetened), and almonds (or another type of nut). If that's still too stoic for you, add a sprinkle of sugar or a bit of honey. 

Monday, June 27, 2016

How to Make a Lot of Buttermilk from Just a Little Buttermilk


There are ways in this world to actually make buttermilk (originally it referred to the thin milk left after making butter, but that's not what the thick, acidic milk is that we now refer to as buttermilk). We're not going to mess with that. Today we just have a simple tip for making more buttermilk when yours is almost gone. Because buttermilk is much more expensive than milk. And because it's so yummy in all those baked goods.

Here's what you do:

1. When you have a few inches of buttermilk left in your jug, you pour milk in--just regular milk. (Shoot for a 1:4 or 1:5 ration. One part buttermilk for four parts milk)
2. Let it sit on your counter for 24 hours.
3. And then, magically, you have buttermilk. It's kind of sort of like making yogurt because that's kind of sort of what buttermilk is.

It's not rocket science, but you do have to trust me a little because I did just tell you to let your milk sit with your old buttermilk on the counter for 24 hours. And I would tell you that again. It works, and makes perfect buttermilk.


I usually do this two times before buying a new jug of buttermilk.

Monday, May 11, 2015

Three-Ingredient Coconut Ice Cream (Made from Pantry-Stable Ingredients)

(Here it is--melting fast)


I'm so excited about this recipe. It's a shame I had to give it such a run-on sentence of a title. But I wanted you to know. Coconut ice cream! With only three ingredients!! Made from pantry stable ingredients!!! As in, you could get trapped in your basement during a tornado and these three ingredients would be staring you in the face, begging you to make ice cream out of them while the roof gets lifted off your house and carried to Oz. If that's not something to look forward to, I don't know what is. But I suppose I've digressed (and also come off as the crazy person that I am, but you know--ice cream! coconut!! pantry stable!!! three ingredients!!!! I'm still freaking out about it!!!!!)

And it is the best, most delicious coconut ice cream I've ever made or eaten.

You open two cans, add sugar, stir. And then add it to your ice cream maker.

The best news is that you don't even have to wait for a tornado to trap you in your basement--you can make this ice cream right now. I know--how lucky are you?

I came up with this ice cream recipe one hot evening last week when I Wanted Ice Cream, but didn't want to go anywhere to buy any and didn't have time to follow my usual method of cooking egg, sugar, and milk, then adding cream and cooling. This custard ice cream recipe is my go-to and it is a delicious recipe, but it's no good when you want ice cream NOW. And I've tried short-cutting it and leaving out the cooking process and it's never quite as rich. It occurred to me that coconut milk instead of cream and eggs would take care of a few problems. And game changer...It is rich and delicious and the stuff you need can just be sitting there waiting for you to need them. So now here we are--ready to encounter potential life-altering disasters with a quart of ice cream in hand.

Note: I tried to convince myself that since that has actual coconut milk in it, I could add blueberries and eat it for breakfast. This justification didn't really work--even for me. But, you know, you can't blame me for trying, right.

Three-Ingredient Coconut Ice Cream (Pantry stable ingredients)
Makes 1 quart ice cream
Prep time: 5 minutes or less
Mix time: 20 minutes
Cost: $2.35
coconut milk: 1.50, evaporated milk: .70, sugar: .15

Note: If you happen to think about your ice cream craving ahead of time, you could put the cans of milk in the refrigerator beforehand. This will make the churning process go a bit faster.
-Also--with my $20 ice cream maker, this produces a soft serve level of ice cream on the first day. This is standard for cheap machines and homemade ice cream. However, if you have a nicer ice cream maker it may be able to make it up as a harder ice cream.

1 can coconut milk (it can even be the cheap stuff as thickness isn't essential for this)
1 can evaporated milk
3/4 C sugar

Whisk together all ingredients. I stirred for a couple minutes, until the sugar was dissolved. I didn't want it sitting there at the bottom of the ice cream.

Pour into ice cream maker and churn according to manufacturer's instructions.

PRINTABLE RECIPE

Saturday, November 16, 2013

Sunday Supper


Different people have different Sunday dinner traditions. There's the classic roast and potatoes with Grandma and company. Or the milder fancy dinner without all the crazy extended family (note: my extended family is not crazy--well, not too much, but they all live far away). And then there are the people who try to keep it simple, so they have a soup night or a breakfast-for-dinner. Kip and I land in a strange and wonderful place in the middle. When we get home from church (at the odd hour of 2:00 pm) we feed our kids a quick lunch and then tuck them away into quiet time while Kip and I eat a nice meal together. People, it's the BEST THING EVER. We started doing this when Mark and Elizabeth were young and picky (now they're older and picky) because I just wanted a meal where I didn't have to listen to people whine about how they didn't like this and didn't like that. But at this point it has evolved into a peaceful, grown-up, even (gasp) slightly romantic thing to do. Kip and I talk. We eat at a clean table. Usually no one spills milk on the floor. (If they do, they clean it up themselves and don't burst into a puddle of tears and whining.)

Then later that night when people get hungry, I usually make popcorn (a tradition I stole from a friend) and smoothies. Sunday dinner (alone and quiet) and then popcorn and smoothies (easy and fun) is one of the few things I enjoy just about every single week. The only slight problem with it is that occasionally by the time I've made a nice meal for me and Kip I'm a little pooped. Oh, I still enjoy it, but it's nice when I have recipes that are easy and awesome. 

So here you go. 

My friend (the same one, incidentally, who has the popcorn tradition) introduced me to this meal. Her friend introduced it to her. He made it every Sunday. And never got bored. Why? Because you can make it with different ingredients and spices every single time and it's still awesome. When I first had it (the pepper, onion, sausage version scooped out with corn chips--oh, man), I had already eaten, but just couldn't stop--it was so good.

Here's what you do:
-You take vegetables and sometimes meat or beans. You cook that up in a skillet and then you throw in a block of cream cheese and a small can of diced tomatoes with juices. You can eat it alone or with chips or rice or probably even on pasta or wrapped into a tortilla. I just can't stress enough how versatile and delicious it is. 

So far I've made three versions: 
1. Chicken, corn, and spinach (plus cream cheese and tomatoes)

2. Onion, red pepper, and sausage (plus cream cheese and tomatoes)

3. Mushroom and spinach (plus cream cheese and tomatoes)


All were incredible. Just incredible (although I did wish for a little meat in my meatless version). The first time I made it I also sauteed some peppers and asparagus for myself (Kip doesn't like those things) and placed them on top of my dish. I'll be darned if I didn't feel like I wasn't sitting down at a fancy restaurant. 

It makes for a perfect leftover meal to use things up you've got. But from scratch it's just as easy. It's a whole food meal that takes 20 minutes. You could mix meats. You could add fresh herbs. You could throw in a handful of beans. You could use Rotel instead of tomatoes to add some heat. It's just really the perfect anything recipe. And if you double it it can feed a crowd.

Here's the template with examples of the real life things I used for my two favorite versions:

Sunday Supper
serves 4
Cook and prep time: 20-30 minutes
Cost: $5.00
cream cheese: 1.00, tomatoes: 1.00, meat: 1.50-2.00, vegetables: 1.00-2.00)

Cheapskate tip: Cream cheese freezes pretty well (if you're going to cook it after you thaw it; it's a little wonky after you thaw it if serving it raw--then you'd probably want to beat it to get the consistency back to normal). I buy a bunch when it's .99 and freeze it. 

olive oil--just a bit
2 C vegetables (1 pepper, 1 onion OR 1 cup corn, 1 C spinach--chopped)
1 C meat (1/4-1/2 pound of sausage OR 1 large chicken breast--diced or shredded)
8 oz cream cheese
1 15-oz can diced tomatoes with juice (I like it especially with Italian seasoned tomatoes)
seasonings as needed or wanted

Heat oil. Add meat if it's raw. Cook. (Take meat out and set aside.) Add vegetables to pan. Cook until they've softened. If using a green like spinach, wait until everything is almost cooked and then throw it in. 

Add meat back to veggies. Add a block of cream cheese (it helps if you chop this into cubes). When it's melted, add the can of tomatoes (juice and all). This will loosen up the cream cheese to make it saucier. Heat.

Taste. Add salt and pepper if needed (it'll depend a little on your meat--sausage is saltier for example).

Then serve. I really like it over rice. I also really like it with some good tortilla chips. But seriously, any type of grain will likely work with it.  


Saturday, October 19, 2013

Homemade Greek Yogurt for Dummies (Crock Pot)


I mean, really. It's so easy it will change your life forever.

And it will save you a stinking butt load of money if you like Greek yogurt. For $2 (TWO DOLLARS!) I got no less than 10 cups (TEN CUPS!) Greek yogurt--that's $.20/cup if you're math impaired (don't worry--math unnecessary for this recipe; brains in general unnecessary for this recipe). Twenty cents for creamy, perfect Greek yogurt.

You can eat it with anything. I like it for breakfast with some jam mixed it. My kids like it best blended with jam and put into popsicle molds and frozen. My friend serves it as a dessert. She mixes it with jam and then adds a squirt of whipped cream to the top. But don't think it can only be served sweet. This thick Greek yogurt can be used as a substitute for sour cream and cream cheese. It can be used in savory dips, for ranch dressing, with tacos.

And in case you missed the whole Greek yogurt bandwagon (or were maybe too poor to buy a ticket), Greek yogurt is awesome and loveable because it is a) delicious and creamy, b) higher in protein, lower in sugar (lactose), and lower than sodium than regular yogurt. And did I mention creamy awesomeness? It's also just way versatile--it can really be subbed for a lot of things.

Let me say that making yogurt is not entirely new to me. I even have a yogurt maker (which I may now sell) that has cute little cups with lids. I used it faithfully when we lived in California, but when we moved here, it became cost INeffective. I couldn't find small amounts of plain yogurt and after I'd bought 32 oz of plain yogurt, well then it seemed silly to bother making little cupfuls of yogurt. And my homemade yogurt always came out somewhat runny. This is true of yogurt. Most (if not all) of what we find in the store has been artificially thickened--cornstarch and gluten are both in Dannon. Homemade yogurt tends to be thinner. Real Greek yogurt, on the other hand, is thick because much of the whey has been strained out of it. But because of that, it is often very expensive. Thus, for the last several years I haven't made my yogurt; I've just bought it. Until the fateful day when my friend (the dessert yogurt making one) brought over some yogurt with raspberry jam in it. It was better than ice cream. Oh, yes, it was. Thick, creamy, and beautiful. And it had cost her almost nothing. And it had been stupidly easy. Now that's what I'm talking about. Because many of the other homemade yogurt recipes I knew of (the ones without the handy yogurt-maker) seemed hard. There seemed to be lots of variables that could cause it to fail. Some required you to double boil your milk (I double boil nothing, people, nothing). Some gave detailed instructions for putting it in a cooler or oven and then keeping it consistently warm but not hot. If you got too cool or too hot, you'd wind up with curdled, runny nasties instead of yogurt. Yes, it was all too frightening. I needed fail proof. I needed dummy proof. I needed distracted mom proof. My friend provided that.

She had used a pot to make the yogurt. You can too if you don't have a crock pot. A regular pot works great, but it requires more of your attention. A crock pot, on the other hand, requires only a one-minute attention span and perhaps and IQ of 32 or so.

Now, what do you do? Let me pull back the curtain so you can be amazed.

1. Put 1 gallon whole milk into your crock pot. Put lid on. Heat until 180 degrees. This should take between two and four hours (depending on your crock pot). If you don't have a thermometer (though one is useful), it will be bubbly/foamy all over on top without actually boiling.
2. Remove lid and let cool to 110-115 degrees (if you don't have a thermometer, this will feel warm when you stick your finger in, but not hot--this is the temperature you'd kind of want to get baby formula to--warm, but nothing that would scald a baby's throat).
3. Add 1/2 C PLAIN yogurt and whisk it in. (I add yogurt to a small amount of milk and whisk in order to keep it from lumping up. Then I put that into the big pot of milk and whisk.)
4. Put lid back on.
5. Put crock pot in oven for 6-8 hours. You don't have to heat your oven or leave the oven light on. You don't have to do ANYTHING. The crock pot provides natural insulation, so it doesn't cool too quickly and the oven provides a space to trap the necessary warmth for your yogurt to yogurtify (it should be kept at a fairly stable 110 degrees; it does this naturally in a crock pot in the oven, so don't worry). That said, I would not recommend you put it into a cold oven (not a problem for us in the summer, but in winter it gets chilly around here). If your oven is cold, turn it on for 1 minute BEFORE you put the yogurt in. Then turn it off. Then put the yogurt in. (Ah, now the IQ requirements have moved up to 45). It will need 6-8 hours to yogurtify. It's nice if you can time this overnight. If you do it during the day, you may want to put a little post it note on your oven that says, "Do not turn on." I do this (yes, I do) because if you or someone you love comes in and decides to make cookies and pre-heats the oven before realizing there's yogurt in there, your yogurt will be ruined and you will be sad.
6. When you take it out, you'll have regular yogurt. Reserve 1/2 C of this for your next batch of yogurt and put that 1/2 C in the fridge.

 (It will look like this.)


7. Now: You can eat the rest of the yogurt regular-style if you want (it was actually a little thicker than that which my yogurt maker used to make). But I HIGHLY recommend straining it and making Greek yogurt (because it's awesome, that's why). Get a tea towel. Put it over a colander, and strain your yogurt. You can do this in the sink if you don't want the whey. Or you can strain it over a pan or large pot/bowl if you want the whey (Note: Whey can be used as a milk or buttermilk substitute in some recipes. It works well in muffins and things like that. That said, I throw my whey away most of the time (unless I know I'm making muffins or something soon). Lazy, I know. Straining will take between two and six hours depending on how thick you want your yogurt. I like mine thick. You might give it a stir after 2 hours to get it to strain more quickly.

And you're done. You will have a TON of Greek yogurt. In Evansville, we can currently get milk for $1.69 at Aldi. And then you'll need a bit of plain yogurt as a starter. Greek yogurt from the store occasionally goes on sale for $1.00/6 oz., but is usually much more. The nice brands can cost as much as $5.00(ish) for 16 oz. or so.

Now to answer some questions:

1. Do I need an instant read thermometer? No, but it is helpful; it takes any and all guesswork away from the process. And you will pretty much earn back the cost of your $9 thermometer in the first yogurt making, so it's a reasonable purchase. Still you don't have to have one. You just might need an IQ slightly higher than 32.
2. What will I do with all that yogurt? The sky is the limit. If you make this stuff, you can stop buying yogurt, sour cream, and (in some cases) cream cheese. You can make amazing smoothies and popsicles. You can do tons of stuff with it. 
3. Do I have to use whole milk? Probably not, but I always do. Still, I'm pretty sure you can make it with any type of cow's milk . However, I won't vouch for taste. True Greek yogurt is whole fat. It's only us Americans who've freaked out about that and developed lower fat versions. It is my opinion that skim Greek yogurt isn't really Greek yogurt at all. It is skim, strained yogurt. Eat it if you want. But my other opinion is that fat (without a lot of sugar) is NOT the enemy. I think natural fats are healthy and filling and great.
4. Why do I heat it and then let it cool? I don't have a complete scientific answer for you. All I know is that if you heat it to 180 you wind up with thicker yogurt than if you don't. I imagine you don't have to heat it that much. I know there are even raw yogurt recipes out there. You'll just likely end up with thinner yogurt. Of course, you'll be straining it, so will still end up with thick Greek yogurt--you'll just have a bit less of it because more will have strained out.
5. How do I make it on the stove top? Let's say you don't have a crock pot. You can still make this stove top. It's best to do when you have other jobs to do in the kitchen because it takes a while to heat and needs to be stirred occasionally so you don't want to burn on the bottom. (You can cook it faster, but you'll have to stir frequently or even constantly so it doesn't burn on the bottom.) Also, you'll want to make it in a heavy pot. The time I made it on the stove top, I used a porcelain-covered Dutch oven pot (WITH A LID). You need to do this because when you put it in the oven, it needs a sort of heat-holding pot. Otherwise it will cool too quickly and not set properly. I suppose you could use a normal pot and insulate it with towels or something, but for me the IQ requirements and fail factor get too high with that.
6. Can I make less? Probably. The problem you're going to come up against with this no fail method is that if you only have a little milk/yogurt in your pot, it will cool off faster. If it cools off too fast in your oven, you'll wind up with runny, curdled mess, not yogurt. If you really really want to make less, I recommend putting it in a small cooler instead of an oven. Or you might just have to babysit your oven a bit more and turn it on here or there throughout the setting process to ensure that your yogurt doesn't get too cool. Anyway, I'd really encourage you to make more simply because yogurt lasts a long time, which leads to...
7. How long does it last? I don't know. Ha. Because it's never gone bad on us and we've kept it in the fridge for upwards of two weeks. I imagine it would last a good month, maybe two, but can't promise that. I will try to do a little experiment next time I make yogurt and set some aside and see how long it takes for it to go bad.

Saturday, June 16, 2012

How to Make Greek Yogurt


First things first: What exactly is Greek yogurt?

Well, after a quick search on the Internet, the jury's still out on that one. Let's start with what we know.

Greek yogurt is:
-Thick and creamy.
-Yummy and popular.
-Expensive.
-Higher in protein and (I believe) those good bacterial cultures.
-Strained. Meaning that--gasp--it's really just normal yogurt that has been strained so that much of the whey (watery stuff you find on your yogurt) has been removed. This explains the higher nutritional content. It's essentially concentrated yogurt, so naturally many of the nutrients are also concentrated.
-Besides being just normal yogurt that has been strained, it is often higher in fat. I read that the authentic stuff can range from 4%-10% fat. This is where the jury starts to get confused. When Greek yogurt first came out in America, it really did seem to be full-fat (3.5-4%). And then came the 2% kinds and sure enough the skim varieties were soon to follow, leaving us with a decidedly Americanized version of Greek yogurt. Oh well. I guess this is why Americans are so skinny while those Greek people are morbidly obese. Oh, wait.

Anyway, sarcastic digs at our low-fat culture aside, Greek yogurt is really easy to make. And by "make" I don't mean actually make, (although you could do that too; making yogurt really isn't so crazy; I've even seen a recipe for it in the crock pot). By "make" I mean to create from normal plain yogurt.

How To Make Greek Yogurt

You'll need:
-A cheesecloth, tea towel, or several layers of coffee filters.
-A bowl.
-A strainer or clothes pins.
-Regular yogurt

Note: I know these instructions look long and detailed, but this is really crazy easy. I was just trying to be very clear.

1. Get your bowl. 


2. Put a tea towel (or cheesecloth or layers of coffee filters) over top the bowl.


3. Secure the towel with clothes pins. If you don't have clothes pins because you are wacky full of character enough to want to make Greek yogurt, but not yet wacky full of character enough to hang your clothes on a line, you can put a strainer over your bowl and then place the tea towel over that.
Note: I use tea towels because that's what I have. I've tried several layers of coffee filters and they work too, but they aren't quite as sturdy or, when layered thick, quite as porous and I prefer the towels. If using towels, they will need to be well-washed afterwards possibly with bleach or they will get really stinky after a few times of mediocre washing.

4. Once your tea towel is secured over your bowl, dump your yogurt into it. You can use whatever milk fat you'd prefer. I've made it from skim and I've made it from full. (News flash: The full fat is a lot yummier, but they're both creamy and punchy and interesting.) You could probably even take vanilla or another flavored yogurt and make yourself a thick, creamy, flavored yogurt, but I haven't done this, so I make no promises.


5. Let it sit. I put mine loosely covered in the refrigerator. However, you can safely leave your yogurt on the counter for several hours. Remember that at its heart, yogurt is soured, thickened milk, so room temperature is not its sworn enemy.

This is how I loosely cover it--with the edges of the tea towel; we try to keep it simple around here.

Note: Letting it sit will take at least a couple of hours. The longer you leave it the thicker it will become. If you leave it overnight or for 24 hours, you will actually end up with something akin to a soft cheese--something, in fact, that can be used in place of cream cheese at least in savory recipes (I haven't tried it in sweet). This is kind of fun and it makes for a healthier alternative to cream cheese (more calcium and the bacterial cultures). If you buy brand name cream cheese, making your own is even cost effective. Anyway, you'll have to check it every few hours, and see when it gets to the thickness you like it.

Today, I left mine for about 6 hours.

Before:

After:


You can see how thick the yogurt has become. 

Today, I used this amazing full-fat yogurt that I intend to marry if Kip ever leaves me (ha, that'll show him). Today I used 6 ounces. After six hours, it weighed in at 3 ounces (which is a number so mathematically simple I could just kiss it, though I'm sure this number will vary somewhat depending on how much yogurt you dump into the bowl). The yogurt cost 6.99 for 5 pounds, which means that it cost approximately 6.99 for 2.5 pounds (or 40 ounces) of Greek yogurt. Which comes out to just over $1.00 for 6 oz of very thick full-fat Greek yogurt. Which is a pretty good price. If we had used cheap Aldi plain yogurt (at less than $2/2 lb, this would have been about $1.80/lb (or about .67 for 6 oz.), which is really not bad. And you still have the whey to throw into smoothies or use as a soup base if you wish. However, for me one of the big advantages of knowing how to make Greek yogurt is that you can do it even if your store doesn't carry Greek yogurt or if they still only carry fancy varieties. You can make it however thick you like. And, if thick enough, you can use it as a super healthy, super natural alternative for cream cheese or sour cream.

I'm hoping to use my new Greek yogurt on a healthy fruit pizza for dinner tonight. If it goes well you should see that recipe soon.

Friday, December 23, 2011

Big Easy Ball o' Cheese and Ham

Cheap Eat Challenge, Part 2: Watch as our family of 6 eats on less than $10/day.


You know what I like about this recipe. Well, a lot. It's easy. It's quick. It's really really good. Plus, it will work for the casual Christmas party you're throwing tonight for a few friends, or the New Year's Eve get-together next week when you don't want to go all out. And if you're one to eat a ham for Christmas dinner, this is an awesome way to use up some of your leftovers.

All that I ask is that you don't underestimate it for its simplicity. These few ingredients pack a mighty tasty punch. You can make it with deli ham, but if you've got that leftover whole ham, that will really take this up a notch.

Big Easy Ball o' Cheese and Ham
Makes 1 big ball
Prep time: 10 minutes
Cost: $3.50-ish
(cream cheese: 2.00, mayo: .15, nuts: .50?, ham: 1.00?--okay, I'm a little sketchy on the costs here, since I used leftover ham and may or may not have forgotten to measure my nuts)

16 oz. cream cheese
1/4 C mayo or Miracle Whip (I used mayo)
1/4 C onion (it gets pureed if you're not into onion-y texture, but if it's the taste that really bothers you, I must warn you, the onion taste is detectable--not overpowering, but yes, it's there)
5 oz. ham
1 C chopped pecans (or walnuts if you happened to be the unprepared type who has no pecans lying around and is not willing to go to the store on Dec. 23rd)

If you're pecans/walnuts are not pre-chopped, put them in a food processor and give them a go until they're good and fine.


Take them out and put them in a different bowl. Wipe or rinse out your processor.

Now put in your cream cheese, mayonnaise, and the onion. Blend until it's smooth and creamy.

Add the ham and pulse or run it on low until the ham is in small bits, but not pureed. This is the part that kind of makes this cheese ball for me. If you get the ham nice and small, the taste and flavors it has are distributed beautifully throughout the cheese ball, but there's enough texture left that nobody feels like they're dipping their crackers in ham-flavored baby food.

Shape your cheese ball. (Confession: I'd never done this before and was a little nervous. It was easy. You just begin plopping it on your serving vessel and shape it into a ball with a spatula.) Sprinkle/pat nuts on until the entire ball is covered.

Serve or cover and refrigerate for later.

PRINTABLE RECIPE

And Merry Christmas from Snowbeard the Pirate here:
Clearly my sense of the aesthetic is defunct.

Saturday, October 29, 2011

What is Kefir and How Do I Use It (and Why Would I Want To): An Introduction

Cheap Eat Challenge, Part 2: Watch as our family of 6 eats on less than $10/day.


Kefir (pronounced kuh-FEER) is, essentially, fermented milk. Oh stop it with the gag reflex already. What do you think Yoplait's been selling you all these years, cotton candy?

What's so special about it?

1. It's an excellent probiotic and also has lots of protein and calcium. Furthermore, since it is fermented and much of the milk sugars are eaten up during fermentation, it is an excellent food for people who are lactose intolerant.

2. You can ferment it right there on your very own kitchen counter for much less work than it takes to make homemade yogurt since kefir just does its thing at room temperature.

3. And it's much much cheaper than making your own yogurt. Or buying it.

I've been using it in my smoothies since I think that this is a probiotic time of year (in other words, a time of year when we want our guts as healthy as possible in preparation for those joyous bugs our kids will be bringing home from school and those joyous food binges we shouldn't, but might go on over the holidays). I think it would make excellent drink yogurt as well blended with fruit and sugar, although it is too runny to eat as we would eat the types of yogurts we're used to. (However, as a side note, the types of yogurt we're used to have been strained by the companies that make them. Normal yogurt also comes out fairly soft/runny too and then the food companies strain out much of the whey to get the yogurts to a consistency we're used to.If you wanted you could strain your own kefir for a more yogurt-like texture. However, it would still be more sour than plain yogurt.)

Haven't had enough fun yet? Well, from it you can make a soft, although crazy sour, cheese without heating any milk or adding a thing. Easiest cheese ever. My slightly crunchy friend, Vanessa (who introduced me to kefir), and I thought that--while it had some serious sour pop alone--it was really good spread on apples with some peanut butter.


How did I get to know kefir?

I was introduced to it by said slightly crunchy friend, Vanessa. I got some grains last year (the grains are those chunky cauliflower-looking things in the picture at the top of the post) and used it a time or two to bake with, but was--for whatever reason--too daunted or lazy to consume it raw, which is where most of the benefit lies.

And then this fall I kept hearing about probiotic this and probiotic that. I'm not one to ignore a sign when it spits at me in the face. So I got some more grains from Vanessa. And I've become a huge fan.

How do I use kefir?

1. Obtain some grains. They look slightly cream colored or yellowish and somewhat like cauliflower. If you have a slightly crunchy friend, you can ask him/her. If not, you can start your own slightly crunchy movement by ordering online. My other friend, Brooke, got hers here. In the picture up top, you see the grains in the red sieve. They act as the fermenters.

2. Once you've obtained your grains, pour some milk--raw or store-bought over the grains.

3. Cover it with something breathable--a dish towel or coffee filter or something like that. I keep mine in an old yogurt container with this patented lid system. Impressed? But of course you are.


4.Let sit for at least a day. If you're a highly motivated person, you can swish it around a time or two during the day. (Note: If it's hot in your house, you can let it sit for less time that that.)

5. When ready to use, strain out the grains using a non-metal strainer. I use the silicone one pictured at top. (Note: You probably can use a metal strainer, but over time, fermented things corrode metal. Another note: Do not let kefir sit in a metal container because it will corrode the metal and also absorb the metal-y taste and you'll have weird, who knows what kind of kefir.) Your normal kefir will look something like this.


Unless you've neglected it a bit, in which case it's separated and you'll see either a somewhat congealed, possibly slightly chunky looking bit like this (sorry, bad picture),


 or whey like this (depending on whether your whey has sunk or risen).


If it's separated, you can swirl it about with a spoon to get it white again or just dump it through the sieve and let some whey come through and some white stuff. Doesn't matter unless you end up with a whole lot of whey (which is still rich in protein, but not so much in probiotic).

6. Add a few tablespoons to your smoothie or granola or cereal or whatever. It's a bit sour, so go slow at first and see if you notice it. Or add some extra sugar at first or whatever. I usually use about 2-4 Tbsp in my smoothie and can't even tell it's there.

7. You can also cook with it as a milk, buttermilk, or yogurt substitute. This is a great thing to do if you're starting to get a little too much. However, the bacterial goodness will cook out, so you'll be cooking to use up something you don't want to waste, rather than cooking to get all the probiotic goodness out of it.

8. If you get a lot, you can make a cheese. Easiest cheese ever, but sour. We'll have a tutorial on that later. But when I made it I forgot to take pictures.

What should I warn you about kefir?

1. It's sour. So is plain yogurt, but kefir is a little more so. Especially if it's left to sit for long periods of time. And really especially if it's left to sit for long periods of time in a warm house.

2. The longer you let it sit, the stronger the sourness becomes. Also, the more grains it grows. (You don't need many grains to keep it going. If you get lots of grains, you may want to discard some or give them away or just throw them in your smoothies because the more grains you have the more milk this will eat and the faster it will ferment and soon you'll have your own factory. This is great if you want to make cheese out of it or just drink a lot of smoothies. But if you want to go at it a bit slowly at first, keep your grain population down).

3. When left to just sit, it will separate into whey and the creamy stuff with the grains mixed in. If you want to keep it mixed and more yogurt-y looking, give it a swirl a time or two a day. If you want to make cheese, let it sit and separate and that will be easier to do. If you could care less, that's fine too. You'll end up with part whey, part white stuff straining into your smoothie.

4. Refrigeration is okay and might become necessary (see below). Just don't forget about it and discover it two years later (though by then perhaps it will contain the cure to Parkinson's disease, but you'll never know because you won't dare eat it, much less feed it to a sufferer of Parkinson's disease).

5. If it's hot the grains will grow faster and the kefir will become more sour, more quickly. If you don't want this, throw it in the fridge. Just don't forget about it for, like, 17 months or anything.

6. If you look up "Why is kefir good for you" or something like that online, you may meet some wonky people (and I mean that in the kindest possible way)--people who drink sometimes quarts a day and maybe claim that it cured their cancer/diabetes/acne/the national debt. That may well even be true (except for the national debt; pretty sure it's still there) and it doesn't bother me if you want to drink it all the live long day, but it's not my approach to kefir. I see it as a healthy, cheap probiotic that can be consumed in small portions daily by me (and by mine without their even noticing). P is for probiotic and that's good enough for me. C is for cheapy and that's good enough for me, um, too.

7. If you're not used to eating gut-healthy foods (aka whole grains, fruits and vegetables and yogurt-y stuff), use only a bit at first as it might really get your gut moving. You know what that means, right? Just making sure. So start slowly and as you get used to it, you can up the ante.

Seriously, it's fun. You can pretend you're a pioneer. Or a goat farmer. Or just a crunchy person. And then you might decide you like it. You might even end up taking pictures for your very own blog about kefir. You might be thinking about all those wonky crunchy people whose blogs you were reading online. And then you might have to move the wilting roses intended for the compost bin out of the way. And then you might have this weird kind of moment where you wonder if you have actually become a real live crunchy person. Only time will tell. In the meantime, you can eat a really healthy, really easy to digest, really cheap food.

LinkWithin

Related Posts Plugin for WordPress, Blogger...