Showing posts with label Thanksgiving. Show all posts

Tuesday, November 13, 2018

Ten Best Pies

BEST OF THE TASTY CHEAPSKATE


So, uh, I noticed something as I was picking the "best of" pies on The Tasty Cheapskate. At least 50% of them are chocolate. I don't know what to say, except that we are people of weak moral values. Why don't we eat more fruit pies? What about nut pies? How can you eat this many of the same pie type of pie and feel good about yourself? What is wrong with getting to know pies that are different from you, huh? I'm sorry, friends, I truly am. We should have a delicious strawberry pie, an amazing cooked peach pie. We should have lemon. And berry. And chess. They are delicious and I love those types of pies.

But I will say this. What we do, we do well. Each and every chocolate pie featured here will make you want to lick the plate. Clean.

But since it's almost Thanksgiving, we'll start today with pumpkin.


1. Pumpkin Pie. This is the best one I know. Pumpkin pie is lovely because it's so much easier than most people think. May you never buy overly-bright-orange pumpkin pie from the Wallymart again.


2. Vegan Pumpkin Pie. In the event that you are a vegan, or want to feel good eating pie for breakfast because it's healthy. This is for you, baby. Also, I think the post is kinda funny. I mean, kinda. In a me, kind of way.


3. Chocolate Pie with Latticed Cookie Crust. This is my favorite chocolate pie for Thanksgiving. It's basically like a big cookie with a chocolate filling. Yeeesss, we have pumpkin and chocolate pies for Thanksgiving. I think we've established that we have issues, okay.


4. Chocolate Orange Mascapone Cheesecake Pie. And this is my favorite pie for Christmas. Yeesss, I have enough chocolate pies on my blog to designate them for different holidays. We've established that a problem exists. Would you please stop harping on it? I'm sure I'll get help for it soon.


5. Peanut Butter Pie. Oh look, a non-chocolate pie. That may or may not have a chocolate crust with chocolate garnish. But, come on, we're branching out, right?


6. Classic Apple Pie. Okay, fine, you win. Here is a classic fruit pie for you. Oh so classic. And oh so amazing. Also, completely gorgeous. And if you make it for the holidays, you're kids can go nuts doing cute little seasonally appropriate dough cut outs. Fun for the whole family!


7. Easy chocolate Pie. Hey, look, we're back to chocolate. What d'ya know? This one was my first chocolate pie love. Simple, rich, delicious. And SO EASY. Three ingredient filling! If you're looking to save time and still be amazing for Thanksgiving, pick this one.


8. Raw Peach Pie. This one is seasonally inappropriate. But it's so good, it needed to make the list. Plus, I needed it to diversify. It's like the one ethnic character on that TV show you like.


9. No Cook Chocolate Mousse Pie. Are you in love? This is the pie for lovers. (Or addicts, I suppose.) So, yes, I it's our Valentine's chocolate pie. So rich. Surprisingly easy. Potentially gorgeous.


10. Chocolate Chunk Chocolate Pie. And I saved the best for last. Yes, it does have the word 'chocolate' twice in its title. (You know, it's rude to keep pointing out my weakness publicly like this.) Creamy chocolate-chess-pie filling with chunks of chocolate throughout. I love this pie. The end.

If you happen to eat things BESIDES pie on Thanksgiving, I've got some tips for baking, brining, and other stuff HERE and HERE.

I hope to get to a cranberry post next week, but just in case I don't, check out some of the recipes in THIS POST.

Monday, November 23, 2015

Thanksgiving: A Menu


Because I'm just now thinking about this... Maybe you are too.

1. Too many notes on TURKEY.

2. Not enough notes on STUFFING. (I'm going to admit that I'm still looking for perfection here, but this is a decent basic recipe)

3. The perfect ROLLS


4. Too many good cranberry recipes to choose from (who says that???)
There's cranberry salsa
Pomegranate Sweet relish (which is not relish-y at all, but very sweet)
Cranberry Orange Relish (only sweet)
And a really delicious classic Cranberry sauce

5. Mashed potatoes.

6. Sweet potatoes with farro--a little something different.

7. Roast vegetables:

8. And pie (chocolate)
(Or this one if you want dumb easy; it's the picture up top.)

9. More pie (pumpkin)

Friday, November 21, 2014

Dumb Easy Dinner: Thanksgiving Style


So if nobody's coming to my house for Thanksgiving, and I'm not going anywhere for Thanksgiving, this is what happens to me: I forget it's coming. It's kind of an unforgivable trait in a food blogger, but it's true. Exactly two days ago, I was like, "Wait. Thanksgiving is next week." Yup, that's how I roll.

Fortunately for me, I was already planning (and by planning, I do mean kind of sort of thinking about) doing a dumb easy dinner line up for Thanksgiving. Because sometimes you really are just planning a simple dinner for your own little family, but simple or not, you want it to taste amazing. I'd much rather make a few fabulous things for a small gathering than a booty load of food that comes out of cans. If you're not serving a crowd this year or are looking for a simple, but delicious side dish or pie, here you go.

1. Dumb Easy Chicken. No, it's not turkey and I'm wagering purists won't do it, but I'm not quite sure how to make turkey dumb easy simply because it is so huge (maybe a breast cooked in a crock pot???). But this roast chicken is easy and fabulous. It won't serve a crowd, but if you don't have a crowd, this only seems like an advantage (fact: Americans throw out $282 million dollars worth of edible turkey every year). Sometimes I'm pretty sure my kids can't tell the difference between turkey and chicken anyway.

2. Dumb Easy Cranberry Sauce. And, no, it's not out of a can. But it can be made ahead of time and is much more simple than you think. And worlds better than the canned crap.

3. Brussels Sprouts Salad. Best salad ever. Simple, adaptable, seasonal, mostly healthy. You can make this the day of. Or--it would be a perfect place for a bit of leftover cranberry sauce and turkey chunks.

4. 10-minute Green Beans. There's no can of anything soup. These are pretty fancy (though the picture I have up on the site is seriously ugly, so you'll need a tiny bit of faith, but it's delicious). Also, these just need a quick stir-fry on the stove. The big disadvantage of this dish is that it doesn't travel well, so if you're taking a side dish somewhere, it probably won't work for you.

5. Dumb Easy Chocolate Pie. Five minutes of prep time, people. That's it.  (Though you will need a chill time, so don't go making this 5 minutes before dessert, though it might be a lovely pudding if you do).

6. You'll also "need" as we all do some good mashed potatoes or sweet potatoes. So have at it.

Tuesday, November 26, 2013

Green Beans with Pine Nuts and Lemon

(nighttime picture; arg)


I know everybody's all crazy about the green beans with cream of something something something and also cheese. But there are things I like better. Especially on a day when I'm already eating turkey with gravy, potatoes with butter and gravy (and maybe some sour cream mixed in), stuffing with about 12 cups of butter melted therein, that sweet potato casserole that we all know is not a casserole, and PIE. Yes, hopefully lots of pie. As one of my friends said (and a true doctrine of my life as well): If I'm going to have to choose between the beans with cream of something something something and cheese and another piece of pie, well, I'm taking the pie.

But wait, now you don't have to. Because you can now have amazing green beans and eat your pie too. Or maybe eat your pie two. (Ha ha. How clever am I, right? Yeah, don't answer that.)

I got this recipe this summer from Kalyn's Kitchen and it was amazing. Wonderful flavors and even a few indulgent ingredients, but just enough for flavor and texture--nothing that goes overboard and bumps out the pecan pie. Because we wouldn't want that.

Green Beans with Pine Nuts and Lemon
adapted from Kalyn's Kitchen
Makes 4-6 servings
Prep time: 5 minutes
Cook time: 10 minutes
Cost: $2.40
beans: 1.50, Parmesan: .10, pine nuts: .50, other stuff: .30

Note: It's harder to find perfect green beans in the winter than it is in the summer. Do your best not to get tough, seedy, nasty ones.

1 lb fresh green beans
1 Tbsp olive oil
1 clove garlic. minced or a light sprinkle of garlic powder
1 Tbsp lemon juice
1 tsp lemon zest
1 Tbsp Parmesan (I use a bit more than this)
2-4 Tbsp pine nuts

Prepare beans by washing, drying, and chopping off the ends.

Heat oil in a skillet. Add green beans and cook at medium heat. You want them to cook through, but also to get some good color. So after they've cooked through, you might want to turn up the heat.

When they are cooked to the tenderness you enjoy (for me this is not crazy crispy, but definitely not soggy), up the heat a bit, then throw in the garlic powder (or clove, but take care not to let it burn) and stir it in some oil, then mix with the beans. Add the pine nuts and stir fry for a few more minutes.

When it's done, throw the lemon juice and zest into the pan and give a stir. I ALSO ADD SOME SALT.

Remove from heat and sprinkle with Parmesan cheese. Serve immediately (this is the toughest part of doing this on Thanksgiving Day). It's still very good if left to sit for a couple minutes, but not as pretty.

PRINTABLE RECIPE


Tuesday, November 19, 2013

Cranberry Pomegranate Sweet Relish


So apparently Thanksgiving is coming. It's one of my favorite holidays. Partly because of the food (of course). Partly because it's a time to get together with family and/or friends. Partly because we certainly need a holiday to celebrate thanks. And partly--perhaps largely--because in its way it's a simpler sort of holiday. Since it's just a month away from Christmas businesses and advertisers tend to leave it alone and place their focus on the big Yuletide moneymaker. And although we do have to reserve a little fear those crazed Pinterest posters who would have you gluing together acorns in order to make a basket in order to put your centerpiece of pears and squashes (preferably dipped in crystalized sugars of course). But even those ideas often get bumped out by the next big craft for a homemade Christmas stocking. So, while Christmas commandeering Thanksgiving is one of the frustrating things about this season, it can ironically be one of of the blessings as well. On Thanksgiving you don't have to give a gift; gifts will come next month. On Thanksgiving you can go simple with your decorations--we can go all crazy soon enough. On Thanksgiving you can sleep in and then later when it's time to eat pie, you won't have already maxed out on chocolate Santas (just turkey and stuffing).

Still--in our modern and apparently somewhat luxurious American lives--we sometimes find it hard to resist going big. Each year has to be better (by which I mean more fabulous and intense) than the last. Each child has to (by which we sometimes mean 'deserves to') have this holiday permanently imprinted on his or her tiny brain as yet another epic event of childhood holiday lore.

Maybe I'm just getting old, but the last couple of years, I've felt a little over it. That's not always a good thing for a food blog, but it might be a good thing for our lives. I want to make delicious food, but I want to keep it simple. On the years I host Thanksgiving you won't find any oxtail soups on our table (or any soups at all; there's enough food already don't you think). You won't find cake and pie and pudding. And you certainly won't find nuts glued together into a basket. What I hope you'll find is some of the most basic, traditional recipes done very very well.

Today's recipe is one for cranberries. It allows you to keep it simple. There's no cooking. You can prep it in about ten minutes total. Also, you can totally make this way ahead (like--you could make it today and it would still be good on Thanksgiving--if you can keep from eating it, that is). It has several healthy players in its ingredient list.

Yet in its way, it allows you to go big too. It's beautiful--the fruits slightly indulgent, exotic, and glittering like little Thanksgiving gemstones on your table (who needs a nut basket right?). It's delicious--so so so delicious--I could eat it for every meal. It combines tart and sweet beautifully (with sweet ultimately winning out).  It is a side dish that will seem wonderfully luxuriant.

Also, although cranberries play a big role, it doesn't taste cranberry-y (totally a word, right?). My husband hates cranberries; he's not a big fan of pomegranates either, but he--much to his surprise--liked this. So it's a good recipe for pleasing cranberry lovers and those who don't--all in the same dish.

Note: Though called a relish, I eat it like a fruit salad--just spooned into a bowl. However, with some cream cheese and crackers on the side, it could easily be served as an hors d'oeuvres and serve a more sweet relish-y role.

I need to thank my friend Vanessa for introducing it to me and letting me inhale it at her house. And then giving me the recipe--a family recipe from her husband's side (thank you Stanfills). You know you've married well when you can inherit recipes like this.

So make it. Enjoy the indulgence. And the simplicity.

Cranberry Pomegranate Sweet Relish
a Stanfill family recipe
Makes a big bowl full
Prep time: 10 minutes
Cost: $6.40 (This is only about $.50/serving, but if you wish to cheapen it, cut out the raspberries--I almost forgot them and when I tasted this I still loved it without them)
(holiday sale prices) pomegranate: 1.00, cranberries: 1.00, apples: 1.00, oranges: .25, raspberries: 3.00, sugar: .15

Tip: This video is the best way I've found for removing pomegranates. (Parent warning: He uses the 'h' word once.) You cut along the equator, hold the half pomegranate seed-side down in your hand over a bowl. Then you whack it with a wooden spoon like it's getting the spanking of its life. The seeds will fall into your hand and the bowl and it will take you only about 1 minute. I thought the first time I tried it that I would surely whack my hand, but I've done it a bunch of times now and still haven't. It's completely awesome. Try it.

Note on sugar: This is a very sweet relish. I bet you can reduce the sugar if you wish. I bet you could take it down to 1/2 cup, although you'd be getting a much tarter finished product. I intend to try this next time. That way I really can justify eating this for every meal, right?

Note on fruits: You can leave out the oranges or the raspberries (but not both). Everything else I consider a must.

2 tart apples, fairly large (I recommend Granny Smith)--cored
1 10-oz bag cranberries
1 pomegranate (see tip)--seeds
1-2 oranges--peeled (I used one; they do add some juice to this so be aware of that)
1 10-oz bag raspberries--thawed and drained
1 C sugar
1 tsp lemon juice

Put apples in food processor and pulse for a couple seconds to break them up into big pieces. Add cranberries to food processor. Pulse until you've got smallish, relish-looking chunks. Add the orange and pulse a couple times.

Put in bowl. Add pomegranate seeds, raspberries, sugar, and lemon juice. Mix to combine.

Let sit for several hours (or preferably overnight).

Eat. I just eat this out of a bowl, but I bet it would be incredible with plain Greek yogurt.

PRINTABLE RECIPE


Tuesday, November 20, 2012

A Few Thanksgiving Reminders

Before I sign off for the week, here are a few links to recipes and tips you might find useful. And a little reminder to enjoy the day. And a big reminder to write down how you do certain things so that next year, you won't be like, "I know I did this one amazing/disastrous thing. Now what was it..."

Tips and Links


Monday, November 19, 2012

Fast and Perfect Pie Crust


Pies have a bad reputation for being hard. It kind of makes sense. There's a long baking time and a longer cooling time. There's a filling that can puddle and a crust that--to talk to any foodie--seems as ripe for disaster as global warming itself. We are told that crust must be flavorful and flaky, but it can't fall apart upon eating. It should be golden. It should be tasty. It shouldn't shrink. It shouldn't shatter.  Blah blah blah. And because of all this fuss, there's a whole slew of internet suggestions for making your pie crust just so. Your hands can't touch it. You've got to chill it. You need shortening. You need ice. You need cold butter. You need alcohol (because it supposedly evaporates and leaves spaces for flakiness in case you were wondering). You need to take frozen butter and grate it in a cheese grater. You need a marble slab for kneading. You need to not add too much flour when rolling or it will be tough. You need to not roll it too long or it will be tough. You need pie weights. You need milk and sugar to be brushed on to it. You need a bloomin' anti-depressent, that's what you need.

But you see, the thing about making a pie--at least for me--is that it can be kind of therapeutic. The counter dusted with flour, the rolling of the dough, the peeling and slicing of the fruit, the methodology, the seasonality, the ritual as old as your great-grandmother herself. It's like yoga to me, um, minus the calorie burn. But it's not like yoga if you make it miserable. So in keeping with my lazy-but-good cook desires, here are some guidelines for making it as painless as possible.

You will need:
A food processor (although you might be able to get away with a blender)
Frozen butter
Cold water
flour
salt or sugar (depending on whether you're making a savory or sweet pie)

It doesn't hurt to have:
a pie crust shield (one of those thingies you put on the pie crust to keep it from burning while the rest of the pie finishes baking--like this:


Here's how you do it.

1. Add 2 1/2 C flour to your food processor. Add 1 Tbsp sugar for a sweet pie (or 1 tsp salt for a savory one).
2. Pulse.
3. Cut your frozen butter(1 C) into squares with a nice sharp knife. (I find that cutting it leaves bigger chunks that are more likely to withstand imperfect crust-making skills.)
Toss those squares into the food processor and pulse several times. You want to get your butter into pea-sized bits (or so they say). If they get smaller than this, don't stress; you're fine. the fact that it's frozen will keep it from melting and completely incorporating into your dough. Ideally, you want little butter chunks, so that as the pie cooks you'll have a nice flaky crust with all the buttery flavor. Frozen butter chunks are the easiest and best way I know to accomplish this.
4. Add 1/4-1/2 C cold water in a stream as the processor runs until the dough starts to come together (not until it's a mushy mess). I usually use about 1/3 C water, sometimes with a couple extra tablespoons thrown in. It doesn't have to come together completely; it can look a little crumbly, but it shouldn't look like just a flour mixture anymore. It should look kind of like this:

5. Dump it out and form it into two balls.
6. Generously (as in GENEROUSLY) flour your surface. Ignore your too-much-flour fears because if you don't use enough here, your dough will stick and you'll have to re-roll and that means more flour and can't you just feel your blood pressure rising from the stress. It's still okay (see #8), but it'll stress you out and you don't need that.
(If you look closely, you can see the bits of butter still in this.)
7. Roll out one of your balls. It won't be perfectly round. That's okay. Patch as you need to. Reflour your rolling pin as necessary.

8. Fold it up and put it in your pan. Do some more patching if you have to. No biggie. If it happens to stick to your counter, don't cry. That butter's still cold and all is not lost. Just re-flour everything (GENEROUSLY) and roll it out again.
9. Fill your pan with fillings. P.S. While you do all this, you probably want to put your other ball in the fridge.
10. Then when your pie is filled, take out your ball of dough. Roll it out and flop it on top.
11. Cut off the overhanging pieces of pie crust and crimp the dough together somehow. It doesn't have to be perfect. If you like perfection, go online and find a few tutorials, but don't blame me if you get a headache. I just sort of pinch it together. When I was a kid, I used the tines of a fork to smash it and make a lined pattern for the crust.
12. Cut vents into your pie.
13. Line the bottom of your oven with aluminum foil. Your pie is going to bubble sugary stuff up and there is a decent chance some of this will bubble onto your oven. So give yourself a break and line it with foil first. [Note: This step should be somewhere above--it should be done BEFORE your oven is hot, okay.]
14. Cook your pie. Cover the edges with one of those pie shield things if you have one. If not, you can use aluminum foil. Or you don't have to do anything; life won't end; your edge crust will just get a little dark.

Now let's say you're doing an open-faced pie, such as a pumpkin pie. You can still make the full recipe of dough and save half. You can just freeze the ball (this is what I usually do), but if you've got a little extra energy you can roll it out and freeze it and have a ready-to-go pie crust for yourself. Here's how:
1. Roll it out.
2. Put wax paper on half of it and fold it in half over the wax paper.
(Here, there's wax paper on all because I wasn't quite thinking; it works too)
3. Put wax paper on half again and fold again. 

4. Wrap it in plastic wrap.

5. Put it in a Ziploc bag and put it in the freezer.

6. Before using, you'll need to de-thaw it a bit so you can unfold it easily. 


Friday, November 16, 2012

Cranberry Orange Relish


So simple. So good. So punchy.

I keep eating it and pretending it's health food. Which it kinnnnda is. I mean it's got a ton of cranberries and an orange. And maybe, well, a little bit of sugar too. But I bet it's better for you than cranberry juice, and I'm sticking to that assertion.

Even Kip, who hates cranberries, liked the flavor. Although he wasn't too into the texture which has--gasp--chunkies. Chunkies, the bane of my married life, they are.

I read an idea about how you could even hollow out oranges and serve it in them. It seemed pretty cute and it was, but honestly, I liked the look better in a simple white dish.


Cranberry Orange Relish
adapted from Epicurious
Serves 6
Prep time: 10 minutes
Cost: $1.40
cranberries: 1.00 (if you're lucky), orange: .30, sugar: .10

1 12-oz bag of cranberries
1 orange, with zest
1/2-1 C sugar
1/8-1/4 tsp almond extract (optional, but awesome)

Zest the orange. Now cut it in half and cut out the flesh. You can cut it like a grapefruit and avoid all the pithy stuff, or you can just cut it out in a lump like lazy people (me) do.

Toss cranberries, orange, zest (start with just 1 Tbsp zest if you're a little zest shy, but I just zested the whole orange and added it), and sugar (start with 1/2 C and add more if you need it) into a food processor.

Process.

Taste. Add almond extract if using (I also tried vanilla extract, but didn't notice a big difference in flavor; the almond was like vavoom). Add more sugar if you need it. I like it tart, but added more sugar when I gave it to my kids to try. Because apparently I'm that Mom.

Eat it out of a bowl or add it to sandwiches or--I'm thinking this would be incredible--add it to a plain muffin mix for an awesome and beautiful cranberry orange muffin. (Hello Thanksgiving breakfast) (You know I just might try this this weekend).

PRINTABLE RECIPE

Wednesday, November 23, 2011

Thanksgiving: a Tip

Tired? I know, so am I. Nevertheless do yourself a little favor tonight or tomorrow. Jot down a few notes about what you did right. How was it that you changed that pumpkin pie from the recipe? What did you put in the brine that you loved so much? How much did your turkey weigh, how long did you cook it, at what temperature(s) and on which oven rack? That sort of stuff. The stuff you think you'll remember, or the stuff that doesn't seem that important till next year when you're wondering how exactly you managed to pull off that silky smooth pie. Just write it down. It won't take long and it will save you some time next year.

Tuesday, November 22, 2011

How to Make Homemade "Boxed" Stuffing (also How to Doll Up Your Regular Boxed Stuffing)

Cheap Eat Challenge, Part 2: Watch as our family of 6 eats on less than $10/day.

(Yours will have more green flecks that this if you use dried herbs. I plan to use fresh ones, so this is a little bland looking today.)

Last year my sister gave me a super easy super good recipe that juiced up boxed stuffing. The problem was that it was, like, Wednesday and I didn't have any boxed stuffing. Enter the Internet.

And the glorious thing is that homemade boxed stuffing is pretty much just as easy as walking down an aisle to find the pre-prepared stuff. Except for one detail: you either have to dry your bread ahead of time by leaving it out in a bowl (as I did this year) or you've got to toast it in the oven so it's dry (as I did last year when it was Wednesday and the time for air-drying had passed). Otherwise, be prepared to be amazed at how easy and tasty your own homemade non-Stouffers can be.

You can just leave it at that or you can add some fresh veggies and herbs to make it a-m-a-z-i-n-g. Which is what I recommend. Though I hardly insist. Anyone else double dog tired even though it's only Tuesday? (Note: I can't blame Thanksgiving for being tired, well, not too much--I think this tiredness is just from regular life:).

Homemade "Boxed" Stuffing
Makes a couple "boxes" worth
Prep time: 5 minutes (not counting any oven-drying time your bread might need)

Note: One of the fun things about doing this at home is that you can use an assortment of bread. When you have some lying around, just toss it into a bowl (a bowl that gets some airflow). This year I did this with whole wheat, white, potato, corn bread, and Italian bread. It makes for a fun mix.

Note: If you happen to have fresh herbs about from a garden or that you bought to use for your bird, you can use those instead of the dried herbs listed below. It's really really and really good. You'll use tablespoons in place of teaspoons-->1/2 tsp dried sage = 1/2 Tbsp fresh chopped sage)

6 C bread, dried and cubed
1 Tbsp parsley flakes
3 cubes chicken bullion
1/4 C minced onion (or about 1 Tbsp onion powder)
1/2 C dried minced celery (I skipped since I didn't have it, but I did use a bit of celery salt and then cut down the salt)
1 tsp dried thyme
1 tsp pepper
1/2 tsp dried sage
1/2 tsp salt

Combine it all in a bowl. Done.

Now if you just want to make it up like that, you'll add 1/2 C water and 2 Tbsp melted butter. Combine it all together, cover it, and let it sit 5 minutes. Then fluff with a fork. [Note: I ended up needing more water than this. I think it's because my pieces of bread were a bit large and chunky.]

However, if you'd like to take it up a notch (and if you've got 5 extra minutes to chop, it is well, well worth your time), leave it dry and follow the instructions below:

Heat 2 Tbsp butter in large skillet

Add:
1/4 C onion, finely chopped
2-3 celery stalks, chopped
the dry recipe above (or one store-bought box of stuffing mix)
1/2 C water [Again, I had to add more water than this, probably an extra 1 1/2-2 C--I think due to my large chunky pieces of bread. Next year I'll get those smaller.]

Stir well, cover, remove from heat.

If it's really dry, add a bit more butter or water.

Then add:

1 apple, diced
1/3-1/2 C craisins

Stir in fruit and serve.

PRINTABLE RECIPE

Monday, November 21, 2011

Easy Cranberry Sauce

Cheap Eat Challenge, Part 2: Watch as our family of 6 eats on less than $10/day.


Although I have more than my share of homemade Thanksgiving memories, our family never made cranberry sauce. As I recall, most of us didn't like it and those who did preferred theirs from a can. Consequently, cranberry sauce is something I had to marry into. Last year my mother-in-law walked me through it. It was sort of embarrassingly easy--like simpler than getting my 75-year-old can opener into (and then around) one of those cans. It's also so so good. Like a nice, incredibly pretty, non-gelatinous homemade jam.

Easy Delicious Cranberry Sauce
Makes a couple cups
Cook time: 5-10 minutes
Cost: $1.15
(cranberries: 1.00, sugar: .12, other stuff: .03)

12-16 oz. bag cranberries
1 C water
3/4 C sugar
1/4-1/2 tsp lemon juice
a grate of lemon zest (optional)

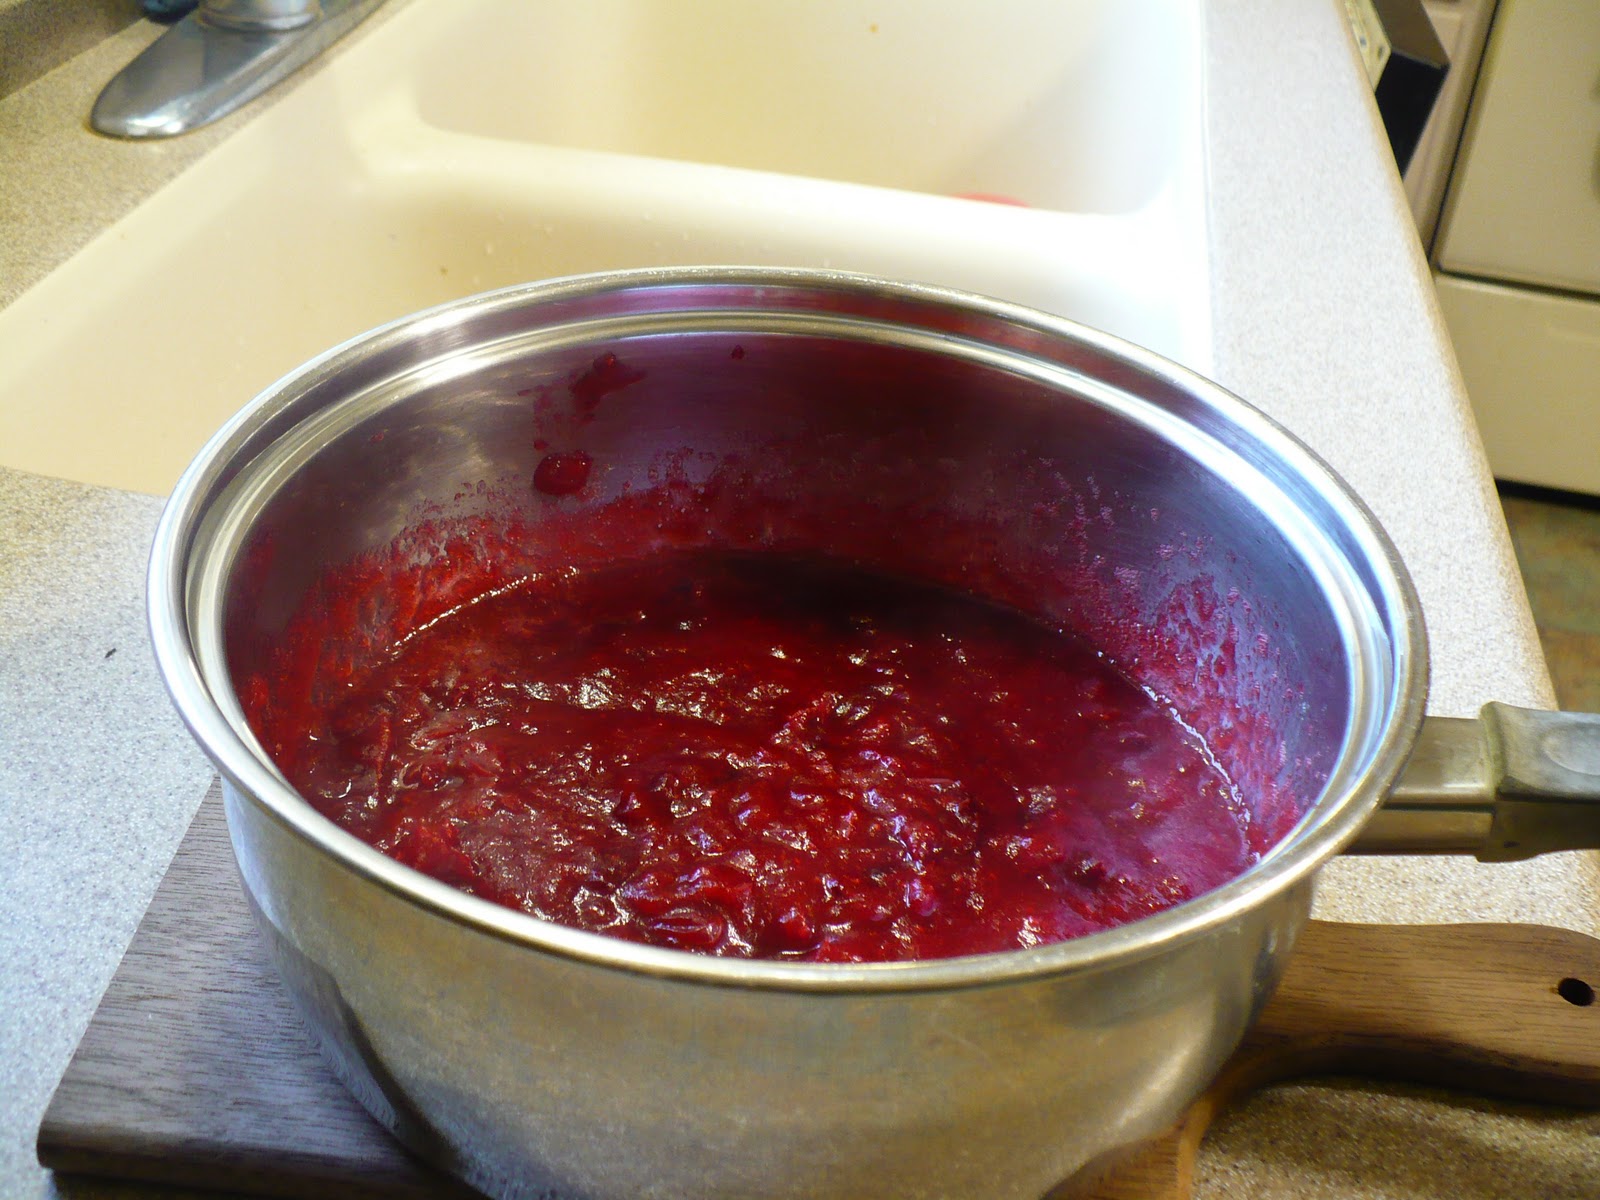
Put cranberries and water in a pot and let cook on medium, stirring here and there, until they pop open (some of them actually make a popping sound--how thrilling) and get kind of mushy-like.

From this...

To this...


Then mash them to the consistency you like (I use a potato masher).


You can even run them through the blender if you like, though I like more texture. Add sugar. Spoon out a bit and taste. If it's not sweet enough for you add more sugar by the tablespoon-full until it is. Then add a wee bit of lemon juice to brighten it up and bring out the flavor. And a scrape of zest if you've got an actual lemon lying around and if you like lemon.

Let it cool and you're done.

The other awesome thing about this is that you can do it on a Monday and by Thursday it'll still be just as good. As long as you can keep your paws out of it, that is.

PRINTABLE RECIPE

Saturday, November 19, 2011

Ideas on Making a Good Free Range Bird, (with some links to pies and soups thrown in)

Cheap Eat Challenge, Part 2: Watch as our family of 6 eats on less than $10/day.


Now that my trim is (cough) mostly painted, it has occurred to me that Thanksgiving is a mere 5 days away. Perhaps this occurred to you, say, 3 weeks ago. If so, I salute you. If not, you were perhaps among the masses of lunatics I saw on the road this morning. (Don't worry, lunacy is nothing to be ashamed of. And let's do lunch.)

I have, unintentionally, been preparing for this holiday by making this amazing pie and the acorn squash soup from earlier this week. Not weird enough for you, try some roasted parsnips or this parsnip soup. You should also make my sister's rolls because they will make you happy.

And I thought people could use a reminder about making a turkey, especially a free-range turkey, which might need some extra love in the form of a nice brine. Because free-range turkeys are not all shot up with a salt-water solution. That's part of the reason we buy them, yet it also means you could wind up with a dry bird if you don't know a few tricks of the trade.

So have a look here for all I know about turkeys and don't forget the brine.

Next week, look for a super simple, yet awesome cranberry sauce and a super simple yet awesome stuffing that can be made from scratch or using a boxed stuffing mix that is dolled up. (That is, of course, if I can find the small scraps of paper I wrote these recipes on last year. Because we all know the best way to keep a recipe you use only once a year is to scribble it on a small piece of paper and stuff it somewhere.) Super simple yet hopefully awesome is the theme this year (looney bin painting projects aside, of course). And if you're lucky you can look for some beautiful croissants and a great pumpkin pie and lots of cookies and maybe some much better pictures of my old favorites. Maybe.

Friday, November 26, 2010

Thanksgiving Considered

I consider a lot of things at 5:30am. That's not to say I get up to do anything about them, but I definitely consider them. Around 6:30 or 7:00 I'm ready to go back to sleep. Unfortunately by then my kids are awake and starting to consider things themselves--like breakfast.

This morning I was thinking about Thanksgiving--what went right, what went wrong. Does it ever all go right? (If it does for you, don't tell me okay; it'll just make me feel bad.)

So here we have it, a brief run-down (I saw you snork that pie through your nose when I said 'brief') of what went right and wrong with our holiday and its food.

What I Did Right:

1. I was thankful.
2. I was happy (except for a short stressed period having to do with the turkey, whoops.)
3. The pumpkin pie was perfect. I'll be posting the recipe sometime in December.
4. The rolls were perfect. Possibly even better than usual. I actually made a small time miscalculation and had them just about risen just as the turkey was going into the oven. Consequently, I punched them down and put them in the fridge, where they promptly rose again. I let them go for a while and punched them down and made them into rolls and put those in the refrigerator to rise very slowly. Which they did. The slow rising several times seemed to make rolls pillowier (what? you think I made that word up) than usual--they were light while still having some bite and texture. So, if you've got the time, using the refrigerator can help your rolls even more. If you don't have the time, don't worry--they'll still be wicked good.
5. With my mother-in-law's help, I made a super simple cranberry sauce that was sweet with just a bit of brightness, of punch. I'll try to post that in December too.
6. I made stuffing. Hurray and thanks to my sister, Rebecca, for passing the recipe on to me. It was super simple. It was good. It could be adapted in a trillion ways. It can be actually stuffed into a turkey or made on the stove. It warmed well. I also figured out how to make a homemade "box" stuffing, which is so simple, you might be embarrassed, at least I was. I'll post that soon too--maybe before Christmas, or maybe I'll save it for when we're eating on $6/day for our Cheap Eat Challenge
7. The brine and seasoning for the turkey and stuffing were perfect. Perfect. They were so good. If nothing else good came from my herb garden this year (and I assure you, plenty of good things did), it still would have been worth it for my turky and dressing.
8. I had my family with me. Cheesy, but true.

What Went Wrong:

1. Oh dear. I must first start with a confession. My turkey, which was perfect last year and which I raved about and promised you perfection with--it gave me a little grief. It was a little bigger than last year's bird, which is all I can figure to blame. (Also, when it wasn't done when expected, I kept taking it out to check it every 20 mintues or so, which I'm sure messed with my already low oven temp.) It took longer to cook than I expected and when "finished" there was a sketchy spot near the bottom, which I swore wasn't quite cooked when we started to cut into it. We cut above it and when we went to finish carving and store the meat afterwards, it looked no longer pink? Did it cook as it sat and we ate? Was the light weird when we first looked at it? Was it close to the bone and therefore just a little pink-ish? I don't know. I do know that my mother-in-law (bless her immortal soul) swore to me that she was sure it was done and just perfect and that I didn't need to worry about it. I don't know if she was lying to me or not, but if she was, I sure appreciated it. Mother-in-laws get a bad rap in this world, which makes me even more grateful for mine. At any rate, even though the turkey tasted great, it stressed me out. Next year, I'm going to do it a little differently. In fact, as soon as I'm done with this post, I'm going to go adjust my turkey roasting post. Next year, I'll either plan to cook the turkey longer (like 15-20 minutes/lb after I lower the temperature of the oven) or to lower it to a higher temperature (like 325). The latter is what I'm leaning towards right now. The other option I might consider is starting the bird out on its breast and then flipping it partway through, but that is probably a last resort because it seems painful to me).
2. My chocolate pie tasted perfect. In fact, I think I might christen it Silky Fudge Pie or Truffle Pie, because that is what the chocolate portion tasted like. However. The chocolate-y top separated from the graham cracker crust in a big way. I'm not sure why. I think it might be because I cooked the chocolate part to a higher temp that usual (very close to boiling; I may have even popped a bubble or two above the surface--oops), which made it firmer, which might have made it impossible to adhere to the crust. As it is, you kind of try to take it out and the top peels off and you dump the chunky yummy graham cracker crust on it or nearby or whatever. It's good, but, uh, the presentation needs a little work. Also, my kids tend to leave big chunks of the crust on their plates, which I then feel compelled to eat. Yes, I do.
3. My boiled potatoes sat too long on the stove waiting for the darned turkey to finish. By the time they got mashed, they were a bit gummy. This might not have happened with a russet or something, but we were using waxy reds (because we love them) and they were more tempermental for us. They tasted good anyway.
4. I felt a bit sad at dinner because of my turkey. Come on, it's just a piece of food. I had my family, our warm house, my husband sitting next to me holding my hand, my in-laws, my kids actually complimenting the food (this is not, sigh, a normal dinner occurrence for us). I had all these great things and I sat there wishing my turkey was more centerfold worthy. I'll try to do better next year. Oh yes I will.

Happy Thanksgiving.

Tomorrow we'll get some turkey stock.

And then it's on to Christmas recipes.

Also, we'll be counting down (and, uh, hopefully preparing/bracing for) our Cheap Eat Challenge starting January 1st. Join us.

Monday, November 22, 2010

It's Turkey Lurkey Time: Roasting, Seasoning, Great Gravy, and an Argument for Free Range Turkey

I'll give you a buck if you can name that musical (It's turkey lurkey time, Tom Turkey ran away, but he just came home...) Just kidding, I won't give you a buck; I'm cheap. But I will be impressed.


First, a note on brining. I have only ever brined a fresh, not-shot-up-with-saline-solution bird. And although in my last post I said you could still brine a turkey to good effect if it'd been treated with a saline solution (that sounds like a medical sort of thing doesn't it), I've been reading conflicting information on this. Some say that if you brine an already sodium/water filled bird it will get way too salty. This makes sense. They recommend a shorter brining or one with less salt. This also makes sense. However you do it, though, if you're dethawing your bird in water (and who isn't--has anyone in the course of history ever managed to actually de-thaw a turkey in the refrigerator without starting on July 4th), throw in a bit of salt and some herbs. The herbs should heighten the deep-down flavor of your bird.

Now...

How to Cook Your Turkey:

Ha ha. See how much authority I gave that phrase. Let me put it in bold so there is no mistake. Now you're going to think I'm like some of those folks on the food network who talk like they've made a certain "failproof" recipe, oh, oodles of times and then you make it and it's a bust and you realize they may never have made it before, but they're paid to stand up there and look/sound confident while their recipe creators/testers sit backstage and snort milk through their noses. Ahem, but I digress. The point is, I have cooked a turkey several times in my young life, and I--for the record--have never died of food poisoning. Or even had to put the turkey in the microwave after it's "done." Now if that isn't a sterling food record I don't know what is. Seriously, though, my turkeys have always been pretty good (except for one unfortunately garlic-y Christmas turkey when I was pregnant and couldn't handle even just a bit of garlic). But last year my turkey well exceeded the levels of just pretty good. It was really really good, great even. It also cooked quickly, which can be really nice on a busy Thanksgiving day. I took the advice of Alton Brown, which I wasn't sure I should due to a certain hot chocolate recipe I'd once tried from him that is the perfect gift for all your friends who enjoy creamed corn starch (oh look, there are the recipe testers with hot chocolate dripping out of their noses). But I digress again. Brown suggests starting the bird at a high temperature and then reducing the heat. Last year I did this, freaked, turned it down even more, cried, made Kip go buy an instant read thermometer, called my sister sniffling, and then turned out a perfect turkey. Today I will try to help you avoid all those prior steps and just get to the perfect turkey part. So, here we go.

1. Rinse your bird if brined. Rinse it really well--inside and out. Pat it dry if you are not lazy and care about skin crispiness.
2. If your bird has been frozen, it should be completely dethawed. If it's not, spend some time running cold water on it until it to get it completely de-thawed instead of popping it in the oven partially frozen and crossing your fingers.
3. Also, along this note, remove the neck and giblets--not that I think you're an idiot--just that Thanksgiving morning can be stressful and things get forgotten.
4. Preheat oven to 475 or 500 degrees. You heard me. 
5. After you've seasoned and or stuffed the bird (more on that below), slather the skin with butter, and put it breast side up on the lowest rack of the hot oven for 20-30 minutes. [A note: many great chefs recommend starting the turkey breast side down and flipping it partway through in order not to get the breasts overdone. This would probably work. I don't do it. I do stuff the breasts--more on that below.]
6. Reduce the heat to 325 degrees. (Don't take the bird out, just reduce the heat.) Cook for about 10 minutes per pound of bird (so for a 14 pound turkey, I'm going to cook it for 140 more minutes or about 2 hours.) Alternatively, you can reduce the heat even more (275 or so), but plan to cook it longer--probably 15-20 minutes per pound of bird.)
7. Keep your eye on it. If it starts to get too brown, throw a bit of foil over it. Alternately, you might want to start with foil on it and then uncover near the end.
8. Don't baste. It's not necessary if you've brined (or the store has essentially brined) your bird, and basting will un-crispy the skin as well as mess with the oven temp because you keep opening the oven.
 9. Check the turkey BEFORE it's supposed to be done--like halfway through the cooking time. Last year, my turkey was done way before I thought it would be.
10. And now for my most important advice: INSTANT READ THERMOMETER!
Look, do you want to cry in front of your in-laws or not? Do you want burned or raw turkey or not? I'm cheap too, but this is possibly the best kitchen gadget you will ever buy. Certainly for 10 bucks. BUY A THERMOMETER. Stick it in your turkey when you think it's done or if it's getting too brown or if you think it's raw, or if you're about to cry. Just stick it in. Don't touch the bone. Stay in the flesh. The breast should be about 165 degrees and the thigh 170-175 degrees. (The thigh area closest to the main body of the bird is the thickest part--stick it there.) If it's at those temps, you're done. You don't have to guess. You don't have to take the bird out and cut it open and see it's pink and put it back. You don't have to listen to your uncle comment on how his wife/mom/girlfriend's turkey is so much moister than your overcooked one. Just stick the thermometer in. I might get some weird ads showing up on the site from saying that so much in this post, but that is the price I'm willing to pay if you will please just use a thermometer and get a perfect turkey and not have to cry beforehand. (Here's a video link on checking bird with a thermometer if you're interested.)
11. The thermometers that come in some birds are not meant to spring until the bird is at 180-190 degrees which is 20-30 degrees overdone. Buy your own thermometer, my cheap friends.
12. After it's cooked, rest the bird (covered with foil) for 15-20 minutes.


(Here he is, ready to go in.)

Seasonings:

To season the bird I like to use just about the same stuff I used for the brine. I stuff some of it in the cavity, and sprinkle the rest on top and in the veggies on the baking sheet.
6 sprigs fresh thyme
1 flowery sprig of sage (about 15 leaves)
4-6 sprigs rosemary4-6 cloves garlic
pepper

Additionally, I stick a quartered orange in the cavity.
Then I coarsely chop:
3 medium onions
3 carrots
3 celery ribs
Some I add to the cavity and the rest I sprinkle around the bird.

I confess that I don't eat these vegetables, but use them to flavor the gravy and stock.

Stuffing:

This is, admittedly, not my area of expertise. I've only made a really great stuffing once and I found it so fussy that I don't really want to do it again--it was like making a whole separate meal. Currently I'm looking for something simpler and still tasty. So you'll have to look elsewhere for a great stuffing recipe. However, I do always stuff the breasts of my turkey. I do this to keep the breasts from overcooking since I don't flip the bird. If you have a great stuffing recipe, that's just a bonus. To stuff the breasts, simply separate the skin from the flesh--you'll have 2 breast pockets (yeah, it's gross) and stuff the stuffing in. If you don't want to do this, take your chances with some drier breasts or start the turkey breast side down and then flip it halfway through cooking.

Gravy:

You'll find some fussy recipes out there for gravy--if it involves boiling and chopping giblets, it's just not for me. But then again, I do like a good gravy--a weak oily broth is not what I'm looking for on Thanksgiving Day.

The best (and least fussy) way to get perfect gravy is to brine your turkey, to cook with flavorful seasonings and vegetables, and then to put the vegetables and seasonings into a strainer and squeeze all the juices and goodness into the gravy pot along with all the drippings from the turkey. Then thicken the gravy as you normally would. (I use cornstarch mixed with water. When the gravy begins to boil add it gradually till the gravy is the desired consistency). If you do this, you'll have great gravy. (Also, I think people should use 'great gravy' as an exclamation more in their everyday speech. 'Great gravy, Jim, is that a gun.')

Stock:

I'll have more on this after Thanksgiving, but once you've strained your vegetable juices for the gravy, keep those old used up veggies with the bones and stock stuff. It might all look pretty tired by this point, but it's still got enough left in it to give your stock a nice flavor.

For some printable instructions, go here.

And finally...

An argument for free range turkey:

Of course there are those arguments about how the care of free range animals is better for the environment because their wastes don't create pollution.

And of course there are those arguments about how much more humane it is to have a bird live a good life instead of a teeny tiny cubicle life.

And of course they taste better. And you can control the brine instead of your bird getting shot with a salt/water solution.

But I would like to make an argument on cost. It's more expensive, yes, there's no denying that. But they're not so very much more expensive as they may seem. My free range Indiana turkey will cost $1.99/lb. I understand you can get them from Whole Foods for about that same price if you live in an area with Whole Foods. This year sales don't seem as good as usual. I feel like stores are tightening up. But my free range bird costs just the same as it did last year. In Texas where my sister lives she couldn't find turkeys below $.99/lb (which is what they are here at Walmart/Aldi). At other stores here they are cheaper --$.39-.59/lb, but you have to buy at least $25 worth of food from to get it at that price. So, you go into the grocery store, you buy your lower quality, pollutant-contributing, inhumanely treated bird. And then you also must buy $15-20 worth of other food that is priced higher that that at Aldi or WalMart, which would be fine if the quality was superior (and sometimes it is). But sometimes it's the same lousy non-local food that likely comes from the same big farms and same big suppliers as the Walmart/Aldi stuff, only with a higher price tag. Furthermore, the salt/water solution they shoot it with adds a bit of weight. Furthermore, with frozen turkeys, you're occasionally paying for ice--ice that is in the cavity to keep the bird nice and frozen.

So, I got a 14 lb turkey for $1.99/lb, which comes up to: $27.86

Joe Doesntknow got his 14 lb bird from Buy Low where he paid $.39/lb, which comes up to: $5.46
Of course 2-3 lb of that was water/ice solution, so we're going to add an extra $1.00.
He also bought 5 lb yams that were twice as much as those from Walmart for an extra $1.oo
He bought ready made rolls which (besides being gross) cost at least $2 more than their delicious homemade counterparts.
He bought 2 ready made pie crusts for $1.50 more than homemade (and probably at least .50 more than Walmart's)
He bought red potatoes that were $1.00 more a bag than at Walmart.
He bought a couple loaves of bread, which came up to $3.00 more than at Walmart.
That probably brought him up to the extra $20 he needed to spend and in the process he wasted: $9.50, so his turkey really ended up costing him $14.96.
And if he springs for a couple super nasty, not-as-orange-as-they-should-be ready made pumpkin pies, well then, he's blown the rest of his savings anyway.

So, yes, more expensive, but not so extremely much, and none at all if you're going to fill your cart with a bunch of processed foods.

Saturday, November 20, 2010

Turkey Brine


I suppose that at this point in time, I can no longer deny that Thanksgiving is a mere five days away. I'm sure everyone else has been making lists and checking them twice. I have been doing more productive things like "running" to Michaels for a few pieces of scrapbook paper (though I do not scrapbook) and leaving a jillion years later with three (count them--3) full bags of stuff. And I am not crafty. And I do not usually go to Michael's. I do not believe I have been there even once in the last year. Clearly, now I know why. It's like a sparkly-loving alien invaded my body. What have you done, oh wily extra-terrestrial with my normal craft-hating, somewhat will-powered does-not-shop-on-Saturday-afternoon-especially-the-weekend-before-Thanksgiving self. Becasue, seriously, body-leching aliens aside, it's a jungle out there. My original errand (the one that got me out of the safety of my house) was to stop off at the post office (the closest one to us is at the mall). There were no parking spots. You had to wait for one or get really really lucky. It was like Christmas Eve. Who are these lunatics and how did I become one of them? Oh yes, my body was taken over. Now I remember.

Anyway, why was I out and about on such a clearly dangerous day. Because I wanted my sisters to have some herbs so they could brine their turkeys. Why was this so very important? Because brining makes turkeys better. It is essential if you get a free-range bird because they haven't already shot the bird up with a salt solution. But it's not a bad idea no matter what kind of turkey you get because it flavors it nicely.

What the heck does it mean to brine? It means you soak the bird in a salt/water solution that you've probably flavored with other herbs? And why would you do this? You know, you're asking a lot of questions--especially those in the science catergory, which for the record, is not my strongest suit. I mean, really, who do you think you are? My kids? Next you will asking me where babies come from. Oh sorry--I mean, for a brief explanation (as well as the inspiration for my brining recipe), have a look at slash food. Basically, the brine alters the protiens in the turkey, trapping the flavors and juices inside instead of allowing them to evaporate in cooking.

Brining basics:

1. Brine for 1 hour per pound of bird. So if you've got a 14 pound turkey, brine for 14 hours. This means (just in case your math skills are faltering under the pressure) that you'll need to start this the day before.
2. The most important stuff is the salt, sugar, and water, but the herbs are nice too. They give it flavor in addition to juiciness.
3. If you don't have fresh herbs, dry work too and are much cheaper.
4. Submerge the bird in the water. Weight it with something if you must. I use a big stockpot, but a cooler would work too.
5. Put it in the refrigerator or a cooler that is the same temperature as a refrigerator (below 40 degrees). This is so you don't end up allowing "harmful bacteria" to grow in your bird. "Harmful bacteria" is what the internet generally refers to when speaking of turkey safety. Vague threats bother me, but not as much as the possibility of actually consuming too much harmful bacteria on a day of celebration, so I do what they say. I put my brine in a huge stockpot and then put it in the fridge overnight.
6. Before you cook your bird, rinse it off thoroughly. Not to be bossy or anything, but if you skip this, you will have a very very very salty bird and you will be sad. Even if you like salt. Even if you're the person who always reaches for the salt before tasting your food and then dumps it on. Still, you must rinse your bird. Or you will be sad. Am I making myself clear?
5. If you want a perfectly crispy skin, pat it dry after you rinse it and let it sit for a bit to dry off further. I do not care about skin because I think it's gross (sorry skin foodies), so I skip this. (It's still hardly soggy, for the record.)
7. Even though your bird has been brined in herbs, you'll probably still want to cook it with herbs as well. It's good for the turkey, but even better for the gravy. More on this tomorrow.

Turkey Brine

2 C salt
2 C sugar
2 gallons water
3 bay leaves
4 cloves garlic, cracked
1/2 Tbsn pepper or 1 Tbsp cracked peppercorns
3 springs rosemary
a  cluster of sage (10-15 leaves)
5 sprigs thyme

Combine the salt and sugar in the water and let the salt and sugar dissolve. Warm water makes this faster, but let the water cool again before adding the bird. Add your bird. Add the herbs and stir/slop them about a bit. Put the huge stockpot in the fridge overnight (1 hour per pound of bird). Alternately, you can use a cooler kept below 40 degrees. And don't forget to rinse the turkey in the morning before you cook it.

Other additions to consider if you think mine sound lame: Citrus fruit, cinnamon, cloves, Italian herbs such as basil and oregano. Add what you like. I hate to say this because who needs a food blogger if it's true, but it's hard to mess it up. It's a great time to be experimental because any old combination of classic herbs will make it good.

PRINTABLE RECIPE

Tomorrow we'll have tips for cooking, tips for gravy, and my argument for free-range birds.
LinkWithin

Related Posts Plugin for WordPress, Blogger...