Thursday, July 7, 2011

Best Ever Crepes with Brown Sugar Peaches

Cheap Eat Challenge, Part 2: Watch as our family of 6 eats on $10/day.


I've always liked crepes, but when my friend Maren made them for me and Kip many moons ago, I knew I'd found my one and only. Her crepes were the perfect texture, the perfect ratio of egg to milk to flour, they held up well with a flip, and they were pretty much perfect in every other way.

Besides being wicked good, crepes have many other fine personality traits. They can feed a crowd on the cheap. They can be eaten with sweet or savory fillings. They're super quick to whip up (though you do have to commit to standing off and on at a skillet for 20 minutes or so while they cook). They also make surprisingly good leftovers, holding up much better than pancakes or waffles do.

When I announced I was making crepes for dinner, Kip had to make a special run to the store for some Nutella. This is not, at any level, a tasty cheapskate thing to do, but then Kip is not the tasty cheapskate in this relationship. And so, Nutella became our first post-$6/day splurge. And tasty cheapskate or not, even I thought it was worth it. For the record, I saved my Nutella for a treat after I'd eaten my crepes with some fruit inside. But you don't have to.

And now for a poem:

Crepes

I love crepes with jam,
I love crepes with fruit,
I love crepes with sauteed zucchini,
I love crepes with buttery browned mushrooms,
I love crepes with caramelized onions,
I love crepes with cheese,
And I really really really love crepes with Nutella and whipped cream.
Yes I do.

And this is why I paid thousands of dollars to go to graduate school for creative writing. Seriously, though, you can eat crepes with just about anything. And if that's not to love, then what is.

Bon appetit.

Best Crepes Ever with Brown Sugar Peaches
Makes: a booty load (sorry I never count--I'm guessing it makes 15-20 crepes; we always have leftovers)
Prep and cook time: 30 minutes
Cost: $1.55
(eggs: .40, milk: .60, flour: .26, other stuff: .04, butter: .25)

Note: These directions are given to you as Maren gave them to me. I always make mine this way with an extra cup of milk added at the end. Would it matter if you added it at the beginning? I don't know. I just do it as she said because hers were the best and I don't mess with that.

Whisk together:
4 eggs
3 C milk

Combine:
2 Tbsp sugar
3 C flour
1 tsp baking powder
1/2 tsp salt

Add dry mixture to egg/milk mixture.

To this batter, add:
1 C milk
1 tsp vanilla

Whisk it all together. It might be a little lumpy at first, but whisk for a minute or two and most will go away. If you still have some lumps when you make the crepes, don't worry, the crepes will still come out just fine.

Heat skillet to medium or just below. Plop a pat of butter on the skillet. You want your skillet nice and non-sticky--whether that happens with plenty of butter or with a good non-stick pan is up to you. Pour the batter onto the skillet and tilt the skillet so that the entire face of the skillet is covered with a thin layer of batter. It won't be thick like a pancake, or even close. It'll look like this:
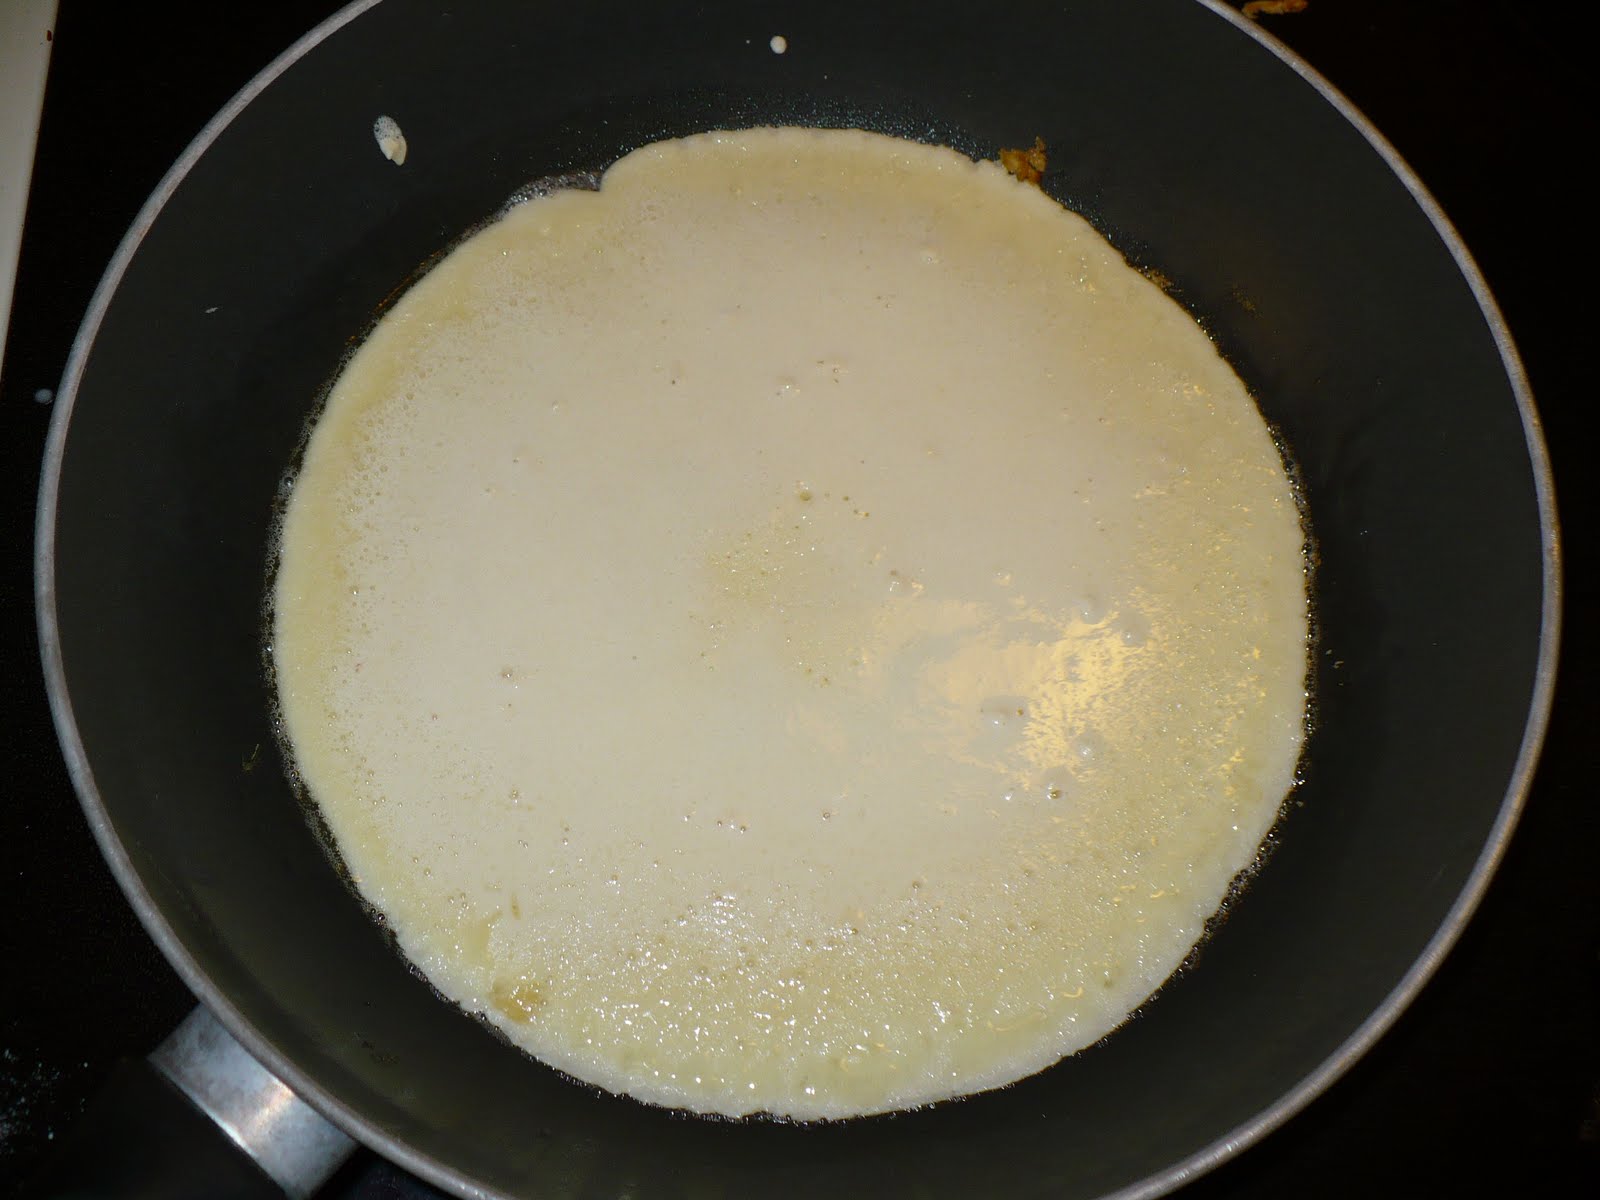

Now you're going to let the crepe cook until there it's kind of cooked all the way through--there won't be any (or much) raw batter-y patches left and it will be just barely golden brown on the bottom (it takes 1-2 minutes usually). If it's not done enough you'll have a really really hard time flipping this baby. At this point you'll flip it over to give the other side a chance to color just a bit. I think that authentic French crepe makers don't always even flip theirs, but I like to.

Continue this process until you're done. If you've got too much batter, you can save it as batter or you can make it all into crepes. They reheat very well.

Note: Your first crepe will probably be a disaster. I don't know why this is a law of the universe, but it is. I suspect that your pan is still warming up and stuff. Anyway, if your first crepe tears and crumples and looks a mess, do not despair. Set it aside for the baby or the dog, re-butter your pan and do it again. I promise that the next will (almost surely) be much much better. If it discourages you too much, dip some in Nutella and eat it. That should make you feel much better about the world.

Another note: If, however, your crepe is burned on the bottom, turn down the heat and wait a couple minutes before continuing.

Brown Sugar Peaches

3-4 medium sized peaches, peeled and diced
1/2-1 Tbsp butter
2 Tbsp brown sugar

Melt butter in a small skillet. Add peaches and brown sugar. Cook on medium until the peaches have released  their juices and some of the liquid has boiled off (just a few minutes). Take off heat and serve on your crepes (or in your yogurt or over your oatmeal or, like, wherever).

PRINTABLE RECIPE

Wednesday, July 6, 2011

Pace Peach Cobbler

Cheap Eat Challenge, Part 2: Watch as our family of 6 eats on $10/day.


The only sad thing about this cobbler is that I failed to take even one single decent final picture. This may have something to do with the fact that it was made and muchly consumed while my sister and her kids were here. Of course this was a lot of fun, but it didn't leave a whole lot of extra time or, um, counter space. Truth be told, the colorful nude peaches are more of a centerfold beauty than the finished product anyway.

Cobbler and the lovers thereof fall into 2 distinct groups. One group likes a biscuit-y cobbler. I expect that this is the more traditional of the two--a simple sweet biscuit batter atop lovely ripe peaches. I won't turn this down if you offer it to me, but I admit that I am more in the 2nd camp of cobbler aficionados--that of the cake-y cobblers. These have peaches (or, you know, whatever fruit you wish) topped with a batter that is slightly sweeter and wetter--one much more like cake batter. The problem with being in this second camp is that cake-y cobblers are much much too often made with a cake mix. And, not to be an annoying food snob or anything, but you have to work really hard to get me to like a recipe made with a cake mix. Oh, they exist. But they are very few and very far between. And they don't include cobblers.

And so it is fortunate that I married into Kip's family because they make the most wonderful from scratch cake-y cobblers in the world. I first discovered this when Kip and I were dating and I went to his sister's house for dinner. She served this cobbler and, oh, it was some kind of wonderful. And then after Kip and I were married his mom brought a bunch of right on ripe peaches from their tree and we made this cobbler with them. If you have peaches that are so ripe they will be overripe tomorrow, this recipe will take you to cobbler nirvana. If not, don't despair because this can be made with any peaches, including frozen ones and even some good canned ones (although I highly recommend fresh, ripe ones).

As if from-scratch cake-y goodness isn't good enough, this cobbler also has a sugary glaze on top. Yes sir, it does.

Pace Peach Cobbler
make 8x8 inch pan
prep time: 15 minutes
Bake time: 45-60 minutes
Cost: $1.68
(peaches: 1.00, butter: .21, flour: .14, milk: .08, sugar: .25)

2-3 C peaches, peeled and sliced (line the bottom of your pan and then pile them higher if your like your cobbler nice and fruity)

Batter:

3 Tbsp butter
1 tsp baking powder
1 C all-purpose flour
3/4 C sugar
dash salt
1/2 C milk

Glaze:

3/4 C sugar
3/4 C boiling water

Directions:
Layer peaches on the bottom of an 8x8 inch pan.

To make the batter:
Combine dry ingredients. Cut in butter with a food processor, pastry blender, or by mushing it in with your fingers. Alternately you can just whip out the beaters and blend it in that way. Add milk and mix briefly.

You can see here that it will be slightly wetter than a biscuit dough:

Plop the batter over the peaches and spread it out with a knife or spatula.

Sprinkle the remaining 3/4 C sugar over this and then slowly pour the boiling water over the whole thing.

Put in oven and bake at 350 for 45-60 minutes. When it's done it should be golden on top and when you stick a fork (or cake tester for the more refined) in, it should come out with a few moist crumbs. You don't want it dough-y, but you don't want it dry either.

I like it best warm with ice cream. (Whipped cream works too. As does eating it cold out of the pan, not that I would ever do such a thing.)

PRINTABLE RECIPE

I've linked this and my crepes to Sweets for a Saturday.

Tuesday, July 5, 2011

Basil Meatball Sandwiches with Crunchy Veggie Slaw

Cheap Eat Challenge, Part 2: Watch as our family of 6 eats well on $10/day.


I realize I'm a day late and a dollar short posting this the day after Independence Day and all. But it's still grilling season. Heck, you don't even need to grill these; if it's a rainy day, just bust out a skillet and pretend you did.

These tasty meatballs were meant to be served with the slaw inside the bun. In some families the belief exists (especially among those of a certain gender which shall not here be named, but which slant rhymes with 'bland') that the only vegetable included in a sandwich should be a red one served in the form of a sauce that rhymes with 'getchup'. If this is the case in your family, don't worry, you can man this sandwich up just fine, as Kip has so generously demonstrated in this picture:

(Oh, wait, I see another vegetable in that sandwich as well--one that rhymes with smickle. Perfect.)

One more note on this sandwich (the female version that is). The recipe originally called for carrots with daikon radish, which is a spicy white Asian radish. I had none on hand, but it is one of those weird vegetables that occasionally shows up in CSA baskets and farmer's markets and you (I) wonder what to do with it. So, although you don't need it for this sandwich so desperately that you should hunt it down if you don't have it, this is definitely a great way to use one if you've got one. 

Basil Meatball Sandwiches with Crunchy Veggie Slaw
adapted from Bon Appetit Magazine (I think)
Serves 4 (large sandwiches)
Prep and cook time: 15-20 minutes for meat; 10 minutes for slaw, but it should rest an hour
Cost: $3.80 (not including buns here)
(hamburger: 3.00, carrots: .40, celery: .30, other stuff: .10)

1 lb hamburger or ground pork
1/4 C fresh basil, chopped
4 cloves garlic, chopped
3 green onions, chopped
1 Tbsp fish sauce
1 Tbsp hot chili sauce
1 Tbsp sugar
2 tsp cornstarch
1 tsp black pepper
1 tsp chunky salt (or 1/2 tsp table salt)

Slaw:
2 C carrots, grated
1-2 C celery, finely chopped (or grated daikon radish or cabbage or probably any other crunchy vegetable)
1/4 C rice vinegar (didn't have so used white wine vinegar)
1/4 C sugar
1 tsp chunky salt (or 1/2 tsp table salt)
1 Tbsp Asian sesame oil
16 large cilantro sprigs (didn't have, so didn't use, but think it would have been so awesome)

Note: If you've got pesto, that can be substituted for the basil and garlic--use about 1/4 C pesto)

To make slaw:

Grate carrots and chop celery.

Mix together with vinegar, sugar, salt, and sesame oil. Let sit for 1 hour (I let mine sit covered at room temperature). You might be tempted to skip this resting period, but I have to say that I tasted mine right after I made it and it was so so much better an hour later. 

To make meatballs:

Combine hamburger with everything else. Mash it together and roll it into meatballs that are 1-2 inches across (remember they'll shrink). Cook in skillet until no longer pink in center. 

Serve on buns of some sort with the slaw or whatever other toppings make you and yourn happiest. 

A Word on Waste
If you end up with leftover slaw, don't throw it out. Save it and the next day add some granny smith apples (or another crisp apple) and/or raisins to make a salad out of it. 

LinkWithin

Related Posts Plugin for WordPress, Blogger...