I told you it was a weekend of sweet bread. On Sunday (yes, that would be the day after we made cinnamon buns) we made an orange pull apart bread. You remember orange pull apart bread, don't you? If you don't remember it, you haven't made it. Orange pull apart bread is my one true love, no offense Kip.
I discovered orange pull apart bread on Sweet As Sugar Cookies. The recipe is perfect in every way, but when I went to make it this weekend, the instructions just wouldn't click in my brain. And I remembered that I had changed the order of ingredients/instructions last time as well. Below you'll find the play by play of how I made it. I hope it inspires you to give it a go yourself. It is worth a go. Who am I kidding? It's worth 1000 go's. If you never make any other yeasty sweet bread ever in your life, you should make this one. So clear off your counters, pull out your flour, and walk with me.
Orange Pull Apart Bread
taken from Sweet As Sugar Cookies
Makes 1 loaf (8 inch loaf pan)
Prep time: 20 minutes
Rise time: 1 1/2 hours
Cook time: 30 minutes
Cost: $1.55
(milk: .05, butter: .30, sugar: .05, eggs: .20, flour: .25, orange: .30, butter: .30, sugar: .10)
1/3 C milk
1/4 C butter
1/4 C water
1/4 C sugar
2 1/4 tsp yeast
1 1/2 tsp vanilla
2 eggs
2 3/4 C all-purpose flour
Filling:
1/2 C sugar
1/4 C butter, melted
3 Tbsp grated orange zest (or about that from one orange)
Heat milk and butter until butter is melty (I do this in the microwave). Add cool water, so that the mixture is warm to the touch, but not hot (about 110 degrees). Add yeast and sugar. Add eggs and vanilla and mix it all up into a gloppy yeasty mess.
To this, add 1 C of flour and mix. Then add another cup of flour and mix. It should be about ready to turn out to knead. (If not, add another 1/4-1/2 C flour). Turn it out to knead adding remaining flour as it gets sticky. I actually ended up adding another 1/4 C flour by the time all was said and done (for a total of 3 C). Your dough should be soft, but not sticky. This is a dough richer in fat, so it will have a more oily feel than a regular bread dough. When it's ready, you should be able to put your hand in, have it leave and imprint, and pull off without sticking.
Shape it into a nice and put it in your bowl to rise.
Then punch it down and roll it out into a rectangle that is about 12 x 20 inches. Do yourself a favor and put a good dusting of flour on the counter before you roll it out. (You're dough will be about 1/4 inch in thickness.)
Now, melt your butter and drizzle it on. Then spread it with your hand so it covers the entire surface area.
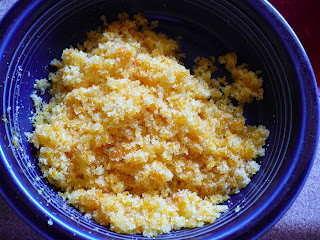
Mix your sugar and orange zest until it's gorgeous and fragrant.
Then spread that on your dough.
Cut the dough short-ways into 5 strips. So you're going to have 5 12x4 inch strips. If you get mixed up and do it the opposite way as I've done below, that will be fine too, although it won't go into your pan as neatly.
Here's a picture of it done correctly from my cinnamon loaf a few months ago.
Then you're going to stack your strips on top of each other. They'll kind of stretch when you pick them up. That's okay. (Again we'll rely on the cinnamon bread for a picture.)
Then you'll cut this long stack into 6 even-ish pieces (so 6 rectangles that are 2 inches wide).
And here are my slightly goofy, too large ones with the orange bread. (Don't you love tutorials where the blogger messes up herself?)
(There are 3 more rectangles not pictured here.)
Then you'll stack them cut side up in a well-greased loaf pan.
See how beautifully they fit when you do it just right, but don't worry--if you do it wrong, it all comes out well int he end anyway.
Cover this and let the loaf rise until it's all squishy and coming up to the top or even a bit above the top of the pan. (Forgot the picture. Sorry.)
Then bake at 350 for 30-40 minutes.
The top will get a little crusty and you'll worry you might be cooking it too long, but don't worry, that's just caramel-y sugar forming on top. Remove from oven, let it cool slightly, and then take it out of the pan and, yup, tear it apart.
Here's my loaf from several months ago...
You can frost this if you wish. I didn't the first time I made this, but I did this weekend. Guess what? I prefer it without frosting--more crispy topped, orange-y goodness coming through. But it's great both ways. If you'd like to frost it, use your favorite vanilla or cream cheese frosting and squirt the juice from the orange (the one you zested) into it. Voila.
PRINTABLE RECIPE


OhMYGosh - how will I ever choose between these versions??? Orange or Cinnamon??? Love this method - great post!
ReplyDeleteDonna
apronstringsblog.com
Orange is my favorite. And it will be yours too if you like citrus-y things. If you don't love them, then you'll probably like the cinnamon best, though even a citrus un-liker won't hate the orange bread.
ReplyDelete